12 Genius Floating Shelves Bathroom Ideas That Actually Work
Let me guess – you’re standing in your bathroom right now, looking at that blank wall space and thinking “there’s gotta be something better I can do here.” Well, you’ve just hit the jackpot because I’ve spent the last three years obsessing over bathroom storage solutions, and floating shelves have completely transformed my space (and my sanity).
Here’s the thing: floating shelves aren’t just pretty to look at – they’re practical storage heroes that actually solve real bathroom problems. No more knocking bottles off the sink edge or playing Jenga with towels in tiny cabinets. I’ve tested, tweaked, and totally messed up enough installations to know what actually works versus what just looks good on Pinterest.
Ready to transform that cramped bathroom into an organized oasis? Let’s talk about the 15 best floating shelf ideas that’ll make you wonder how you ever lived without them.
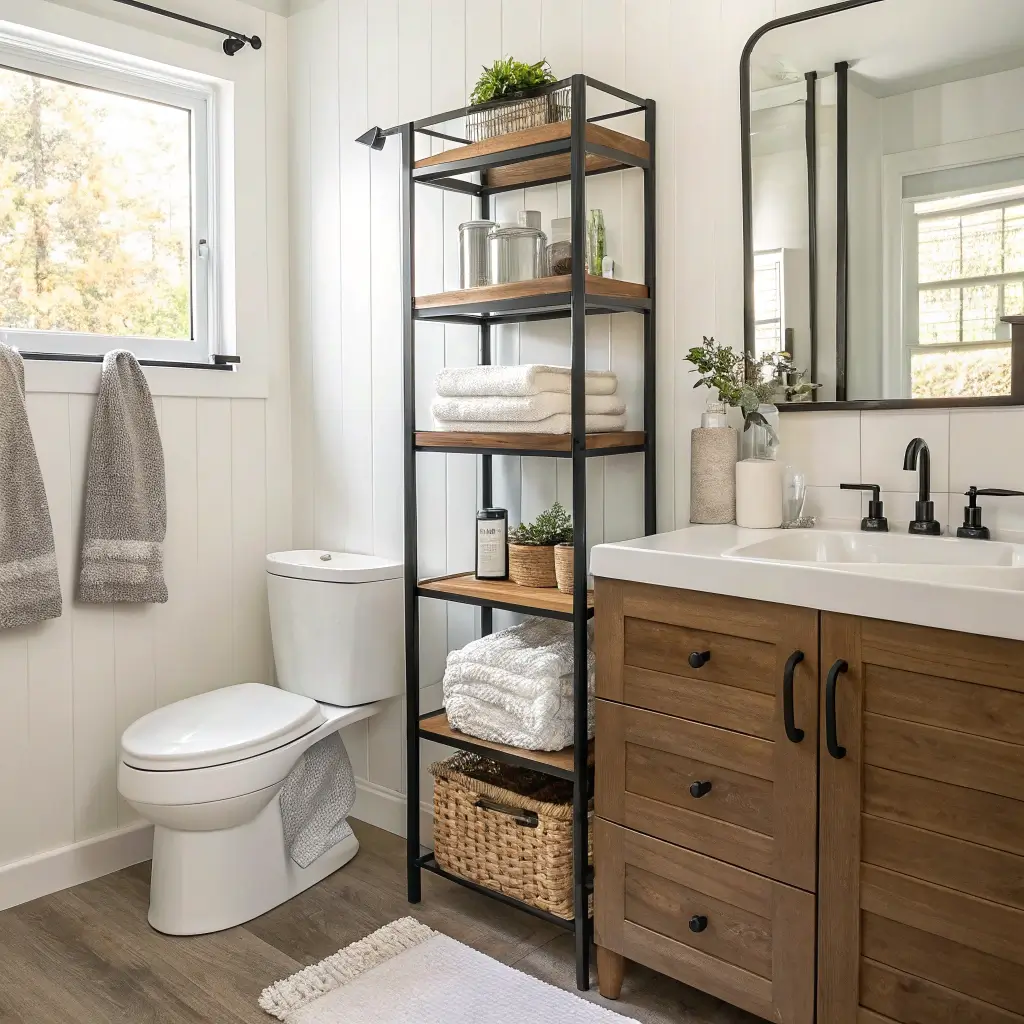
Over-the-Toilet Floating Shelf Stack
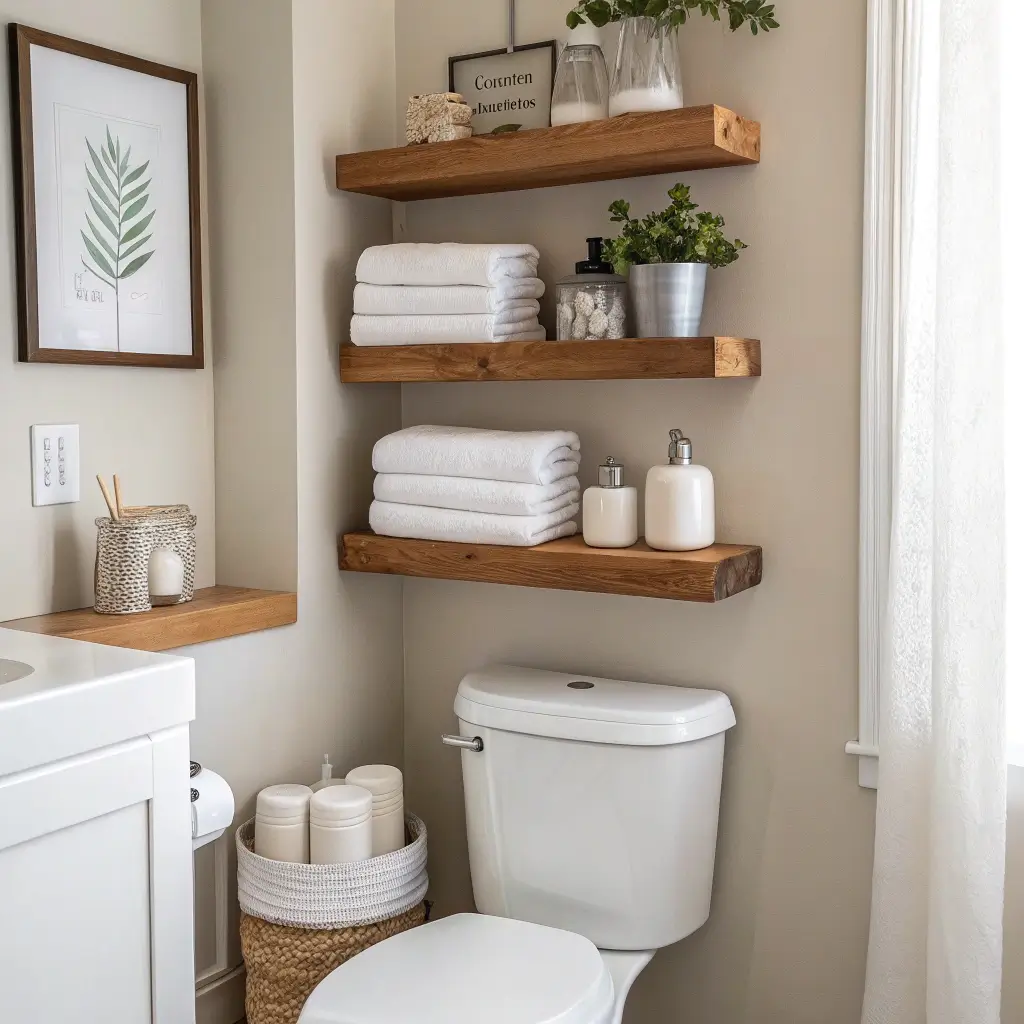
You know that awkward space above your toilet? The one that just sits there, doing absolutely nothing? This is prime real estate that most people completely ignore. I installed a three-tier floating shelf stack above my toilet last year, and honestly, it changed everything.
The trick here is getting the spacing right. You want about 12-14 inches between each shelf – enough room to actually grab things without playing contortionist. I keep decorative baskets on the top shelf (because who’s reaching up there daily?), everyday toiletries on the middle shelf, and extra toilet paper on the bottom one. Pro tip: mount the lowest shelf at least 24 inches above the toilet tank so you don’t smack your head when standing up.
What makes this setup genius is how it utilizes dead space. Think about it – you’re basically creating a whole storage unit out of thin air. And unlike those clunky over-toilet cabinets from the ’90s, floating shelves keep everything feeling open and airy.
Installation Tips That Actually Matter
Start by finding your wall studs – seriously, don’t skip this step unless you want your shelves (and everything on them) crashing down at 2 AM. I learned this the hard way when I tried to use just drywall anchors for my first attempt. Not fun.
Use a level for every single shelf. Even a slight tilt becomes super obvious once you start placing items on them. And here’s something nobody tells you: install your brackets slightly closer together than the shelf length suggests. This prevents any future sagging, especially if you’re storing heavier items like spare shampoo bottles.
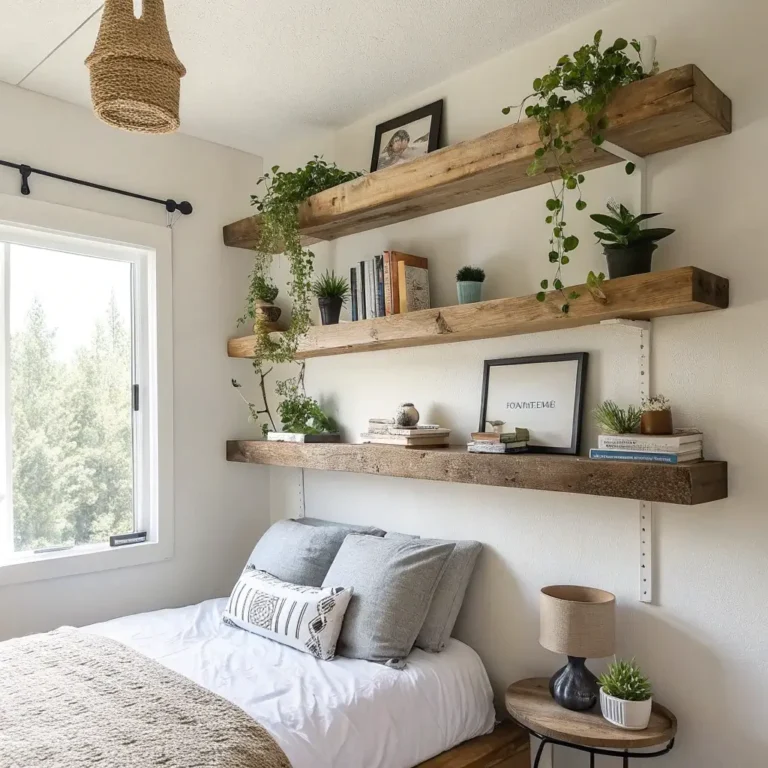
Minimal Wood Slab Shelves Above Sink
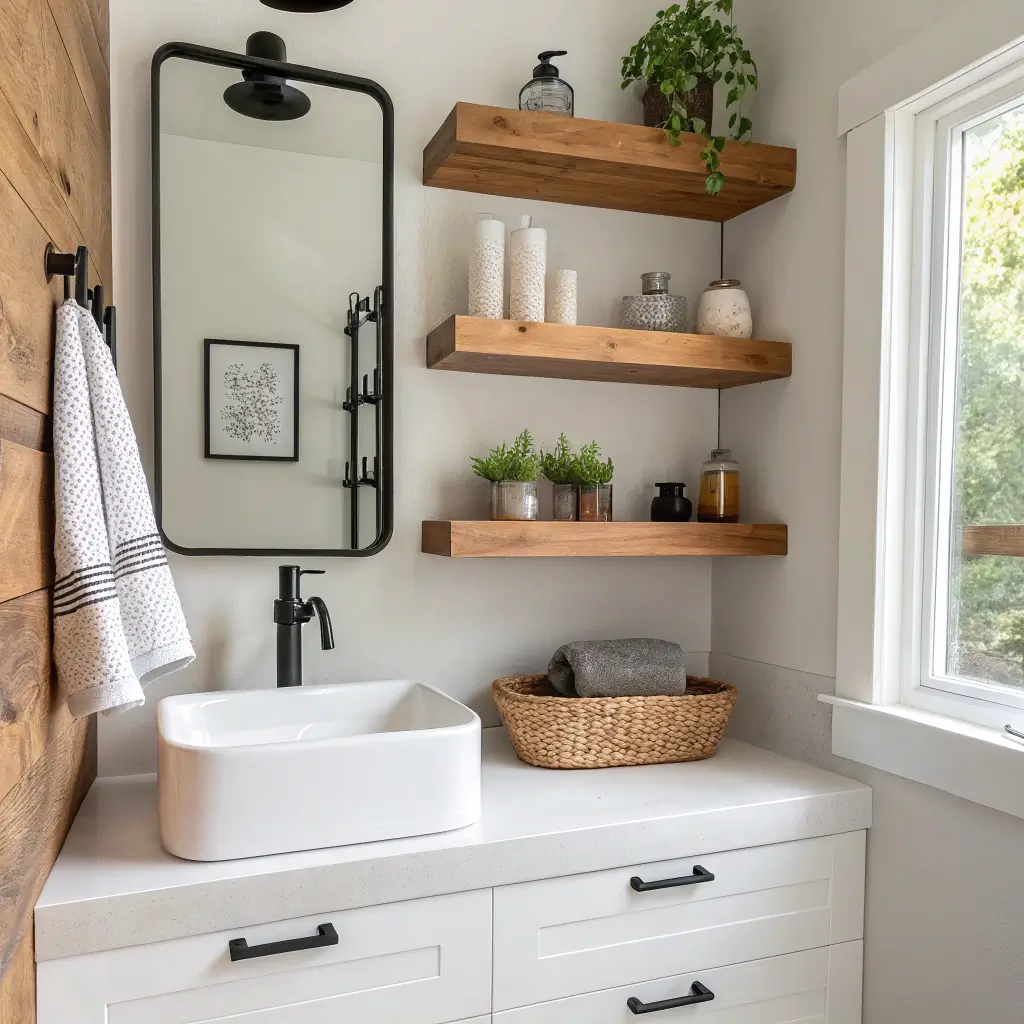
Remember when everyone was obsessed with chunky, ornate bathroom furniture? Thank goodness we’ve moved past that. Minimal wood slab shelves are having their moment, and for good reason – they make even the tiniest bathroom feel like a spa.
I went with 2-inch thick walnut slabs above my sink, and the natural wood grain adds so much warmth without overwhelming the space. The key is keeping them unfinished-looking (though definitely seal them against moisture – trust me on this one). These shelves work because they’re substantial enough to hold your daily essentials but sleek enough not to crowd your mirror space.
The Perfect Height Formula
Mount your first shelf about 6-8 inches above your faucet if you have a wall-mounted one, or 12 inches above a standard vanity backsplash. This gives you enough clearance to wash your face without bumping your head, but keeps everything within easy reach. Ever tried reaching for face wash with soap in your eyes? Yeah, accessibility matters here.
The beauty of minimal wood slabs is their versatility. They complement literally any bathroom style – from industrial to farmhouse to ultra-modern. Plus, the natural wood actually improves with age and bathroom humidity, developing this gorgeous patina that manufactured shelves just can’t match.
Corner Floating Shelves for Small Bathrooms
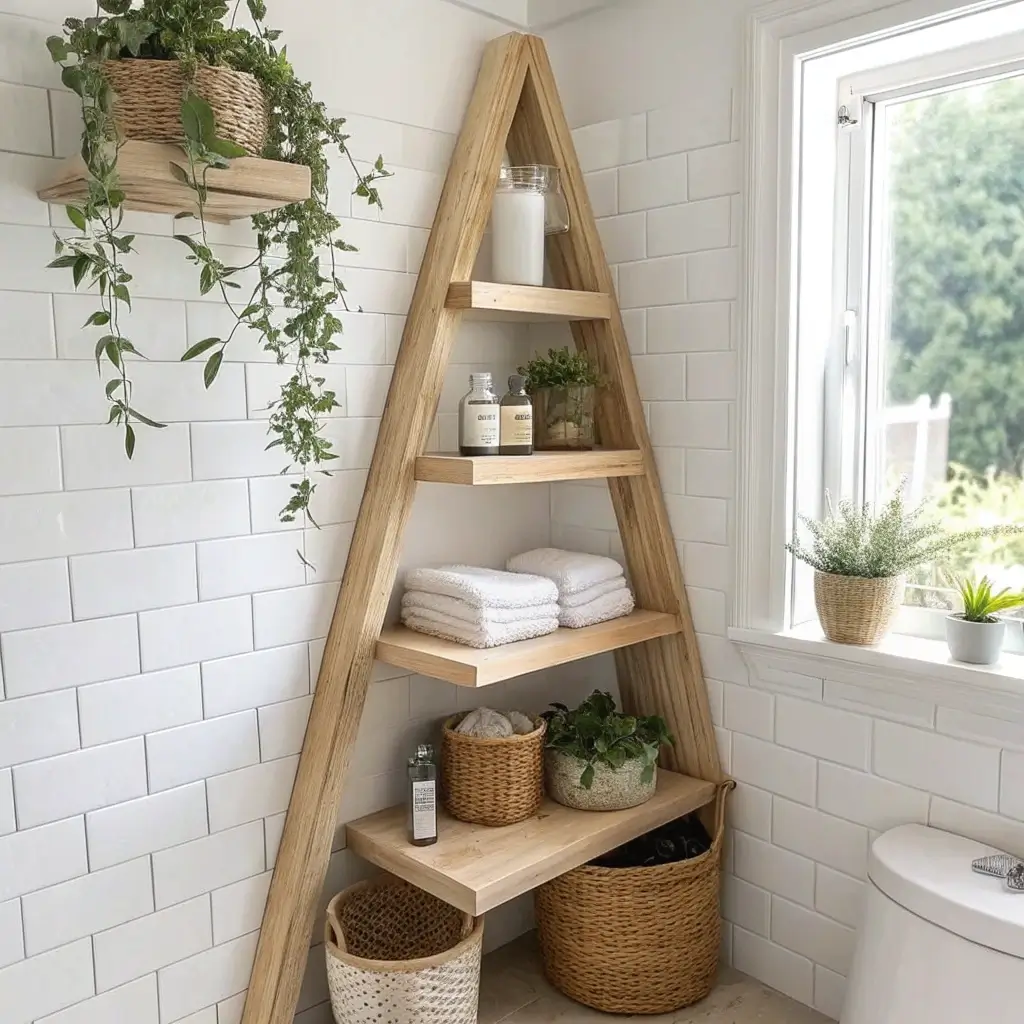
Corners are the unsung heroes of small bathroom storage. Seriously, why do we always ignore them? Corner floating shelves maximize every square inch of space without making your bathroom feel cluttered.
I installed triangular corner shelves in my guest bathroom (which is basically the size of a closet), and suddenly had room for all the essentials plus some cute decor. The trick is to go vertical – stack 3-4 small corner shelves rather than trying to cram everything onto one large one.
Making Corners Work Harder
Position your corner shelves where two walls meet near the vanity or above the toilet. The sweet spot is usually 12 inches from the corner on each wall – this gives you decent shelf space without jutting out too far into the room. And here’s a game-changer: use clear acrylic corner shelves in super tiny bathrooms. They practically disappear but still hold all your stuff.
What I love most about corner shelves? They force you to curate what you display. You can’t just dump everything on them like you might with a regular shelf. This actually makes your bathroom look more intentional and put-together.
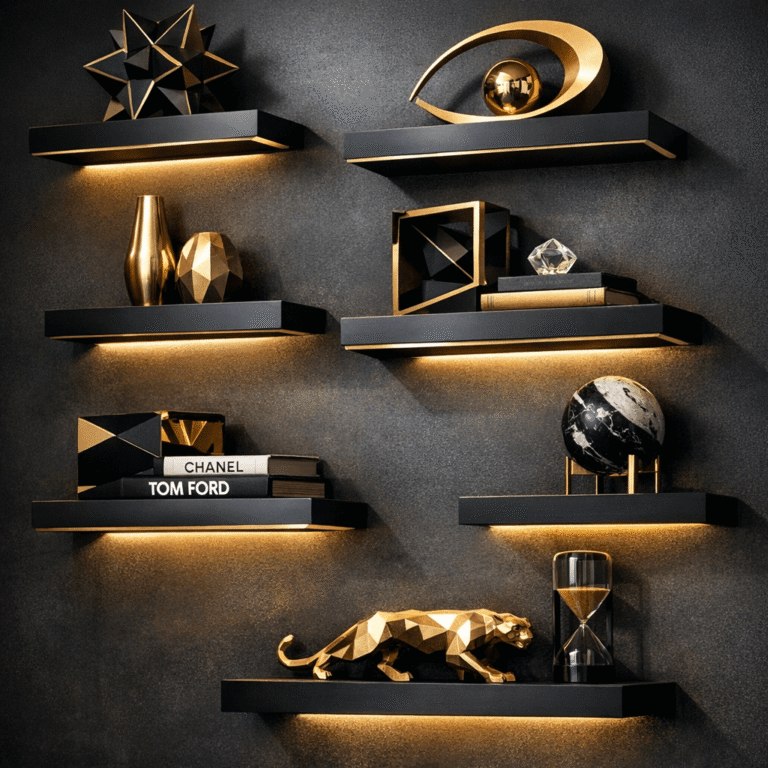
Black Metal Floating Shelves with Wood Accents

Want to know what’s trending hard right now? The industrial-meets-cozy look of black metal frames with wood inserts. These shelves bring that perfect balance of edgy and warm that makes a bathroom feel current without being too trendy.
I swapped out my boring builder-grade medicine cabinet for two black metal floating shelves with reclaimed wood inserts, and wow – instant personality. The contrast between the matte black metal and natural wood grain creates visual interest without trying too hard. Plus, the metal frame adds structure that prevents the wood from warping in humid conditions.
Styling Black Metal Shelves Like a Pro
Here’s the secret: don’t overstyle these shelves. The frame itself is already making a statement, so keep your accessories simple. White towels, clear glass containers, maybe one small plant. The industrial vibe works best when it feels effortless, not forced.
These shelves particularly shine in bathrooms with white subway tile or plain walls. The black creates definition and breaks up all that white without feeling heavy. And FYI, they’re surprisingly versatile – they work just as well in a modern minimalist bathroom as they do in a rustic farmhouse setup.
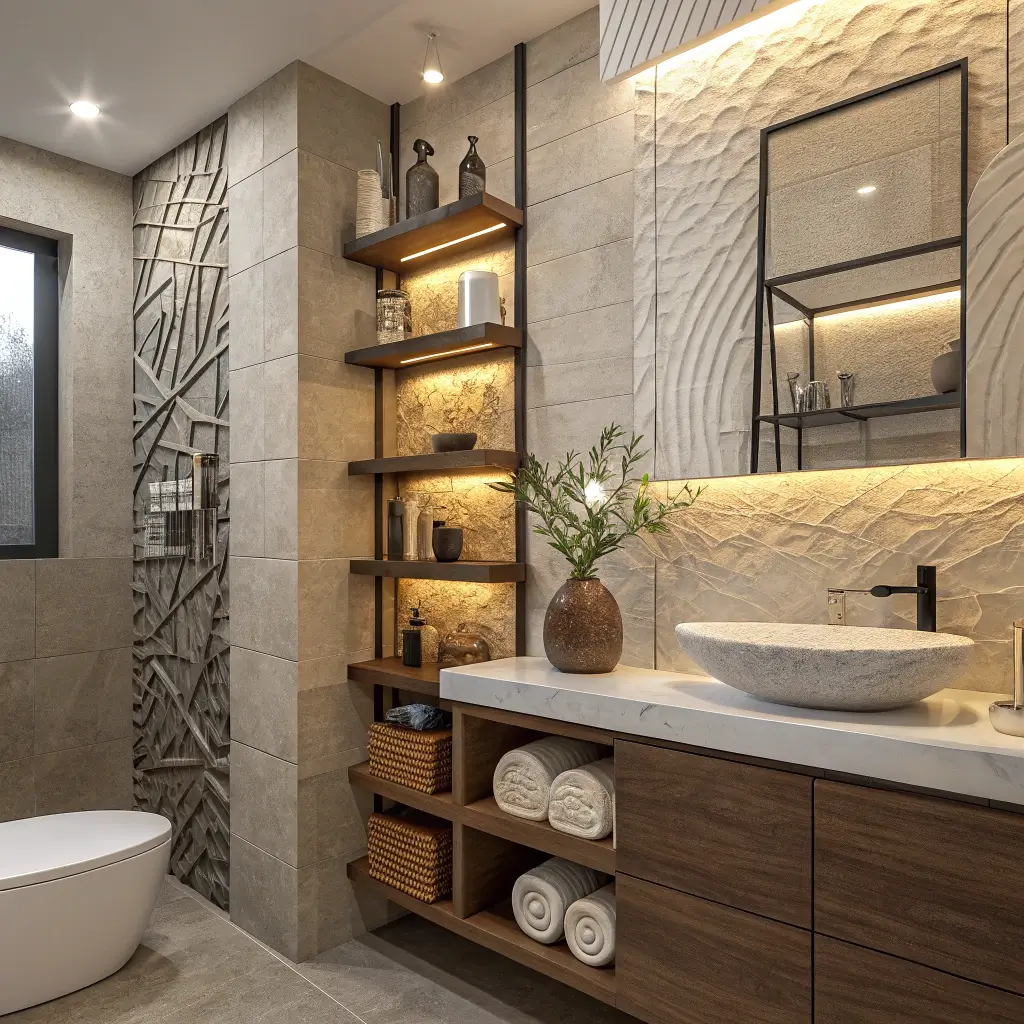
Floating Shelves Built Into Bathroom Niche
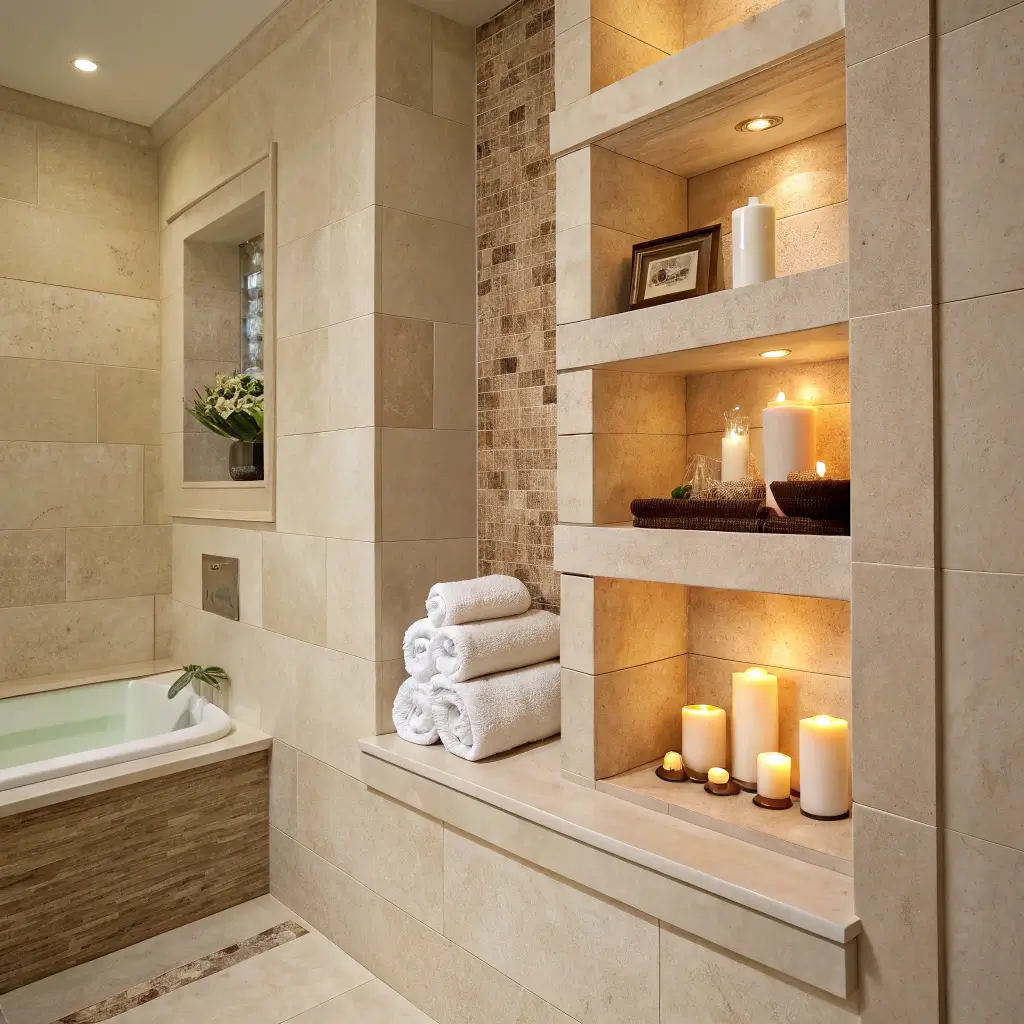
Got one of those random wall niches in your shower or bathroom? Lucky you! Built-in floating shelves in a niche are basically custom storage that looks like it cost thousands but really doesn’t.
My master bathroom came with this weird recessed area next to the shower that the previous owners just… ignored. I added three floating glass shelves, and boom – instant built-in storage that looks like it was always meant to be there. The contained space means you can go a bit wild with styling without it looking cluttered.
Maximizing Niche Potential
Measure your niche depth carefully – you want shelves that sit flush with the wall or slightly recessed, never protruding. Tempered glass shelves work brilliantly in shower niches because they’re waterproof and let light through. For dry niches, wood or even marble can add serious luxury vibes.
The best part about niche shelves? They don’t steal any floor space. You’re literally using space that’s already carved out of your wall. It’s like finding free square footage in your bathroom.
Also Read: 15 Fun DIY Floating Shelves Ideas and Unique Wall Displays
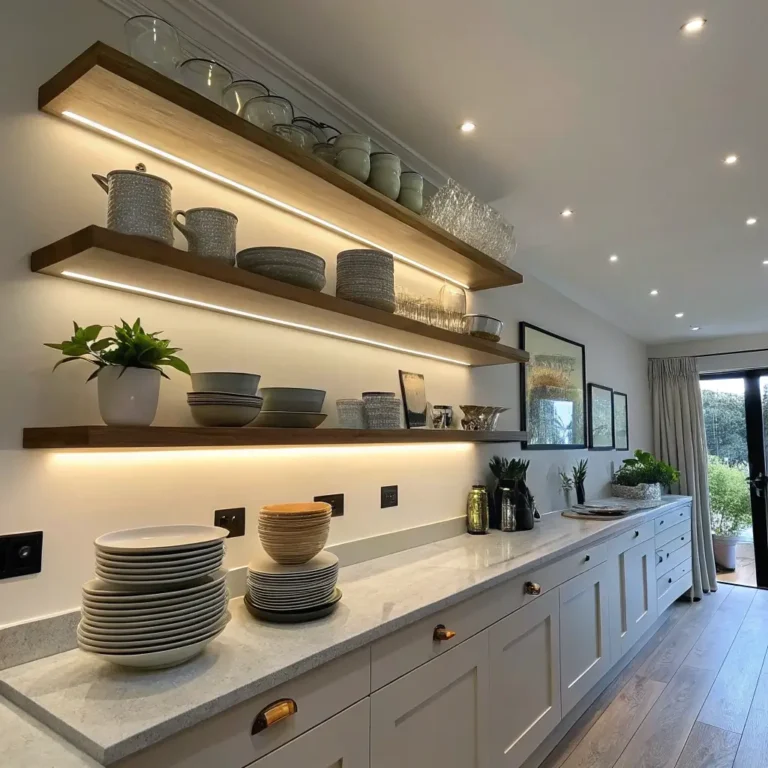
Glass Floating Shelves for Modern Bathrooms
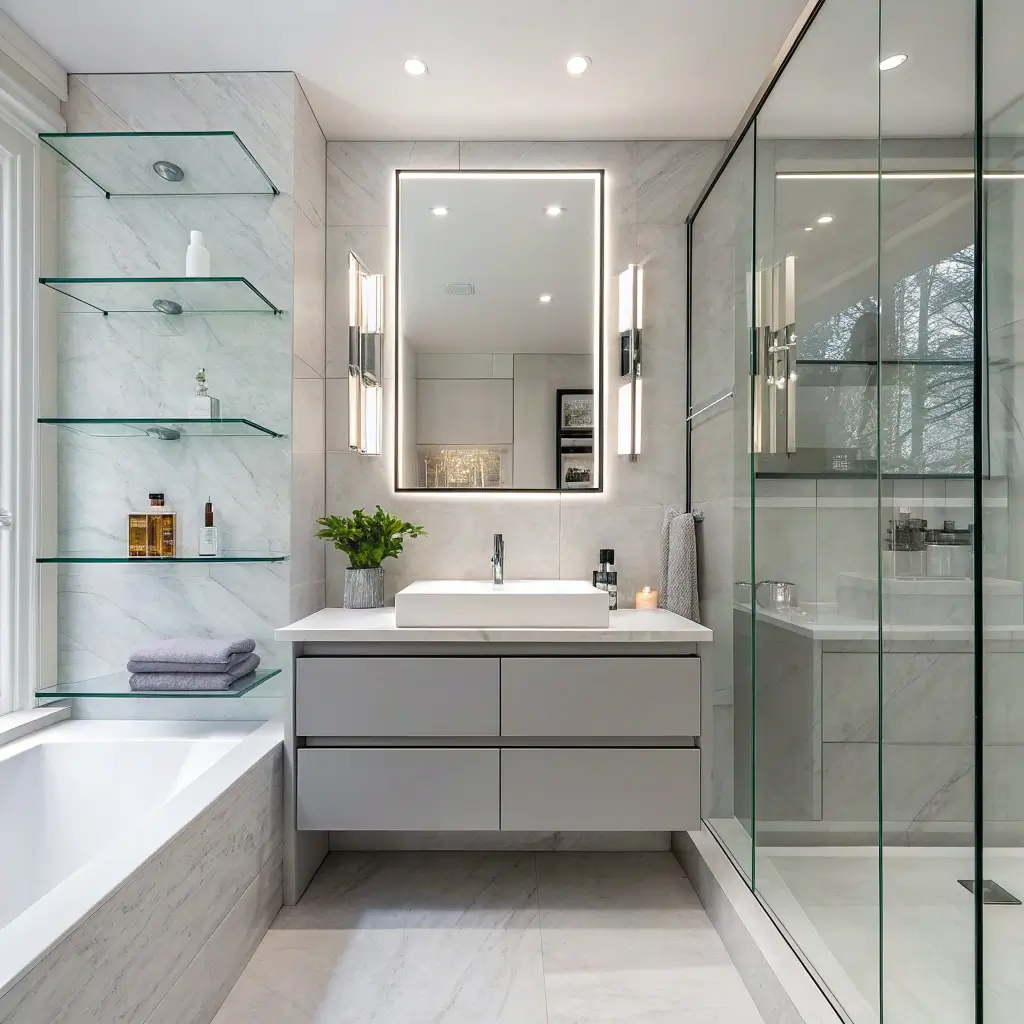
Glass shelves might seem fragile, but quality tempered glass floating shelves are actually tough as nails and perfect for creating that sleek, spa-like atmosphere. They’re my go-to recommendation for anyone trying to make a small bathroom feel bigger.
I installed 3/8-inch tempered glass shelves in my powder room, and guests always comment on how spacious it feels (it’s literally 25 square feet). The transparency means they don’t create visual barriers, and light passes right through them. Plus, they’re super easy to clean – just spray and wipe.
The Right Glass for Your Space
Skip the cheap glass shelves from big box stores – they’ll chip and look cloudy within months. Invest in proper tempered glass with polished edges. The slightly green tint of regular glass actually looks more expensive than ultra-clear glass, IMO.
Mount them with minimal brackets or those fancy floating clamps that grip the glass from behind. The less hardware visible, the better the floating effect. And here’s something cool: LED strip lights underneath glass shelves create this amazing glow that makes everything on them look like it’s floating.
Rustic Floating Shelves with Woven Baskets
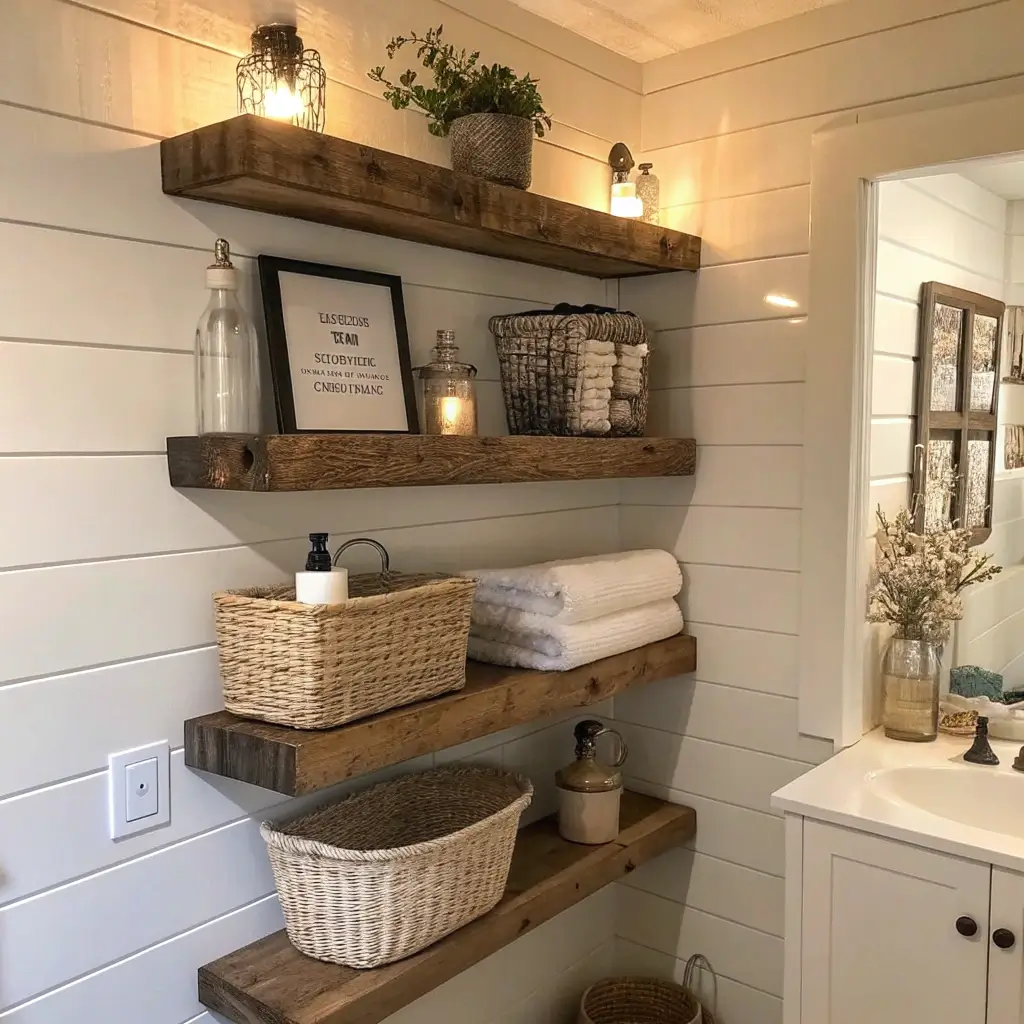
Want that Pinterest-worthy farmhouse bathroom without going full shiplap-crazy? Rustic wood floating shelves paired with woven baskets give you all the cozy vibes without the commitment.
I used reclaimed barn wood for my shelves (found a guy on Facebook Marketplace who sells old fence planks – score!), and paired them with natural seagrass baskets. The combination hides all the ugly stuff while looking effortlessly styled. The baskets are genius for corralling small items that would otherwise create visual chaos.
Basket Selection That Makes Sense
Choose baskets that are about 2 inches shorter than your shelf depth – this prevents them from tipping forward. Natural materials like rattan, seagrass, or water hyacinth complement the rustic wood perfectly and handle bathroom humidity well. Avoid anything with fabric liners unless you want mildew city.
The rustic-basket combo works because it adds texture and warmth to what can be a pretty sterile room. Plus, you can switch out basket contents seasonally without anyone knowing you’re hiding three half-empty shampoo bottles in there.
Floating Shelves Framing the Bathroom Mirror
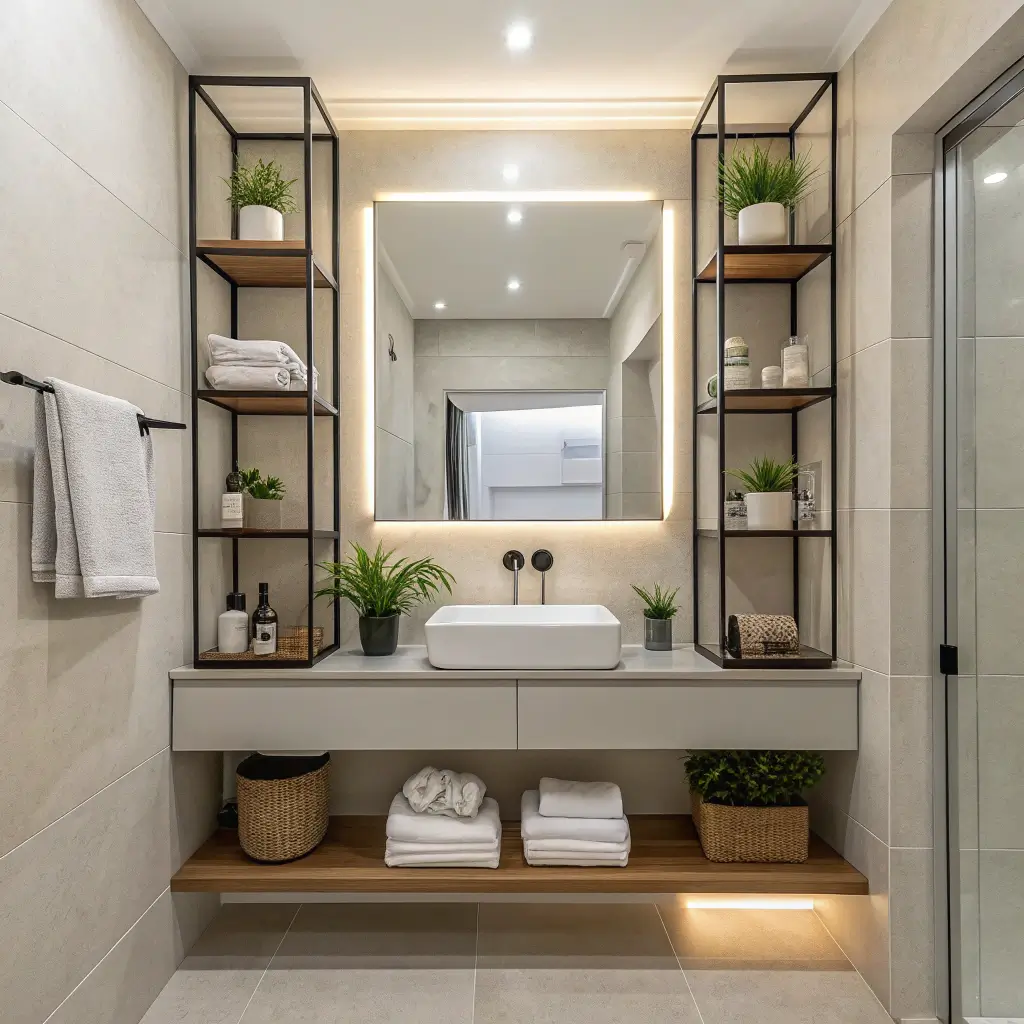
Ever notice how a mirror just floating on the wall looks kind of… lonely? Floating shelves on either side of your mirror create this gorgeous frame effect that makes your whole vanity area look custom-designed.
I installed narrow 4-inch shelves flanking my bathroom mirror, and it completely changed the whole vibe. Suddenly my basic builder mirror looked intentional, like part of a cohesive design. Each shelf holds just enough – a small plant on one side, pretty soap dispenser on the other – without crowding the mirror.
Creating Balance Without Symmetry
You don’t need perfectly matching items on each shelf. In fact, asymmetrical styling often looks more natural. Maybe a tall vase on one side, stacked washcloths on the other. The key is visual weight balance, not identical placement.
Keep the shelves at eye level or slightly below – you want them in your sightline when looking in the mirror but not blocking your view. And leave at least 6 inches between the shelf edge and mirror edge. Too close and it feels cramped; too far and you lose that framing effect.
Also Read: 15 Amazing Kitchen Floating Shelves Ideas and DIY Inspiration
Single Long Floating Shelf Over Bathtub
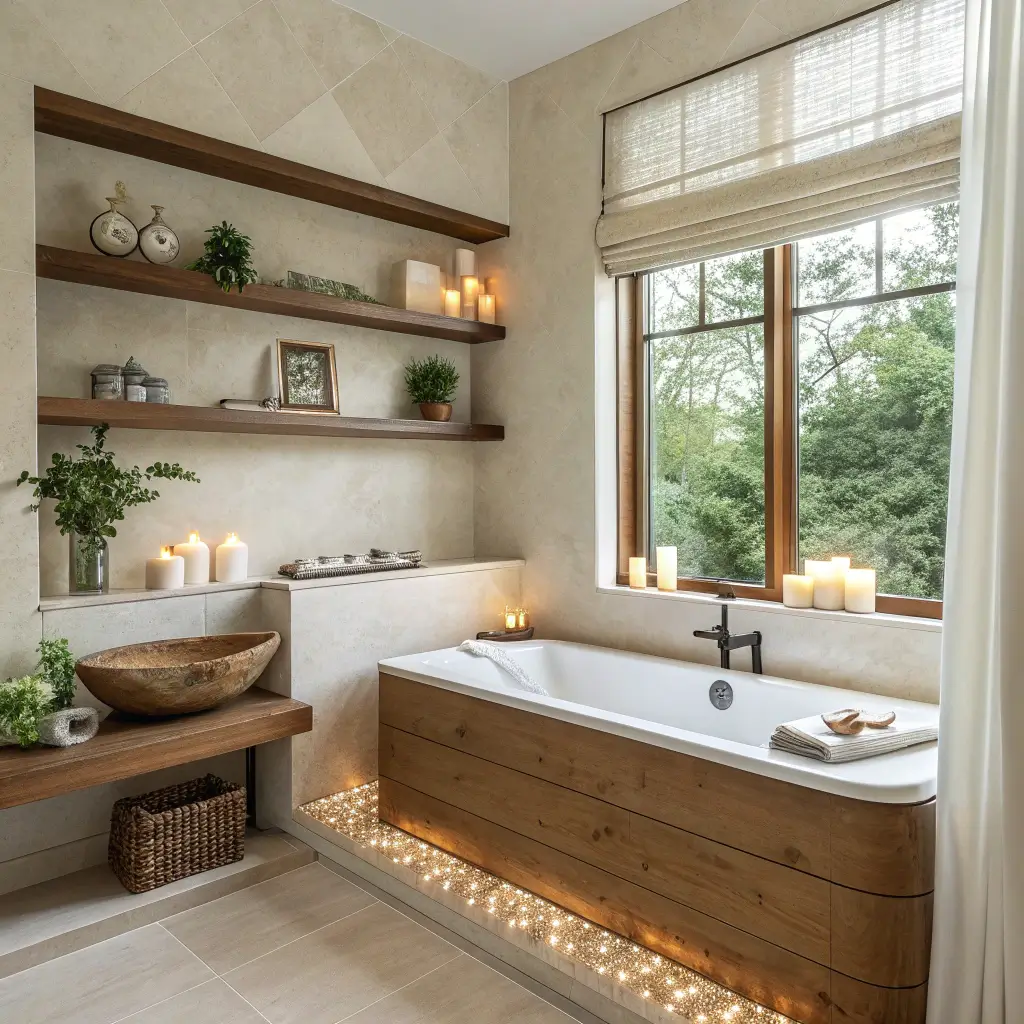
Who says bathtub storage has to be those suction cup caddies that constantly fall down? A single long floating shelf running the length of your tub is a game-changer for bath lovers.
I mounted a 48-inch oak shelf about 18 inches above my tub edge, and it holds everything from fancy bath salts to candles to my phone (don’t judge – we all scroll in the tub). The continuous line creates this clean, modern look that those corner caddies could never achieve.
Moisture-Proofing Your Tub Shelf
This is crucial – seal your wood shelf properly or watch it warp within months. I use marine-grade polyurethane, applied in three thin coats. The finish needs to be completely waterproof because this shelf will get splashed constantly.
Mount it high enough that you won’t knock things off when getting in and out of the tub (learned that lesson the expensive way with a broken candle holder). But keep it low enough to reach while sitting in the tub. Sweet spot? About 18-24 inches above the tub edge.
Asymmetrical Floating Shelves for Accent Walls
Forget everything you know about perfect alignment – asymmetrical floating shelves are having a major moment, and they’re way easier to pull off than you’d think.
I created an asymmetrical arrangement on my bathroom’s accent wall using five shelves of different lengths, and people literally stop mid-hand-wash to compliment it. The key is making it look intentional, not like you measured wrong (even though my first attempt definitely looked like I measured wrong).
The Art of Controlled Chaos
Start with your longest shelf and build around it. Keep at least one consistent element – either all the same wood tone, all the same thickness, or all the same bracket style. This creates cohesion within the chaos.
The rule I follow? Odd numbers of shelves, varying lengths by at least 6 inches, and maintaining 8-12 inches between shelves. Too close together and it looks cluttered; too far apart and you lose the gallery effect. This setup works brilliantly for displaying a mix of functional items and decor without looking too staged.
Floating Shelves with Built-In Towel Bar
Why install a shelf and towel bar separately when you can have both? Floating shelves with integrated towel bars are the multitasking heroes your bathroom needs.
My kids’ bathroom has one of these above the toilet, and it’s honestly genius. Folded towels on top, hanging hand towel below, zero wall space wasted. The integrated bar means one less thing to install and creates this cohesive, built-in look that separate pieces never quite achieve.
Choosing the Right Style
You can find these in tons of styles – from industrial pipe-and-wood combos to sleek modern metals. The rustic wood-and-metal pipe version adds instant character to bland bathrooms. For modern spaces, look for powder-coated aluminum or stainless steel versions.
Mount these at standard towel bar height (48 inches from the floor) so the hanging towel is easily reachable. The shelf above becomes perfect for extra towels, decorative items, or toiletry storage. Just remember – the towel bar means you need extra clearance below, so plan accordingly.
Also Read: 15 Elegant Floating Shelves Bedroom Ideas for Organized Rooms
Marble Floating Shelves for Luxury Bathrooms
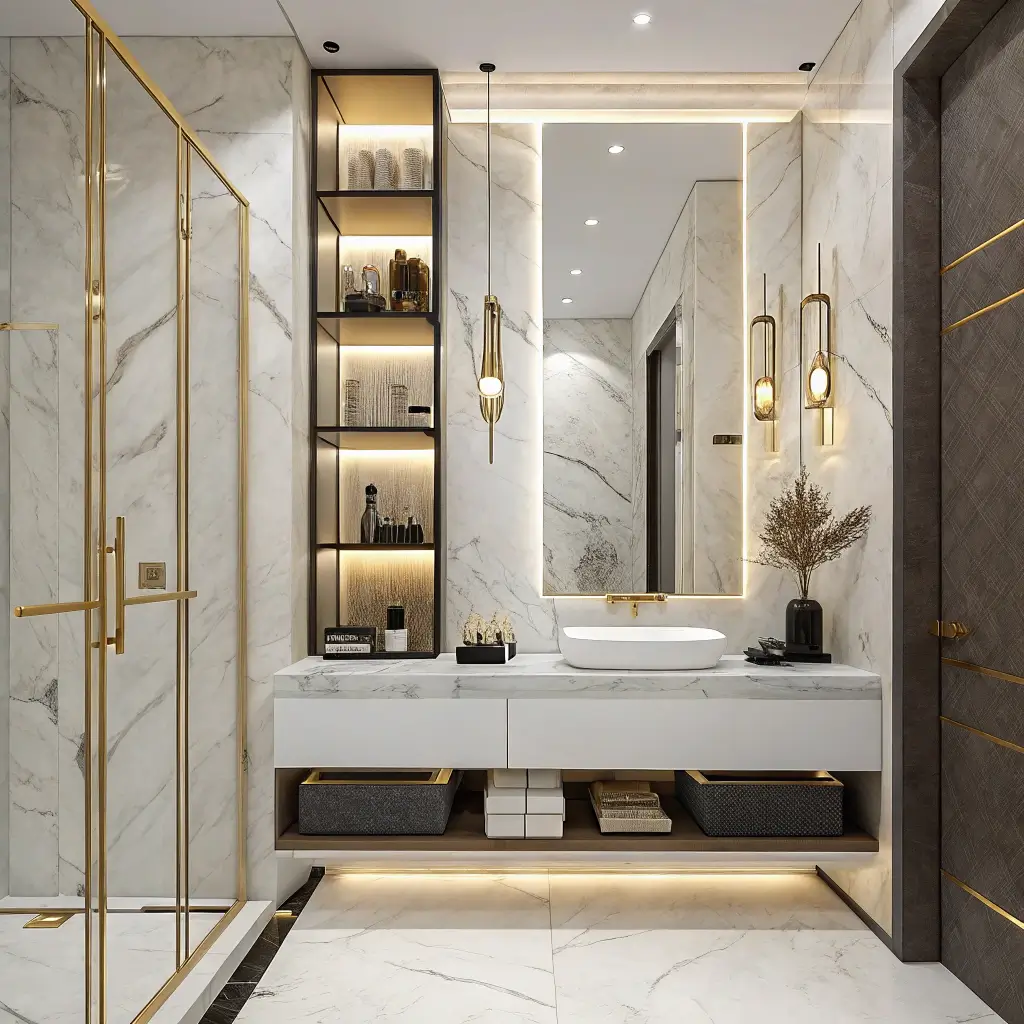
Want to feel like you’re living in a boutique hotel? Marble floating shelves instantly elevate any bathroom from basic to bougie. Yes, they’re an investment, but the impact is absolutely worth it if you’re going for that luxury spa vibe.
I splurged on Carrara marble shelves for my master bathroom renovation, and two years later, I still feel fancy every single morning. The natural veining means each shelf is unique, and the cool surface is perfect for storing perfumes and skincare products (some actually recommend keeping certain serums cool!).
Working with Real Stone
Real marble is heavy – like, really heavy. You absolutely need proper wall anchors rated for the weight, and finding studs isn’t optional, it’s mandatory. Each 24-inch shelf weighs about 15-20 pounds empty, so factor that into your bracket selection.
Marble needs sealing to prevent staining, especially in bathrooms where it’ll encounter oils and cosmetics. I reseal mine every six months – it takes five minutes and keeps them looking pristine. And here’s a pro tip: honed marble hides water spots better than polished, though polished definitely has that high-end gleam.
Final Thoughts
After installing floating shelves in three different bathrooms (and helping friends with probably a dozen more), I can honestly say they’re the single best storage upgrade you can make. They’re affordable, customizable, and actually solve real storage problems instead of just looking pretty on social media.
The best part? You don’t need to pick just one idea. Mix and match these concepts based on your space and needs. Maybe corner shelves by the sink and a long shelf over the tub. Or hidden bracket shelves flanking your mirror with a rustic setup over the toilet. The possibilities are endless, and that’s what makes floating shelves so genius.
Start with one simple project – maybe those over-toilet shelves you’ve been thinking about – and see how it transforms your space. Trust me, once you experience the joy of having everything organized and easily accessible, you’ll be planning your next shelf installation before the first one’s even loaded up. Your bathroom (and your morning routine) will thank you for it.