15 Brilliant Cupboard Organization Ideas for a Clutter-Free Home
Let’s be real for a second – you probably opened this article because your cupboards look like a tornado hit them, right? Mine used to look exactly the same until I discovered these game-changing organization methods that transformed my kitchen from chaotic disaster zone to Pinterest-worthy paradise.
I’ve spent the last five years testing every cupboard organization hack out there, and trust me, I’ve seen some real doozies.
Some ideas sound great in theory but fall apart faster than my New Year’s resolutions. But these 15 methods? They’re the real deal, and I’m about to share everything I learned the hard way so you don’t have to.
Whether you’re dealing with tiny apartment cupboards that barely fit a cereal box or massive pantries that somehow still feel cramped, I’ve got solutions that actually work.
And the best part? Most of these won’t require you to sell a kidney to afford them.
Minimalist Cupboard Reset System

Have you ever opened your cupboard and felt personally attacked by the avalanche of random stuff that tumbled out? Yeah, me too. That’s why I started with the minimalist cupboard reset system, and honestly, it changed everything.
Here’s the deal: you empty everything out first. I mean everything – even that mystery jar in the back that might be jam or might be a science experiment. Once your cupboards are bare, you only put back what you actually use. Sounds simple, but you’d be amazed how much junk accumulates when you’re not paying attention.
I discovered I had four can openers (who needs four can openers?), three half-empty bags of the same pasta, and enough plastic containers to supply a small country. The minimalist approach forces you to confront your hoarding tendencies head-on. Keep only what serves a purpose, and suddenly your cupboards feel twice as big.
The Three-Box Method
When I reset my cupboards, I use three boxes:
- Keep: Items used weekly
- Maybe: Things used monthly or seasonally
- Donate/Toss: Everything else
This system works because it removes decision fatigue. You’re not standing there for 20 minutes debating whether you’ll ever use that avocado slicer your aunt gave you. If you haven’t touched it in six months, it goes in the donation box. Period.
Small Space Cupboard Storage Hacks
Living in a 500-square-foot apartment taught me that small cupboards require big creativity. You can’t just throw things in and hope for the best – that’s a recipe for disaster (and possibly a concussion from falling canned goods).
The secret to maximizing small cupboard space? Think vertical and get creative with dead space. I installed adhesive hooks on the inside of cupboard doors to hang measuring cups and spoons. Suddenly, I had an entire drawer’s worth of space freed up. It’s like finding money in your coat pocket, but better.
Another game-changer: shelf risers. These little platforms essentially double your shelf space by creating two levels where you had one. I use them for plates and bowls, but they work great for canned goods too. Just make sure you measure your cupboard height first – learned that one the hard way when my “brilliant” purchase didn’t fit.
Magnetic Magic
Here’s a hack that’ll blow your mind: stick magnetic strips inside your cupboards. I use them to hold:
- Spice tins
- Knife guards
- Metal measuring spoons
- Tea tins
This frees up so much shelf space, it’s ridiculous. Plus, everything’s visible and easy to grab. No more digging through drawers looking for that one specific measuring spoon.
Tiered Shelf Organizer Layout
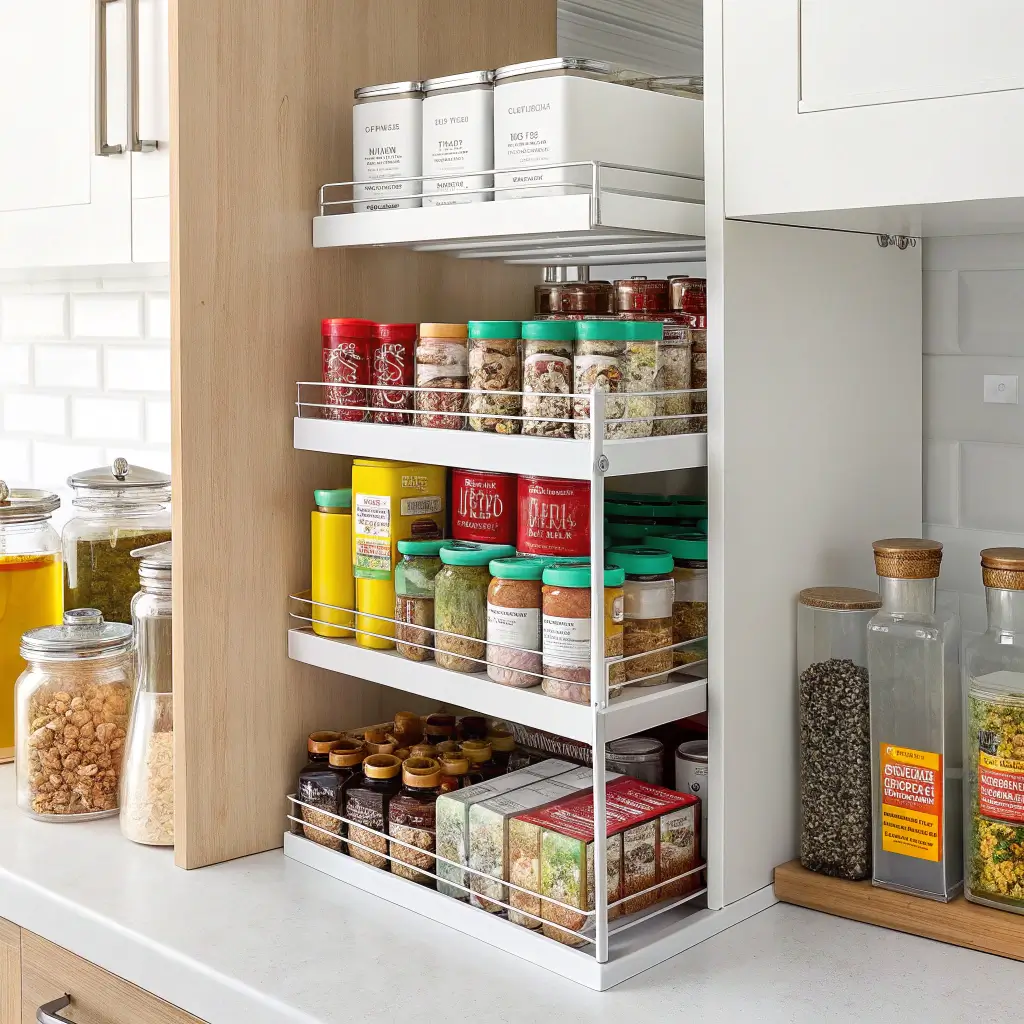
Remember stadium seating at the movies? The tiered shelf organizer brings that same concept to your cupboards, and it’s absolutely brilliant. Everything’s visible, nothing gets lost in the back, and you actually know what you have.
I installed expandable tiered shelves in my spice cupboard, and suddenly I could see all 30+ spices at once. (Yes, I have a problem. No, I don’t want to talk about it.) Before this, I’d buy duplicates because I couldn’t see what lurked in the back. Now? I save money and space.
These organizers work especially well for:
- Canned goods
- Spices and seasonings
- Medicine cabinets
- Nail polish collections (don’t judge)
DIY vs. Store-Bought
You can DIY tiered shelves using small boxes or even sturdy shoeboxes covered in contact paper. But honestly? The $15 expandable ones from the store are worth it. They adjust to fit your cupboard perfectly and last forever. Sometimes being cheap costs you more in the long run, IMO.
Also Read: 15 Stunning Modern Cupboard Design Ideas For Stylish Homes
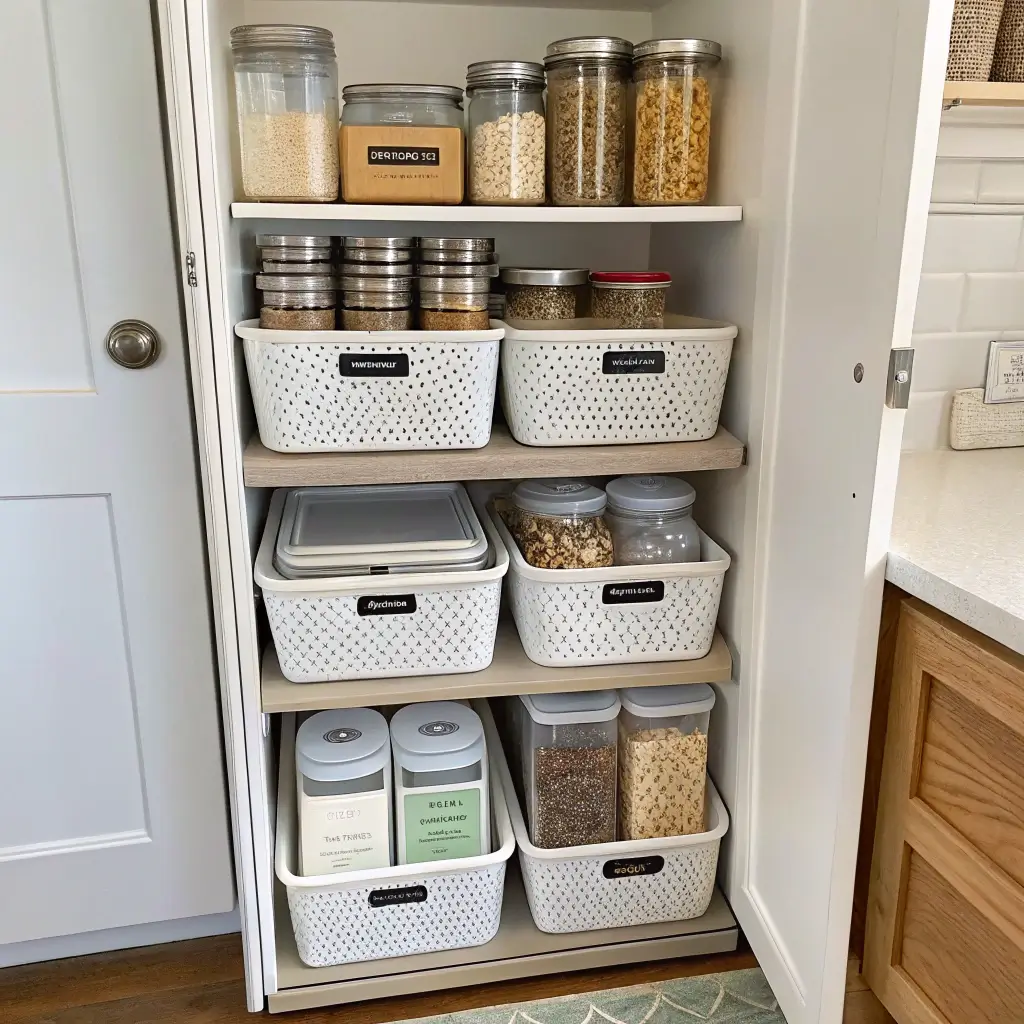
Clear Container Cupboard Method
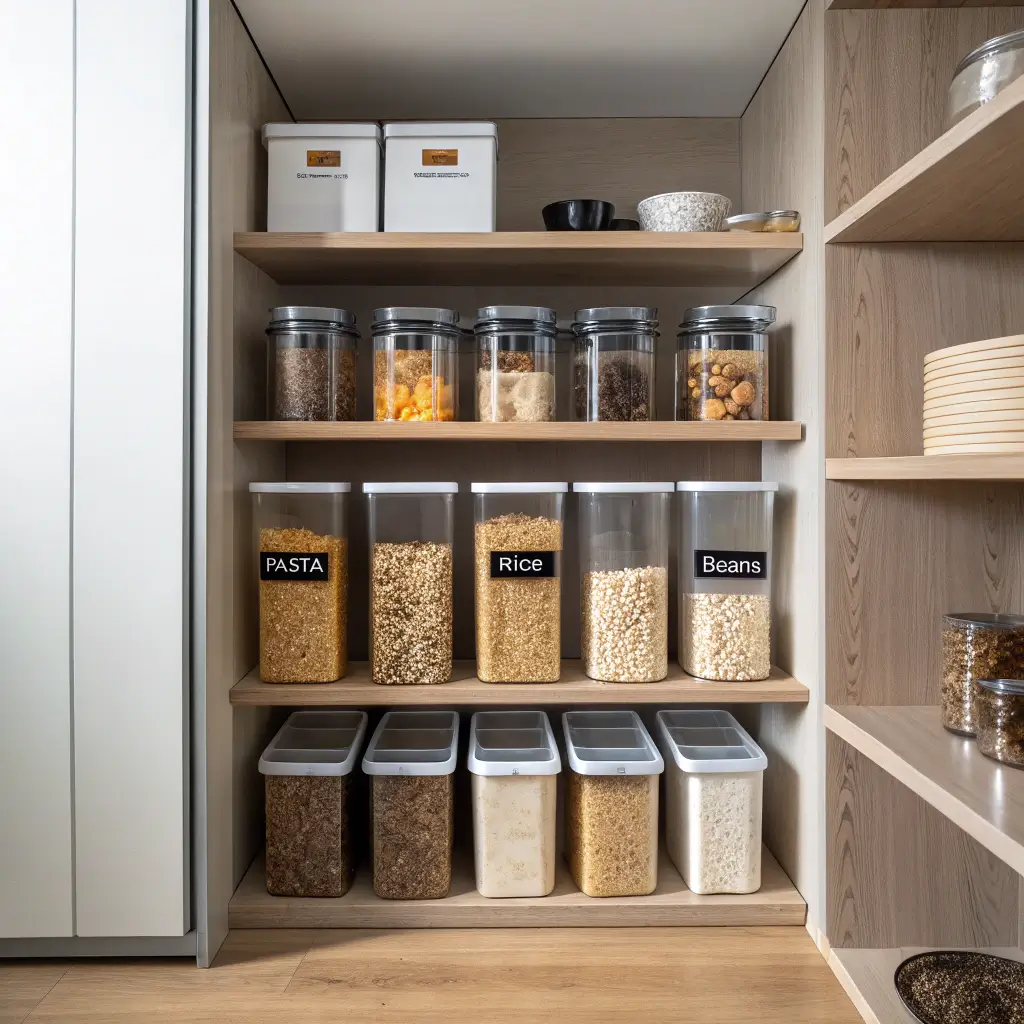
Switching to clear containers was like getting x-ray vision for my cupboards. No more mystery bags or wondering if that’s flour or powdered sugar (spoiler: it was baking soda, and yes, I ruined a cake).
I invested in a set of airtight clear containers, and it revolutionized my pantry cupboard. Everything from pasta to cereal to nuts goes into these bad boys. The uniformity alone makes your cupboards look organized, even if you’re naturally messy like me.
The Benefits Nobody Talks About
Beyond the obvious “you can see what’s inside” perk, clear containers:
- Stack perfectly, maximizing vertical space
- Keep food fresher longer than original packaging
- Prevent pest problems (bye-bye, pantry moths!)
- Make inventory checks a breeze
Pro tip: buy square or rectangular containers, not round ones. Round wastes precious cupboard real estate with all those gaps between containers. Trust me on this one.
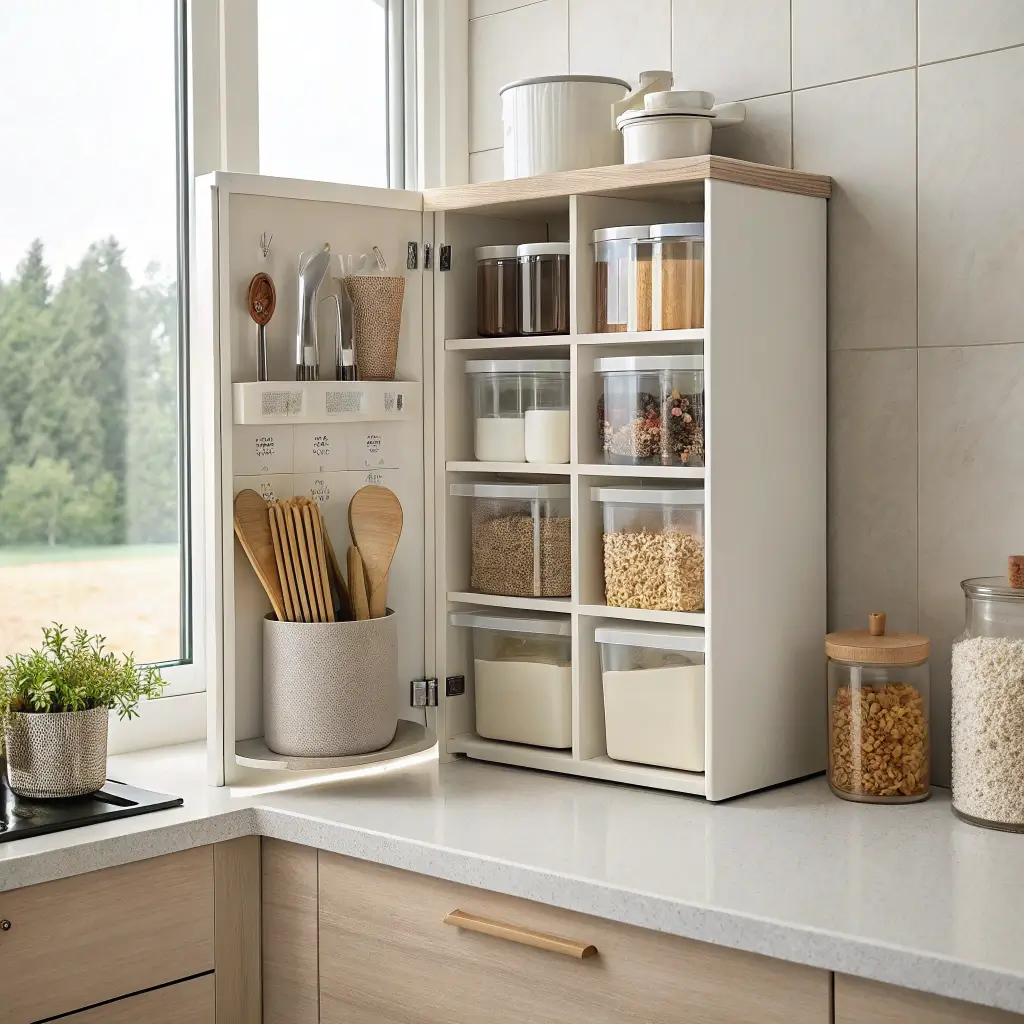
Lazy Susan Cupboard Setup
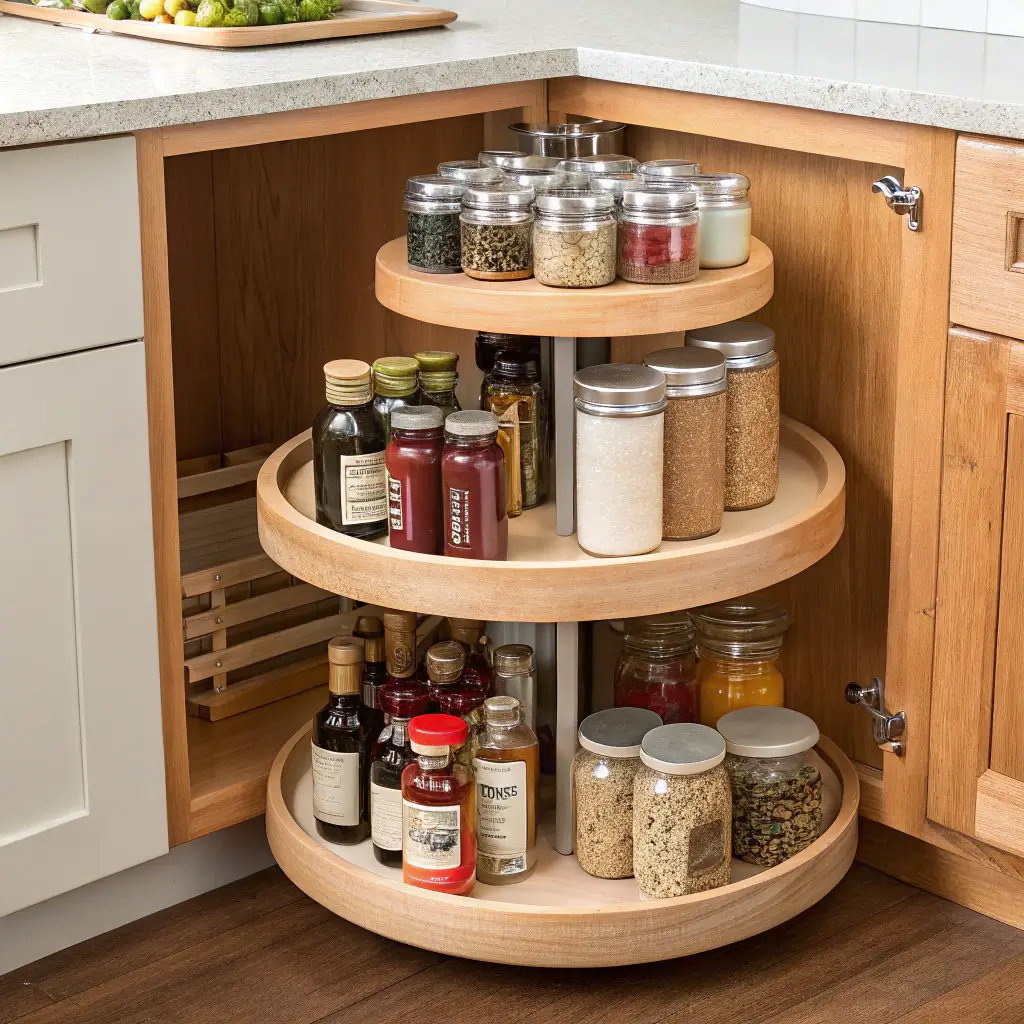
Who named these things “Lazy Susans” anyway? They should be called “Genius Susans” because they’re working harder than anything else in my cupboard. These rotating platforms turned my corner cupboard from a black hole into prime real estate.
I have three different sizes spinning away in my cupboards right now. The large one holds oils and vinegars, the medium handles vitamins and medications, and the small one corrals all those little packets of sauce from takeout (what, like you throw them away?).
Strategic Placement Tips
Lazy Susans work best when you:
- Group similar items together
- Keep heavier items toward the center
- Leave a little space between items for easy grabbing
- Use them in corner cupboards where reaching is awkward
Ever tried reaching for something in the back corner of a cupboard? It’s like playing Twister with your kitchen. Lazy Susans eliminate that whole gymnastics routine.
Vertical Divider Cupboard System
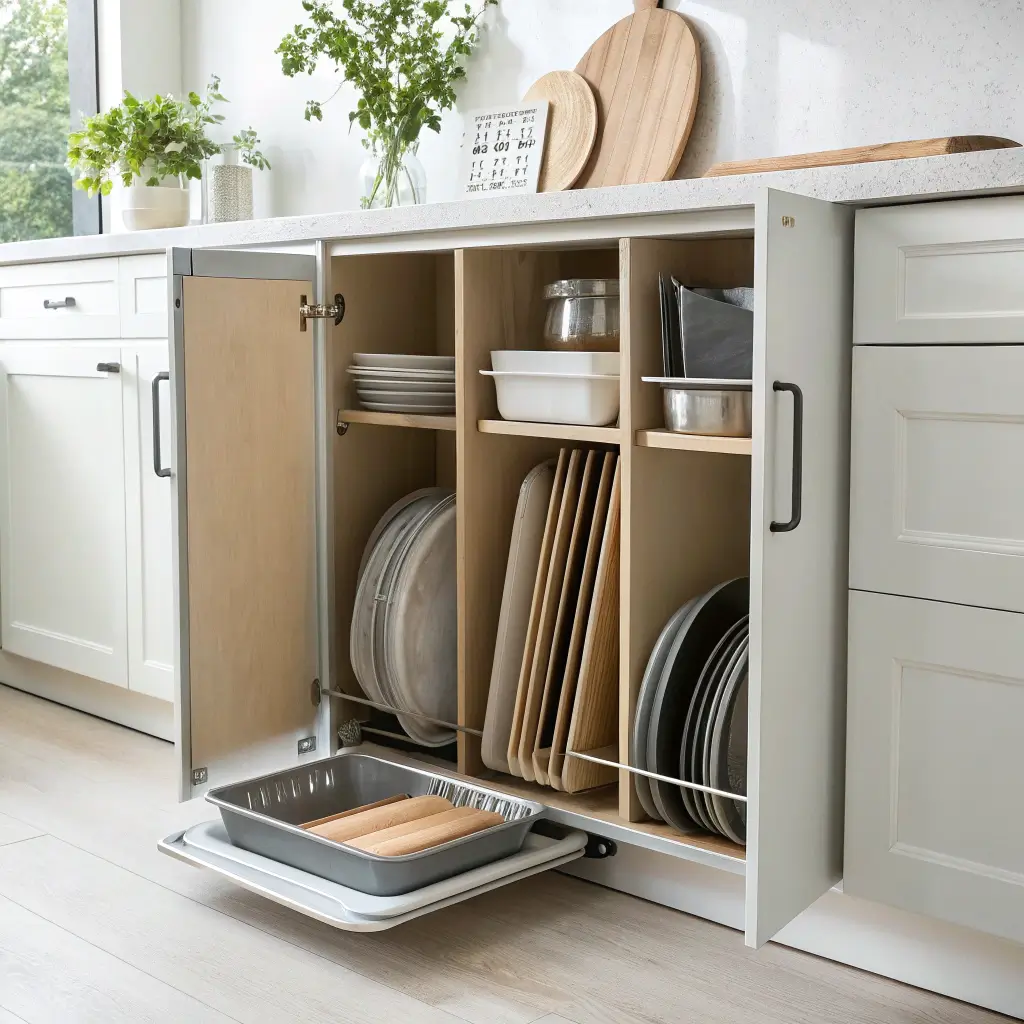
Vertical dividers changed my life – and I’m only being slightly dramatic. These simple slats transformed my baking cupboard from a leaning tower of cookie sheets into an organized filing system for all my flat stuff.
Installation took maybe 20 minutes with tension rods (no drilling required!), and now every cutting board, baking sheet, and cooling rack has its own slot. No more avalanche when I need one cookie sheet. No more scratched non-stick surfaces. Just grab and go efficiency.
What to Organize Vertically
Beyond the obvious baking sheets, vertical dividers work great for:
- Pot lids (game-changer!)
- Serving platters
- Plastic container lids
- Tupperware bases
- Pizza pans
- Cutting boards of all sizes
Also Read: 15 Gorgeous Kitchen Cupboard Designs Ideas to Maximize Style
Budget Dollar-Store Organizer Setup

Listen, not everyone has $500 to drop on fancy organizing systems, and that’s totally fine. Some of my best cupboard solutions cost less than a fancy coffee. Dollar stores are goldmines for organization supplies if you know what to look for.
My entire spice drawer organization system? Eight dollars. Small plastic bins from the dollar store, arranged in rows, with spices standing upright so I can read the labels. It looks just as good as those expensive drawer inserts, and if something breaks, I’m out a whole dollar. Devastating, right?
Dollar Store MVPs
Here are the best dollar store finds for cupboard organization:
- Plastic bins in various sizes
- Wire shelving racks
- Adhesive hooks
- Small baskets
- Drawer organizers that work in cupboards too
The trick is buying multiples of the same item for a cohesive look. Mismatched organization supplies make your cupboards look MORE chaotic, not less.
Labelled Zones Cupboard Method
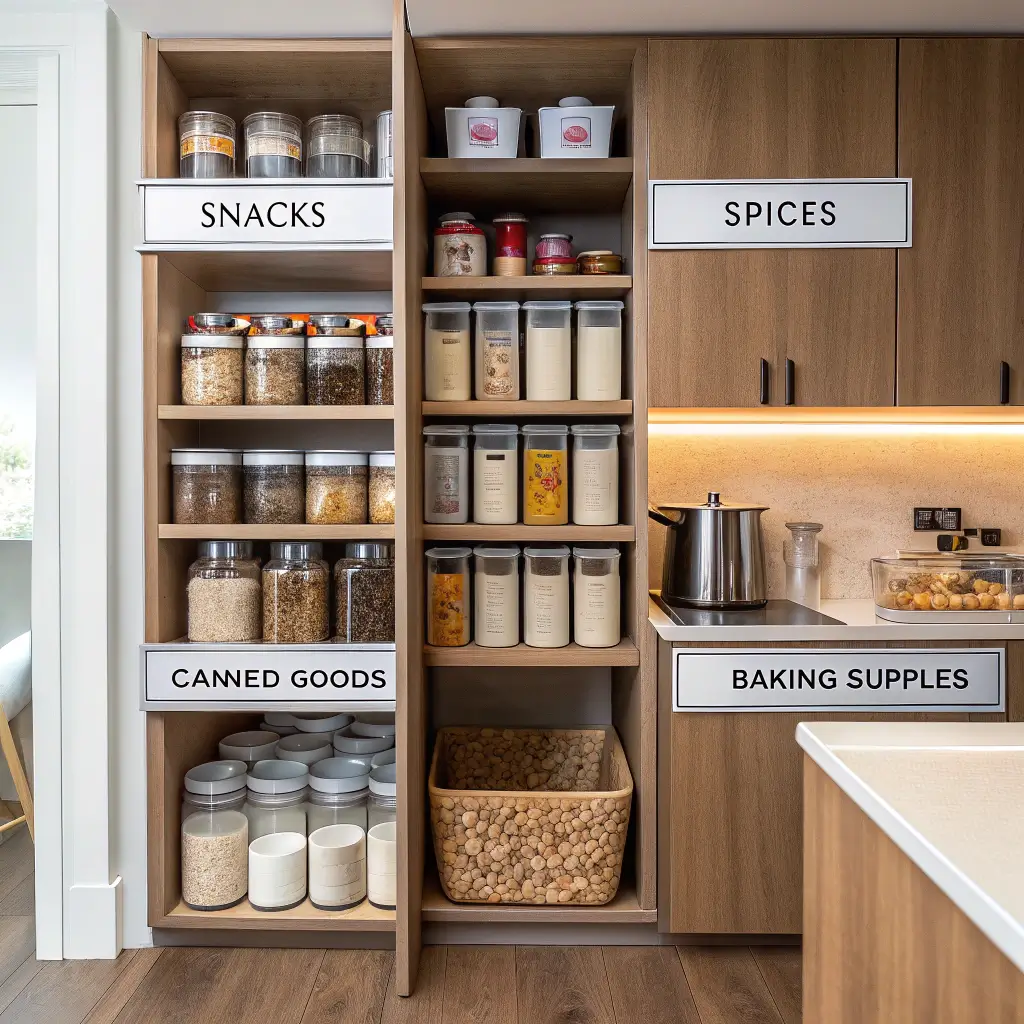
Creating designated zones in your cupboards sounds fancy, but it’s basically just giving everything a home and labeling it so everyone (including future you) knows where stuff goes. Revolutionary? No. Effective? Absolutely.
I divided my cupboards into zones: baking, breakfast, snacks, dinner prep, and “husband’s weird protein powder collection.” Each zone has a label, and everything stays in its designated area. No more hunting through five cupboards for vanilla extract – it lives in the baking zone, period.
Label Maker Love
Yeah, I became that person with a label maker. Judge all you want, but my cupboards look amazing and everyone in my house actually puts things back where they belong now. That alone makes the $20 label maker worth its weight in gold 🙂
Labels work especially well on:
- Shelf edges
- Clear containers
- Basket fronts
- Inside cupboard doors (for zone maps)
Hidden Basket Storage Cupboard
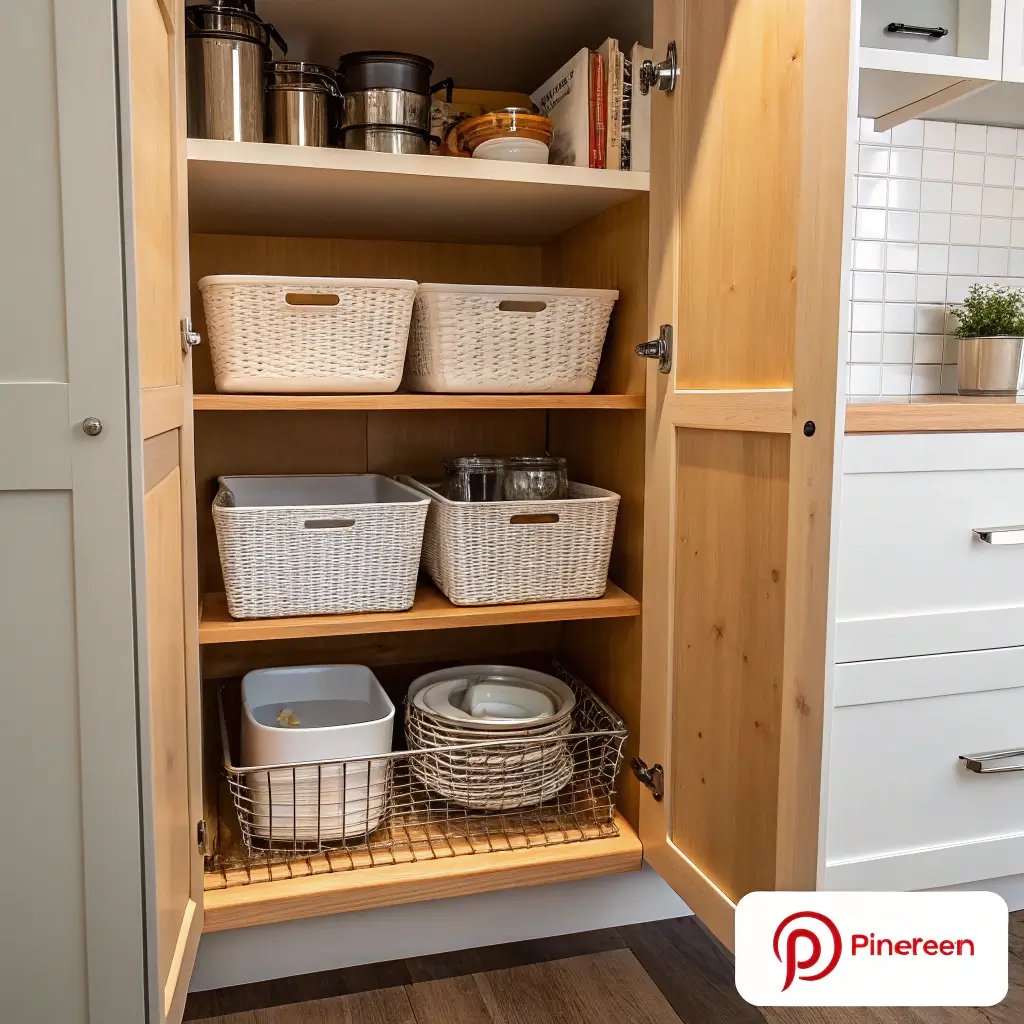
Sometimes you need to hide the chaos, and that’s where hidden basket storage comes in clutch. These pull-out baskets attach to your cupboard shelves and slide out like drawers, giving you access to everything without the tetris game of removing items.
I installed sliding baskets in my snack cupboard, and now the kids can actually reach their approved snacks without destroying everything else. Each basket has a category – chips, granola bars, fruit snacks – and they just pull out what they need.
Installation Reality Check
FYI, installing these can be tricky if your cupboards are old or wonky. Measure three times, drill once. Or better yet, get the kind that don’t require drilling. They’re slightly less stable but way more apartment-friendly.
Also Read: 15 Stunning Floating Book Shelves Ideas for Stylish Homes
Color-Coordinated Cupboard Layout
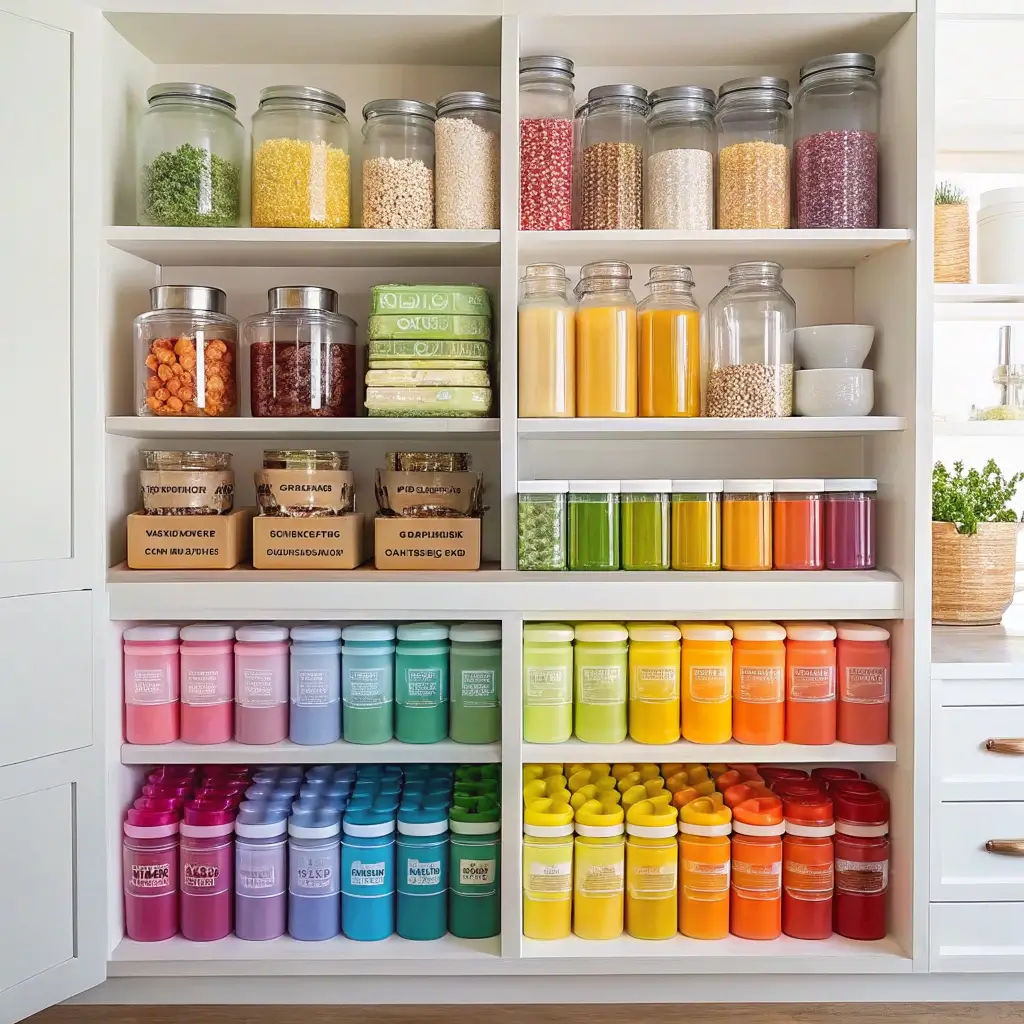
Before you roll your eyes, hear me out. Color coordination isn’t just for Instagram influencers. Organizing by color actually helps your brain process information faster, making it easier to find what you need.
I organize my spices by color (reds together, greens together, etc.), and I can spot paprika in seconds now. Same with my food storage containers – all blue lids together, red together, clear together. It looks pretty AND functions better.
Practical Color Coding
Color coordination works best for:
- Food storage containers and lids
- Spice collections
- Canned goods labels
- Cleaning supplies (safely separated by type!)
The key is being consistent. Don’t go half-hearted with this method or it’ll just look weird.
Pull-Out Tray Cupboard Design
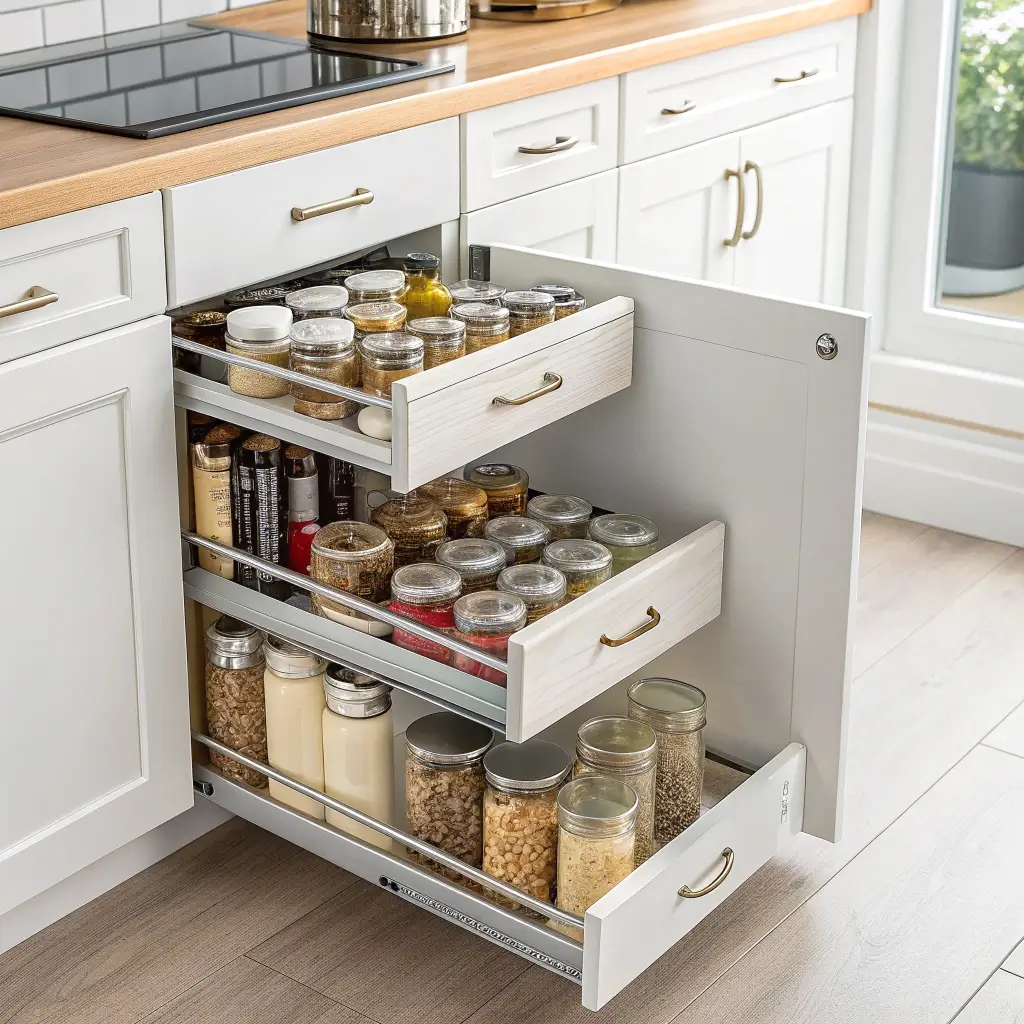
Pull-out trays are like drawers for your cupboards, and they’re absolutely worth the investment if you have deep cupboards. No more archaeological expeditions to find that one pot in the back.
I installed heavy-duty pull-out trays in my pots and pans cupboard, and cooking became so much easier. Everything glides out smoothly, I can see all my options at once, and my back doesn’t hate me anymore from crouching and digging.
Weight Considerations
When installing pull-out trays, consider:
- Weight capacity (cast iron is heavy!)
- Full-extension slides for complete access
- Soft-close mechanisms to prevent slamming
- Height between trays for your tallest items
Stackable Bin Cupboard System
The stackable bin system works like modular furniture but for your cupboards. These bins stack securely, maximize vertical space, and can be reconfigured as your needs change.
I use stackable bins for everything from pasta to snacks to baking supplies. The best part? When I need something from the bottom bin, I just unstack and restack. No more shoving my arm into dark cupboard corners hoping I grab the right thing.
Bin Selection Strategy
Choose bins that are:
- Same brand (for consistent stacking)
- Clear or clearly labeled
- Not too deep (or you’ll create new black holes)
- Easy to clean (because spills happen)
Capsule Kitchen Cupboard Setup
Inspired by capsule wardrobes, the capsule kitchen approach keeps only versatile, multi-use items that work well together. It’s minimalism with a purpose.
I pared down to one set of dishes, one set of glasses, and cooking tools that serve multiple purposes. My cupboards went from stuffed to spacious, and everything I kept earns its place. That unitasker cherry pitter? Gone. The mandoline that does 12 different cuts? Stayed.
The Capsule Kitchen Essentials
My capsule kitchen includes:
- One dish set for 6 people
- Multi-purpose pots and pans (3 pots, 2 pans)
- Versatile tools only
- Quality over quantity approach
This method requires brutal honesty about what you actually use versus what you think you might use someday.
Before-After Cupboard Transformation
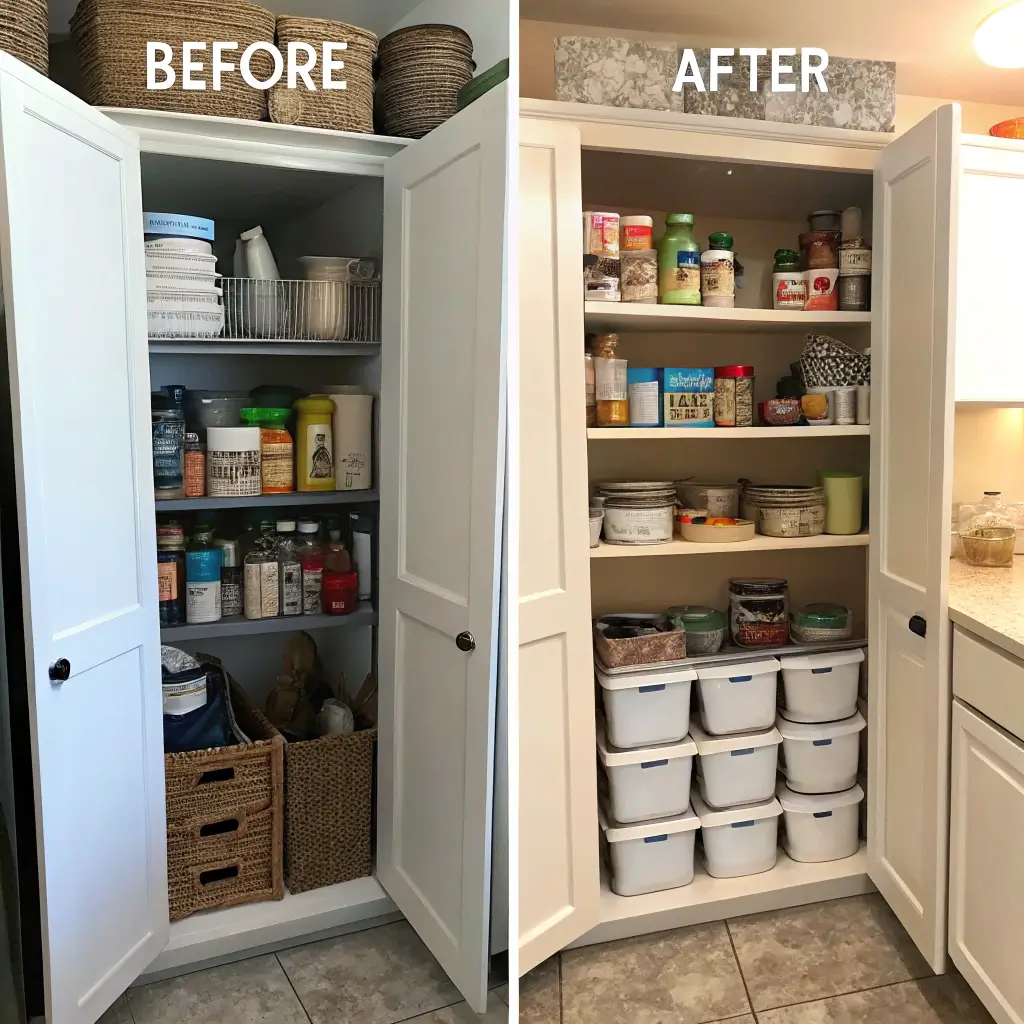
Nothing motivates like a good before-and-after transformation, and documenting your cupboard organization journey keeps you accountable. I photograph every cupboard before starting, then again after organizing.
These photos serve two purposes: they remind me how far I’ve come when I’m tempted to let things slide, and they help me remember where everything goes after a reorganization. Plus, the satisfaction of seeing that transformation? Chef’s kiss
Documentation Tips
When documenting your transformation:
- Take photos from the same angle
- Use good lighting (cupboards are dark!)
- Include close-ups of problem areas
- Date your photos for reference
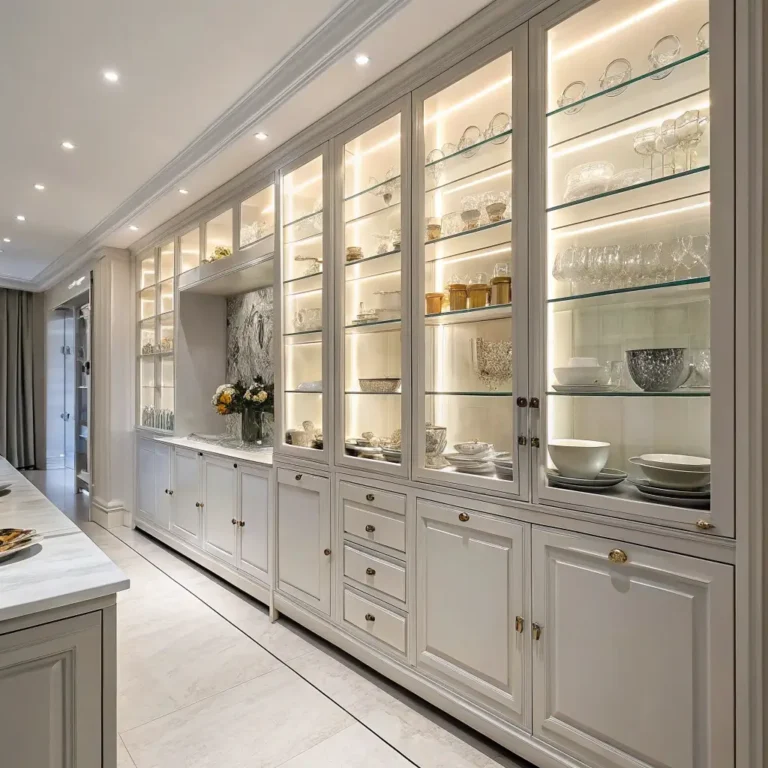
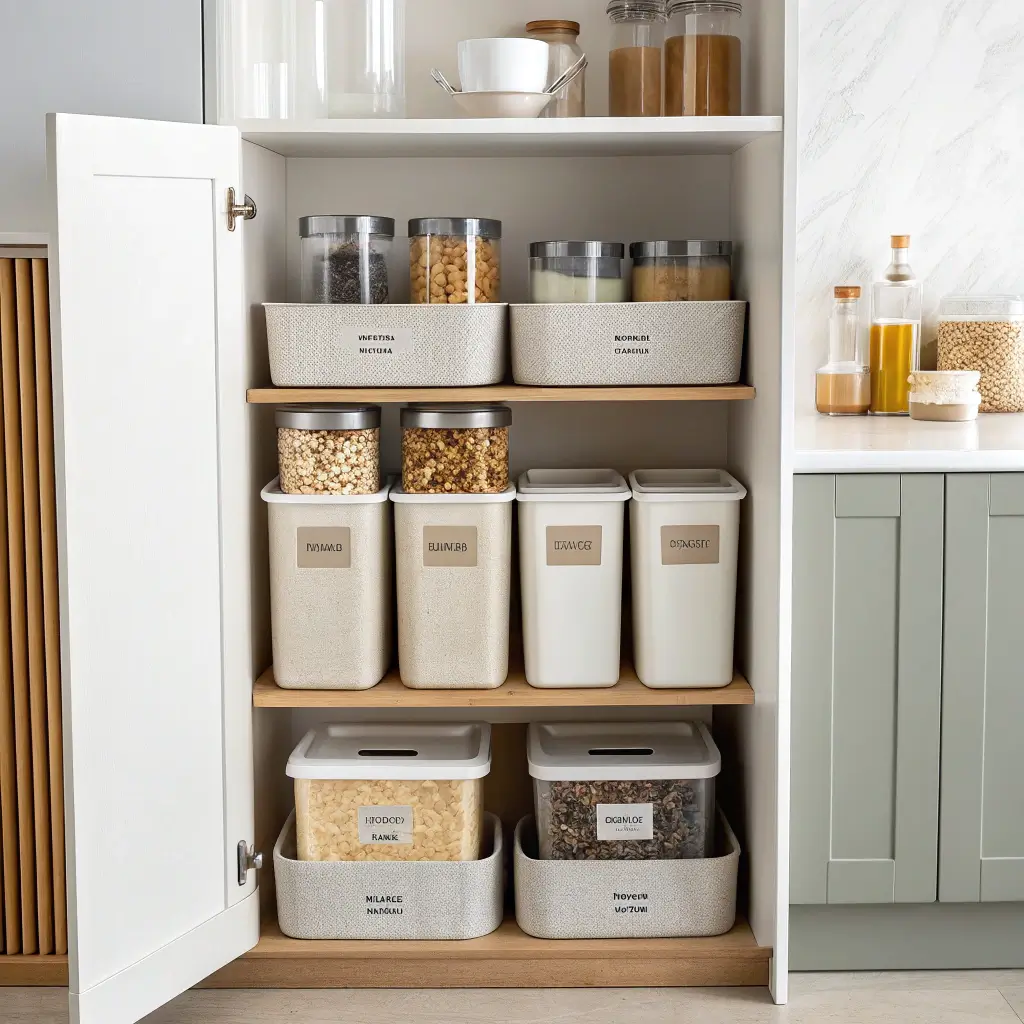
Decluttered Aesthetic Cupboard Layout
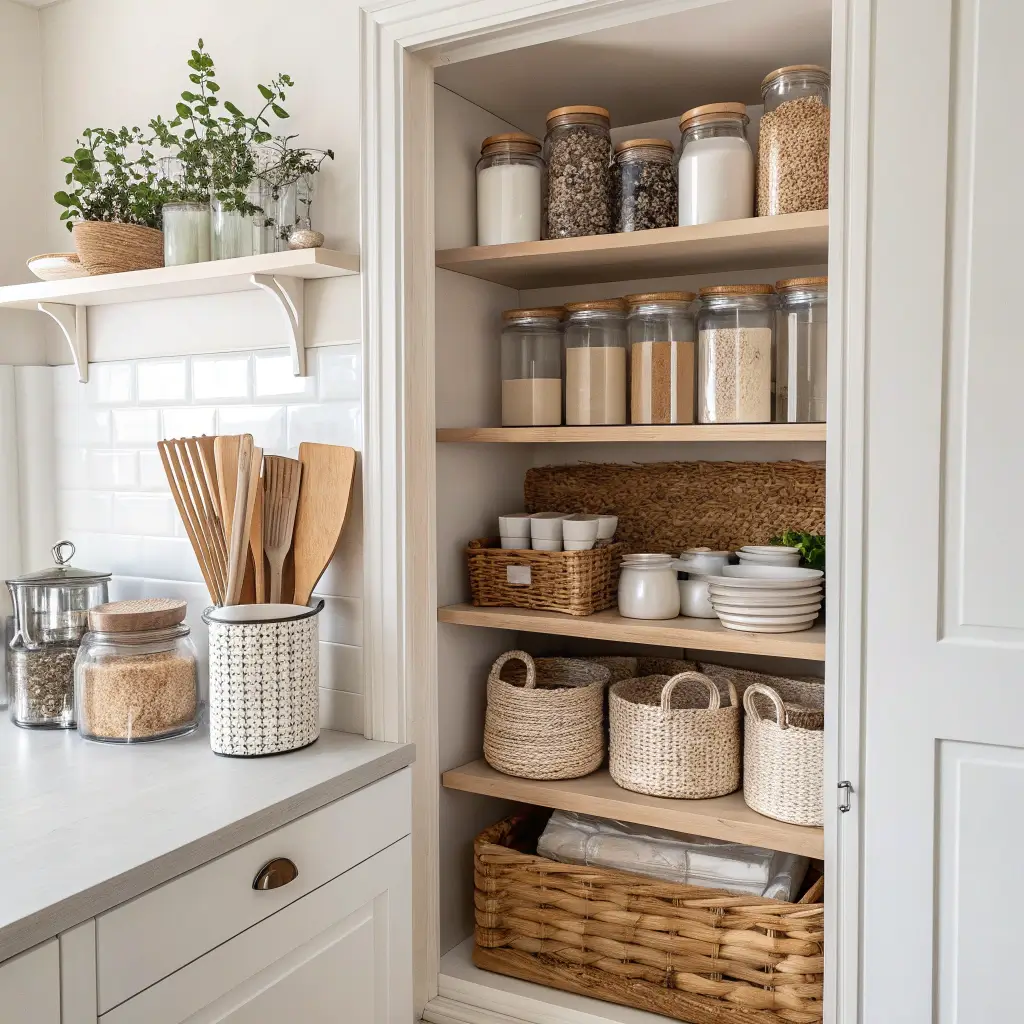
The decluttered aesthetic isn’t just about having less stuff – it’s about creating visual calm in your cupboards. This means consistent containers, limited color palette, and breathing room between items.
I transformed my cupboards using matching white containers, natural wood organizers, and a “nothing on the floor” rule. Everything has space around it, nothing’s crammed, and opening my cupboards actually sparks joy now (thanks, Marie Kondo).
Achieving the Aesthetic
To create a decluttered aesthetic:
- Stick to 2-3 colors maximum
- Leave 20% empty space on each shelf
- Face labels forward consistently
- Group like items together
- Maintain regular decluttering sessions
The hardest part isn’t the initial organization – it’s maintaining it. But when your cupboards look this good, you’re motivated to keep them that way.
Making It All Work Together
Here’s what nobody tells you about cupboard organization: it’s not about picking one system and forcing everything to fit. It’s about combining methods that work for YOUR life, YOUR space, and YOUR habits.
I use a combination of clear containers, tiered shelving, and zones in my pantry cupboard. My pots and pans cupboard rocks the pull-out trays with vertical dividers for lids. The snack cupboard uses hidden baskets and labels. Each space gets what it needs, not what Pinterest says it should have.
Remember, the best cupboard organization system is the one you’ll actually maintain. Start with one cupboard, implement one or two methods, live with it for a week, then adjust. Rome wasn’t built in a day, and your perfectly organized cupboards won’t be either :/
Final Thoughts
After years of testing every cupboard organization idea out there, here’s my honest truth: perfection is overrated, but functional organization changes everything. You don’t need to spend hundreds of dollars or have contractor-level skills to transform your cupboards.
Start small, be realistic about your habits, and remember that organized cupboards aren’t about impressing anyone – they’re about making your daily life easier. When you can find what you need without playing cupboard Jenga, cook without frustration, and actually know what food you have, that’s when you know you’ve nailed it.
So pick one idea from this list, tackle one cupboard this weekend, and see how it goes. Trust me, once you experience the pure joy of organized cupboards, you’ll wonder why you waited so long to start. And hey, if you discover any genius hacks along the way, drop me a line – I’m always looking for the next great cupboard organization idea!