12 Stylish DIY Shoe Storage Ideas for a Clutter-Free Home
Look, we need to talk about that pile of shoes by your front door. You know the one I’m talking about – that chaotic mountain where you spend five minutes every morning hunting for a matching pair.
Been there, done that, got the frustrated tears to prove it. After years of tripping over sneakers and losing my favorite boots in the abyss, I finally cracked the code on DIY shoe storage that actually works.
Here’s the thing: you don’t need to drop hundreds on fancy organizers or completely renovate your closet.
With some creativity and maybe a weekend afternoon, you can transform your shoe chaos into something that actually makes sense. Trust me, if I can do this stuff (and I once tried to assemble IKEA furniture upside down), you definitely can too.
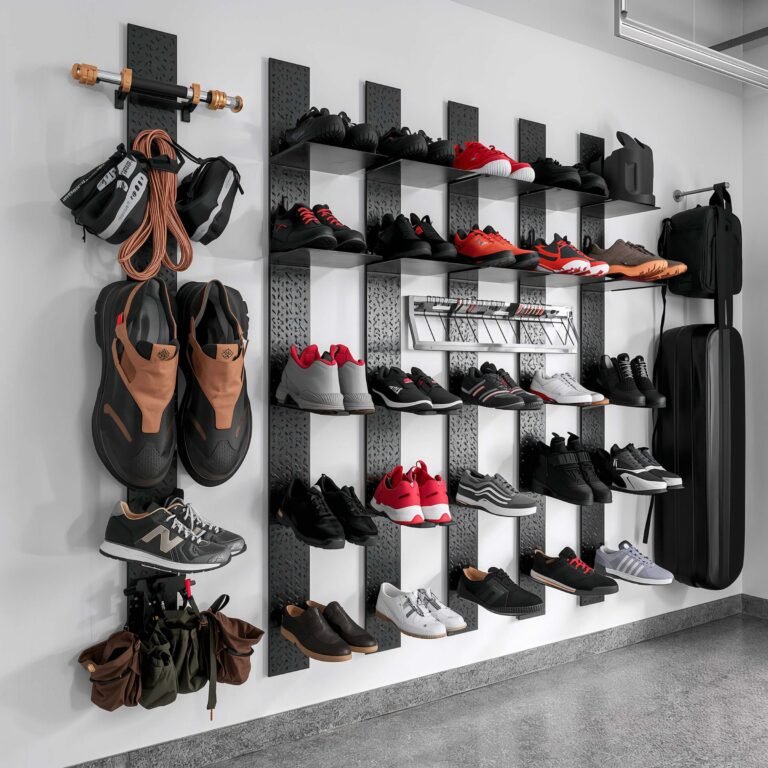
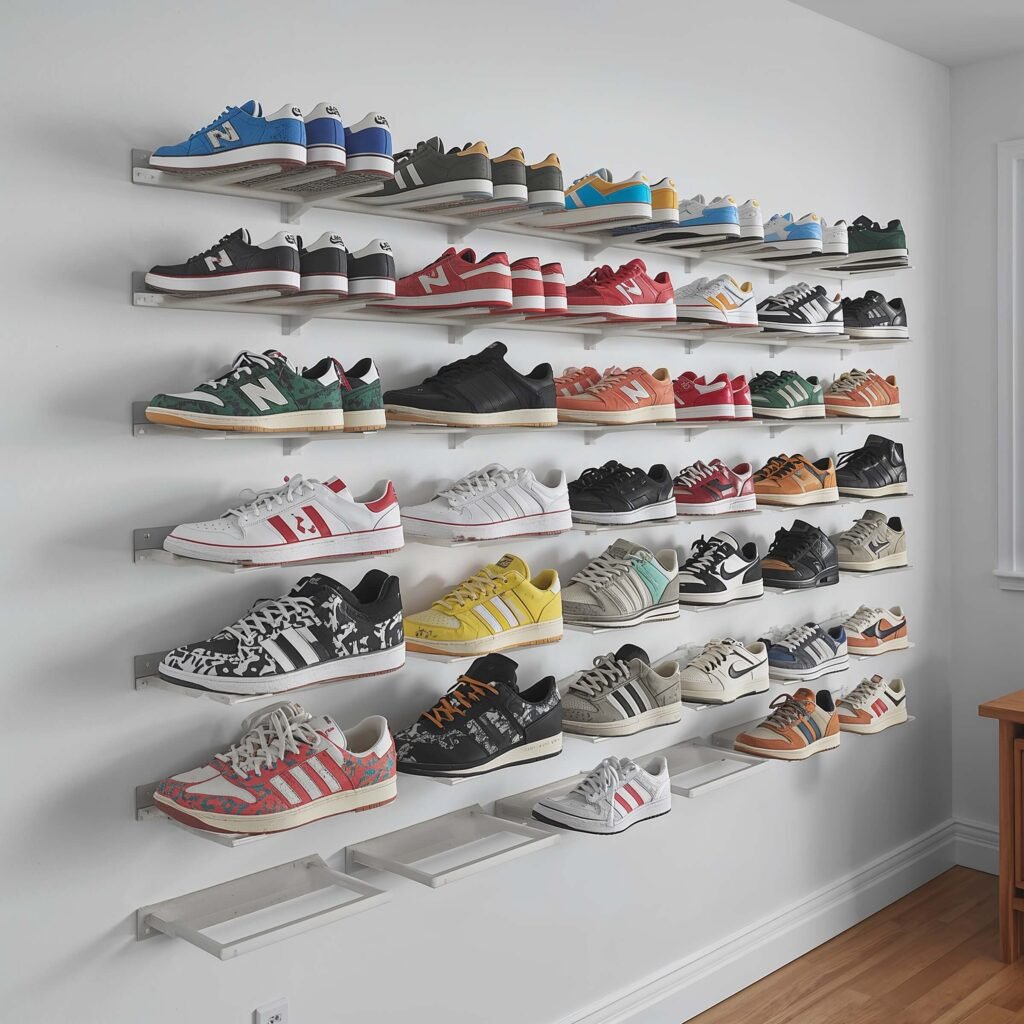
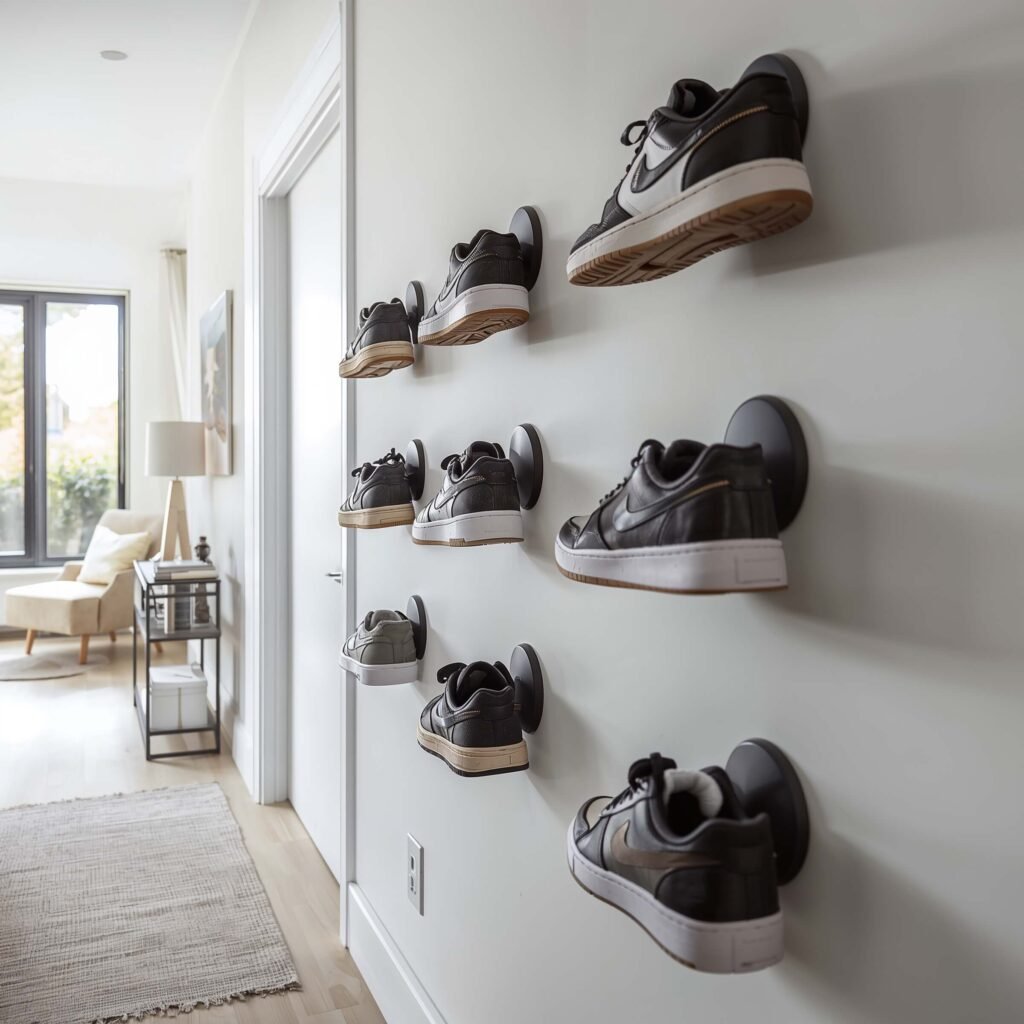
Floating Wall Shoe Racks
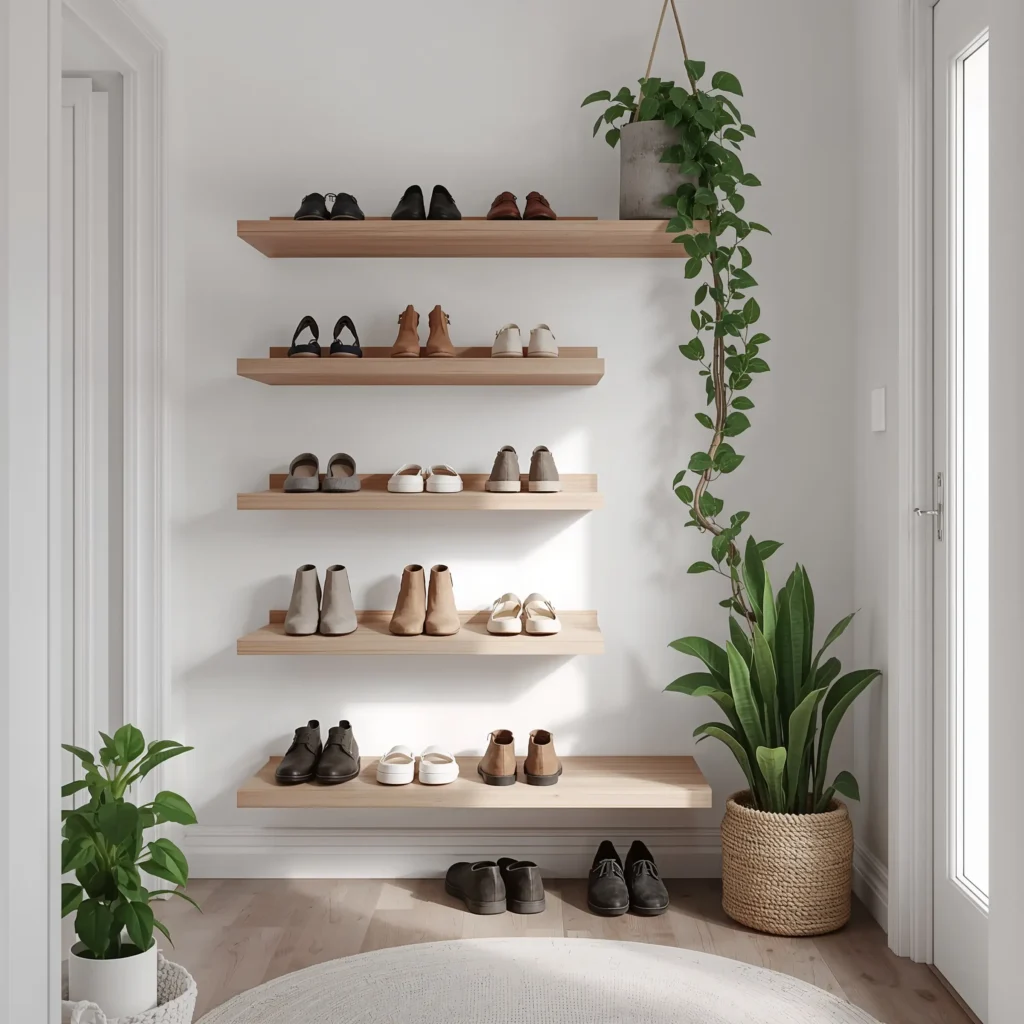
Let’s kick things off with my personal favorite – floating wall shoe racks. These babies are game-changers for small spaces, and they make your shoes look like art pieces instead of clutter. Who knew your beat-up Converse could be decorative?
Why Floating Racks Rock
I installed my first floating shoe rack three years ago, and honestly, it changed my entire morning routine. You mount simple shelves or rails on your wall, and suddenly your floor space opens up like magic. The best part? You can customize the height and spacing based on your shoe collection. Got mostly flats? Stack those shelves closer together. Basketball shoe enthusiast? Give those high-tops room to breathe.
Building Your Own
Creating a floating rack takes maybe two hours, tops. Here’s what works:
- Use sturdy wood boards (at least 1 inch thick)
- Install L-brackets every 24 inches for support
- Add a small lip on the front edge to prevent shoes from sliding off
- Consider adding LED strips underneath for that fancy boutique vibe
The trick is mounting them at the right angle. I learned this the hard way when my first attempt sent heels tumbling at 2 AM. Aim for a slight upward tilt – just 5-10 degrees keeps everything secure.
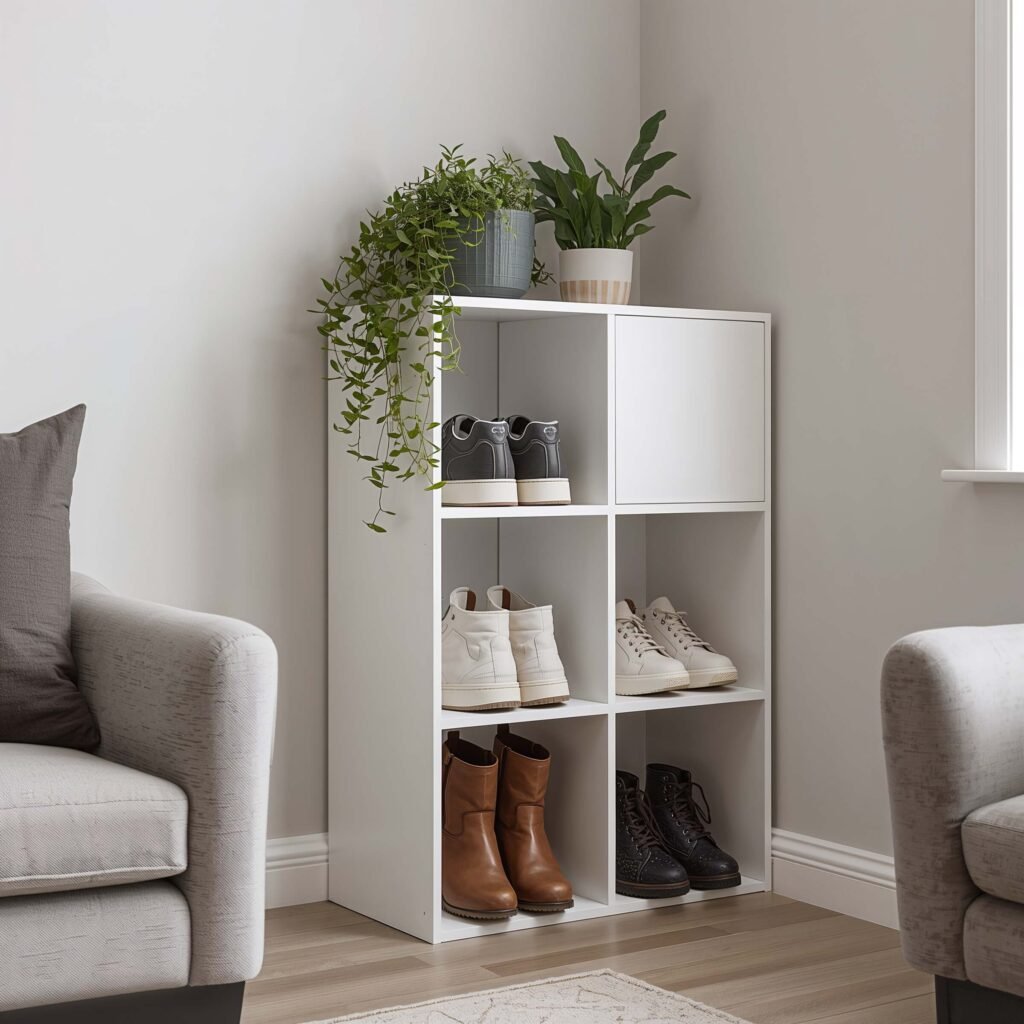
Under-Bench Shoe Storage
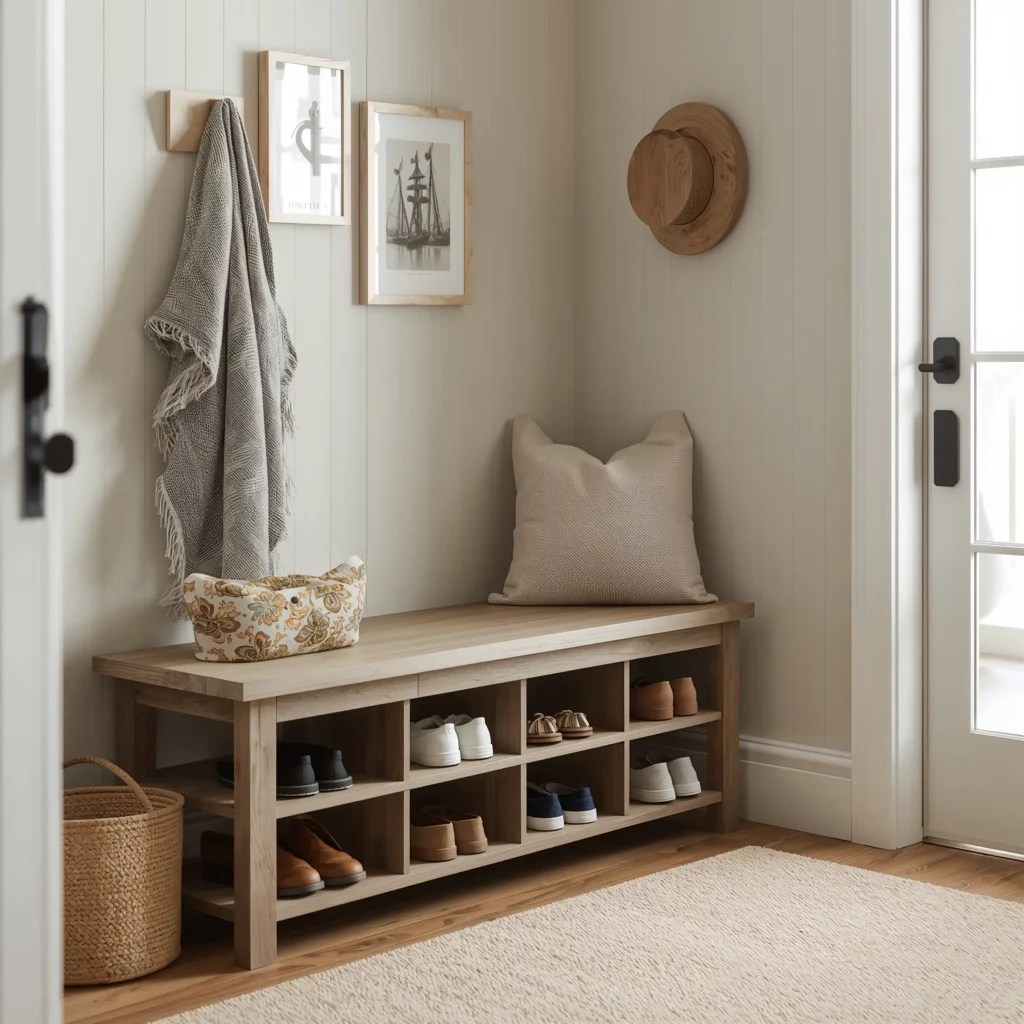
Remember that awkward space under your entryway bench? Yeah, that goldmine of wasted potential. Converting this area into shoe storage literally takes an afternoon and maybe $30 in materials.
Making It Work
Under-bench storage works brilliantly because it hides the mess while keeping everything accessible. I built mine using simple wooden crates from the craft store, and people think I hired a carpenter. The secret sauce? Matching the wood stain to your bench. Suddenly, it looks intentional instead of thrown together.
Smart Organization Tips
Here’s what I’ve learned from trial and error:
- Use dividers to create individual cubbies
- Add small baskets for flip-flops and sandals
- Install a pull-out drawer for shoe care supplies
- Leave the front section open for daily wear shoes
Pro tip: measure your tallest boots before building. Nothing worse than creating perfect storage that doesn’t fit your favorite knee-highs. Ask me how I know :/
Repurposed Ladder Shoe Organizer
Okay, this one makes people do a double-take every time. That old ladder gathering dust in your garage? It’s about to become your new favorite shoe rack.
The Ladder Life
I stumbled upon this idea when my apartment building was throwing out an old wooden ladder. Twenty minutes of cleaning and a coat of paint later, I had the most Instagram-worthy shoe storage ever. Lean it against any wall, and each rung becomes a perfect shoe perch.
Styling Your Ladder
The beauty of ladder storage lies in its versatility:
- Paint it a bold color for a statement piece
- Keep it rustic for that farmhouse chic vibe
- Add hooks on the sides for bags and accessories
- Wrap fairy lights around it because why not?
Wooden ladders work best, but I’ve seen people rock metal ones too. Just make sure it’s stable – wobbly ladders and expensive shoes don’t mix well.
Also Read: 10 Clever Shoe Storage Cabinet Entryway Ideas to Organize Shoes
Hanging Shoe Pockets
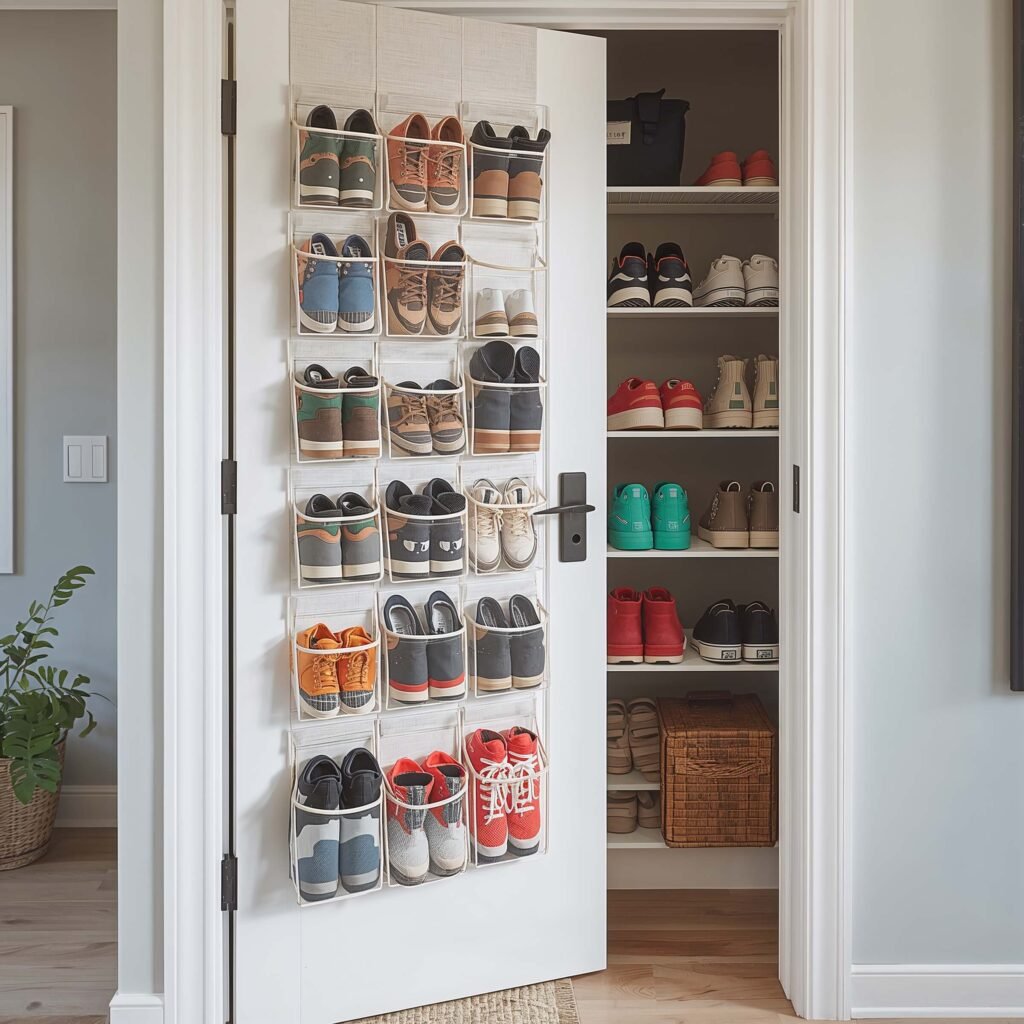
Ever looked at those over-the-door organizers and thought they were just for college dorms? Think again. These space-saving champions deserve way more credit than they get.
Beyond Basic Pockets
Sure, you can buy pre-made hanging pockets, but making your own lets you customize everything. I made mine from heavy-duty canvas because those plastic ones always rip at the worst possible moment. Plus, fabric ones actually look nice instead of screaming “I shop at discount stores!”
DIY Pocket Power
Creating custom hanging pockets requires:
- Strong fabric (canvas or thick cotton works great)
- A sturdy hanging rod or over-door hooks
- Basic sewing skills (or fabric glue if you’re lazy like me)
- Clear vinyl windows so you can see what’s inside
Make pockets different sizes for different shoes. Flats need shallow pockets, while sneakers need depth. My first attempt had uniform pockets, and watching pumps fall out constantly got old real fast.
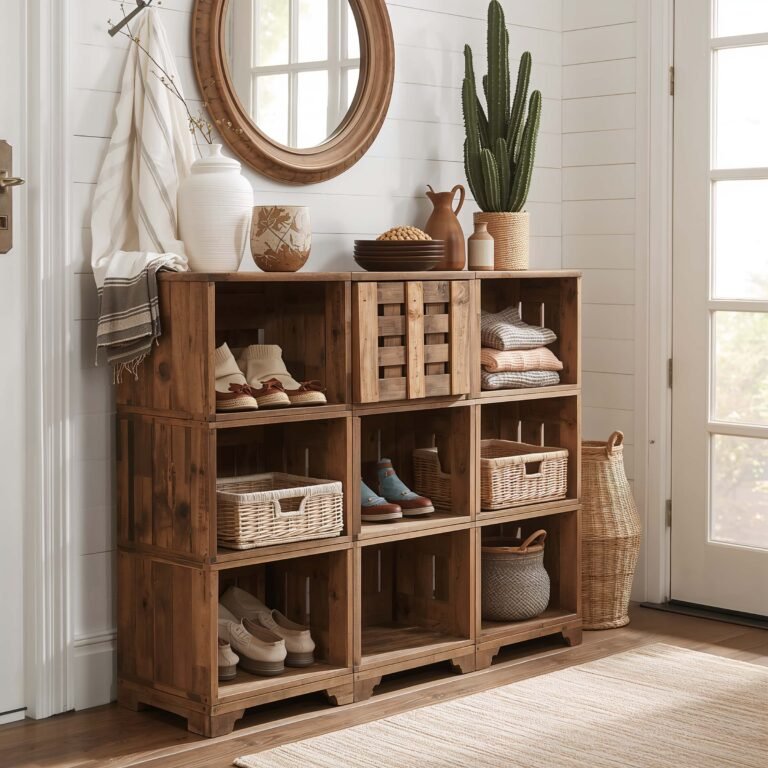
Crate Stack Shoe Shelves
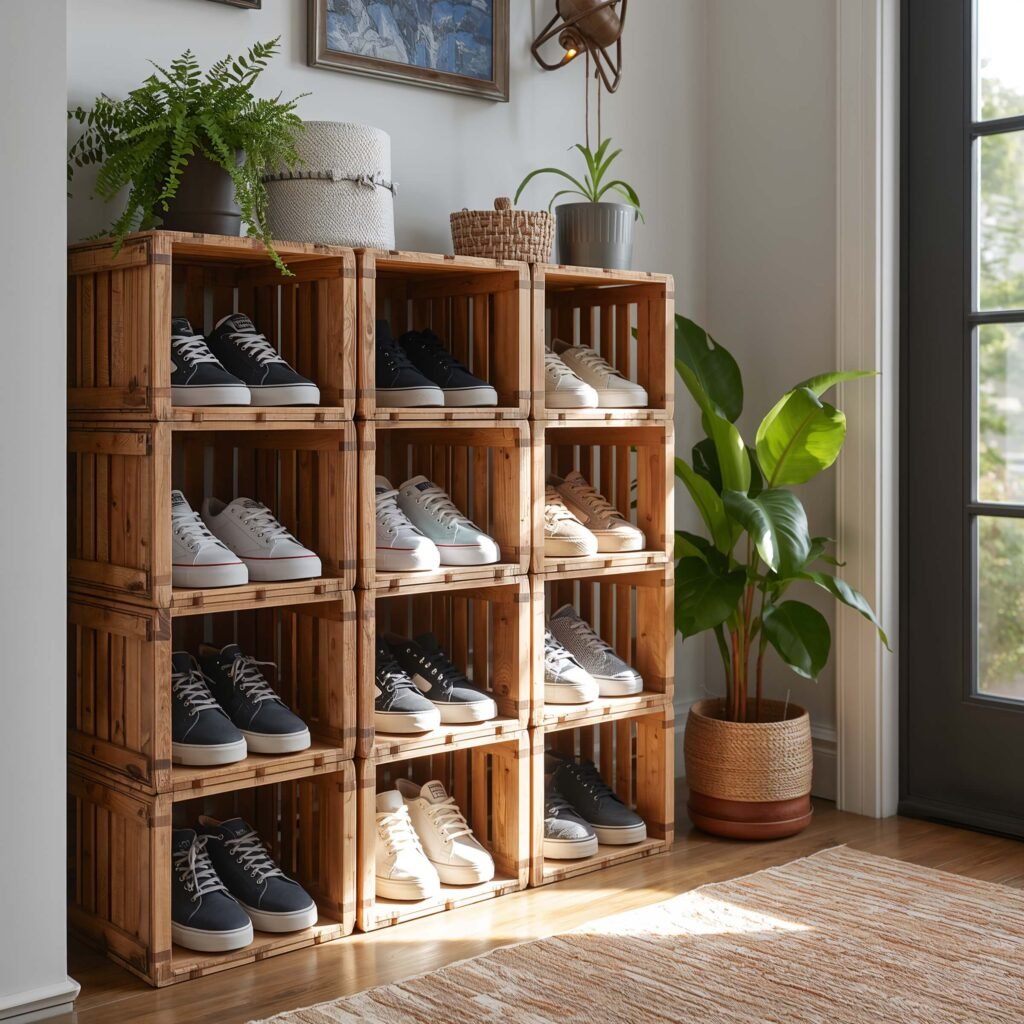
Wooden crates might be the most underrated DIY material ever. Stack them, arrange them, paint them – the possibilities are endless, and they make killer shoe storage.
Crate Creativity
I discovered crate storage when I needed something temporary after moving. Three years later, it’s still going strong. The trick is choosing quality crates that can handle weight. Those flimsy craft store ones won’t cut it for your boot collection.
Building Your Stack
Here’s my tested approach:
- Sand all rough edges (splinters and leather don’t mix)
- Secure crates together with brackets or wood glue
- Add casters to the bottom for mobility
- Install small dividers for sandals and flats
- Paint or stain to match your décor
Position them horizontally for shelving or vertically for a tower effect. I’ve got both in different rooms, and each setup serves different purposes perfectly.
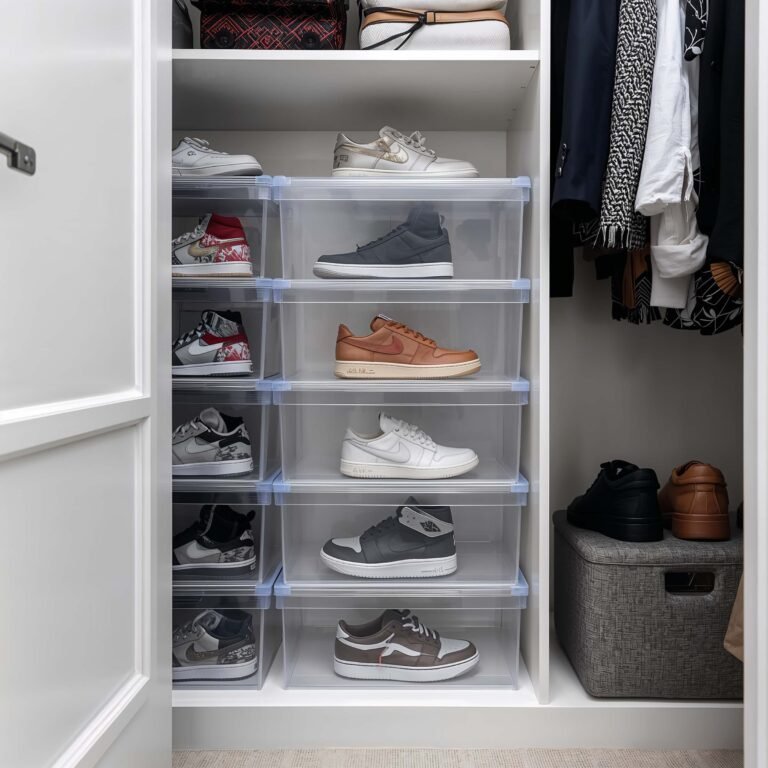
Pull-Out Closet Shoe Drawers

Transform your closet floor from a shoe graveyard into an organized paradise with pull-out drawers. This project requires slightly more skill, but the payoff is absolutely worth the effort.
Drawer Dynamics
Installing pull-out drawers changed my closet game completely. No more crawling on the floor to find that one pair buried in the back. Everything slides out smoothly, and you can actually see what you own. Revolutionary, right?
Installation Insights
For successful drawer installation:
- Measure your closet precisely (twice, because mistakes suck)
- Use heavy-duty drawer slides rated for at least 50 pounds
- Build drawers 2 inches narrower than your space for smooth operation
- Add dividers or small boxes inside for organization
- Consider clear fronts or labels for easy identification
The hardest part? Making sure everything’s level. Crooked drawers will haunt you every single day, trust me.
Also Read: 12 Brilliant Shoe Storage Ideas for a Clutter-Free Home
Rolling Shoe Cart
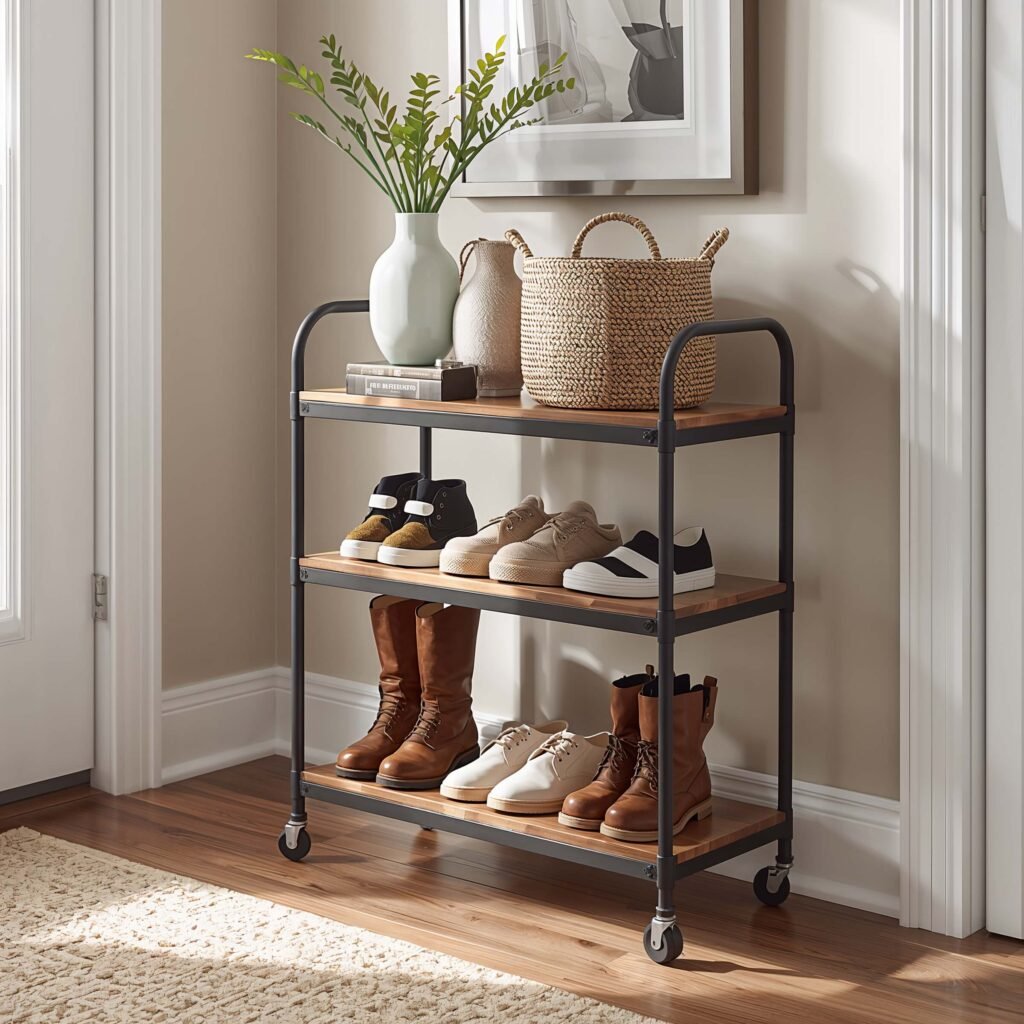
Sometimes you need storage that moves with you. Enter the rolling shoe cart – perfect for people who can’t commit to permanent solutions or renters who move frequently.
Cart Considerations
My rolling cart started as a bar cart that wasn’t getting enough party action. A few modifications later, it became the most practical piece in my bedroom. The mobility factor means cleaning underneath is actually possible, and you can roll it into the closet when guests come over.
Building Better Carts
Creating an effective rolling cart:
- Start with a sturdy base (old TV stands work great)
- Add quality casters that lock
- Install multiple tiers with adjustable heights
- Include side hooks for accessories
- Paint it something fun – mine’s electric blue
FYI, don’t cheap out on casters. Bad wheels equal scratched floors and endless frustration.
Corner Shoe Cubes
Corners are prime real estate that everyone ignores. Those awkward angles? Perfect for custom shoe cubes that maximize every inch.
Corner Conquest
Building corner cubes requires some geometry skills, but nothing too crazy. I measured my corners wrong the first time and ended up with wonky triangles. Second attempt? Perfection. The key is creating modular cubes you can stack and rearrange.
Cube Construction
Essential corner cube tips:
- Cut triangular bases for true corner fit
- Make cubes 12×12 inches for versatility
- Use pegboard backing for ventilation
- Stack vertically to save floor space
- Add labels or photos on the front
These work especially well in bedroom corners where traditional furniture doesn’t fit properly.
PVC Pipe Shoe Slots
Who says PVC pipes are just for plumbing? Cut them up, and you’ve got yourself modern, affordable shoe storage that looks surprisingly sleek.
Pipe Dreams
This idea seemed weird until I tried it. Now I’ve got a wall of PVC pipes holding my flats and heels, and everyone asks where I bought it. The answer? Home improvement store, about $40 total. The look on their faces is priceless.
Perfect Pipe Setup
Making PVC shoe storage work:
- Use 4-6 inch diameter pipes
- Cut lengths between 10-12 inches
- Sand all edges smooth
- Spray paint for a designer look
- Secure with construction adhesive or brackets
Arrange pipes in patterns – honeycomb, straight lines, random scatter. Each layout creates a totally different vibe.
Also Read: 10 Stunning Dining Area Wall Decor Ideas for Cozy Spaces
Shoe Storage Ottoman
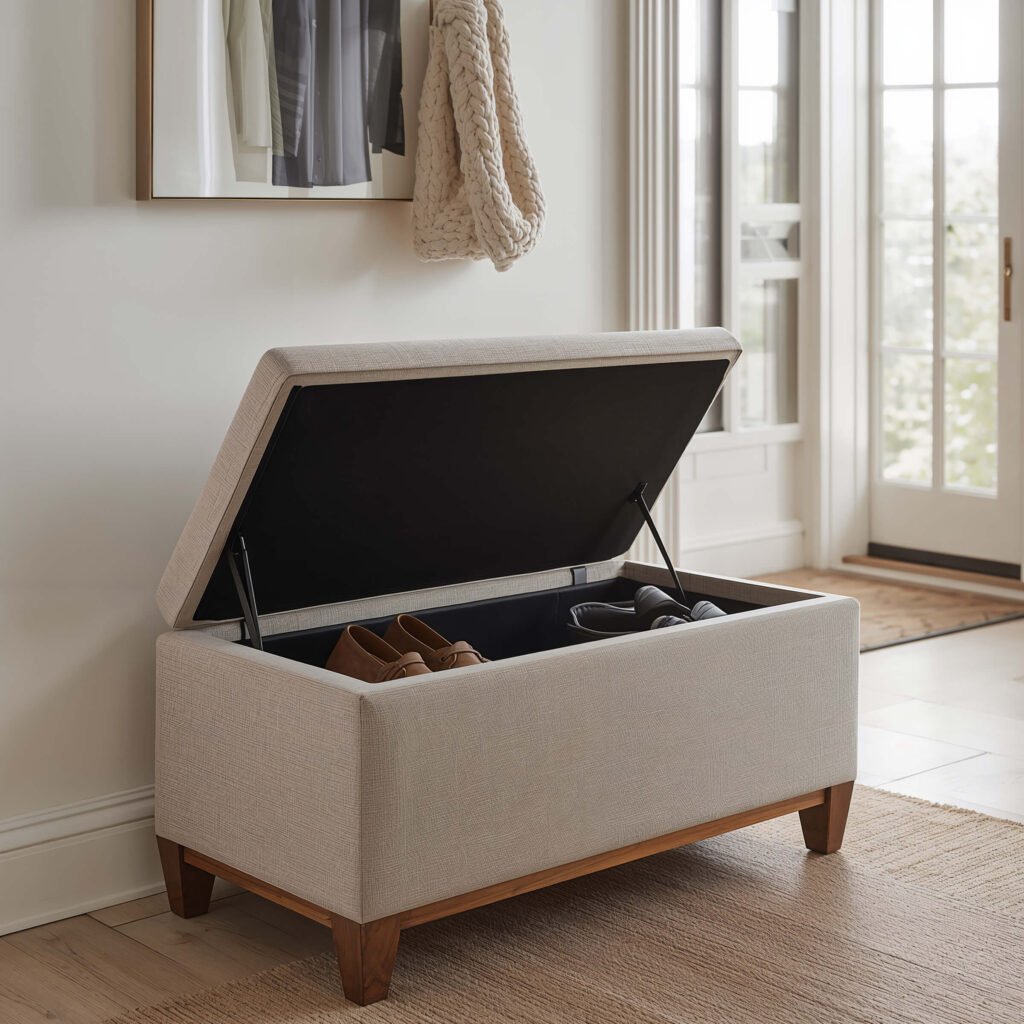
Multi-functional furniture wins every time. A storage ottoman pulls double duty as seating and shoe storage, making it perfect for small spaces.
Ottoman Excellence
I built my ottoman from an old coffee table and some foam padding. Now it holds twelve pairs of shoes and provides extra seating when friends come over. Plus, nobody knows there’s a shoe collection hiding inside. Sneaky? Maybe. Genius? Definitely.
DIY Ottoman Design
Building your storage ottoman:
- Start with a sturdy base (wooden crate or old table)
- Add hinges for easy access
- Install dividers inside for organization
- Top with thick foam and durable fabric
- Include handles on the sides for moving
The padding needs to be thick enough for comfortable sitting but firm enough to maintain shape. I learned this after my first attempt created a sad, saggy situation 🙂
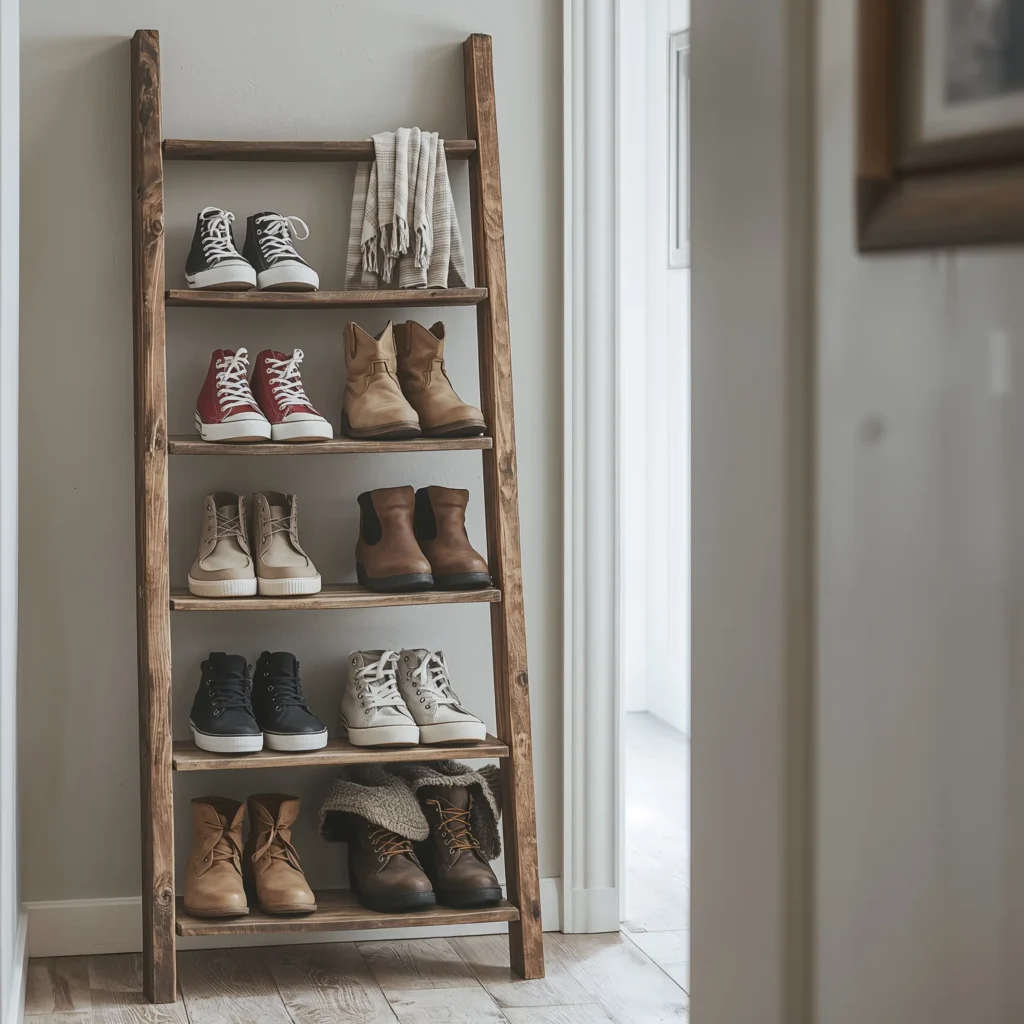
DIY Tiered Shoe Ladder
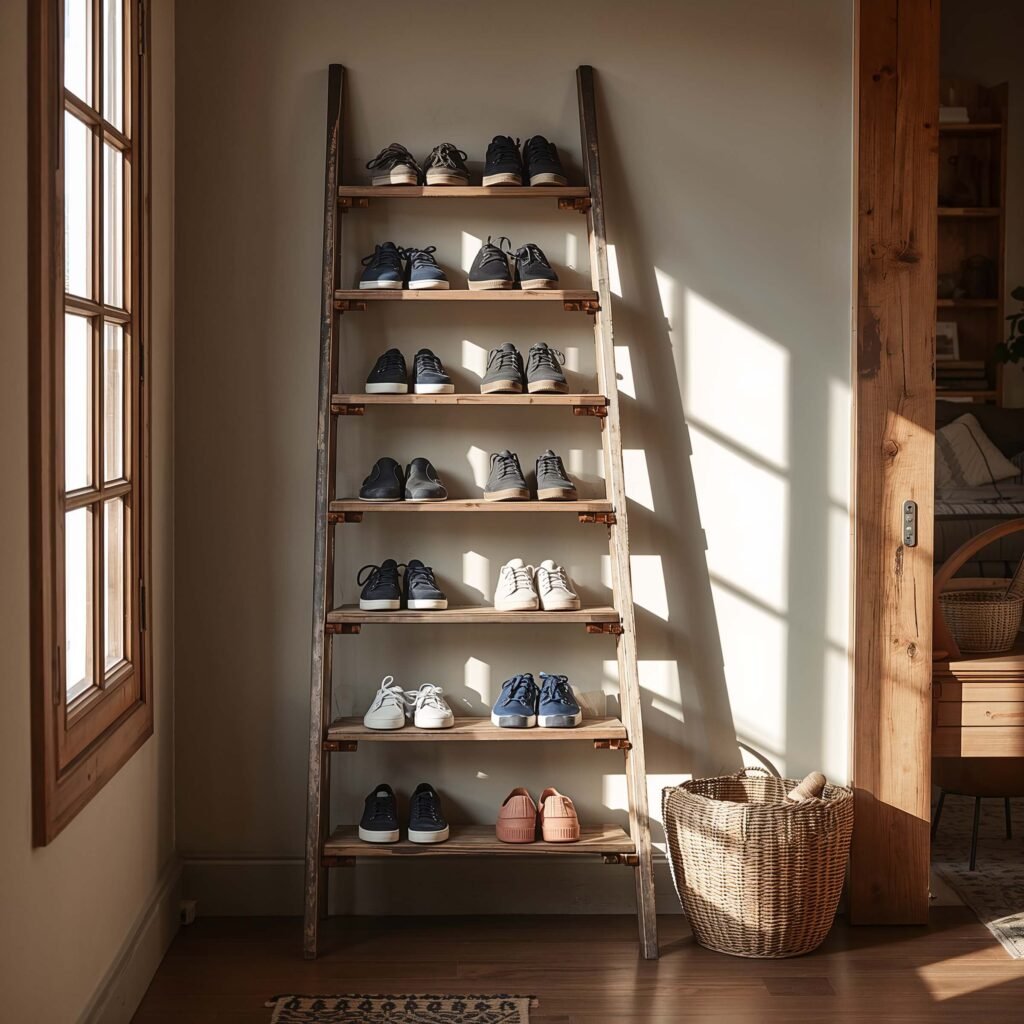
Not to be confused with the repurposed ladder, this involves building your own tiered structure specifically for shoes. Think stadium seating for your footwear.
Ladder Logic
A tiered ladder gives you maximum visibility of your collection. Every pair sits at a different height, so nothing gets lost in the back. I built mine to fit perfectly in my closet, but they work great against any wall too.
Building Basics
Constructing your tiered ladder:
- Use 1×4 boards for the frame
- Space tiers 6-8 inches apart vertically
- Angle shelves slightly backward
- Make it as wide as your space allows
- Sand everything super smooth
The angle is crucial here. Too steep and shoes slide off. Too flat and you can’t see what’s in the back. Aim for about 15 degrees – that’s the sweet spot.
Magnetic Shoe Holders
This last one sounds crazy but hear me out. Magnetic strips on walls holding lightweight shoes? It actually works, and it looks like your shoes are floating.
Magnetic Magic
I discovered this accidentally when I stuck my metallic flats to my magnetic knife strip in the kitchen (don’t ask). The concept translates perfectly to dedicated shoe storage, especially for lighter shoes with metal accents.
Making It Happen
Setting up magnetic storage:
- Install strong magnetic strips at various heights
- Add small metal plates to non-magnetic shoes
- Use this primarily for flats and lightweight shoes
- Space strips based on your shoe sizes
- Paint strips to match your wall for seamless look
Obviously, this won’t work for boots or heavy sneakers. But for a collection of flats or metallic shoes? It’s surprisingly effective and definitely a conversation starter.
Making It All Work Together
Here’s the real talk: you don’t need to pick just one solution. My place uses a combination of floating shelves, under-bench storage, and a rolling cart, and everything works together perfectly. The key is matching your storage to your space and lifestyle.
Think about your daily routine. Where do you take off your shoes? Where do you get dressed? Storage should make your life easier, not add extra steps. I keep everyday shoes by the door, fancy ones in the bedroom, and seasonal stuff in the closet. Simple system, zero morning stress.
IMO, the best DIY projects are the ones that solve real problems without breaking the bank. Every single one of these ideas costs less than buying pre-made solutions, and you get exactly what you need. Plus, that satisfaction of building something yourself? Priceless.
Start with whatever seems easiest or most useful for your situation. You can always add more storage later – that’s the beauty of DIY. Your shoe collection will thank you, your floors will thank you, and honestly, your stress levels will thank you too. Because life’s too short to spend it searching for matching shoes every morning.