10 Genius Two Car Garage Organization Ideas and Storage Tips
Let me guess – you open your garage door and immediately feel a wave of shame wash over you.
That pile of camping gear from 2019 judges you silently while your kids’ old bikes lean precariously against boxes labeled “misc” (we both know you’ll never open those).
Sound familiar? Yeah, I’ve been there too. My two-car garage used to be such a disaster that I literally couldn’t fit even one car inside.
The irony wasn’t lost on me – paying for a house with a garage just to park in the driveway like some kind of suburban rebel.
But here’s the thing: organizing a two-car garage doesn’t have to be this massive, overwhelming project that requires a second mortgage.
I’ve spent the last few years testing different organization systems (some worked brilliantly, others… not so much), and I’m about to share the 10 best solutions that actually transformed my garage from chaos central into a space I genuinely enjoy being in.
Wall-Mounted Tool Storage

Remember that time you spent 20 minutes looking for a Phillips head screwdriver? Yeah, me neither – I blocked out that trauma. Wall-mounted tool storage changed my life, and I’m not even being dramatic here.
The beauty of going vertical with your tools is that you free up valuable floor space while keeping everything visible and accessible. I started with a simple French cleat system, which basically turns your wall into a customizable storage playground. You can move hooks, holders, and shelves around whenever you want without committing to permanent holes everywhere.
Getting Started with Wall Storage
First things first – you need to find your wall studs. Trust me, drywall anchors won’t cut it when you’re hanging 50 pounds of power tools. I learned this lesson the hard way when my drill collection came crashing down at 2 AM (my neighbors loved that).
Here’s what works best:
- Heavy-duty metal rails mounted directly to studs
- Specialized tool holders for each type of tool
- Clear labeling system (because future you will forget where things go)
- Strategic placement at eye level for frequently used items
The transformation happens fast once you commit. My cordless drills now live in custom holders, my hand tools hang on individual hooks, and everything has its designated spot. No more tool avalanches when I open a drawer!
Pro Tips from Experience
Mount your most-used tools at chest height. Your back will thank you later. Also, group similar tools together – all screwdrivers in one section, all wrenches in another. It sounds obvious, but you’d be surprised how many people scatter their tools randomly across the wall.
Overhead Garage Shelving

Look up. See all that wasted space above your head? That’s prime real estate for storage, my friend. Overhead shelving systems turned my garage ceiling into a storage goldmine for all those “use twice a year” items.
I installed my first overhead system about three years ago, and honestly, I kick myself for not doing it sooner. The ceiling can handle way more weight than you think – most garage ceilings can support 250-600 pounds when properly installed into ceiling joists.
Installation Reality Check
Let’s be real for a second – installing overhead shelving isn’t exactly a breeze. You’ll need a friend (bribing with pizza works), a sturdy ladder, and probably more patience than you initially budgeted for. But the payoff? Absolutely worth the afternoon of mild frustration.
The key measurements you need:
- Minimum 7 feet clearance below shelves for walking
- 8 feet clearance if you want garage door clearance
- 16-24 inches deep shelves work best for most items
- 4×4 foot or 4×8 foot platforms are standard sizes
What Goes Up There?
Think seasonal rotation here. Christmas decorations, camping gear, winter sports equipment – basically anything you don’t need regular access to. I keep clear plastic bins up there with labels facing down so I can actually see what’s what without breaking my neck.
One mistake I made initially? Putting heavy stuff overhead. Don’t be like past me. Keep the heavy items lower – your shoulders aren’t getting any younger, and hauling a 50-pound bin down from 8 feet up is nobody’s idea of fun.
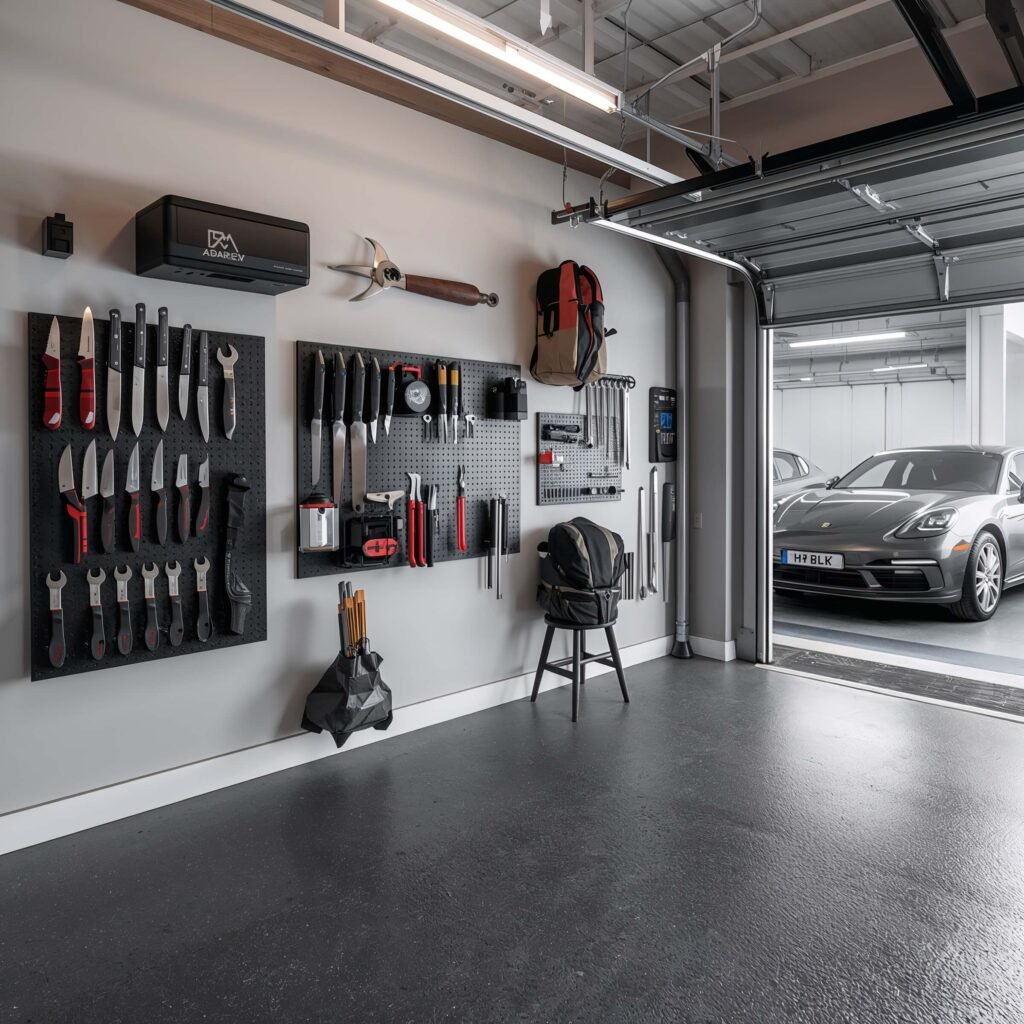
Pegboard Organizer System
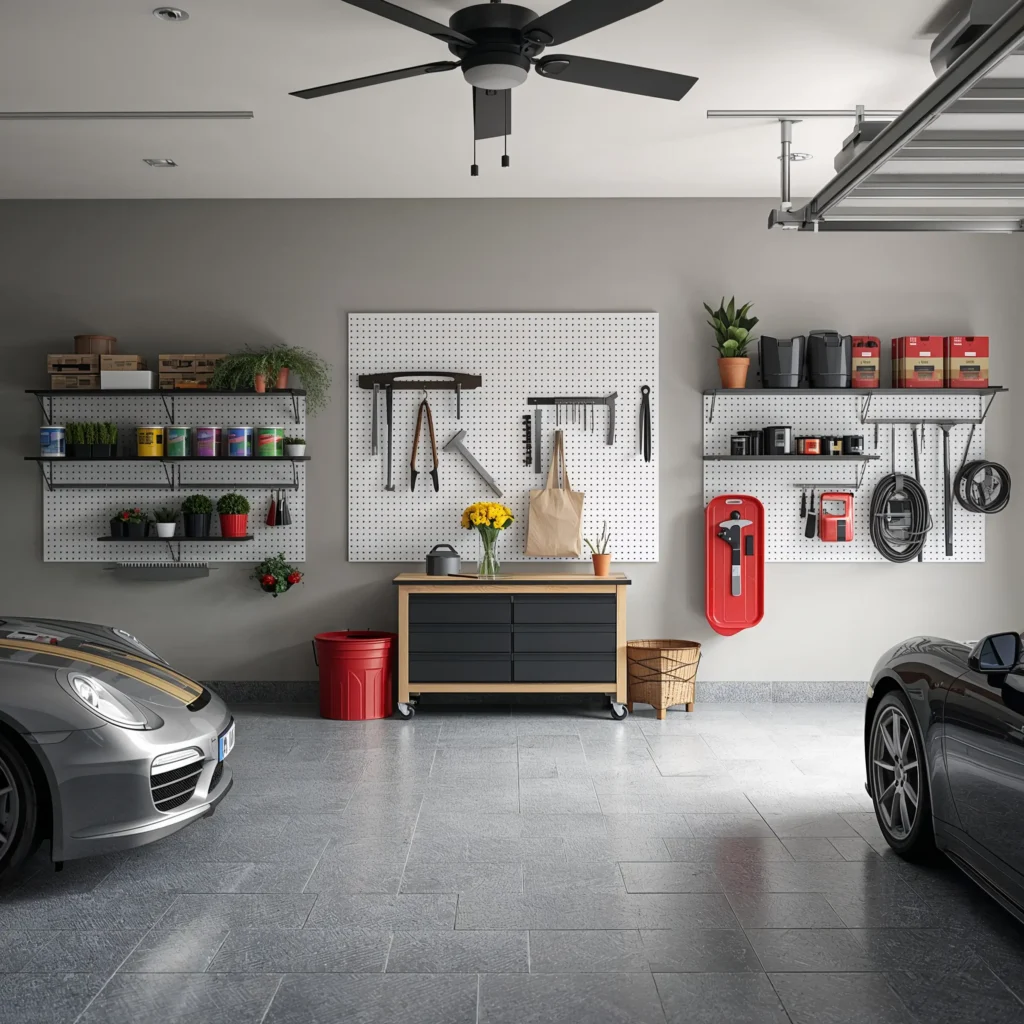
Pegboard might seem old school (because it is), but there’s a reason it’s still around – it just works. Plus, organizing a pegboard scratches that same itch as playing Tetris. Tell me I’m wrong.
I resisted pegboard for years because I thought it looked too “workshop-y” for my taste. Then I discovered you can paint it any color you want, frame it nicely, and suddenly it looks intentional rather than industrial. Game changer.
Modern Pegboard Solutions
Today’s pegboard options go way beyond that boring brown hardboard from the hardware store:
- Metal pegboard for heavy-duty applications
- Plastic pegboard that won’t swell or warp
- Colored options to match your garage aesthetic
- Modular systems that connect together
The accessories available now are insane too. We’re talking custom holders for everything from tape measures to garden hoses. I even found a pegboard holder specifically designed for my cordless vacuum attachments. Living in the future, folks.
Pegboard Layout Strategy
Start by laying out your tools on the floor in front of where your pegboard will go. Arrange them how you think they should hang, then trace around them with chalk once you’re happy. This template method saves you from the reorganizing dance later.
Pro tip: Leave space between items. Cramming everything together defeats the purpose and makes it harder to grab what you need quickly. Breathing room is your friend here.
Also Read: 10 Amazing Garage Makeover Ideas and Modern Design Tips
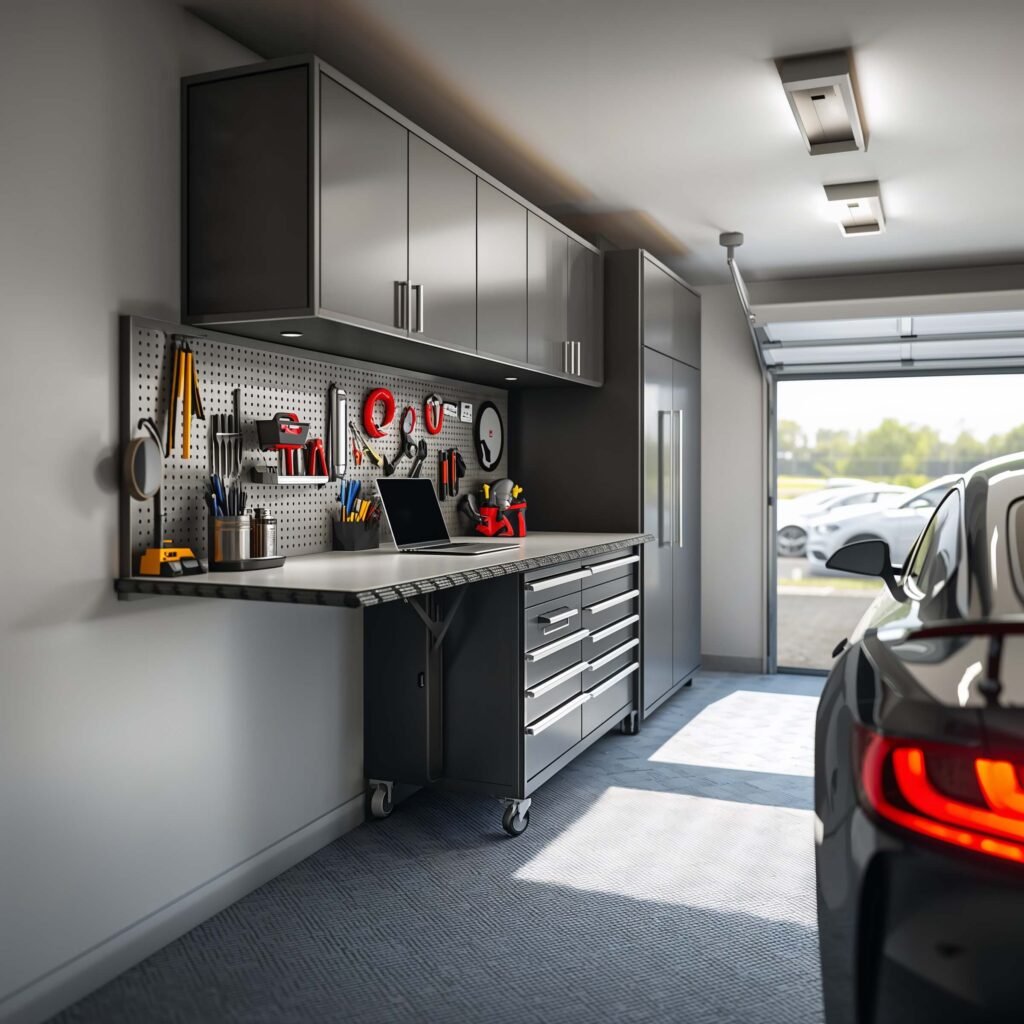
Rolling Workbench with Storage
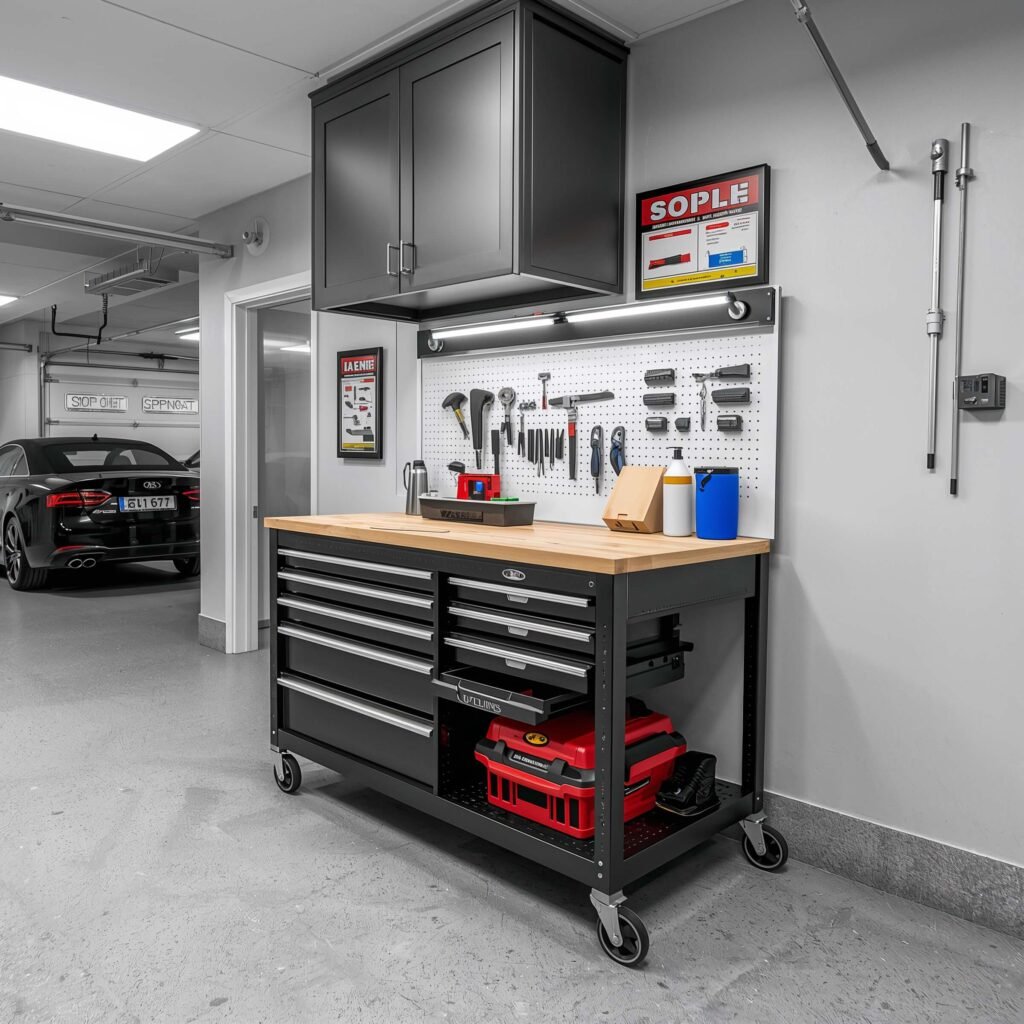
Can we talk about how a rolling workbench is basically the Swiss Army knife of garage organization? Mine has completely changed how I work on projects – no more hunching over the hood of my car or using the ground as my workspace.
I built my first rolling workbench from scratch (humble brag), but honestly, the pre-made ones available now are pretty fantastic and probably more square than my DIY attempt. The mobility factor alone makes this worth considering. Need more room for the car? Roll it against the wall. Working on a project? Roll it wherever you need it.
Features That Actually Matter
After using various workbenches over the years, here’s what actually makes a difference:
- Locking casters (all four wheels, not just two)
- Built-in power strip mounted on the side
- Lower shelf for power tools and supplies
- Pegboard backing for frequently used tools
- Solid wood or butcher block top that can take a beating
The height matters more than you think. Standard height is around 34-36 inches, but if you’re tall like me (6’2″), going up to 38-40 inches saves your back during long projects.
Storage Integration
The beauty of a rolling workbench is the storage potential underneath. I use mine for:
- Pull-out drawers for hardware and small parts
- Open shelving for power tool cases
- Side-mounted holders for clamps and squares
- Magnetic strips for drill bits and driver tips
Don’t cheap out on the casters, BTW. Good ones cost more but roll smoothly even when the bench is loaded with 200+ pounds of tools and materials. Learn from my squeaky-wheel mistakes.
Vertical Bike Rack Setup
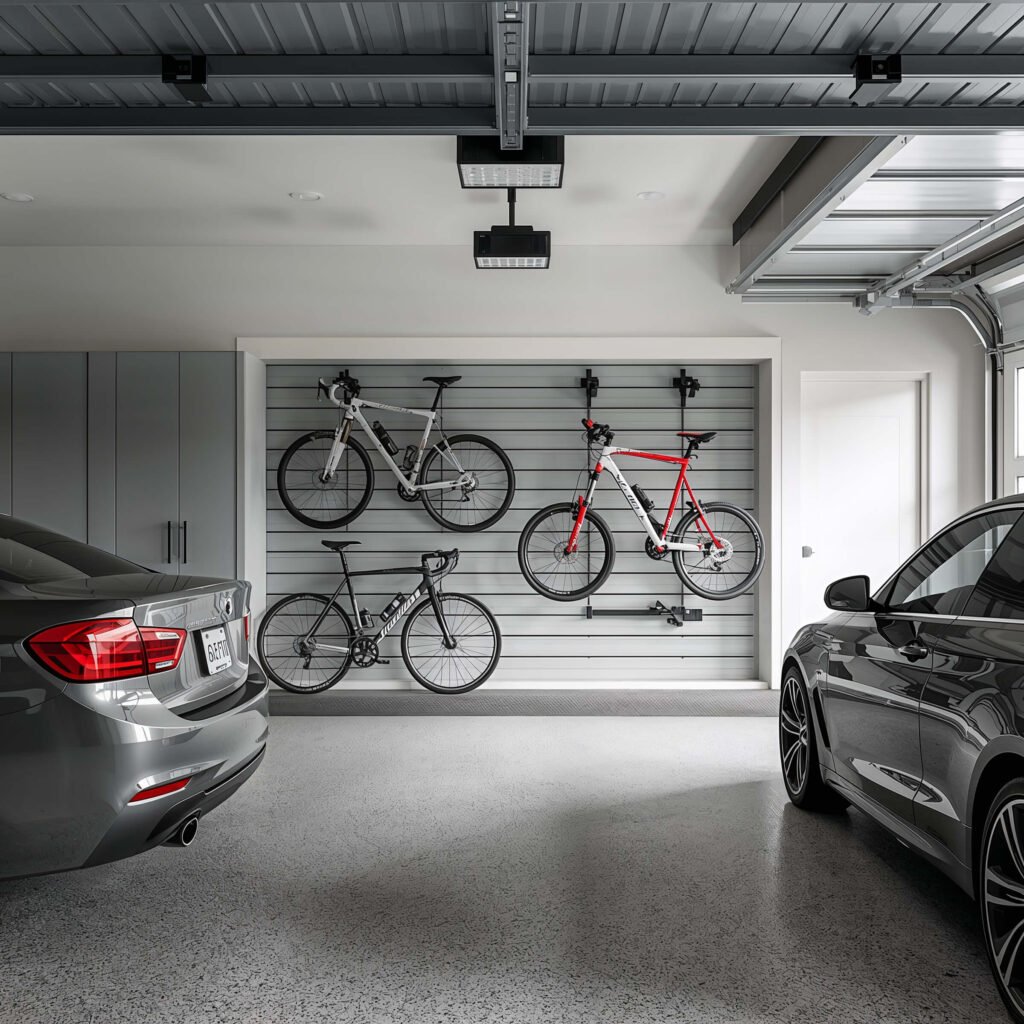
Five bikes. Two adults. Three kids. Zero floor space. That was my reality until I discovered the magic of vertical bike storage. Now all our bikes hang on the wall like expensive artwork (except they’re definitely not art, and my kids’ bikes are definitely not expensive).
The transformation from bike pile to organized storage took one Saturday afternoon and about $100 in materials. Best money I’ve spent on garage organization, hands down.
Types of Vertical Storage
You’ve got options here, and they each have their pros and cons:
- Wall-mounted hooks (cheapest, most flexible)
- Ceiling hoists (great for seasonal storage)
- Freestanding racks (no wall damage, portable)
- Rail systems (slide bikes left and right)
I went with heavy-duty wall hooks because they’re simple and bombproof. Each bike hangs by its front wheel, taking up minimal space. The kids can even hang their own bikes now – major parenting win right there.
Installation Tips That Matter
Mount your hooks into studs – drywall won’t support a 30-pound mountain bike, trust me. Space hooks at least 12 inches apart horizontally to prevent handlebar tangles. If you’re hanging bikes vertically by the front wheel, you need about 6 feet of vertical clearance.
Here’s something nobody tells you: alternate the direction bikes face. One facing left, next facing right. This prevents pedals and handlebars from getting tangled together. Such a simple trick but it makes grabbing bikes so much easier.
Custom Cabinetry for Garage

Okay, custom cabinetry might sound fancy (and expensive), but hear me out. After pricing out quality metal storage cabinets, I realized custom built-ins weren’t that much more expensive – especially if you’re handy with basic tools.
My garage cabinets aren’t winning any design awards, but they’re exactly what I need for my space. No wasted gaps, no awkward corners, just perfectly fitted storage that makes sense for my stuff.
DIY vs Professional Installation
Let’s get real about skill level here. If you can’t cut a straight line with a circular saw, maybe call a pro. But if you’ve built anything from IKEA successfully, you can probably handle basic garage cabinets.
Budget considerations:
- DIY materials only: $30-50 per linear foot
- Semi-custom (you install): $75-150 per linear foot
- Full custom professional: $200-500 per linear foot
I went the DIY route using melamine-faced particleboard. Not the fanciest material, but it’s moisture-resistant and cleans easily. Plus, when my kids inevitably ding it with their bikes, I don’t cry.
Design Elements That Work
Think about what you’re actually storing before designing:
- Adjustable shelves for changing needs
- Deep lower cabinets for bulky items
- Shallow upper cabinets so you can reach the back
- Open shelving sections for frequently accessed items
- Locked cabinet for chemicals and sharp tools
FYI, full-extension drawer slides cost more but are 100% worth it. Being able to access the entire drawer instead of just the front half? Chef’s kiss
Also Read: 10 Brilliant Luxury Garage Ideas for Modern Dream Homes
Slatwall Panel Storage
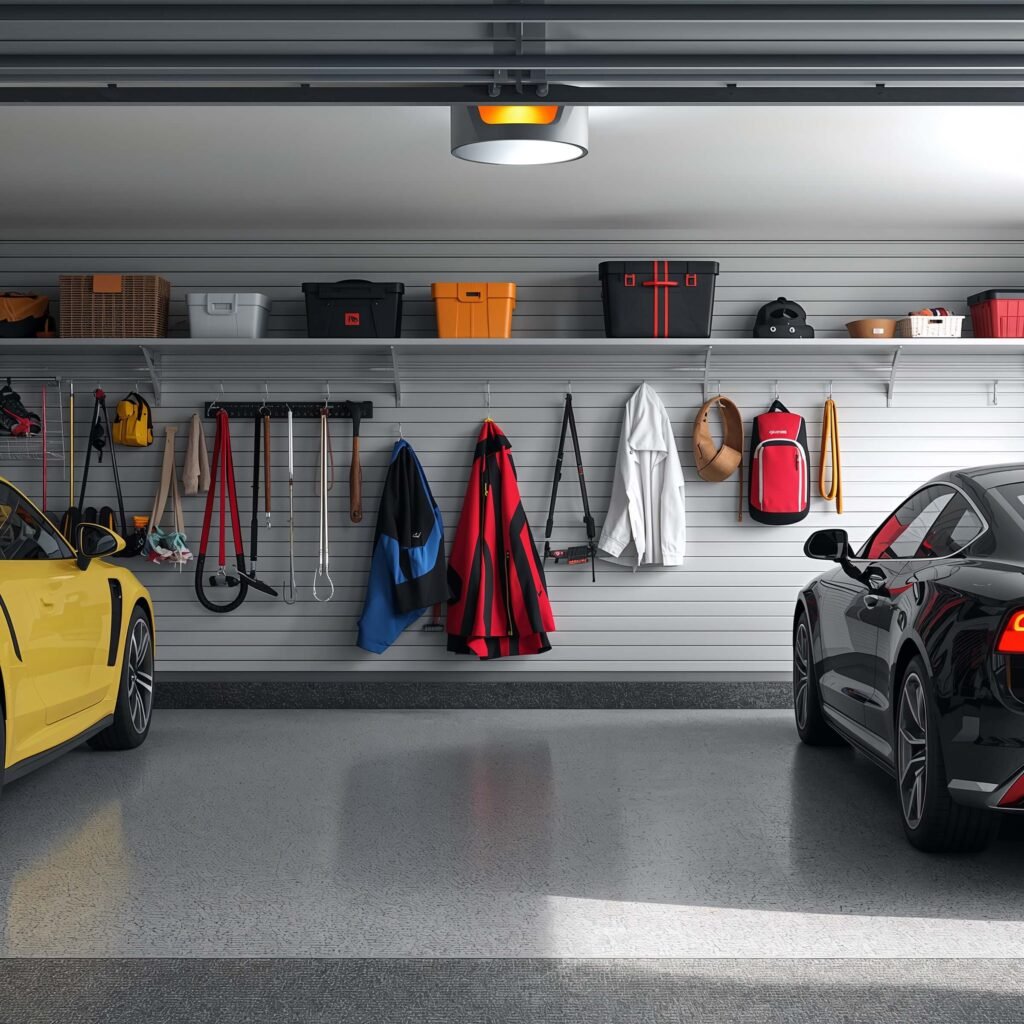
Slatwall is like pegboard’s cooler older sibling. More expensive? Yeah. More versatile and better looking? Absolutely. I installed slatwall panels on one wall of my garage last year, and now I want to cover every vertical surface with this stuff.
The groove system accepts hundreds of different accessories, and unlike pegboard, things don’t fall off when you bump them. The holding power is insane – I hang my ladder horizontally on two hooks, and it hasn’t budged.
Installation Considerations
Slatwall installation requires precision. The panels need to be level and properly supported, or your grooves won’t line up. Not gonna lie, it’s a bit finicky, but the end result looks so clean it’s worth the extra effort.
Key installation points:
- Install blocking between studs for maximum strength
- Use a laser level for perfect alignment
- Leave 1/4 inch gaps between panels for expansion
- Start from a corner and work your way out
Maximizing Slatwall Potential
The accessories make or break your slatwall system. Don’t cheap out here – quality hooks and brackets last longer and hold more weight. My current setup includes:
- Heavy-duty hooks for ladders and long tools
- Basket systems for sports equipment
- Specialty holders for garden tools
- Small parts bins that hook directly into grooves
The best part? Reorganizing takes seconds. Unhook, move, rehook. No new holes, no repairs, just instant organization flexibility.
Garage Loft for Seasonal Items

Adding a loft to my garage was like finding free square footage in my house. That dead space above where my cars park? Now it stores everything from holiday decorations to camping gear, freeing up the ground level for actual garage stuff.
Building a garage loft isn’t for everyone – you need decent ceiling height and some construction know-how. But if you’ve got 10+ foot ceilings, you’re leaving serious storage space on the table by not considering this option.
Structural Requirements
Before you start dreaming about your garage loft, check if your garage can handle it:
- Minimum 9-foot ceiling (10+ is better)
- Adequate support from existing framing
- Building permits (yeah, you probably need one)
- Load capacity calculations
I hired a structural engineer for an hour consultation ($300) to verify my garage could handle the extra weight. Money well spent for peace of mind – nobody wants their loft becoming a ground-floor feature unexpectedly.
Access Solutions
The trickiest part about a garage loft? Getting up there. Your options:
- Pull-down stairs (most convenient, takes ceiling space)
- Ships ladder (steep but space-saving)
- Regular ladder (cheap but annoying)
- Spiral staircase (if you’re feeling fancy)
I went with pull-down stairs, and honestly, it makes the loft actually usable. Carrying boxes up a ladder gets old fast. The pull-down stairs fold completely into the ceiling when not in use – invisible storage access 🙂
Magnetic Tool Holders
Let me introduce you to your new best friend: rare earth magnets. These little powerhouses transformed how I store metal tools, and once you go magnetic, you never go back.
I’ve got magnetic strips everywhere now – inside cabinet doors, on the side of my workbench, even on my garage door frame. Any metal tool becomes instantly accessible without taking up drawer or shelf space.
Types of Magnetic Solutions
Not all magnetic holders are created equal:
- Magnetic strips for knives and small tools
- Magnetic bowls for screws and small parts
- Magnetic bars for wrenches and pliers
- Magnetic sheets for custom applications
The strips I use hold up to 20 pounds per foot. My entire wrench collection hangs on a 3-foot strip, and removing or replacing any wrench takes literally one second. Why did I waste years digging through toolboxes?
Installation Best Practices
Mount magnetic strips at an angle, not perfectly horizontal. This prevents tools from sliding sideways when you remove the one next to them. Such a simple trick but it makes a huge difference in daily use.
Also, space strips appropriately for your tools:
- 18 inches apart for long tools like levels
- 12 inches apart for standard hand tools
- 6 inches apart for small precision tools
Also Read: 10 Brilliant Garage Conversion Ideas for Functional Living Spaces
Foldable Workstations
Space-challenged garage? Join the club. My foldable workstation saved my sanity when I realized I needed workspace but couldn’t sacrifice parking space. When folded, it’s literally 4 inches deep. When deployed, it’s a full workbench.
The Murphy bed concept applied to garage workspace is genius. I use mine for everything from gift wrapping (don’t judge) to small engine repair. Ten seconds to deploy, ten seconds to stow.
Choosing the Right System
Foldable workstations range from basic to elaborate:
- Wall-mounted fold-down tables ($50-200)
- Cabinet-integrated workbenches ($300-800)
- Full Murphy workbench systems ($500-1500)
I started with a simple fold-down table from a big box store. It handled light duty work fine, but when I started doing more serious projects, I upgraded to a reinforced system that handles 300 pounds without flinching.
Making It Functional
A foldable workstation needs smart storage to be truly useful:
- Wall-mounted tool storage above the bench
- Fold-out legs that store against the wall
- Built-in measuring tape along the edge
- Power strip mounted to the wall nearby
- Task lighting that swings into position
The key is having everything you need within arm’s reach when the bench is deployed. Otherwise, you’re constantly folding and unfolding to grab tools – defeats the purpose entirely.
Weight Considerations
Be realistic about what your foldable workstation can handle. That solid core door mounted on hinges might look sturdy, but it won’t support your table saw. Match your workstation capacity to your actual needs, and when in doubt, overengineer it. Better safe than sorry when you’re leaning on it to torque a stubborn bolt.
Bringing It All Together
Look, I get it – reading about garage organization and actually doing it are two very different things. The gap between inspiration and implementation is where most garage dreams go to die. But here’s what I’ve learned after years of trial and error: start small and build momentum.
Pick one system from this list that addresses your biggest pain point. Bikes always in the way? Start with vertical bike storage. Can never find the right tool? Wall-mounted storage or pegboard is your answer. The point is to start somewhere and experience that first win.
My garage transformation didn’t happen overnight. It evolved over two years as I tested different systems, learned what worked for my family, and slowly built the organized space I have now. Some ideas failed spectacularly (RIP to my first overhead storage attempt), but each failure taught me something valuable.
The biggest mindset shift? Realizing that garage organization isn’t about achieving Pinterest perfection. It’s about creating a functional space that works for your actual life. My garage might not win any beauty contests, but I can find any tool in under 30 seconds, both cars fit inside, and my kids can grab their bikes without triggering an avalanche.
IMO, that’s worth more than any magazine-worthy garage that looks great but doesn’t actually work for real life. Your garage should make your life easier, not become another source of stress because you’re trying to maintain an impossible standard.
One final thought – involve your family in the process. My kids helped design their bike storage area, my spouse chose the cabinet layout, and everyone knows where things belong. Shared ownership means shared responsibility for keeping things organized. Revolutionary concept, right?
Now stop reading and go measure your garage. Pick one idea from this list and commit to implementing it this weekend. Your future self will thank you when you’re not cursing at a pile of camping chairs while looking for your socket set. Trust me on this one – an organized garage changes everything, and you’re just one weekend project away from joining the “I can actually park in my garage” club.