10 Stylish Garage Workbench Ideas and Modern Designs
Let’s be honest – if you’re reading this, your garage probably looks like a tornado hit a hardware store. Mine certainly did until I finally got serious about organizing my workspace.
After spending way too many weekends tripping over tools and searching for that one screwdriver I swear I just had, I discovered the secret weapon every garage needs: a proper workbench.
But here’s the thing – not all workbenches are created equal. Trust me, I learned this the hard way after building what I thought was the “perfect” bench, only to realize it ate up half my garage and gave me zero storage.
So today, I’m sharing 10 game-changing workbench ideas that actually work in real garages with real space constraints. Whether you’re working with a shoebox-sized single car garage or blessed with a sprawling three-car palace, there’s something here for you.
Floating Wall-Mounted Workbench
The Space-Saving Champion
Ever looked at your garage floor and thought, “Why is everything always in the way?” Yeah, me too. That’s exactly why I fell in love with the floating wall-mounted workbench concept. This brilliant design completely frees up your floor space while giving you a solid work surface exactly where you need it.
The beauty of a wall-mounted bench lies in its simplicity. You’re essentially creating a sturdy shelf that can handle serious weight – we’re talking 300+ pounds when properly anchored to wall studs. I built mine using a thick butcher block top supported by heavy-duty brackets rated for 500 pounds per pair. Overkill? Maybe. But when you’re wrestling with a transmission or rebuilding an engine component, you’ll appreciate that extra peace of mind.
What really sold me on this design was the customizable height. Unlike traditional benches, you can mount this baby at your perfect working height. No more backaches from hunching over a too-low surface! I positioned mine at 38 inches – slightly higher than standard – because I’m tall and tired of feeling like I’m bowing to my projects.
Installation Tips That Actually Matter
Here’s where most people mess up: they think any wall will do. Wrong! You need to hit those studs, folks. Use a quality stud finder (not the cheap $10 ones that lie to you) and mark your mounting points carefully. I recommend using ⅜-inch lag bolts at minimum, going at least 2.5 inches into the stud.
For the work surface, consider these materials:
- 2-inch thick butcher block for that premium feel and durability
- ¾-inch plywood with hardboard topping for budget-conscious builders
- Solid core door (seriously, these make amazing workbench tops!)
- Laminated MDF if you want something easy to clean
Don’t forget to seal whatever surface you choose. Nothing ruins your day quite like oil stains that won’t come out.
Foldable Space-Saving Workbench
The Transformer of Garage Furniture
Remember those old Murphy beds that folded into the wall? Someone had the genius idea to apply that concept to workbenches, and honestly, it’s revolutionary. My buddy installed one of these in his tiny single-car garage, and now he can actually park his car inside. Wild concept, right?
The foldable workbench disappears when you don’t need it. When folded up, it typically protrudes only 4-6 inches from the wall – basically invisible. Drop it down, and boom, you’ve got a full-sized work surface ready for action. The mechanism usually involves heavy-duty hinges and either legs that fold out or a cable support system.
I’ve tested several designs, and the cable-supported versions feel more stable, especially for heavier projects. The leg-style folders work great for lighter tasks but can get wobbly if you’re really putting some muscle into your work. Pro tip: whatever style you choose, add a safety lock to prevent accidental folding. Trust me on this one – nothing kills productivity quite like your workbench trying to eat your project mid-task.
Building Your Own Folding Beast
Creating your own foldable bench isn’t rocket science, but it does require some planning. Start with these essential components:
- Heavy-duty piano hinges (at least 48 inches long)
- Support cables or folding legs rated for your expected load
- Wall cleats for additional support when deployed
- Magnetic catches to keep it secure when folded
The trickiest part? Getting the geometry right so it folds flat against the wall. I spent an embarrassing amount of time with cardboard mockups before cutting any wood. Worth it though – the final product works like a dream and saves me roughly 16 square feet of floor space.
Industrial Pipe Workbench with Storage
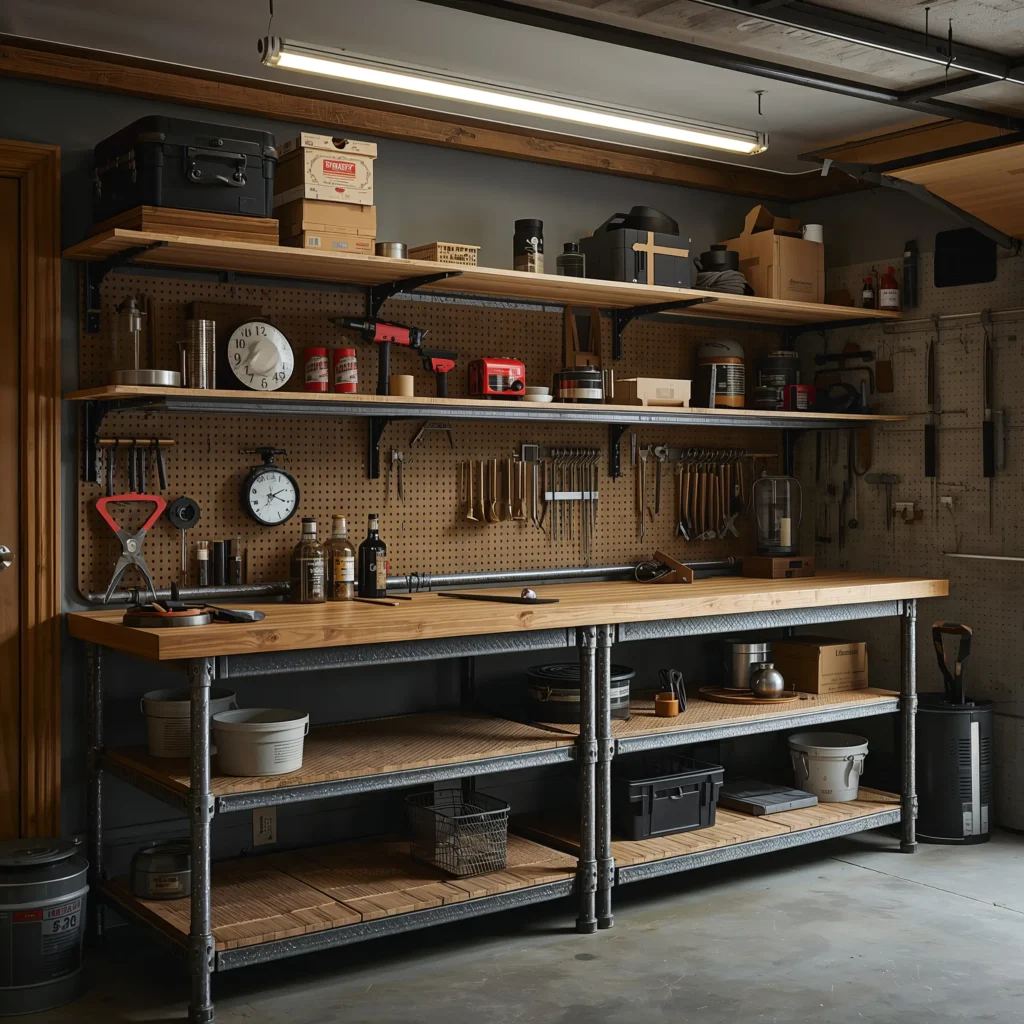
When You Want That Badass Industrial Vibe
Okay, I’ll admit it – I initially built an industrial pipe workbench purely for the aesthetics. There’s something undeniably cool about that raw, industrial look. But here’s what surprised me: these things are insanely practical too. The pipe framework creates natural storage opportunities that traditional benches just can’t match.
Using galvanized or black iron pipes, you’re essentially building an adult version of those construction toys we had as kids. Everything threads together, which means you can modify, expand, or completely reconfigure your bench whenever you want. Need an extra shelf? Thread in some pipes and add a board. Want to hang tools? Slip on some pipe clamps. It’s brilliant in its simplicity.
The cost factor might surprise you though. Pipes and fittings add up quickly – my 6-foot bench ran about $200 just in hardware. But consider this: you’re getting a bench that’ll outlast your grandkids and can support ridiculous amounts of weight. I’ve loaded mine with a 400-pound engine block (don’t ask) and it didn’t even flinch.
Design Considerations for Pipe Benches
When planning your pipe bench, think about these factors:
Pipe Diameter Options:
- ¾-inch pipes for light to medium duty
- 1-inch pipes for heavy-duty applications
- 1¼-inch pipes if you’re planning to rebuild tanks on this thing
The beauty of this system? You can incorporate multiple storage levels without any complicated joinery. I’ve got three shelves under my main work surface, each at different heights to accommodate different tools and supplies. The bottom shelf holds my compressor, middle shelf has parts bins, and the top shelf keeps frequently used tools within easy reach.
FYI, if you’re going for the black pipe look, give them a good cleaning with acetone first. They come coated in manufacturing oil that’ll get on everything you own. Learned that one the hard way :/
Also Read: 10 Genius Two Car Garage Organization Ideas and Storage Tips
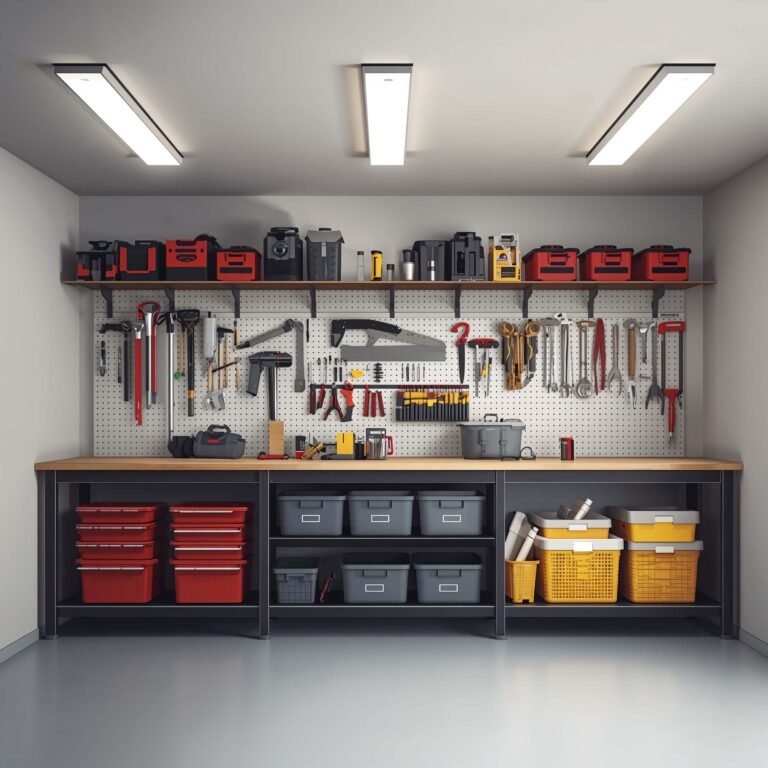
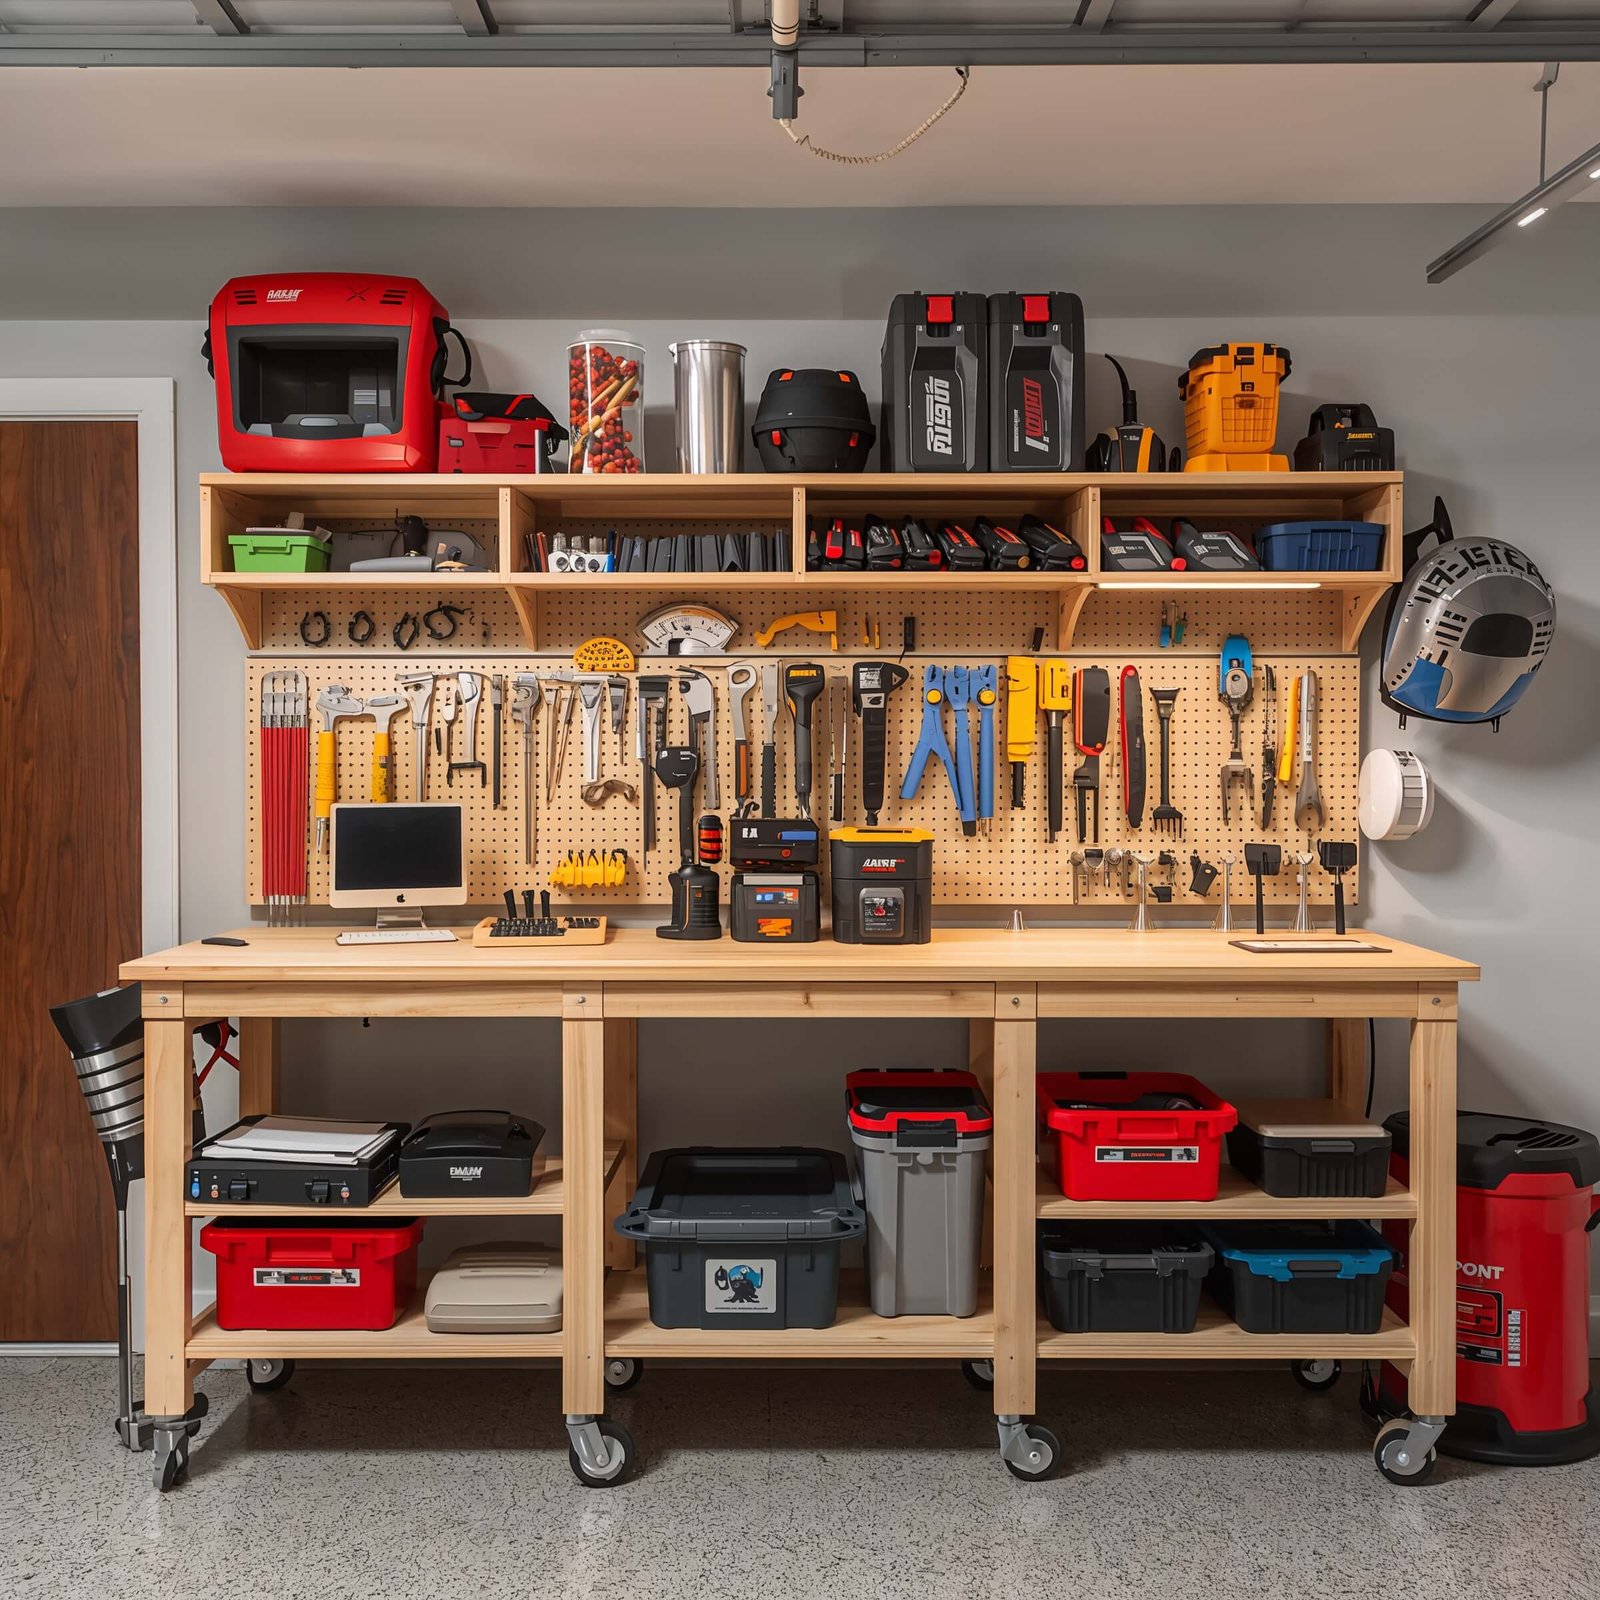
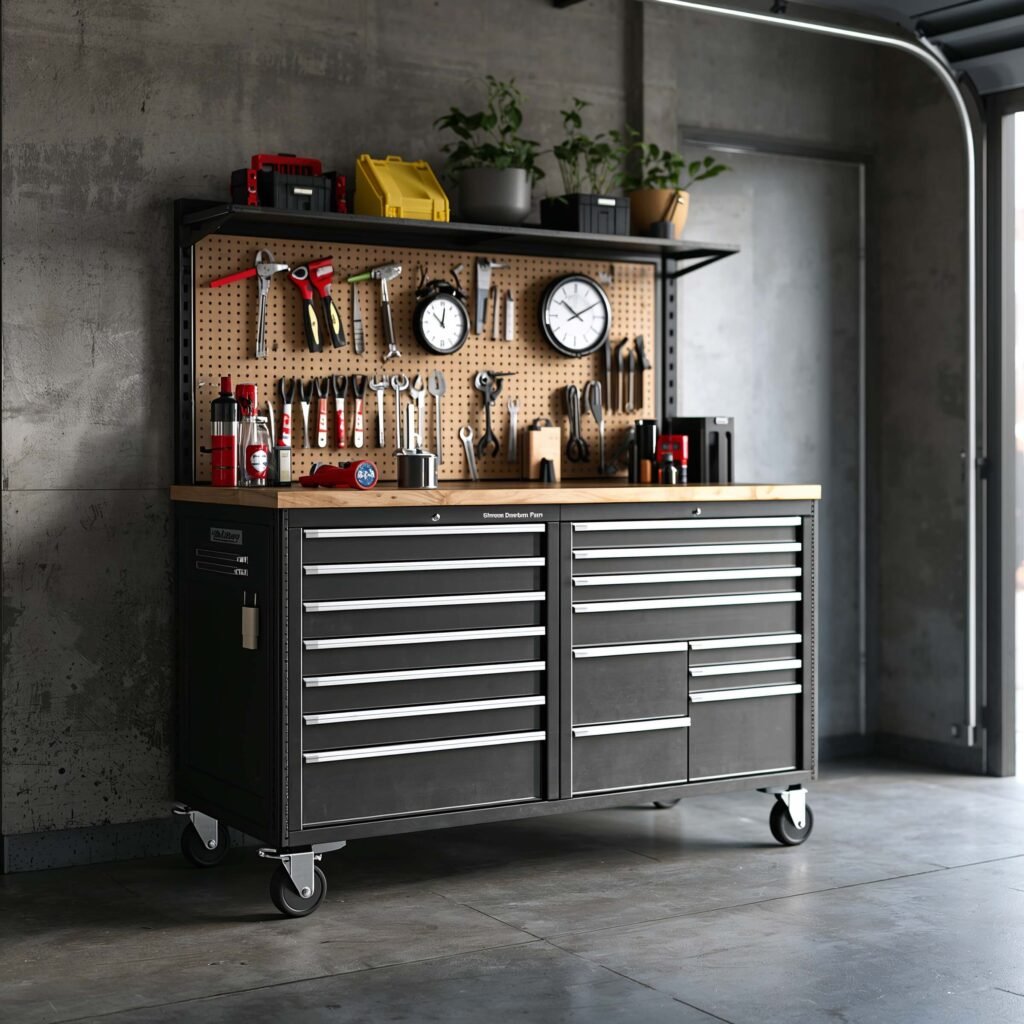
Modular Workbench with Pegboard Backing

The Organizer’s Dream Setup
Who doesn’t love pegboard? It’s like the Swiss Army knife of garage organization. But here’s where most people stop short – they slap some pegboard on the wall and call it a day. What you really want is a fully integrated modular system where your workbench and pegboard work together like peanut butter and jelly.
I built my modular setup using a simple frame system with removable sections. Each module measures 24 inches wide, and I can swap them out depending on what I’m working on. Got a woodworking project? I swap in the module with my saw guides and measuring tools. Working on the car? In goes the module with wrenches and sockets. It’s like having multiple specialized workbenches in one.
The pegboard backing extends from the bench surface all the way to eye level – roughly 30 inches of vertical tool storage. That’s prime real estate for your most-used tools. No more digging through drawers or toolboxes. Everything you need stays visible and within arm’s reach.
Making Modular Magic Happen
Building a modular system requires some upfront planning, but the payoff is huge. Here’s my approach:
Start with a basic frame using 2x4s or, if you’re feeling fancy, aluminum extrusion. Create slots or mounting points every 24 inches for your modules. Each module consists of:
- A pegboard panel (¼-inch or thicker for heavy tools)
- A frame to prevent warping
- Mounting hardware that allows quick swaps
- Dedicated tool layouts for specific tasks
The game-changer? I added LED strip lighting behind the pegboard. When you backlight pegboard, it creates this amazing halo effect around your tools. Sure, it’s a bit extra, but it makes finding tools in dim garage lighting so much easier. Plus, it looks absolutely killer.
Rustic Wooden Farmhouse Workbench

Old-School Charm Meets Modern Function
There’s something deeply satisfying about working on a thick, solid wood bench that looks like it belongs in your grandfather’s workshop. The rustic farmhouse style brings warmth to an otherwise cold garage space, and let me tell you, these benches are absolute workhorses.
I built mine from reclaimed barn wood – scored it from a farm demolition for next to nothing. The top is a full 3 inches thick, made from laminated 2×12 pine boards. Could I have gone thinner? Sure. But there’s something psychological about working on a bench that feels like it could survive a nuclear blast. Plus, the mass actually dampens vibration, making it perfect for hand tool work.
The best part about rustic benches? Imperfections are features, not bugs. That gouge from when your chisel slipped? Character. Those stains from various projects? History. This style gives you permission to actually use your workbench without babying it.
Building Farmhouse Functionality
Creating your own farmhouse bench doesn’t require master carpentry skills. Focus on these elements:
The Top: Go thick or go home. Laminate multiple boards for strength and stability. I used construction adhesive and threaded rod to clamp mine together – way stronger than just glue alone.
The Base: Massive legs are the hallmark of this style. I used 4×4 posts with mortise and tenon joinery, but honestly, heavy-duty lag bolts work just fine if you’re not trying to win any woodworking awards.
Storage Solutions:
- Add a lower shelf using the same thick lumber
- Install drawers using old wooden crates for that authentic look
- Mount a vintage tool cabinet on the side
- Use mason jars screwed under the top for small parts storage
Pro tip: Don’t over-finish the wood. A simple oil finish lets you refresh it easily and maintains that rustic appeal. I use boiled linseed oil twice a year, and my bench looks better with age.
Compact Corner Garage Workbench
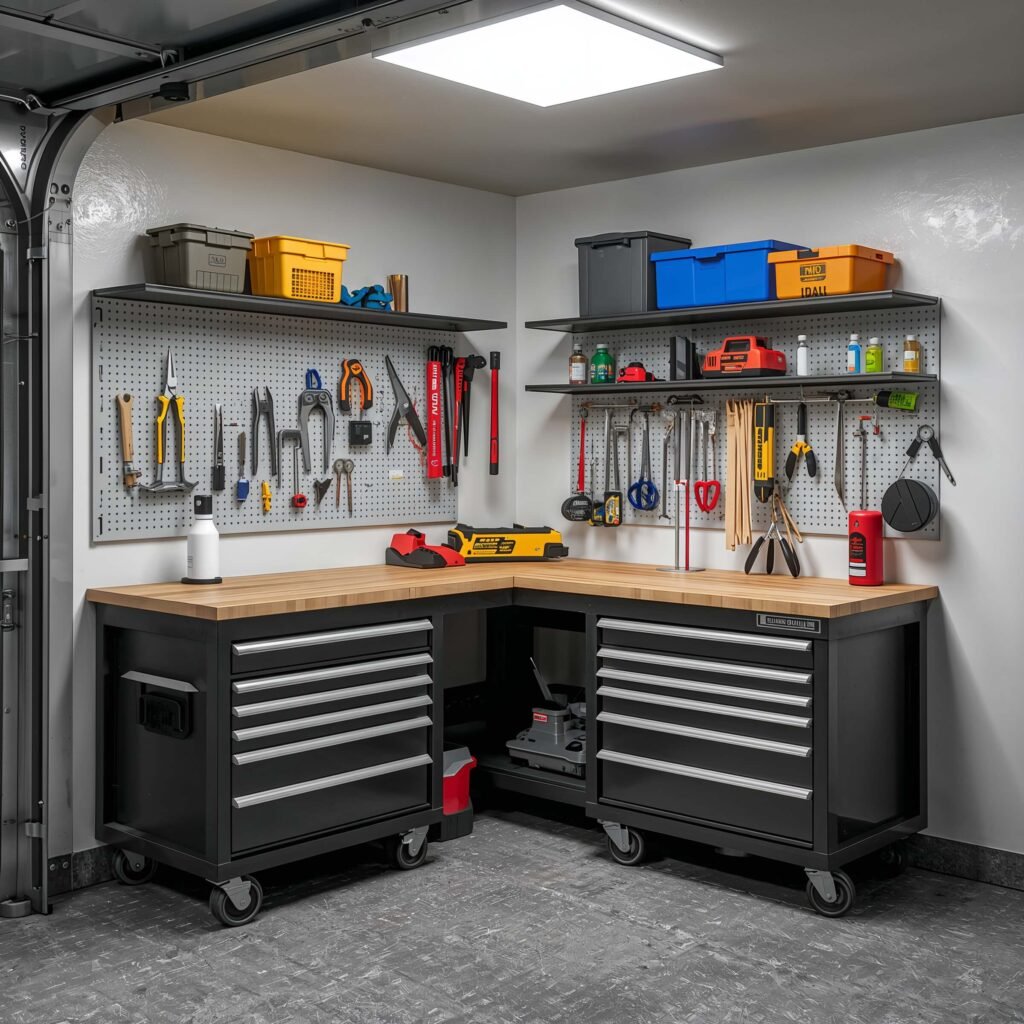
Making Dead Space Work Overtime
Corners are the Bermuda Triangle of garage storage – stuff goes there to disappear forever. But what if I told you that corner could become your most efficient workspace? The compact corner workbench transforms wasted space into workshop gold.
I fought this idea for years, thinking corner benches were awkward to use. Then I actually built one, and holy productivity boost, Batman! Having work surface on two sides means you can spread out projects without taking over the entire garage. Plus, you can work from either side depending on what you’re doing.
The key to a great corner bench? The angle. Most people go with a 90-degree corner, but I recommend creating a 45-degree angled front section. This gives you a primary work area where you can stand comfortably without having to reach into the corner. Think of it like a pentagon shape rather than a simple L.
Corner Bench Construction Secrets
Building in corners requires some special considerations:
Measurement is Critical: Corners are rarely perfectly square. Measure multiple times and create a cardboard template first. This saves you from that awful moment when you realize your “perfect” bench doesn’t actually fit.
Support Structure: Corners can handle serious weight when properly supported. I use a combination of:
- Wall-mounted ledger boards on both walls
- A single leg at the outer corner
- Diagonal bracing underneath for rigidity
Height Variations: Consider making one side of your L slightly lower. I made one side standard bench height (36 inches) and the other side 32 inches. The lower side works great for assembly work where you want to see what you’re doing from above.
The storage potential in corner benches is insane. You can build drawers that pull out from either side, add lazy Susan turntables for parts bins, or install sliding trays that maximize that hard-to-reach corner space.
Also Read: 10 Amazing Garage Makeover Ideas and Modern Design Tips
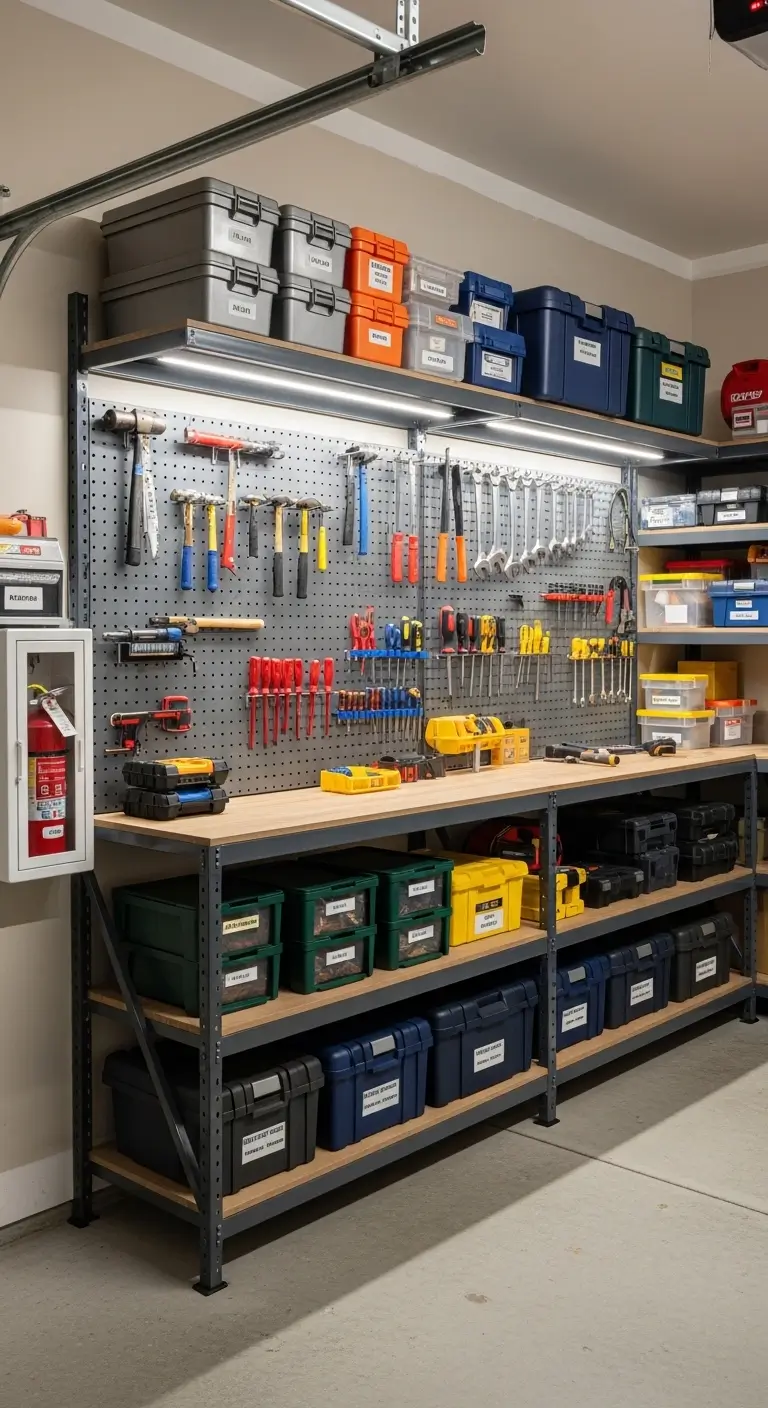
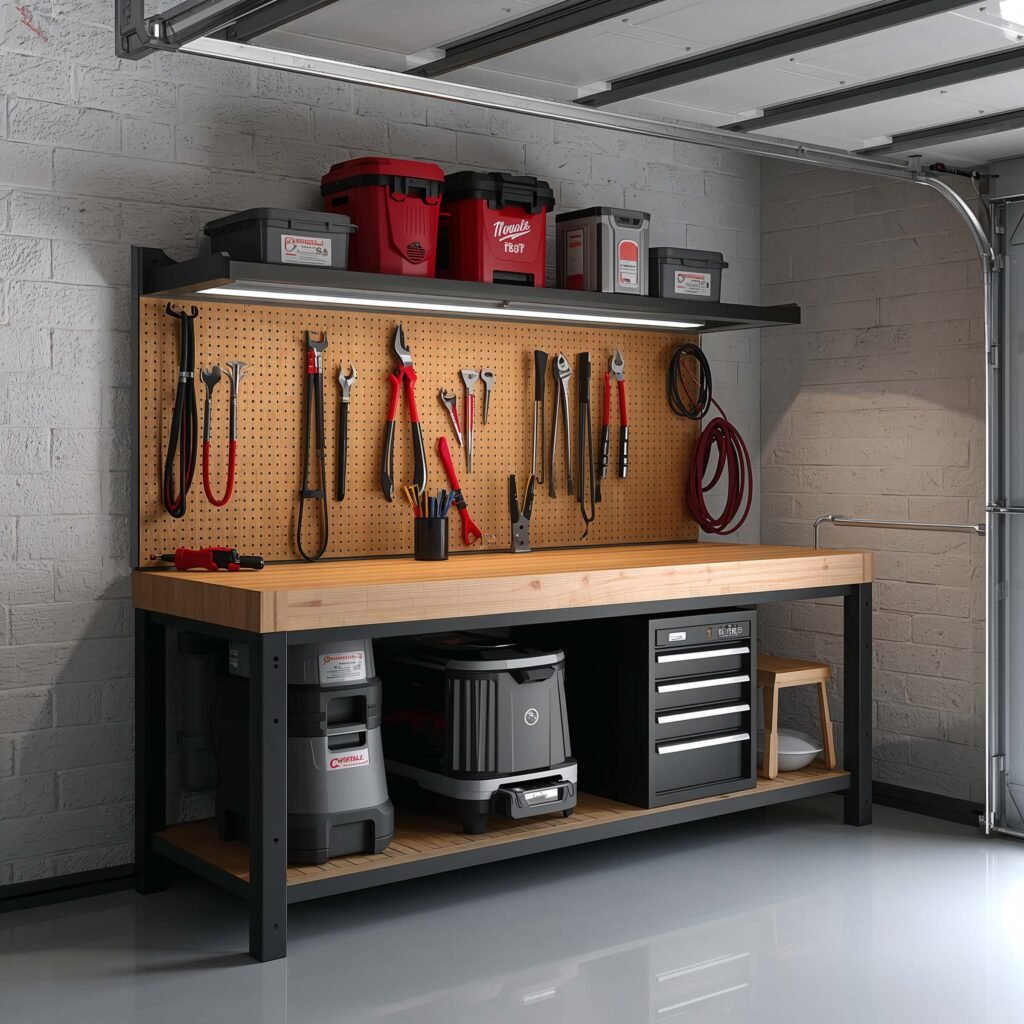
Multi-Level Tool Storage Workbench

The Vertical Storage Revolution
Why limit yourself to one work surface when you can have three? The multi-level storage workbench takes the traditional bench concept and stacks it to the ceiling. Think of it as a workbench with built-in shelving on steroids.
My multi-level setup has transformed how I work. The main bench sits at standard height, with a raised shelf at standing eye level for reference materials and delicate work, plus a lower shelf for heavy tools and equipment. Each level serves a specific purpose, and suddenly everything has a logical home.
The upper level (about 54 inches high) holds my measuring tools, plans, tablet for watching repair videos (we all do it), and lighting. The middle level is my main work surface. The lower level (18 inches off the ground) stores my welder, compressor, and tool cases. It’s like having three workshops stacked efficiently in the footprint of one.
Engineering Your Levels
Creating a multi-level bench requires thinking in 3D:
Structural Requirements:
- Use vertical supports every 32 inches minimum
- Cross-bracing prevents racking and adds stability
- Each shelf needs independent support – don’t just hang them off each other
Optimal Heights for Different Tasks:
- Eye level shelf (54-60 inches): Electronics, fine detail work, reference materials
- Main bench (34-38 inches): Primary work surface
- Lower shelf (16-20 inches): Heavy equipment, rarely-moved items
- Floor level: Rolling tool boxes that slide underneath
IMO, the secret sauce is making at least one level adjustable. I use shelf pins like you’d find in a bookcase, letting me reconfigure heights based on current projects. Working on something tall? Raise that upper shelf. Need more vertical space? Remove it entirely.
Rolling Mobile Workbench with Drawers
Freedom to Work Anywhere
Static workbenches are great until you need to work on something in the driveway, help a neighbor, or just want better lighting. Enter the rolling mobile workbench – your workshop on wheels. This game-changer lets you bring your tools and work surface wherever you need them.
I’ll be honest – I initially resisted going mobile, thinking it would be unstable. Then I built one with proper locking casters and a solid base, and now I can’t imagine working without it. The ability to roll my entire setup outside on nice days? Priceless. Being able to push it against the wall when I need floor space? Essential.
The drawer component elevates this from a simple rolling table to a complete mobile workshop. My setup has six drawers of varying depths, organized by project type. The top drawer holds measuring and marking tools, middle drawers for hand tools, and deep bottom drawers for power tools. Everything travels together.
Building a Bomber Mobile Unit
Creating a stable mobile workbench requires attention to these details:
Caster Selection is Everything:
- Minimum 3-inch diameter wheels (4-inch is better)
- Total weight rating should be double your expected load
- At least two casters must lock both wheel and swivel
- Polyurethane wheels won’t mark your garage floor
Frame Construction:
- Build the base frame from 2×6 lumber or welded steel
- Add diagonal bracing to prevent racking during movement
- Install a lower shelf for weight – it lowers the center of gravity
Drawer Considerations:
- Use full-extension drawer slides rated for workshop abuse
- Add drawer liners to prevent tool migration while rolling
- Install positive locks to prevent drawers opening during movement
One feature I absolutely love: a built-in power strip that retracts into the bench. I can plug in anywhere and have instant access to power tools. Just remember to unplug before rolling to your next location (ask me how I learned that one).
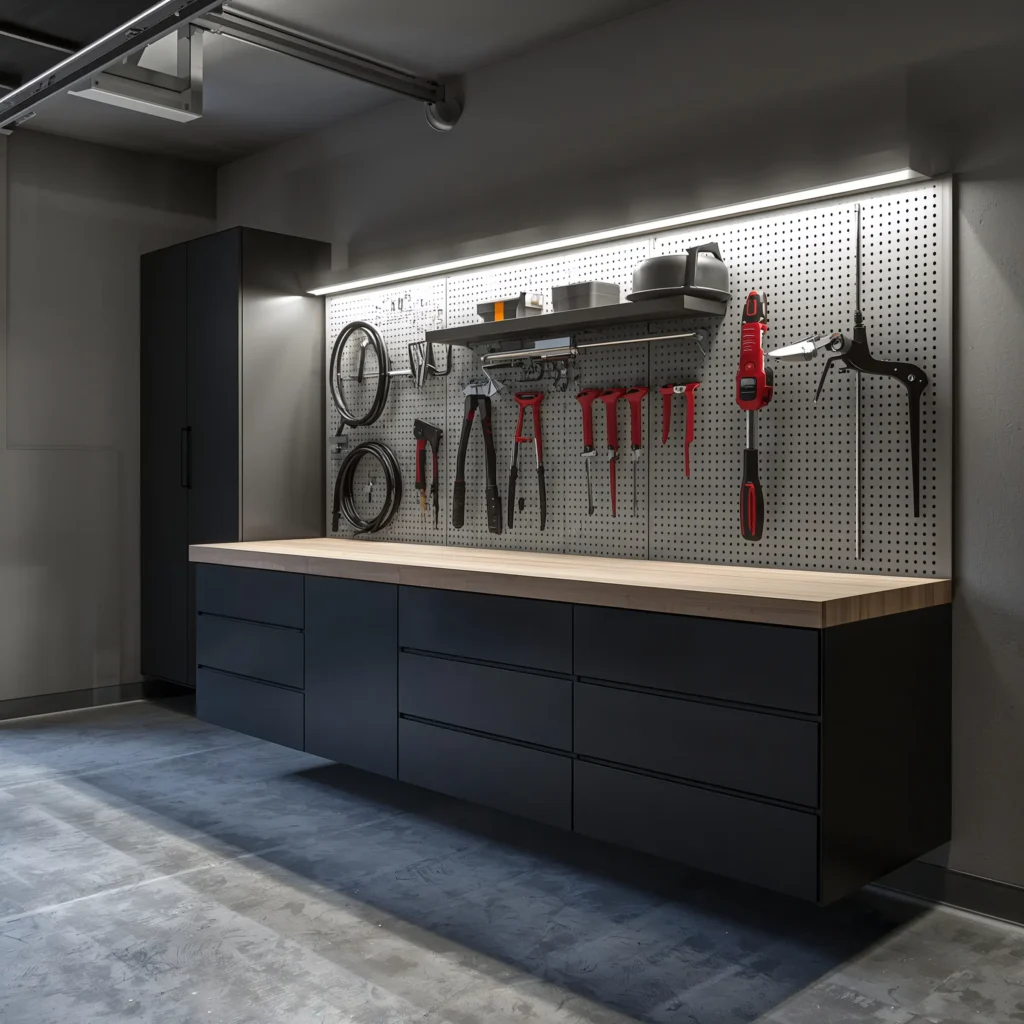
Minimalist Modern Workbench Setup
Less Clutter, More Creating
Sometimes the best workbench is the simplest one. The minimalist modern approach strips away everything unnecessary, leaving you with pure, functional workspace. No frills, no excess storage tempting you to hoard, just clean lines and clear surfaces.
My minimalist bench changed how I work. Without drawers and shelves packed with “might need someday” items, I’m forced to be intentional about my tools. Only the essentials live at the bench – everything else stays in organized storage elsewhere. The result? I work faster, cleaner, and with way less frustration.
The modern aesthetic also brightens up the garage. I used a white laminate top with powder-coated steel legs. The light colors reflect light better than traditional dark wood, making the space feel larger and more inviting. Plus, that smooth laminate surface? Cleanup takes seconds, not minutes.
Achieving Minimalist Excellence
Building a minimalist bench requires restraint and smart choices:
Surface Material Options:
- Phenolic resin tops: Chemical resistant and incredibly durable
- Stainless steel: Ultimate in easy cleaning (though pricey)
- White laminate: Affordable and brightens the space
- Bamboo plywood: Sustainable and surprisingly tough
Support Structure:
- Hairpin legs for that mid-century modern vibe
- Square tube steel for industrial minimalism
- Simple wooden A-frame for Scandinavian style
Organization Without Bulk:
- Magnetic tool holders under the top edge
- A single drawer for absolute essentials
- Wall-mounted tool rail keeps things accessible but off the bench
- Rolling cart that lives elsewhere but comes when needed
The hardest part about going minimalist? Fighting the urge to add “just one more thing.” Every addition needs to earn its place. Does it make you more efficient? Keep it. Does it just make you feel prepared? It probably goes.
Also Read: 10 Brilliant Luxury Garage Ideas for Modern Dream Homes
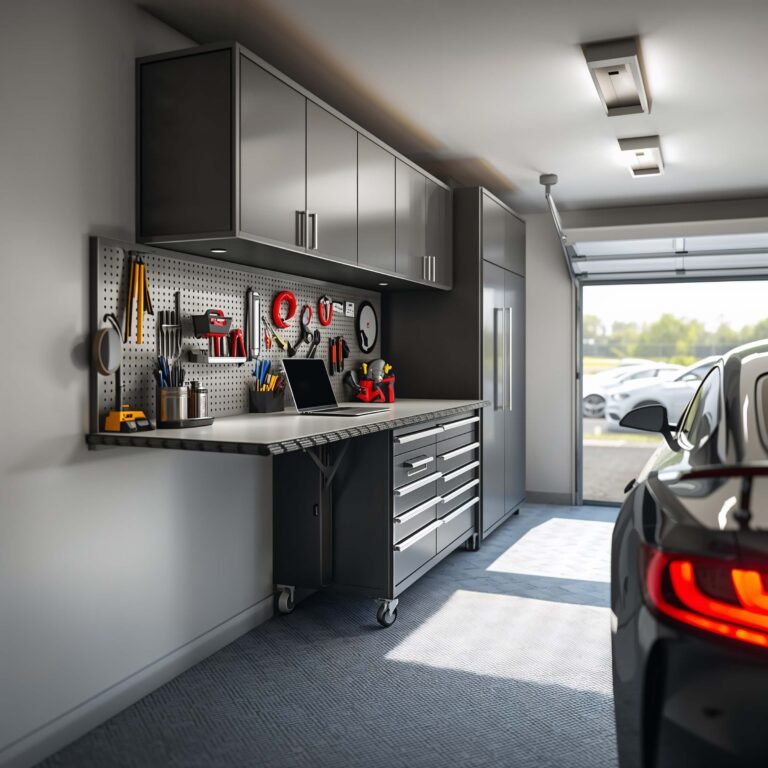
Workbench with Integrated Power Strip
Power Where You Need It, When You Need It
Let’s talk about the most underrated workbench upgrade ever: integrated power management. How many times have you strung extension cords across your garage like Christmas lights gone wrong? Or played musical outlets with your tools? An integrated power strip system ends that nonsense forever.
My powered workbench has transformed my workflow. I installed a heavy-duty power strip along the back edge with outlets every 16 inches. No more crawling under the bench to plug things in. No more tools pulling themselves off the bench because the cord’s too short. Just unlimited, convenient power exactly where I work.
But here’s where it gets really good – I added USB charging ports for phones, tablets, and rechargeable tool batteries. There’s also a built-in surge protector and a master switch that kills everything with one flip. Safety first, right? 🙂
Electrifying Your Workspace Properly
Adding power to your workbench requires planning and possibly an electrician (sorry, DIY evangelists, but electrical code exists for good reasons):
Power Strip Options:
- Bench-mounted metal strips: Professional grade, typically 20-amp rated
- Recessed power strips: Sit flush with the bench surface
- Retractable power centers: Pop up when needed, hide when not
- Under-bench mounted: Keeps the top clear but accessible
Installation Best Practices:
- Run a dedicated 20-amp circuit if you’re using serious power tools
- Install GFCI protection for safety (code requirement in many areas)
- Position outlets to avoid sawdust and liquid spills
- Add separate switches for different zones
Smart Additions:
- Built-in LED task lighting on the same circuit
- Pneumatic quick-connects if you use air tools
- 240V outlet for welders or large equipment
- Wireless charging pad for phones (because why not?)
The investment in proper power infrastructure pays dividends every single day. I calculated that I save about 10 minutes per project just from not dealing with extension cords. Over a year? That’s hours of actual productivity gained.
Choosing Your Perfect Workbench
So there you have it – 10 workbench ideas that can completely transform your garage workspace. Which one’s right for you? Well, that depends on your space, budget, and what drives you crazy about your current setup.
If you’re tight on space, that foldable or floating wall-mounted bench might be your salvation. Got a corner collecting cobwebs? The corner bench turns that dead zone into your favorite spot. Love having everything organized and visible? The modular pegboard system or multi-level storage bench will scratch that itch.
Here’s my advice: start with your biggest pain point. If you’re always hunting for outlets, prioritize that integrated power strip setup. If you can’t park in your garage, look at space-saving options. If you’re constantly moving projects around, go mobile.
Remember, the best workbench is the one you’ll actually use. Don’t get so caught up in building the “perfect” bench that you never get around to using it for actual projects. I’ve been there – spent three months perfecting a bench only to realize I’d rather be using it than endlessly tweaking it.
Whatever you choose, make it yours. Add that cup holder. Install those speakers. Paint it your favorite color. This is your space, your escape, your creative kingdom. Make it work for you, not some magazine’s idea of what a workshop should look like.
Now stop reading and start building. Your garage (and your sanity) will thank you. And hey, when you finish that amazing new workbench, you’ll finally have a proper place to build your next project. It’s the circle of DIY life, really.
Happy building, and may your measurements always be twice-checked and your cuts always be straight!