10 Inspiring Garage Floor Ideas and Modern Transformations
Look, we both know your garage floor looks like it survived a zombie apocalypse. Mine did too until I finally got tired of staring at those oil stains that seemed to multiply every time I blinked.
After transforming countless garage floors (okay, five, but who’s counting?), I’ve learned what works, what doesn’t, and what makes you question your life choices at 2 AM while covered in epoxy.
Your garage floor takes more abuse than a punching bag at a boxing gym. Cars drip mysterious fluids, tools fall with dramatic crashes, and somehow there’s always that one mystery stain that appeared overnight. But here’s the thing – your garage floor doesn’t have to look like a crime scene.
Whether you’re planning to create the ultimate man cave, need a functional workspace, or just want to stop apologizing every time someone sees your garage, I’ve got you covered.
These ten garage floor ideas range from weekend-warrior-friendly to “maybe-I-should-call-a-professional” territory.
Epoxy Coated Garage Floors
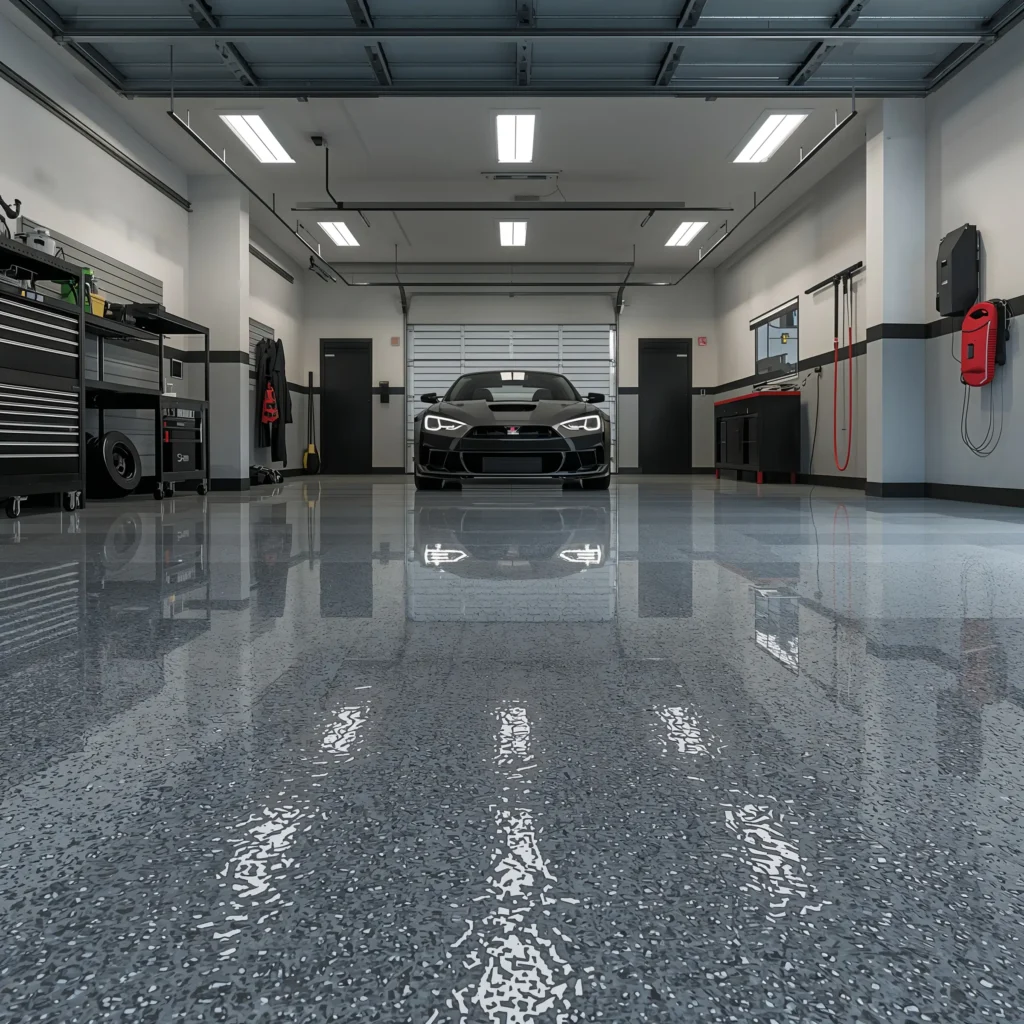
Let me start with the heavyweight champion of garage floors – epoxy coating. I installed my first epoxy floor three years ago, and honestly? It still looks better than my kitchen floor (don’t tell my wife).
Epoxy coating creates this super durable, glossy surface that makes your garage look like it belongs in a luxury car showroom. The stuff bonds directly to your concrete, creating a seamless surface that laughs in the face of oil spills and tire marks. You know that satisfying feeling when water beads up on a freshly waxed car? That’s your entire floor with epoxy.
Why Epoxy Rocks
The durability factor alone sold me on epoxy. This coating handles:
- Heavy vehicle traffic without breaking a sweat
- Chemical spills that would destroy regular concrete
- Temperature swings from freezing winters to scorching summers
- Impact from dropped tools (because we all know that happens)
Here’s what really surprised me though – the maintenance is ridiculously easy. A quick sweep and occasional mop, and you’re golden. Compare that to scrubbing oil stains out of bare concrete, and you’ll understand why I’m such an epoxy evangelist.
The Installation Reality Check
Now, before you run to the hardware store, let me give you the real talk about installation. Prep work makes or breaks your epoxy floor. You’ll spend more time preparing the surface than actually applying the epoxy – think 80% prep, 20% application.
The concrete needs to be:
- Completely clean (no oil, no dirt, no dreams of shortcuts)
- Properly etched or ground for adhesion
- Moisture-tested (moisture and epoxy go together like oil and water)
- Crack-free or properly repaired
Skip the prep work, and you’ll watch your beautiful new floor peel up like a bad sunburn. Trust me, I learned this lesson the expensive way.
Polished Concrete Garage Floors
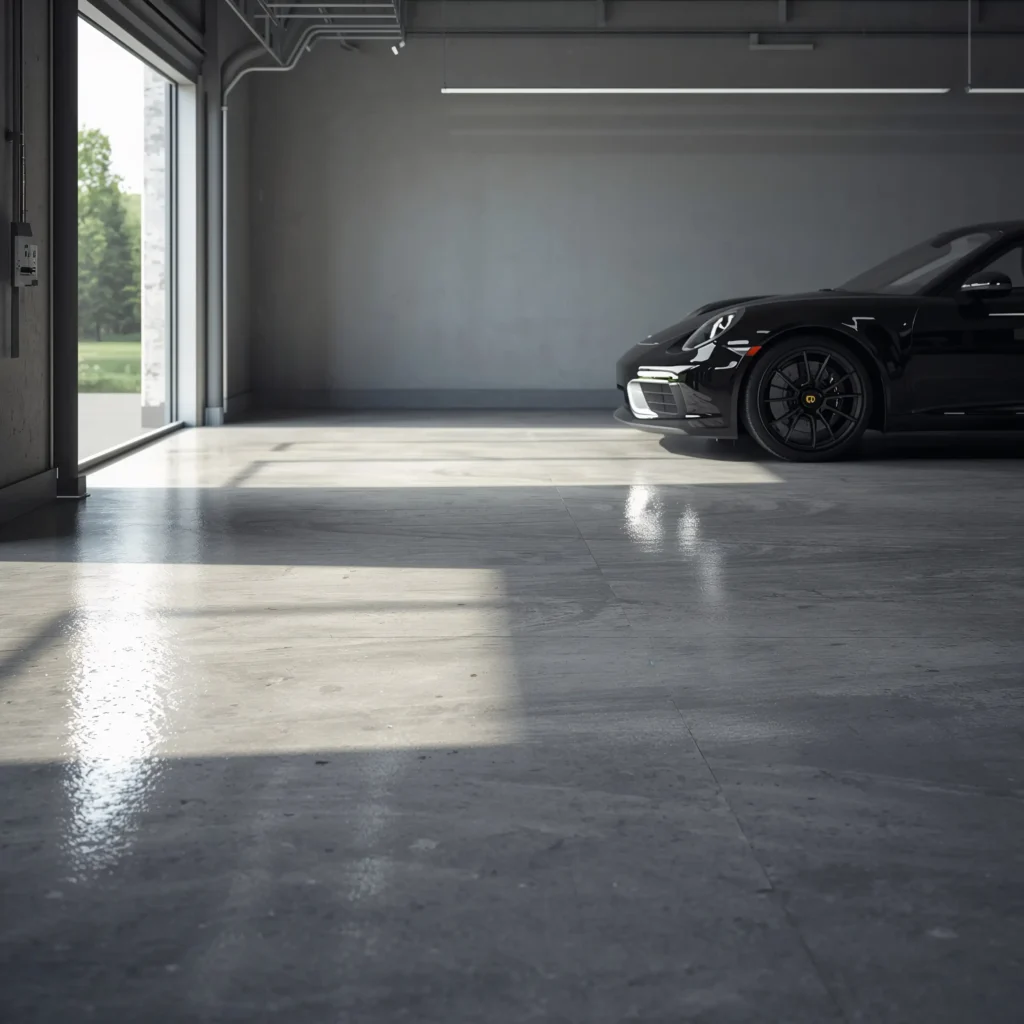
Ever walked into a high-end retail store and wondered how they got their floors so shiny? That’s polished concrete, and it works brilliantly in garages too. This option transforms your existing concrete into a mirror-like surface that looks expensive but costs less than you’d think.
I helped my neighbor install polished concrete last summer, and watching the transformation felt like one of those home makeover shows. The process involves grinding down the concrete surface with progressively finer grits until you achieve that glossy finish. Think of it like sanding wood, but with concrete and much bigger machines.
The Good, The Great, and The Glossy
What makes polished concrete such a winner? First off, you’re working with what you already have – no additional materials needed. The grinding process actually densifies the concrete, making it stronger and more resistant to stains and damage.
The benefits stack up quickly:
- Zero coatings to peel or chip over time
- Incredibly long-lasting (we’re talking decades)
- Reflects light, making your garage brighter
- Environmentally friendly (no VOCs or chemicals)
Maintenance and Reality
Here’s where polished concrete really shines (pun intended). The maintenance requirements are basically nothing. Dust mop occasionally, wet mop when needed, and maybe reapply a densifier every few years. That’s it. No waxing, no resealing every year, no special cleaners.
But let’s be real – this isn’t exactly a DIY weekend project unless you enjoy renting industrial floor grinders. The equipment alone costs more to rent than hiring a pro for smaller spaces. Plus, the dust… oh man, the dust. Even with proper vacuum systems, you’ll find concrete dust in places dust shouldn’t exist.
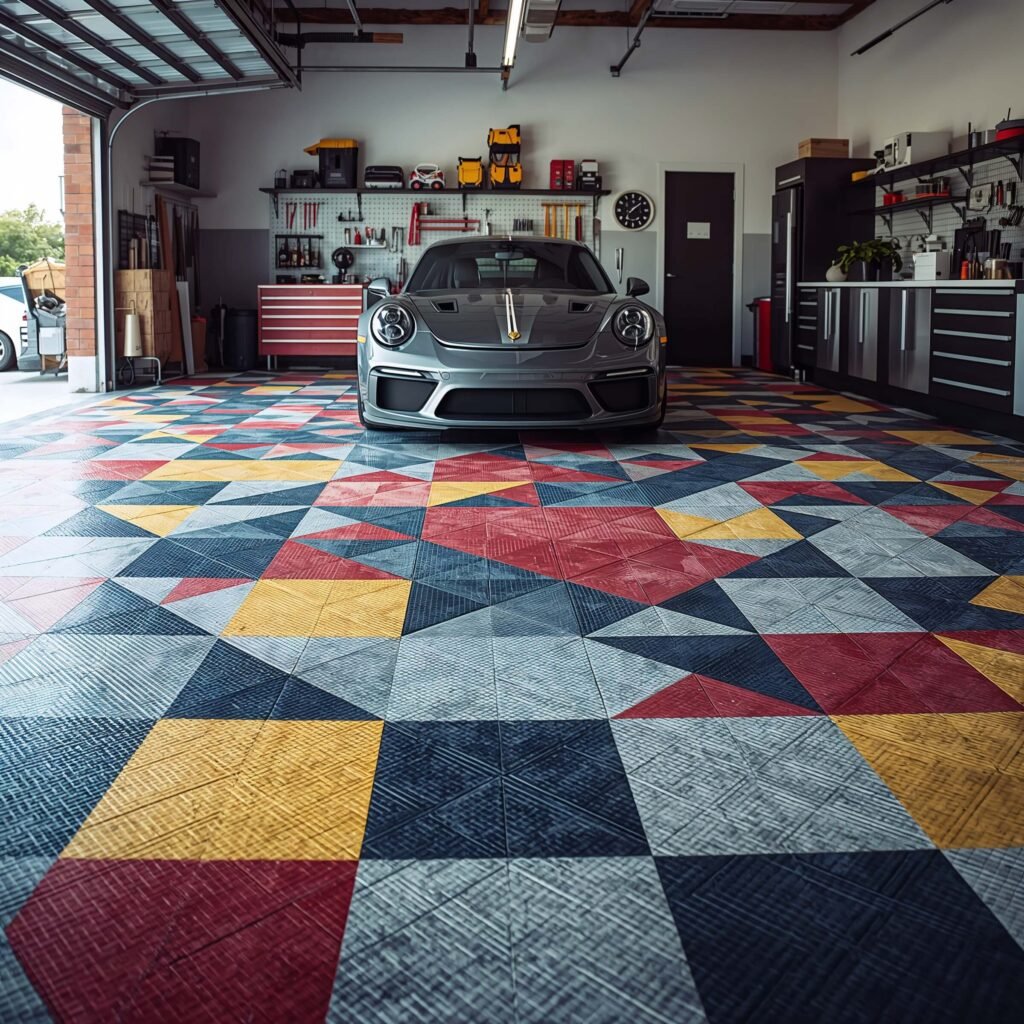
Interlocking Garage Floor Tiles

Remember playing with LEGO as a kid? Interlocking garage floor tiles work on the same principle, except they’re tough enough to park a truck on. These tiles snap together without any adhesive, making them perfect for commitment-phobes and renters alike.
I installed these in my last house’s garage, and the whole process took one Saturday afternoon. No mixing chemicals, no waiting for things to cure, no wondering if I just ruined my concrete forever. Just snap, snap, snap, done. The instant gratification factor alone makes these tiles worth considering.
Types and Options
The variety in interlocking tiles will make your head spin:
- Rigid plastic tiles for maximum durability
- Flexible PVC tiles for comfort underfoot
- Perforated tiles for drainage (great for wet climates)
- Solid tiles for a seamless look
What really caught my attention? The design possibilities. You can create patterns, borders, even logos with different colored tiles. My buddy created a giant checkerboard pattern that looks absolutely killer. Want to change it up next year? Just pop them up and rearrange.
The Pros Nobody Talks About
Beyond the easy installation, these tiles offer some sneaky benefits. They create an air gap between your concrete and the tile surface, which helps with moisture control and insulation. Standing on them for long periods feels way better than concrete – your back will thank you.
Temperature swings don’t faze these tiles either. They expand and contract as a floating floor system, so you don’t get the cracking and separation issues that plague some coatings. Plus, if you damage one tile (it happens), you just replace that single tile instead of redoing your entire floor.
Also Read: 10 Stylish Garage Workbench Ideas and Modern Designs
Stained Concrete Designs
Stained concrete transforms your boring gray slab into a work of art. And no, I’m not exaggerating – I’ve seen stained floors that look like marble, leather, or even abstract paintings. The key lies in how the stain reacts with your concrete, creating unique patterns and colors that can’t be replicated.
You’ve got two camps here: acid stains and water-based stains. Acid stains create those organic, mottled patterns through a chemical reaction with the concrete. Water-based stains give you more color options and consistent coverage. IMO, acid stains look more natural, but water-based stains give you better control over the final result.
Creating Your Masterpiece
The creative possibilities make stained concrete ridiculously fun. You can:
- Layer multiple colors for depth and dimension
- Use stencils for borders and patterns
- Score patterns into the concrete before staining
- Combine techniques for truly unique designs
I went with a coffee-brown acid stain with darker borders, and people constantly ask if it’s some kind of fancy imported tile. The organic variations in the color make it look expensive and intentional, not like I’m trying to hide old concrete.
Sealing the Deal
Here’s the catch with stained concrete – you absolutely need a good sealer. The stain itself doesn’t protect the concrete; it just colors it. Without a sealer, your beautiful stained floor will wear away faster than your New Year’s resolutions.
Choose your sealer based on:
- Sheen level (matte to high-gloss)
- Durability needs (foot traffic vs. vehicle traffic)
- Maintenance preferences (some need reapplication yearly)
- Slip resistance (especially important in garages)
Rubber Garage Flooring Mats
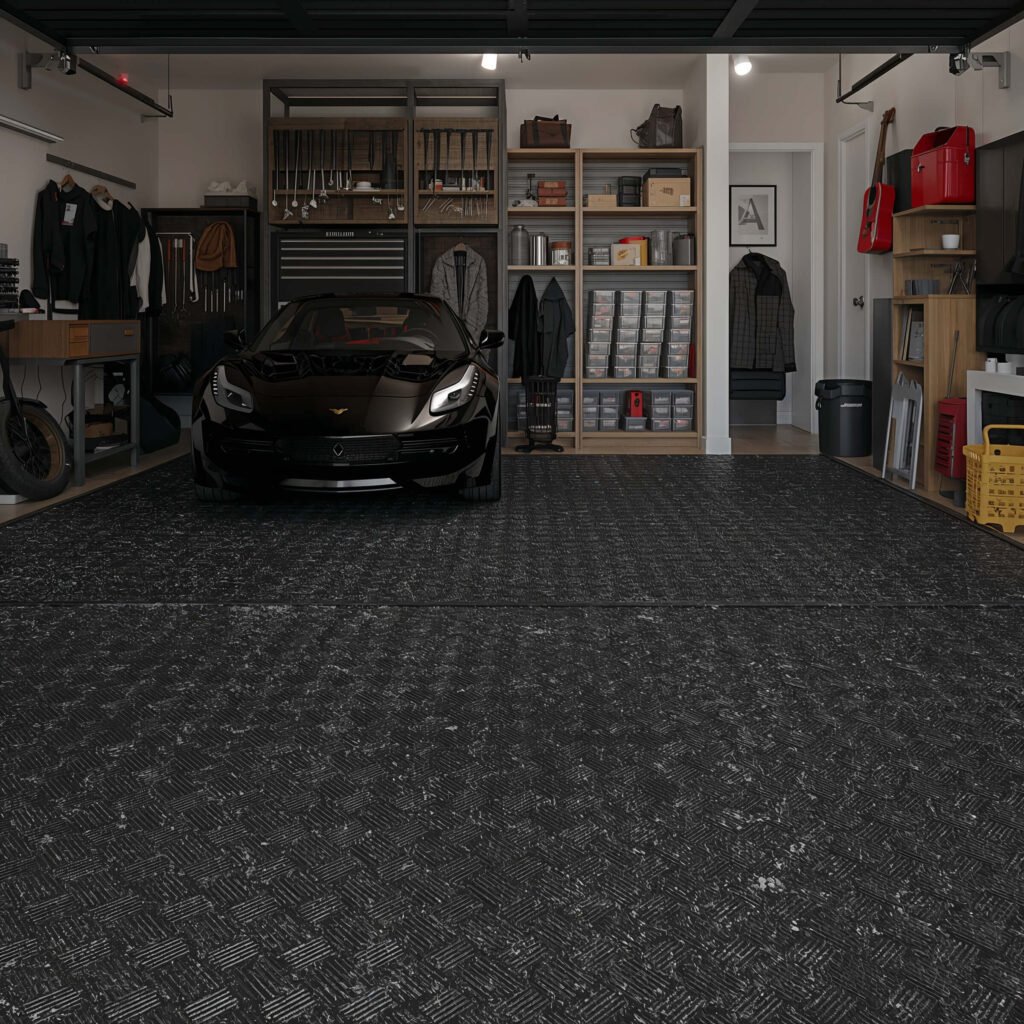
Rubber flooring might sound like something from a gym, but hear me out. These mats provide cushioning, insulation, and protection that hard surfaces can’t match. Plus, they’re practically indestructible – I’ve had the same rubber mats under my workbench for five years, and they still look new.
The comfort factor sells itself. Ever spent hours working on a project in your garage? Your feet, knees, and back know the pain of standing on concrete. Rubber mats provide that cushioning that makes marathon garage sessions actually bearable. They also insulate against cold concrete in winter – no more frozen toes! 🙂
Installation Options
Rubber flooring comes in several forms:
- Roll-out mats that cover large areas quickly
- Interlocking rubber tiles for custom configurations
- Parking mats specifically for under vehicles
- Diamond-plate patterns for that industrial look
What surprised me? The installation simplicity. Most rubber options just lay down without any adhesive. The weight keeps them in place, and the material grips the concrete naturally. You can literally transform your garage floor in an hour.
Durability That Surprises
These mats handle abuse like a champ. Oil, gasoline, antifreeze – rubber shrugs it all off. Drop a wrench? The rubber absorbs the impact. Drag something heavy across it? No scratches or gouges. The material bounces back from punishment that would destroy other flooring options.
The one downside? Hot tire pickup can be an issue with some rubber products. If you’re parking hot cars (like after a track day), make sure you get mats specifically rated for vehicle parking.
Painted Garage Floor Patterns
Before you roll your eyes at paint, let me tell you about modern garage floor paints. We’re not talking about that thin stuff from the 80s that peeled if you looked at it wrong. Today’s garage floor paints include epoxy hybrids and polyurethane formulas that actually stand up to garage abuse.
I painted my first garage floor as a broke college kid, and while it wasn’t perfect, it transformed the space for under $100. The key? Choosing the right paint and – surprise, surprise – proper prep work. A well-painted garage floor can last 3-5 years with decent maintenance.
Paint Types That Actually Work
Not all paints deserve garage floor duty:
- 1-Part epoxy paint: Easier to apply than true epoxy, more durable than regular paint
- Latex concrete paint: Budget-friendly but needs frequent touch-ups
- Polyurethane paint: Super durable but pricey
- Acrylic concrete stain: Penetrates concrete for longer-lasting color
Pattern Possibilities
This is where painted floors get fun. You can create:
- Racing stripes down the center
- Geometric patterns with painter’s tape
- Faux tile designs with contrasting colors
- Border designs to define spaces
My current setup has gray paint with white parking guides and a red border around my workbench area. Total cost? About $150. Time invested? One weekend. Satisfaction level? Through the roof.
Also Read: 10 Genius Two Car Garage Organization Ideas and Storage Tips
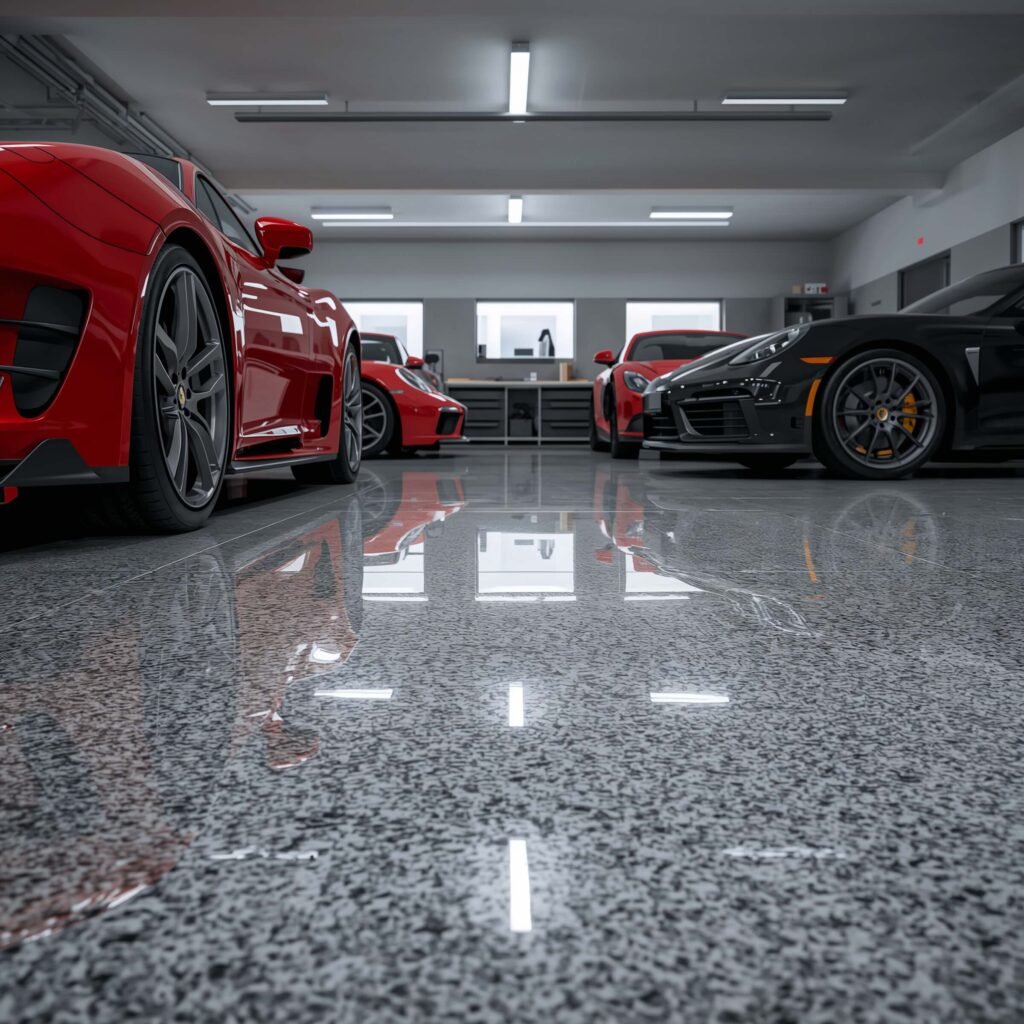
Metallic Epoxy Garage Floors

Want your garage to look like it belongs in a sci-fi movie? Metallic epoxy creates these insane 3D effects that look like molten metal, marble veining, or even lunar craters. The metallic pigments create depth and movement that photos honestly can’t capture.
I watched a pro install metallic epoxy once, and it looked like magic. They poured the epoxy, added metallic pigments, then manipulated the surface to create swirls and patterns. The final result? Mind-blowing. Every angle shows different colors and patterns – it’s like having a lava lamp as your floor.
The Installation Adventure
Fair warning: metallic epoxy isn’t for beginners. The installation requires:
- Perfect timing on pigment application
- Specific techniques for creating patterns
- Temperature and humidity control
- Experience to know when to stop manipulating
You get one shot at this. Once the epoxy starts curing, that’s it – no do-overs. But man, when done right, metallic epoxy floors become the centerpiece of your garage. I’ve seen grown adults lie on the floor just to stare at the patterns.
Cost vs. Impact Analysis
Let’s talk money. Metallic epoxy costs significantly more than standard epoxy – we’re talking $8-12 per square foot installed. But consider this: it’s still cheaper than high-end tile, and the visual impact destroys any other flooring option.
The durability matches standard epoxy, so you’re not sacrificing function for form. Just prepare for every visitor to spend the first five minutes discussing your floor instead of whatever they came to see.
Garage Floor with Checkerboard Tiles
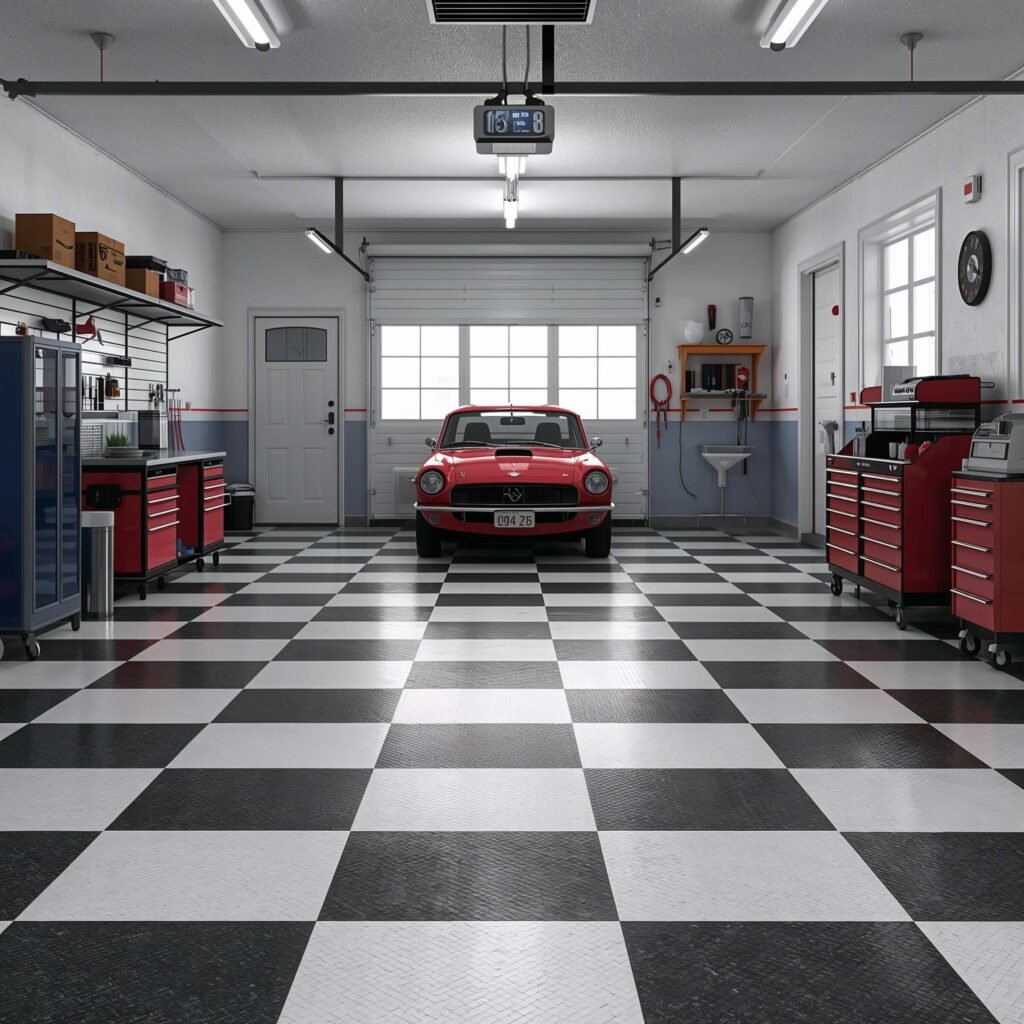
Checkerboard floors scream “classic garage” louder than a ’57 Chevy. Whether you go with actual tiles or create the pattern with paint or stickers, this timeless design never goes out of style. It’s been good enough for race shops and showrooms for decades, so why not your garage?
I installed checkerboard tiles in my buddy’s garage, and the transformation was incredible. The pattern naturally hides imperfections and dirt while creating visual interest that plain floors can’t match. Plus, it photographs beautifully – his Instagram game improved overnight.
Material Options for Checkerboard
You can achieve the checkerboard look with:
- VCT (Vinyl Composition Tiles): Classic and affordable
- Interlocking plastic tiles: Easy DIY installation
- Painted checkerboard: Budget-friendly but labor-intensive
- Porcelain tiles: High-end and super durable
Pattern Psychology
Here’s something interesting – checkerboard patterns actually make spaces feel larger. The alternating colors create depth perception tricks that expand the visual space. Your garage instantly feels more organized and purposeful, even if you haven’t touched anything else.
Want to get creative? Try:
- Different sized checks for unique looks
- Diagonal installation for dynamic appeal
- Border patterns to frame the checkerboard
- Three-color patterns for something unexpected
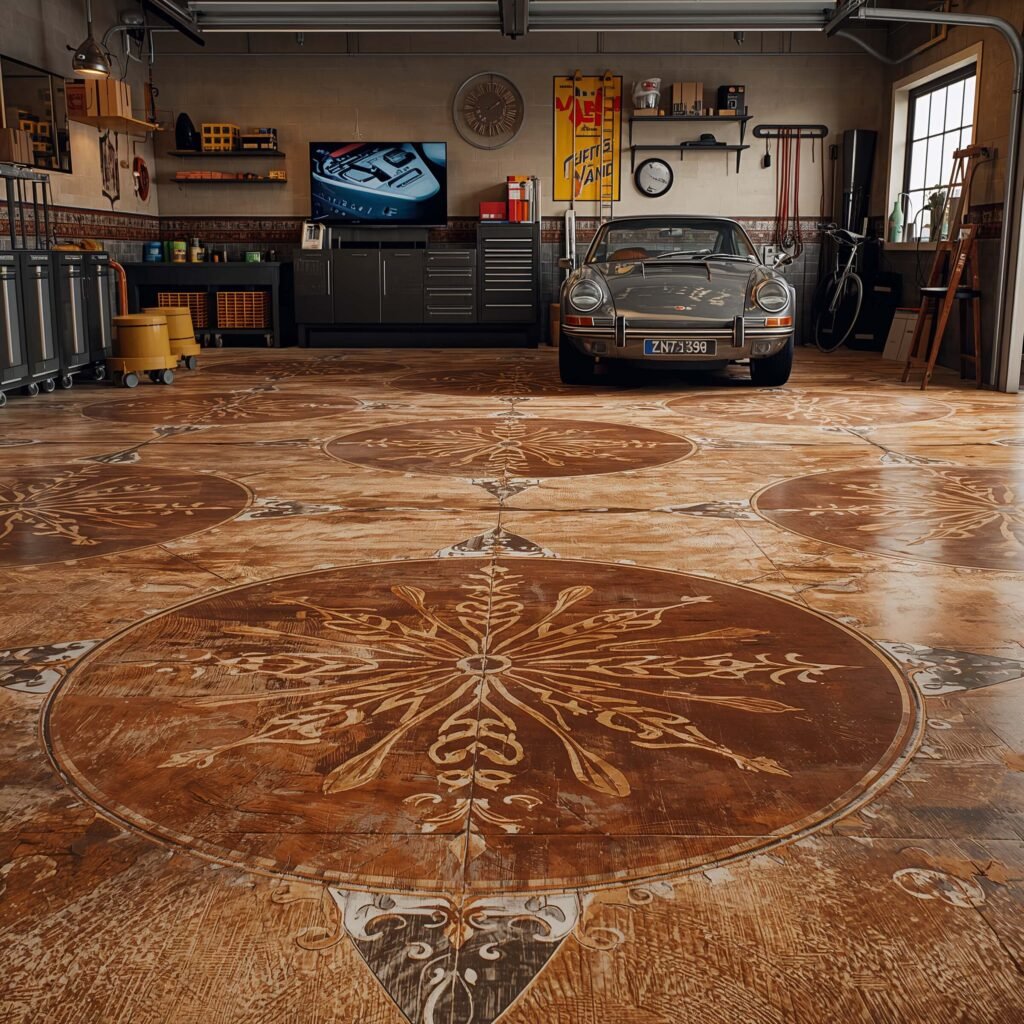
DIY Garage Floor Stenciling
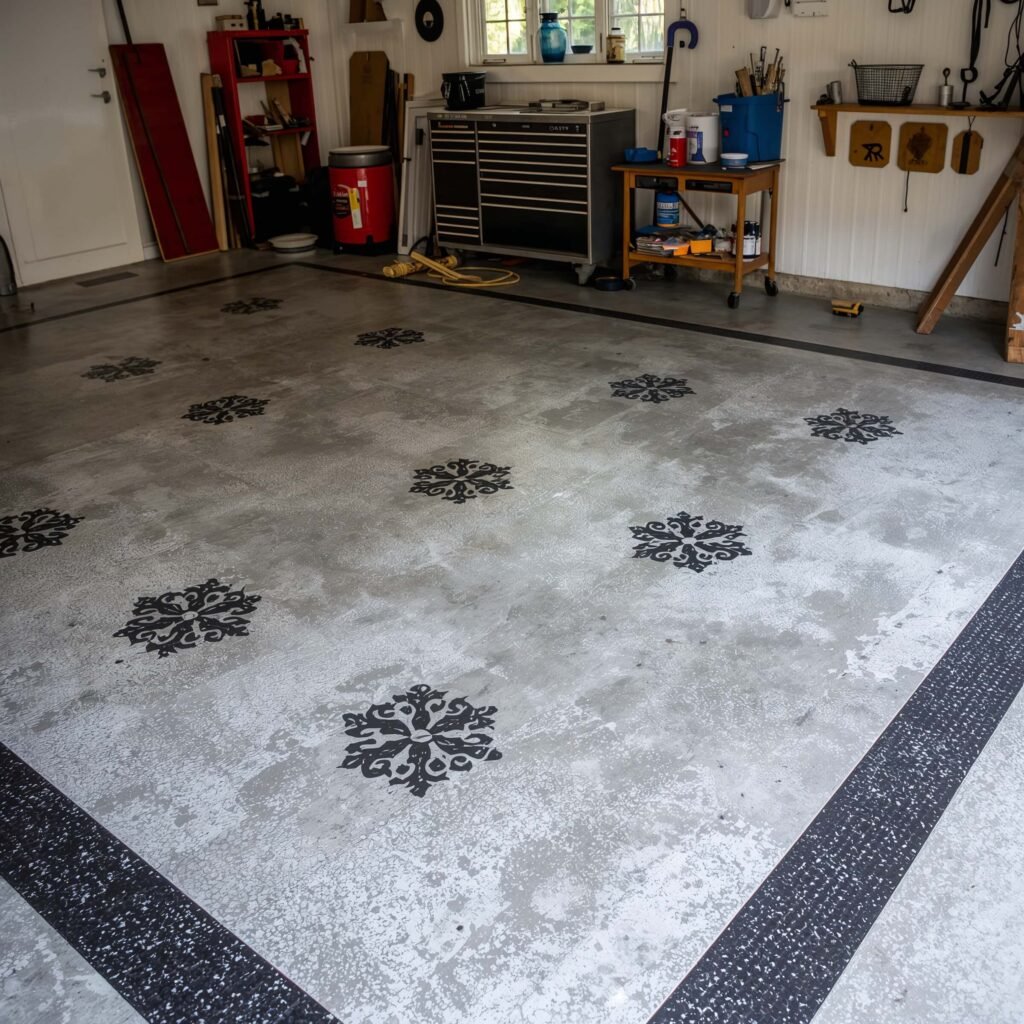
Stenciling turns your concrete into a custom canvas without the custom price tag. Armed with stencils, paint, and patience, you can create patterns that rival expensive tile or stone. The best part? If you mess up, you just paint over it and try again.
I stenciled a brick pattern in my first garage, and while it took forever, people genuinely thought I’d installed real brick pavers. The key lies in choosing the right stencil pattern and taking your time with the application. This isn’t a race – it’s a marathon of careful placement and painting.
Stencil Patterns That Work
Popular patterns include:
- Brick or stone patterns for classic appeal
- Moroccan tiles for exotic flair
- Geometric designs for modern looks
- Custom logos or designs for personalization
FYI, larger patterns work better in garages than tiny, intricate designs. You want something that reads well from standing height, not something you need to crouch down to appreciate.
The Process and Patience Required
Stenciling demands patience like nothing else:
- Clean and prime your concrete thoroughly
- Plan your layout with chalk lines
- Secure stencils firmly to prevent bleeding
- Apply thin coats – multiple thin beats one thick
- Remove stencils while paint is slightly wet
- Seal everything once completely dry
The whole process might take a week of evenings, but the custom result beats any off-the-shelf solution. Plus, you’ll have serious bragging rights when people ask about your floor.
Also Read: 10 Amazing Garage Makeover Ideas and Modern Design Tips
Garage Floor with Resin Coating
Resin coatings represent the premium tier of garage flooring. While similar to epoxy, resin systems offer superior chemical resistance, UV stability, and longevity. Think of resin as epoxy’s overachieving older sibling – more expensive but worth it for demanding applications.
I upgraded to polyurea resin in my current garage after living with epoxy for years. The difference? Night and day. The resin cures faster, resists yellowing, and handles hot tire pickup without flinching. It costs more upfront, but I’m convinced I’ll never need to redo this floor.
Types of Resin Systems
Different resins serve different purposes:
- Polyurea: Fastest curing, extreme durability
- Polyurethane: Excellent chemical resistance
- Polyaspartic: UV stable, won’t yellow
- Hybrid systems: Combine benefits of multiple resins
Professional Installation Worth It?
Here’s my honest take: hire a pro for resin floors. The materials cost nearly as much as professional installation, the application window is unforgiving, and mistakes mean starting over. Pros have the right equipment, experience, and insurance if something goes wrong.
Professional installation typically includes:
- Diamond grinding for proper adhesion
- Moisture testing and mitigation if needed
- Primer and multiple coating layers
- Decorative flakes or colors if desired
- Warranty protection for peace of mind
Making Your Choice
So which garage floor idea wins? Honestly, it depends on your situation. If you’re renting or might move soon, go with interlocking tiles or rubber mats. Want maximum durability? Epoxy or resin coatings deliver. On a tight budget? Paint or staining work wonders. Feeling creative? Stenciling or metallic epoxy let you express yourself.
I’ve tried half of these options personally, and each has its place. My current polyurea resin floor might be my favorite, but I still remember the satisfaction of that first DIY paint job. The best garage floor is the one that fits your budget, skills, and needs – not what some magazine says you should have.
Remember, your garage floor takes more abuse than any other floor in your house. Whatever you choose, invest in proper prep work and quality materials. Shortcuts today mean headaches tomorrow. Trust someone who learned that lesson with a peeling epoxy floor that haunted my dreams.
Your garage deserves better than bare concrete with mystery stains. Pick one of these ideas, block out a weekend (or hire someone who knows what they’re doing), and transform that neglected slab into something worth showing off. Who knows? You might actually start parking in your garage again. :/