10 Creative Garage Shelving Ideas for Heavy-Duty Storage
My garage shelving collapsed last year. Not just sagged a little – completely collapsed. Thirty gallons of paint, power tools worth more than my car payment, and my entire collection of “I’ll fix that someday” parts crashed to the floor at 2 AM.
The sound woke up the entire neighborhood, and my wife still hasn’t let me forget it.
That disaster taught me something crucial: garage shelving isn’t just about organization – it’s about engineering. You can’t just slap some boards on brackets and hope for the best when you’re storing hundreds of pounds of gear. Trust me, I learned that lesson in the most expensive way possible.
Since then, I’ve rebuilt my entire garage storage system using heavy-duty solutions that could probably survive a hurricane. These 10 shelving ideas handle serious weight without breaking a sweat (or your bank account).
Whether you’re storing engine blocks or just accumulated years of “stuff,” these solutions will keep everything safely off the floor and easy to find.
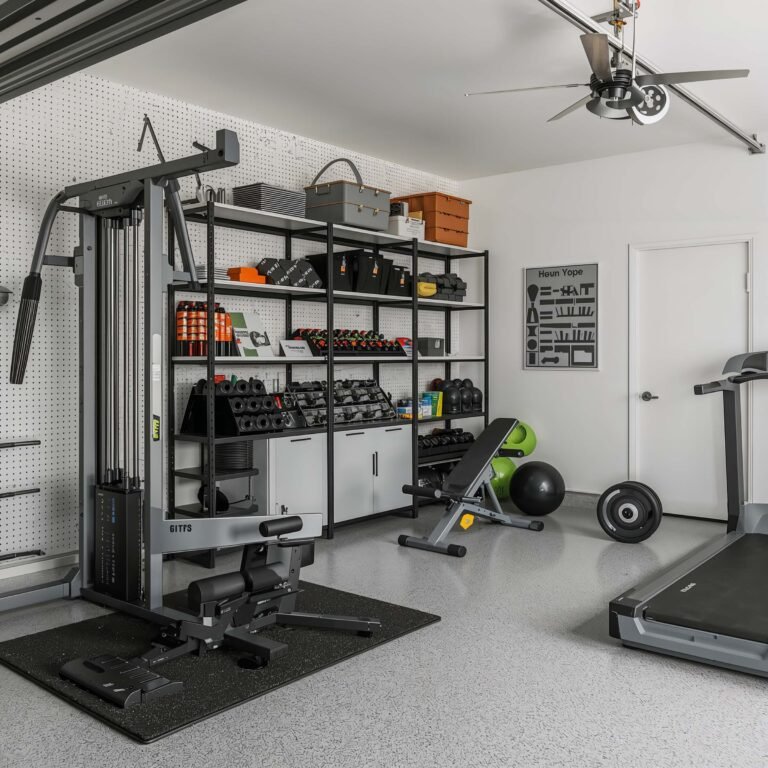
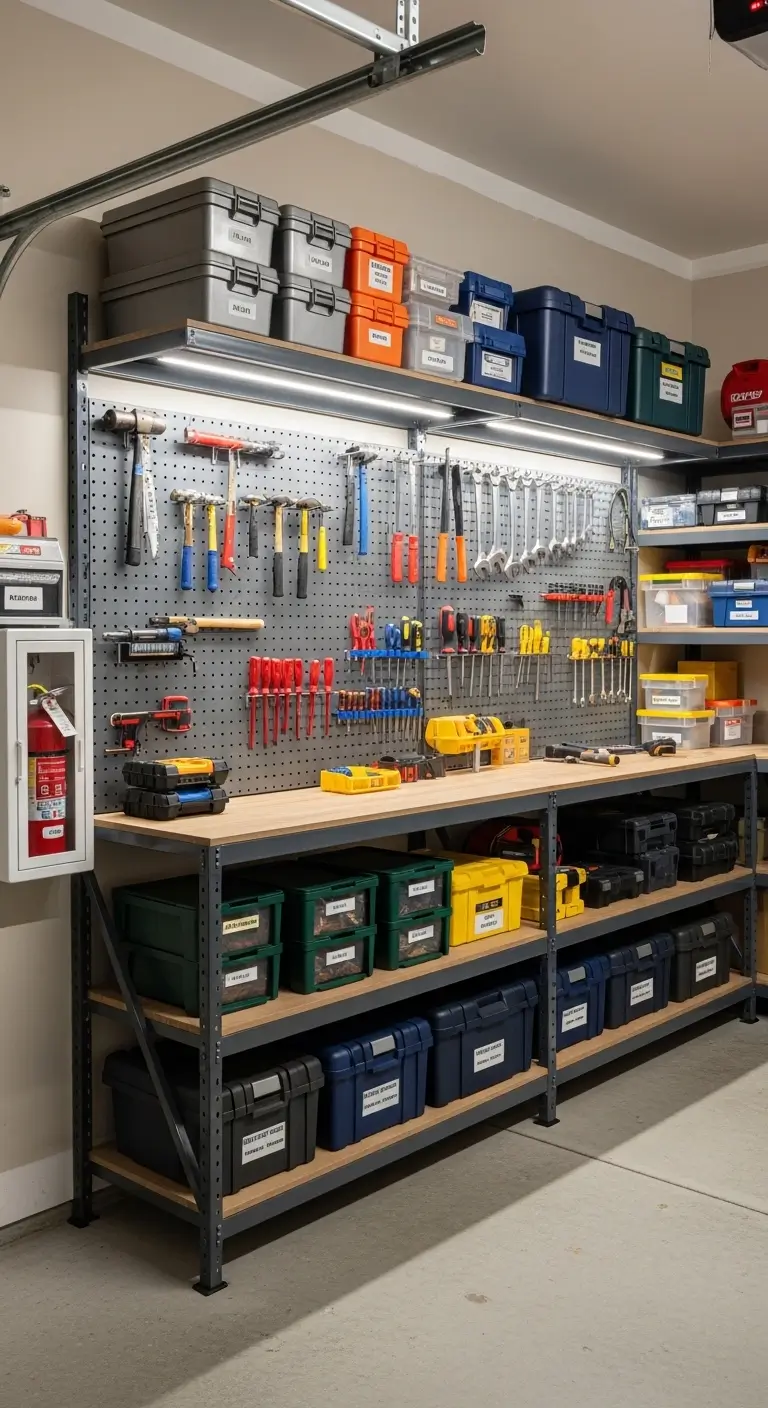
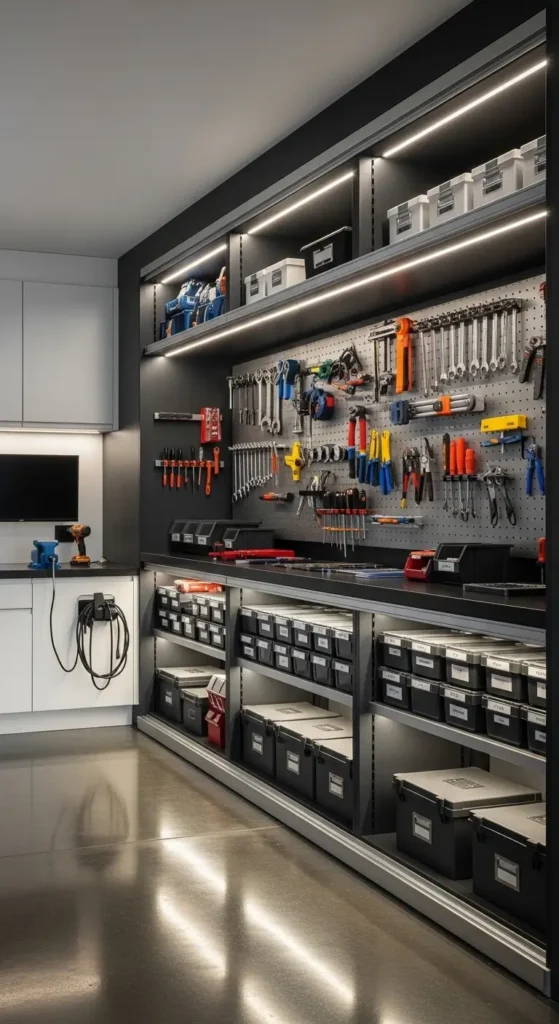
Wall-Mounted Modular Shelves
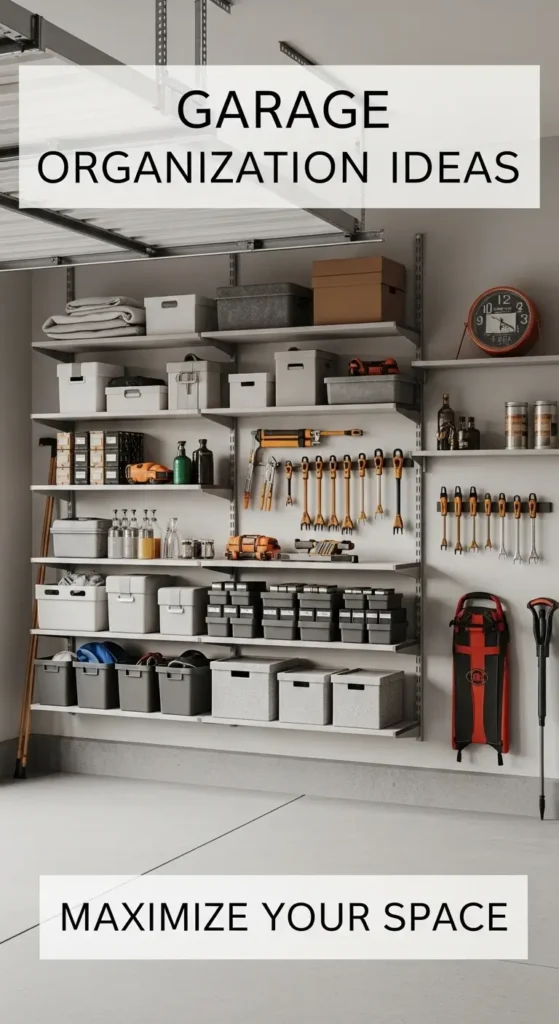
Wall-mounted modular systems changed everything about how I think about garage storage. These aren’t your grandmother’s decorative shelves – we’re talking serious weight capacity with the flexibility to reconfigure whenever needed.
The Track System Advantage
The magic happens with vertical tracks mounted directly to wall studs. Here’s what makes them incredible:
- Hold up to 500 pounds per shelf when properly installed
- Adjustable brackets move up or down in seconds
- No permanent shelf positions limiting your options
- Add or remove shelves as storage needs change
I installed heavy-duty tracks from a commercial supplier (way stronger than retail versions). My setup spans 16 feet of wall and currently holds 15 shelves at various heights. The flexibility means I can store tall items like my pressure washer without wasting vertical space.
Installation Tips That Matter
Getting the installation right makes all the difference:
- Find every stud with a good stud finder (not the cheap ones)
- Use 3-inch lag screws minimum for the tracks
- Level everything obsessively or shelves will slide
- Space tracks 32 inches apart for standard shelf lengths
My first attempt had tracks slightly off-level. Watching boxes slowly migrate to one side was entertaining until they fell off. Learn from my stupidity – use a 4-foot level, not that tiny torpedo level you think is good enough.
Overhead Loft Storage Shelves
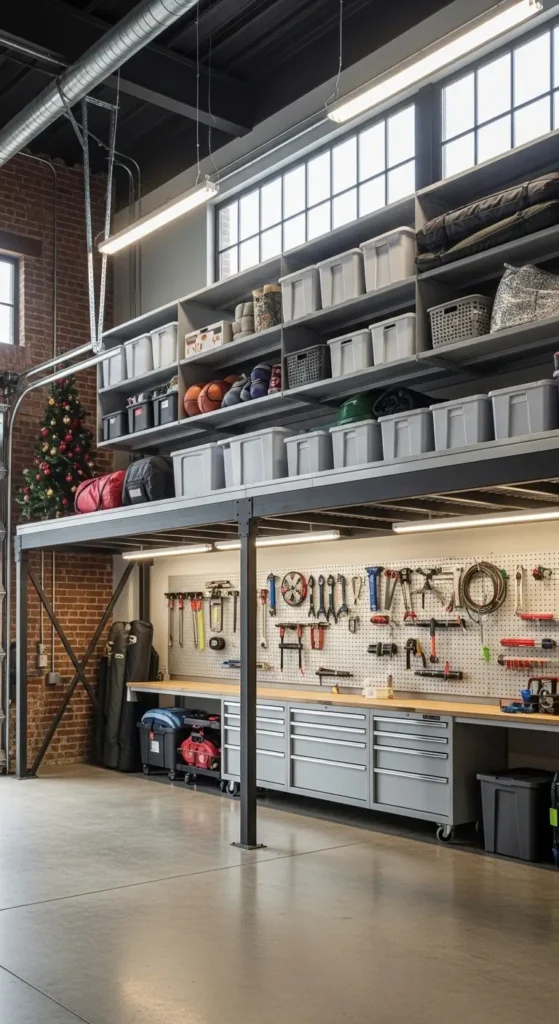
Look at your garage ceiling. Now imagine that entire space filled with organized storage instead of cobwebs and dust. Overhead loft shelving literally doubles your storage capacity without sacrificing any floor space.
Building the Support Structure
Creating bomb-proof overhead shelving requires serious support:
- 2×6 or 2×8 joists spanning across ceiling rafters
- Carriage bolts through rafters (not just screws)
- Plywood decking at least 3/4 inch thick
- Safety railings because gravity always wins
My overhead loft holds 600 pounds of seasonal decorations and camping gear. I overengineered it on purpose – better to build it once than rebuild it after it crashes through your windshield.
Access Solutions That Work
Getting stuff up and down safely matters:
- Sturdy ladder permanently mounted nearby
- Pulley systems for heavy boxes
- Clear labeling visible from below
- Weight distribution maps (seriously, make one)
I use a simple pulley system with a boat winch for heavy items. Cost me $40 and saves my back every time. My neighbor just heaves boxes up there and hopes for the best. Guess whose storage hasn’t collapsed yet?
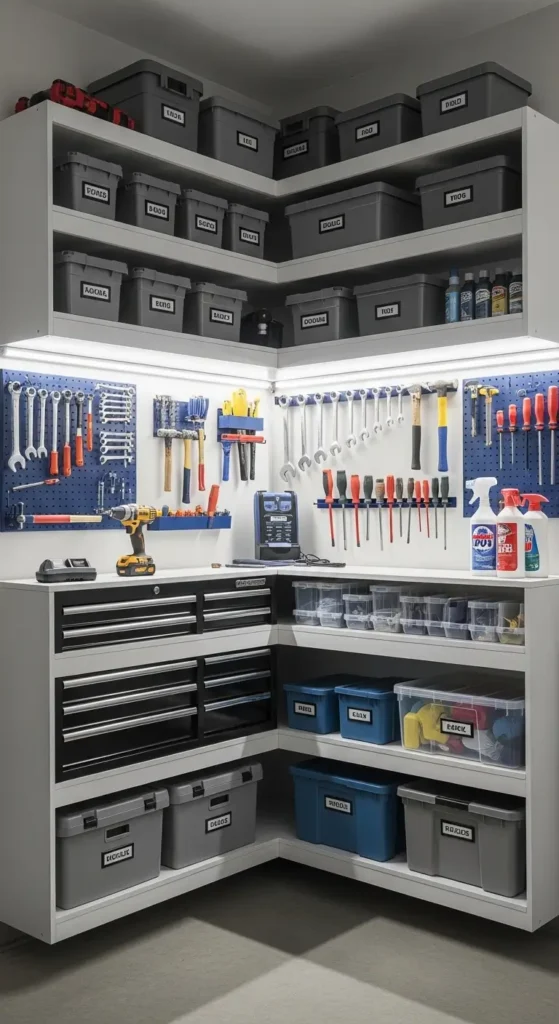
Adjustable Metal Shelving Units
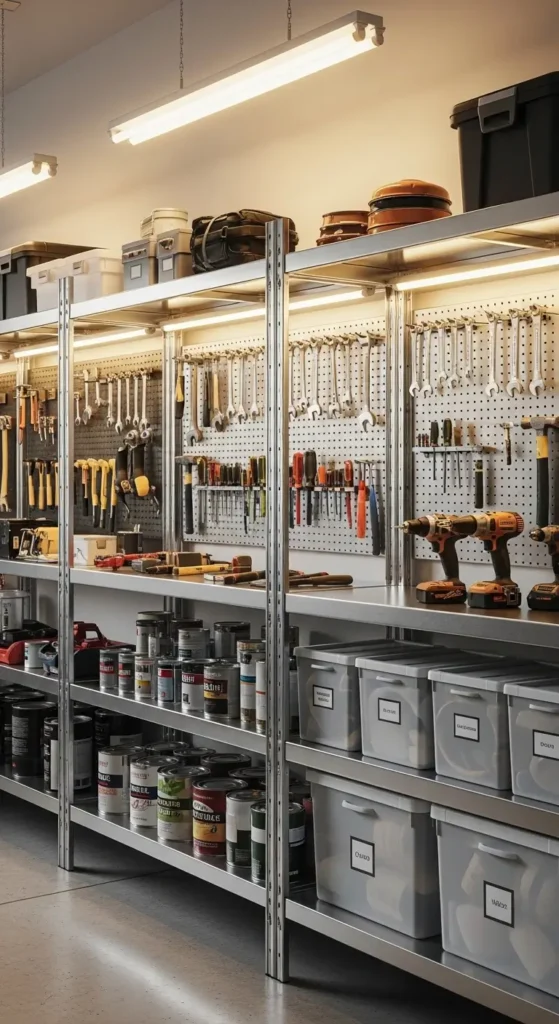
Sometimes you need shelving that just works without any fuss. Commercial-grade metal shelving units deliver instant heavy-duty storage with zero construction skills required.
Why Metal Beats Everything Else
Metal shelving handles abuse that would destroy other materials:
- No warping from humidity or temperature changes
- Rust-resistant coating on quality units
- Weight ratings up to 2000 pounds per shelf
- Easy to clean oil and chemical spills
I bought restaurant surplus shelving units for half the retail price. These things are built to hold commercial kitchen equipment – your tool collection doesn’t even make them sweat.
Configuration Strategies
Maximize metal shelving effectiveness:
- Group heavy items on lower shelves
- Use shelf liners to prevent small items from falling through
- Add casters to move units when needed (get locking ones)
- Zip-tie units together for stability in earthquake zones
My three metal units work as a modular system. I can separate them for different projects or combine them into one massive storage wall. That flexibility alone justifies the investment.
Also Read: 10 Stylish DIY Garage Storage Ideas for an Organized Garage
Wooden Floating Garage Shelves
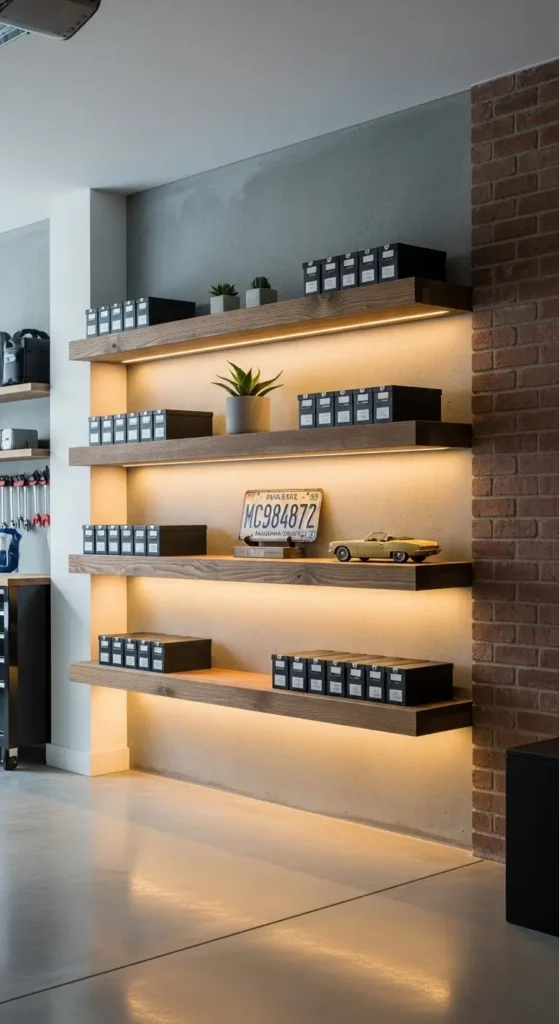
Floating shelves in a garage? Sounds fancy, but properly built ones handle serious weight while looking surprisingly good. Who says garage storage can’t have style?
The Hidden Bracket System
The secret to strong floating shelves lies in the mounting:
- Steel floating shelf brackets rated for 100+ pounds
- Toggle bolts if you miss studs (but try not to)
- 2-inch thick wood minimum for heavy loads
- Multiple brackets for shelves over 3 feet
I built 8-foot floating shelves using construction lumber and heavy-duty brackets. They hold my entire collection of power tool cases and still look cleaner than traditional shelving. Total cost? $100 per shelf.
Wood Selection Matters
Choose wood based on what you’re storing:
- Construction grade pine for general storage
- Plywood laminate for chemical resistance
- Hardwood if you’re feeling fancy (and rich)
- Treated lumber for damp garages
Skip the particle board unless you enjoy watching shelves slowly bow into smiles. I learned that lesson with my first attempt. Real wood costs more but lasts forever.
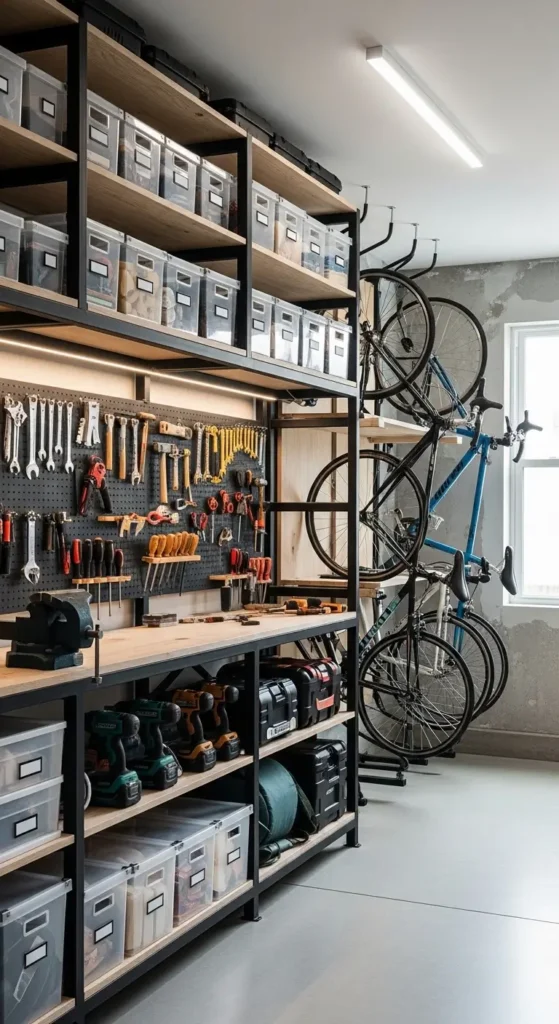
Pegboard and Shelf Combo

Why choose between pegboard and shelves when you can have both? This combo system gives you tool organization plus shelf storage in the same wall space.
The Hybrid Installation
Creating an integrated system:
- Install pegboard first as your base layer
- Mount shelf brackets through pegboard into studs
- Use spacers behind pegboard for hook clearance
- Alternate shelves and pegboard sections
My combo wall has shelves at eye level and shoulder height with pegboard filling the gaps. Tools hang within easy reach while supplies sit on shelves above. It’s organizational perfection.
Maximizing Both Functions
Make both elements work together:
- Shelves for boxes and contained items
- Pegboard for tools needing quick access
- Bins on shelves matching pegboard accessories
- Color coding across both systems
I use red bins on shelves and red pegboard hooks for electrical stuff, blue for plumbing, green for garden. Sounds anal-retentive? Maybe, but I can find anything in seconds.
Corner Shelving for Tight Spaces
Corners are the Bermuda Triangle of garage storage – stuff goes in and never comes out. Purpose-built corner shelving changes that dead space into prime real estate.
The 45-Degree Solution
Corner shelves require different thinking:
- Triangular shelves maximize corner space
- 45-degree support brackets distribute weight properly
- Graduated sizes from bottom to top
- Open sides for easy access
I built a five-tier corner unit that holds more than you’d expect. Each shelf is a different depth, creating a pyramid effect that’s actually quite stable. Plus, nothing gets lost in dark corners anymore.
Corner Unit Construction Tips
Build it right the first time:
- Measure twice because corners are rarely square
- Use a corner clamp for assembly
- Anchor to both walls for maximum stability
- Test weight gradually starting from bottom shelf
My first corner shelf was a disaster because I assumed my garage corners were 90 degrees. Spoiler alert: they weren’t. Now I measure everything and trust nothing.
Also Read: 10 Simple Garage Mudroom Ideas for Clean and Tidy Homes
DIY Pipe and Wood Shelves
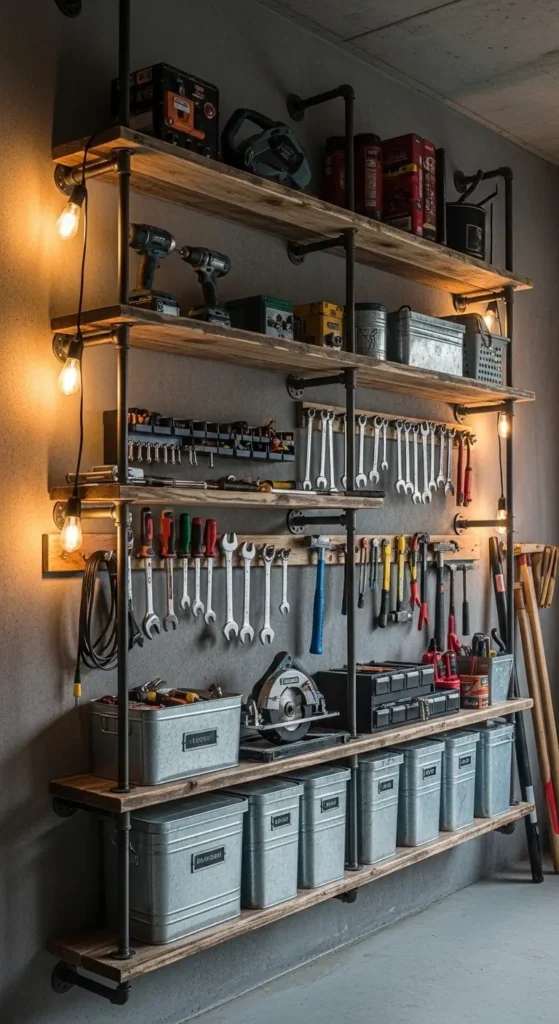
Industrial pipe shelving is having a moment, and for good reason. It’s strong, customizable, and gives your garage that “I definitely know what I’m doing” vibe.
The Pipe System Components
Building with pipes is like adult Legos:
- Black iron pipes for strength (galvanized for outdoors)
- Floor flanges for wall mounting
- Threaded connectors for adjustable configurations
- Wood boards for shelves (2-inch thick minimum)
My pipe shelving system cost $200 and looks like it belongs in a trendy brewery. It holds 300 pounds per shelf without any flex. The industrial aesthetic is just a bonus, IMO.
Assembly Without Plumbing Skills
You don’t need to be a plumber:
- Buy pre-cut threaded pipes from hardware stores
- Hand-tighten everything (no special tools needed)
- Use thread locker on connections you won’t adjust
- Level each shelf before adding the next
I built my entire system in an afternoon with just a wrench and drill. The modular design means I can reconfigure it anytime. Currently, it holds paint cans, but last month it was full of car parts.
Heavy-Duty Industrial Shelves
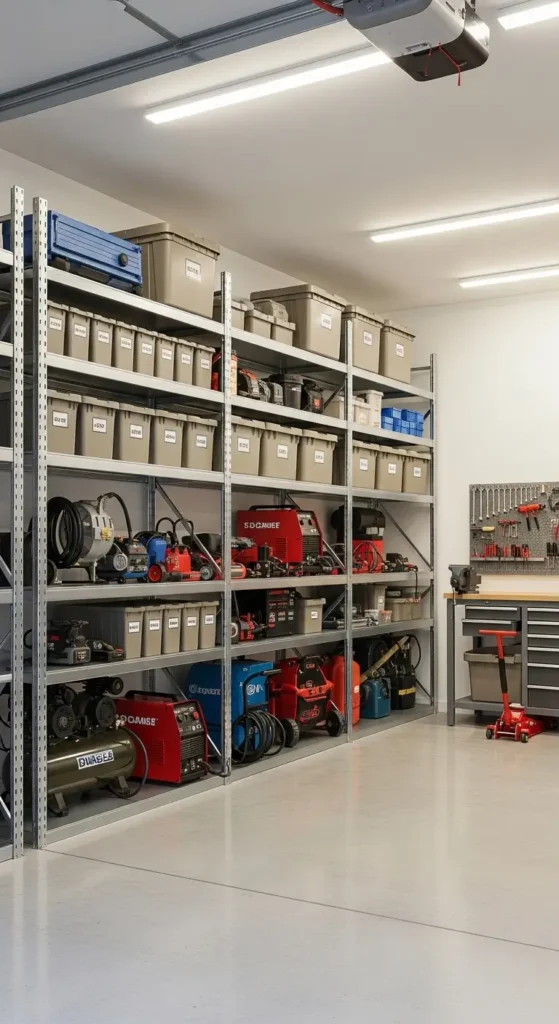
When you need shelving that could survive the apocalypse, industrial shelving is your answer. These aren’t pretty, but they’ll outlast your house.
Commercial-Grade Components
Industrial doesn’t mean expensive:
- Pallet rack uprights from warehouse liquidations
- Wire decking or plywood shelves
- Safety clips preventing accidental beam removal
- Rated for 4000+ pounds per shelf level
I bought decommissioned warehouse racking for $50 per section. Each shelf holds more weight than my car. Overkill? Maybe, but my transmission sitting on that shelf isn’t going anywhere.
Professional Installation Standards
Install like the pros do:
- Concrete anchors rated for the load
- Shim everything perfectly level
- Cross-bracing between units
- Load capacity labels on each shelf
Following OSHA guidelines for warehouse racking seems excessive for a home garage, but those standards exist for good reasons. My shelving could probably survive an earthquake. Actually, it has – twice.
Sliding Garage Shelving System
Sliding shelves are the secret weapon nobody talks about. They double your storage in the same footprint by letting you access multiple rows.
The Track System Setup
Creating sliding functionality:
- Heavy-duty barn door hardware for the tracks
- Reinforced mounting board across the entire span
- Quality rollers that won’t bind under load
- Stops preventing shelves from sliding too far
My sliding system has three shelving units on tracks. The front two slide apart to reveal a third unit behind them. It’s like having a secret storage room hidden in plain sight 🙂
Weight Distribution Considerations
Sliding systems need careful planning:
- Balance loads on each rolling unit
- Heavier items on stationary back unit
- Smooth flooring where units roll
- Regular track maintenance for easy sliding
I learned to keep heavy stuff on the back unit after nearly throwing out my back trying to slide 500 pounds of tools. Physics wins every time – respect it or regret it.
Also Read: 10 Practical Garage Loft Ideas for Easy Storage Upgrades
Multi-Tier Open Rack Shelves
Open rack systems maximize both storage and accessibility. No doors, no drawers, just pure efficient storage you can see and grab instantly.
The Stadium Seating Approach
Multi-tier design principles:
- Graduated depths from top to bottom
- Clear sight lines to all stored items
- Logical grouping by frequency of use
- Proper spacing for your tallest items
My six-tier open rack follows a simple rule: stuff I use daily at waist height, weekly at shoulder height, monthly up high, and heavy stuff down low. This system naturally organizes itself based on actual use.
Preventing the Avalanche Effect
Open shelving needs boundaries:
- Lip edges on shelves preventing roll-offs
- Dividers between different item categories
- Bungee cords for temporary securing
- Non-slip mats keeping things in place
After losing a box of screws to the avalanche effect (3000 screws, took two hours to clean up), I added 2-inch lips to every shelf. Simple upgrade, massive difference.
Making Your Heavy-Duty Storage Dreams Real
Here’s what five years of garage shelving experiments taught me: start with your heaviest items and build around them. That box of grandma’s china doesn’t need industrial racking, but your tool collection might.
My garage now has a mix of everything I’ve described. Metal shelving for chemicals and paint, pipe shelves for frequently used tools, overhead storage for seasonal stuff, and that industrial rack holding car parts that could anchor a boat. Each system serves its purpose perfectly.
The biggest mistake people make? Under-building their shelving. Those particle board shelves from the big box store might look fine, but they’ll sag within a year under real weight. Spend a little more upfront, build it right, and you’ll never worry about another midnight crash.
FYI, once you start building proper shelving, you’ll realize how much stuff you actually own. I discovered I had four hammers, three tape measures, and enough screws to build a house. The good news? Now I know exactly where all of it lives.
Your garage doesn’t have to be a disaster zone where finding anything requires an archaeology degree. Pick one of these systems, start building, and watch your garage transform from chaos to organized workspace. Trust me, the first time you walk straight to exactly what you need without digging through piles, you’ll wonder why you waited so long.
Now stop reading and start building. Those tools aren’t going to organize themselves, and that pile of “miscellaneous” boxes isn’t getting any smaller. Your future organized self will thank you every time you don’t have to play garage Jenga to find a screwdriver.