10 Inspiring Garage Shoe Storage Ideas for Organized Floors
You know that moment when you open your garage door and immediately trip over a pile of shoes that looks like a footwear graveyard? Yeah, I used to start every morning with that delightful experience, usually followed by some creative profanity that would make a sailor blush.
My garage floor used to be a minefield of muddy boots, forgotten flip-flops, and mysteriously single shoes (where do the other ones go, seriously?). Between my family’s sports gear, work boots, and the kids’ ever-growing collection of sneakers, we had about 40 pairs creating chaos by the door.
The final straw came when I stepped on my son’s soccer cleat at 5 AM – barefoot. That spike to the arch changed my life.
Three months and a lot of trial and error later, our garage shoe situation went from disaster zone to organization goals. These 10 shoe storage solutions transformed our garage entry from embarrassing mess to something I actually show off to neighbors.
Whether you’re dealing with work boots that could double as boats or a collection that would make Imelda Marcos jealous, these ideas will get your shoes off the floor and your sanity back intact.
Overhead Shoe Racks
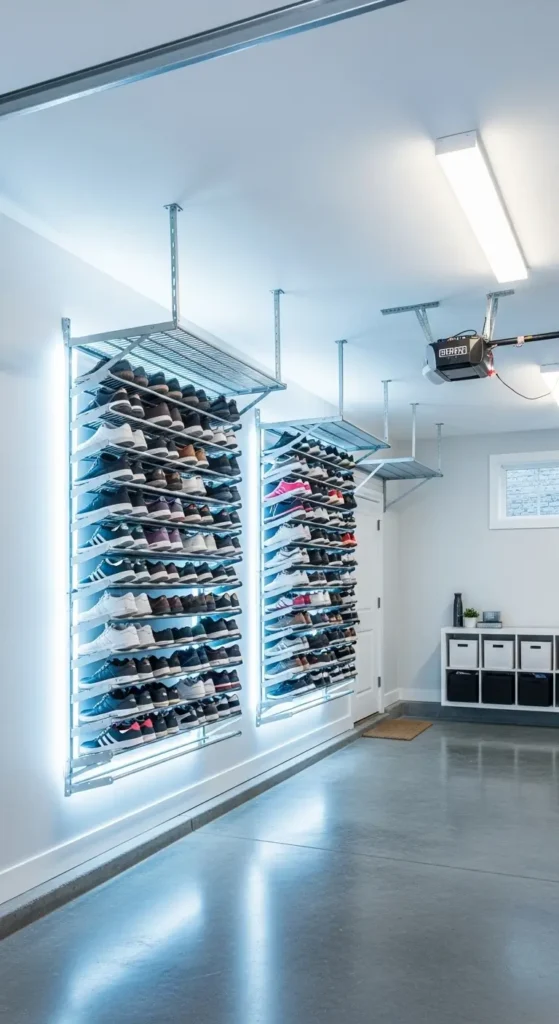
Let me blow your mind with a simple truth: you’ve got tons of unused space above your head in the garage, just waiting to store those seasonal shoes you only wear three months a year.
The Ceiling Storage Revolution
Installing overhead shoe racks freed up 20 square feet of floor space in my garage. Here’s what makes them brilliant:
- Seasonal rotation becomes automatic
- Zero floor footprint means more parking space
- Adjustable heights accommodate boots to ballet flats
- Out of sight but still accessible when needed
I built my overhead system using heavy-duty garage ceiling hooks and wire shelving from a restaurant supply store. Total investment? $75. Number of times I’ve tripped over snow boots in July since then? Zero.
Installation That Won’t End in Disaster
Getting overhead storage right requires some planning:
- Find the ceiling joists (seriously, use a stud finder)
- Install tracks or hooks rated for at least 50 pounds
- Use bins or racks with lips to prevent shoe rain
- Label everything so you remember what’s up there
My first attempt involved drywall anchors. Let’s just say gravity won that round, and my car hood still has the dent to prove it. Learn from my mistakes – always anchor into actual joists.
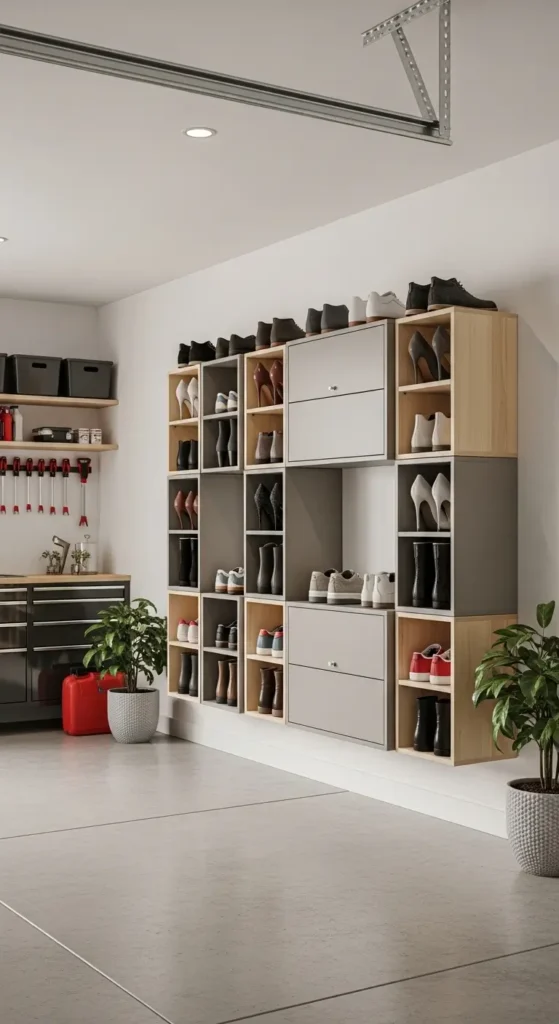
Sliding Garage Shoe Cabinets
Sliding cabinets are like having a secret shoe closet that appears when you need it and disappears when you don’t. Magic? No. Genius? Absolutely.
The Space-Saving Slide System
Here’s why sliding cabinets beat traditional doors every time:
- No swing space needed for door clearance
- Full access to all shoes when open
- Completely hidden mess when closed
- Customizable interiors for different shoe types
I installed mine along the garage wall where we park. The cabinets slide on barn door hardware, and when closed, they look like regular wall panels. Visitors have no idea there are 30 pairs of shoes hiding behind them.
Building vs Buying
You can DIY sliding cabinets for about $200:
- Plywood boxes for the cabinet structure
- Barn door hardware kit from any home store
- Adjustable shelves inside for flexibility
- Soft-close mechanisms to prevent slamming
I built mine over a weekend, and honestly, they work better than the $800 system I priced at the furniture store. Plus, I sized them exactly for our space and shoe collection.
Pegboard Shoe Organizer
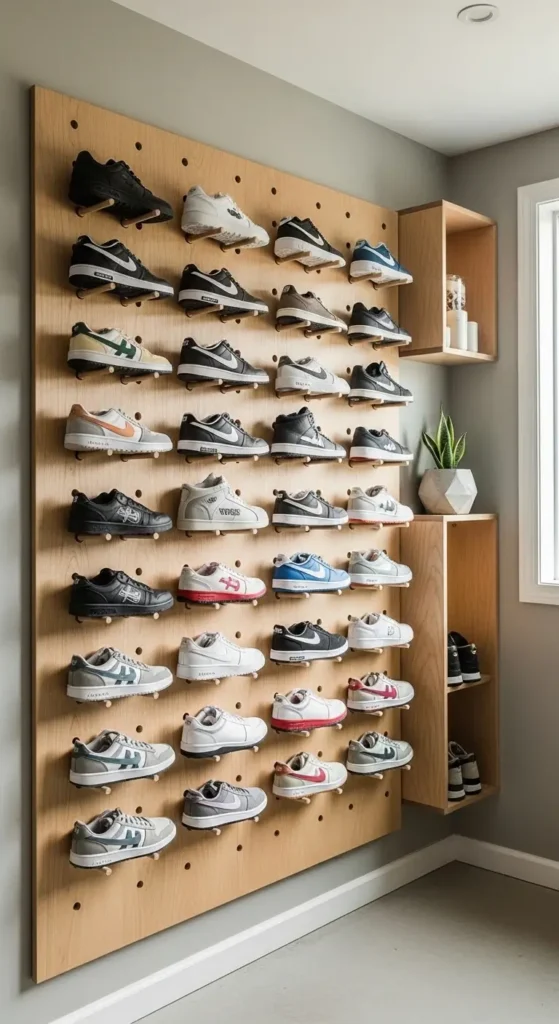
Who says pegboard is just for tools? With the right hooks and holders, pegboard becomes the ultimate customizable shoe storage system.
The Pegboard Transformation
Converting pegboard for shoe storage opened my eyes to its versatility:
- Adjustable hooks move as your collection changes
- Different peg styles for heels, sneakers, and boots
- Visible storage so you find shoes instantly
- Vertical display that actually looks good
My pegboard shoe wall started as leftover material from my tool organization project. Now it holds 15 pairs of frequently worn shoes, and I can reconfigure it in minutes when needs change.
Hook Hacks for Every Shoe Type
Different shoes need different solutions:
- Double hooks for sneakers (heel on top hook)
- Long pegs for boots standing upright
- Angled hooks for heels and dress shoes
- Basket attachments for flip-flops and sandals
I spray-painted my pegboard black and use chrome hooks. Looks way more sophisticated than you’d expect from pegboard. My wife actually requested I expand it – that’s when you know you’ve nailed it.
Also Read: 10 Creative Garage Shelving Ideas for Heavy-Duty Storage
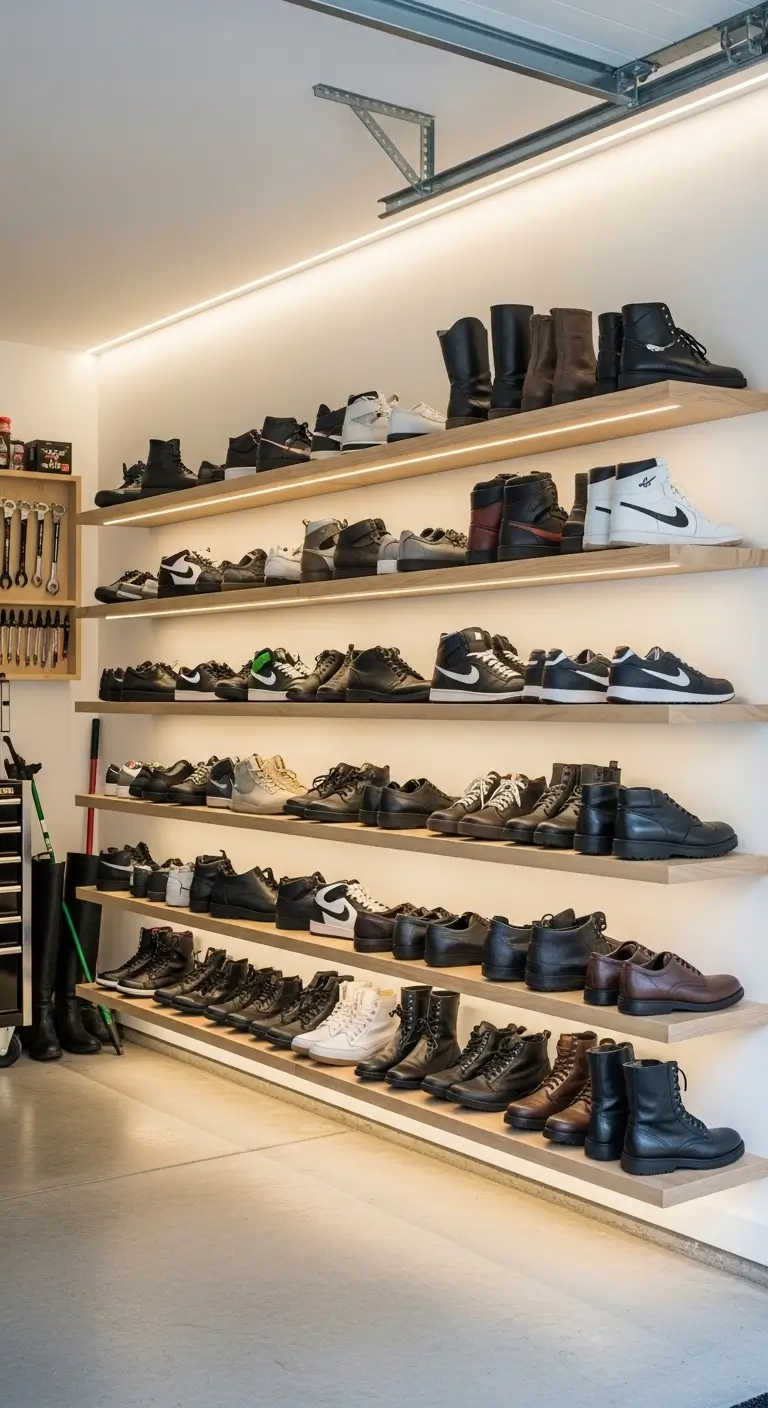
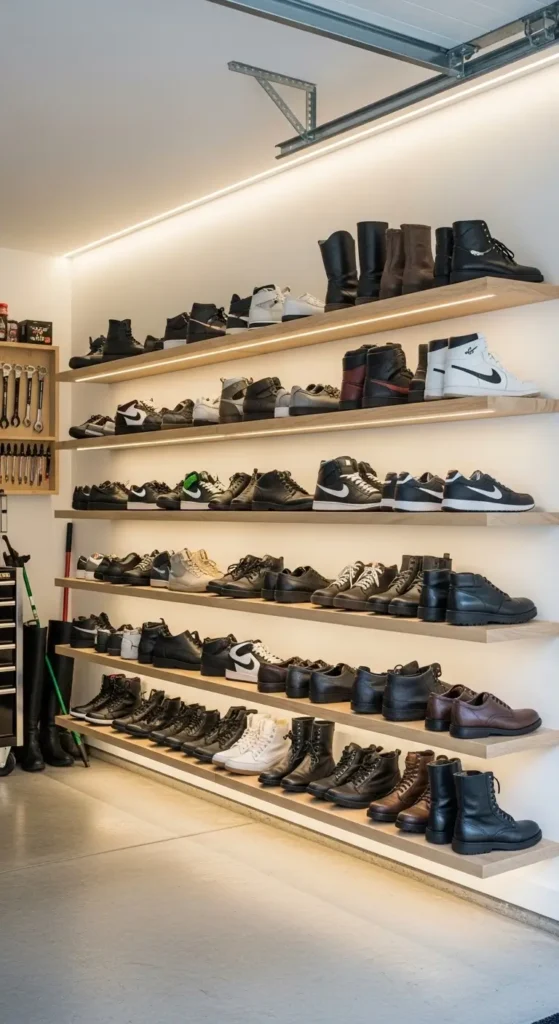
Wall-Mounted Shoe Shelves
Wall-mounted shelves turn dead wall space into prime shoe real estate. No floor space required, just vertical ambition.
Floating Shelf Systems
Installing floating shelves for shoes changed everything:
- Multiple tiers maximize vertical space
- Open visibility means no hunting for pairs
- Easy cleaning underneath (no more dust bunnies)
- Adjustable spacing for boots versus flats
I installed five floating shelves at different heights based on shoe types. Work boots on bottom (heavy), sneakers at eye level (frequently used), and dress shoes up high (rarely worn). Logic beats randomness every time.
The Angle Advantage
Here’s a pro tip nobody mentions: angle your shelves slightly:
- 5-degree tilt keeps shoes from falling
- Better visibility of shoes in back rows
- Natural organization as shoes slide back
- Heel support for high heels and wedges
My angled shelves have saved countless shoes from tumbling onto the garage floor. That tiny tilt makes such a huge difference, especially during those rushed morning searches.
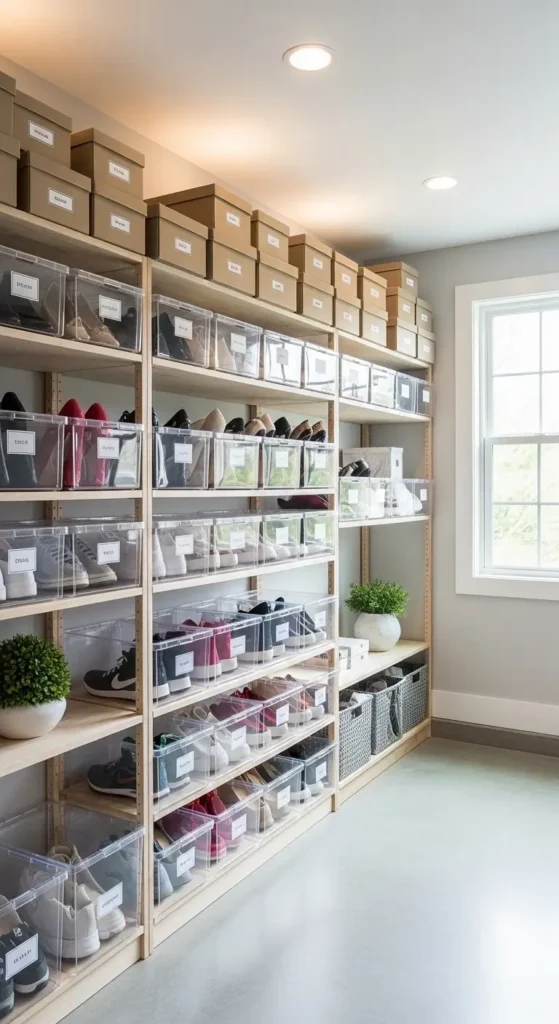
Clear Plastic Shoe Bins
Clear bins solve the age-old problem of “I know I have those shoes somewhere.” When you can see everything, you can find everything.
The Visibility Factor
Clear storage beats solid containers every time:
- Instant identification without opening boxes
- Stack-ability that doesn’t sacrifice access
- Protection from dust and garage grime
- Moisture control with ventilation holes
I switched from cardboard boxes to clear bins last year. Game changer. My morning shoe search went from five minutes of cursing to five seconds of grabbing. That’s 30 extra minutes of sleep per month, BTW.
Bin Organization Strategy
Maximize your bin system:
- Photo labels on the front (smartphone pics work)
- One pair per small bin or three pairs per large
- Seasonal grouping for easy rotation
- Silica packets in bins for moisture control
My 24-bin system holds our entire off-season collection. Each bin has a photo label, and I can grab exactly what I need without disturbing the tower. My teenager actually keeps her shoes organized now – miracles do happen.
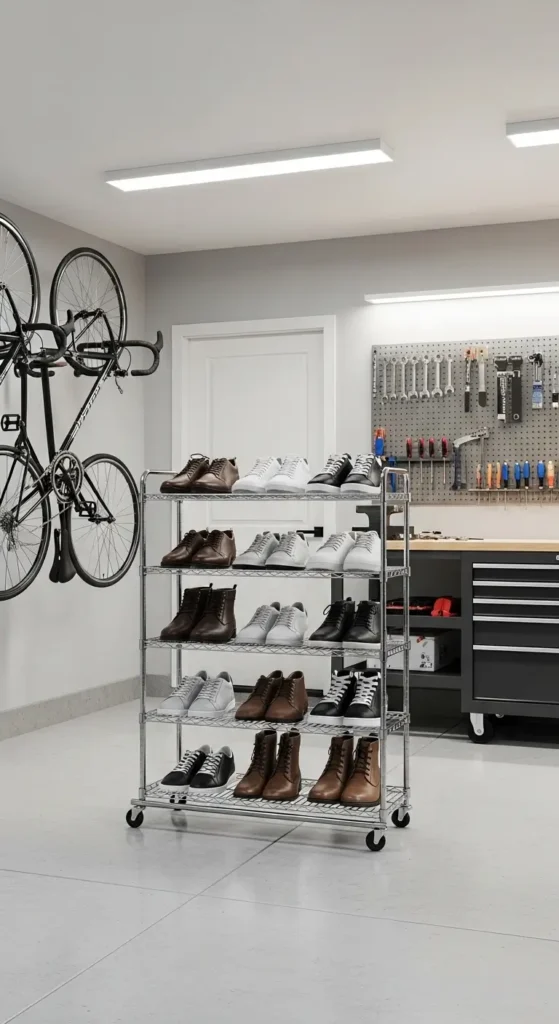
Rolling Shoe Carts
Mobile shoe storage sounds weird until you realize the genius of wheels. Move your shoes wherever you need them, whenever you need them.
The Mobility Advantage
Rolling carts offer flexibility fixed storage can’t match:
- Easy cleaning underneath and behind
- Seasonal swapping without heavy lifting
- Indoor/outdoor transitions for parties
- Reconfiguration as needs change
My rolling cart lives against the wall most days but rolls out for cleaning or when I’m rotating seasonal shoes. During our last garage sale, I rolled it inside to protect the inventory. Try doing that with built-in shelves.
Industrial Cart Conversion
Transform a utility cart into shoe storage gold:
- Metal utility cart from restaurant supply (super sturdy)
- Add mesh shelves for ventilation
- Install dividers to prevent sliding
- Locking wheels to keep it stationary
My converted restaurant cart holds 20 pairs and cost $60 used. It could probably hold a car engine, so shoes don’t even make it break a sweat.
Also Read: 10 Stylish DIY Garage Storage Ideas for an Organized Garage
DIY Pallet Shoe Rack

Before you scroll past thinking “not another pallet project,” hear me out. Pallets are free, sturdy, and already designed for storage. Plus, they give your garage that rustic-industrial vibe everyone’s after.
The Pallet Transformation Process
Turning pallets into shoe storage is simpler than you think:
- Sand thoroughly (splinters and shoes don’t mix)
- Add backing to prevent shoes falling through
- Install at an angle for better visibility
- Stack or hang depending on your space
I scored three pallets from a local warehouse for free. Two hours of work later, I had a shoe rack that holds 25 pairs and looks like it came from a boutique store. Total cost: $15 for sandpaper and stain.
Customization Options
Make your pallet rack unique:
- Stain or paint to match your garage aesthetic
- Add hooks on sides for bags or accessories
- Install LED strips for that retail store glow
- Attach casters for mobile option
Mine is stained dark walnut with Edison bulb string lights above. My friends think I bought it from some fancy store. I just smile and change the subject 🙂
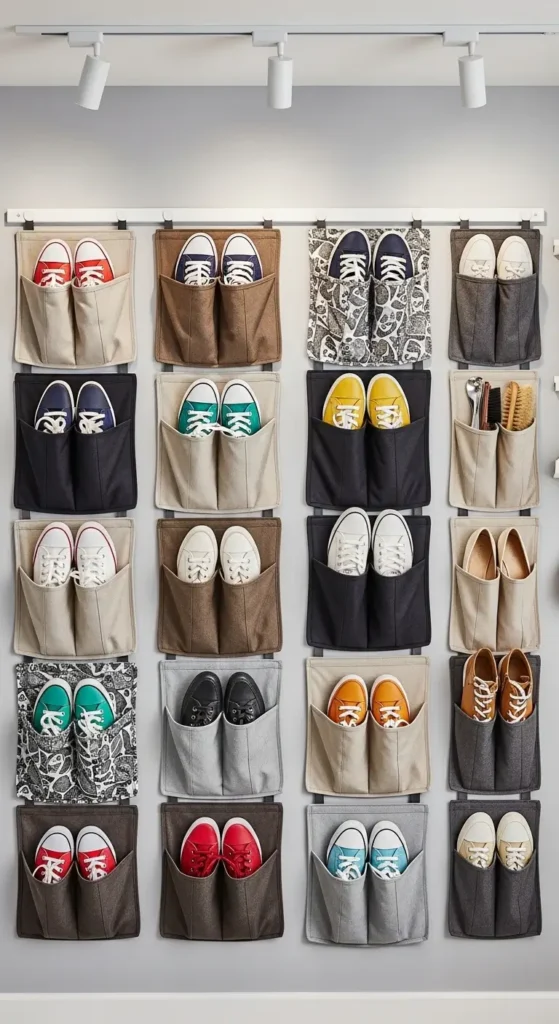
Hanging Shoe Pockets
Over-the-door shoe pockets aren’t just for closets anymore. That garage entry door has been freeloading long enough – time to put it to work.
The Door Storage Maximizer
Hanging pockets utilize the most overlooked space:
- Zero floor space required
- 24+ pockets on a standard door
- Clear pockets for easy identification
- Machine washable options for easy cleaning
I have two over-door organizers: one on the house entry door and one on a wall using curtain rod brackets. Together they hold all our everyday shoes plus random garage accessories in the extra pockets.
Beyond Basic Pockets
Upgrade your pocket storage game:
- Reinforce pockets with cardboard for structure
- Label each row by family member
- Use bottom rows for heavier shoes
- Add cedar balls for odor control
My kids each get one column of pockets. No more “where are my shoes?” arguments. Everyone knows their column, and shoes actually make it into pockets. Usually.
Stackable Shoe Cubes
Modular cube storage is like playing Tetris with your shoe collection. Build up, out, or however your space demands.
The Modular Advantage
Stackable cubes adapt to any space:
- Expandable as your collection grows
- Reconfigurable for different spaces
- Individual compartments prevent pile-ups
- Portable if you move
I started with six cubes and now have 18. Each new sports season seems to add another cube to the collection. The beauty is I just stack them higher – no complete reorganization needed.
Cube Selection Strategy
Choose your cubes wisely:
- Measure your largest shoes first
- Get ventilated options for athlete’s foot prevention
- Match cube depth to your space
- Consider clear doors for visibility
My cube wall looks like a shoe store display. Each cube holds one pair, and I can grab exactly what I need without disturbing the rest. It’s so satisfying I sometimes reorganize them just for fun. (Don’t judge.)
Also Read: 10 Simple Garage Mudroom Ideas for Clean and Tidy Homes
Corner Garage Shoe Tower
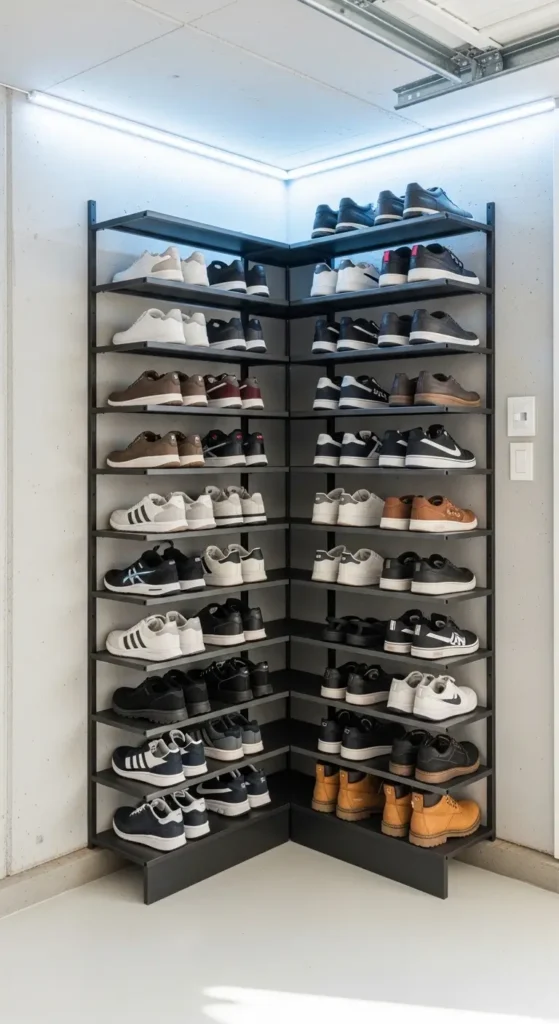
That awkward corner where the car door swings? Perfect spot for a shoe tower that uses space everyone else wastes.
The Corner Space Solution
Corner towers maximize forgotten space:
- Triangular footprint fits where nothing else will
- 360-degree access from multiple angles
- Vertical storage up to ceiling height
- Rotating options for easy access
My corner tower holds 30 pairs in a space that used to collect spider webs and shame. It’s literally the most efficient square footage in my entire garage.
Building the Ultimate Corner Tower
Create your corner shoe command center:
- Lazy Susan base for rotation (optional but awesome)
- Graduated shelf sizes from bottom to top
- Open sides for ventilation
- Top storage for seasonal items
I built mine with leftover lumber and a lazy Susan mechanism from a kitchen cabinet. Now I spin it like a shoe wheel of fortune every morning. My wife thinks I’m weird, but she also steals my storage ideas, so who’s winning?
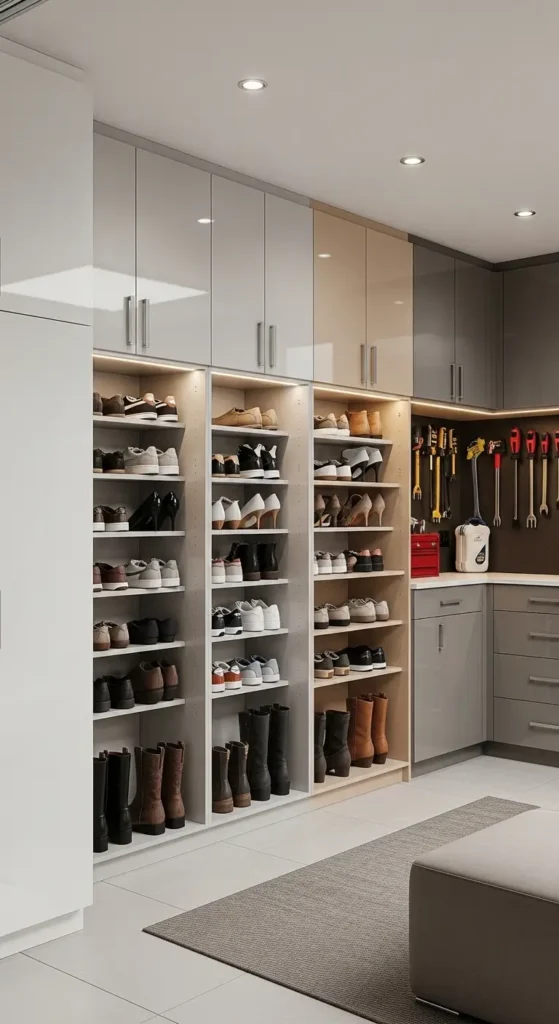
Making Your Garage Shoe Storage Dreams Reality
After trying all these solutions (yes, I have a problem), here’s what I learned: the best system is the one you’ll actually use. My overhead storage is perfect for seasonal rotation, but daily shoes need to be at grab-and-go height.
Currently, my garage uses a combination of wall shelves for everyday shoes, clear bins for off-season storage, and that corner tower for my ever-expanding sneaker collection. Total investment over two years? About $400. Number of mornings ruined by shoe chaos? Zero.
The key is starting small. Pick one solution that addresses your biggest pain point. Hate looking at the shoe pile? Try sliding cabinets. Tired of weather damage? Go with clear bins. Can’t find matching pairs? Wall-mounted shelves with visibility win every time.
IMO, garage shoe storage is actually about respect – respecting your space, your belongings, and your sanity. Once you get shoes off the floor and organized, something magical happens: people actually put them away. Even teenagers. Even husbands. It’s like the organization creates its own momentum.
Your garage doesn’t have to be where shoes go to die. With some creativity and maybe a weekend of work, you can transform that footwear disaster into an organized system that actually makes your life easier. Plus, you’ll never step on a soccer cleat barefoot again.
Trust me on that last part. Your feet will thank you.