10 Amazing Garage Workshop Layout Ideas for Small Spaces
Ever walked into your garage, tripped over that random box of who-knows-what, and thought “there’s gotta be a better way”? Yeah, me too.
After spending countless weekends reorganizing my garage workshop (only to mess it up again by Monday), I finally cracked the code on layouts that actually work.
Look, setting up a garage workshop isn’t just about throwing a workbench against the wall and calling it a day.
Trust me, I learned that the hard way when I couldn’t find my socket set for three months because it was buried under a pile of “I’ll organize this later” stuff.
The right layout transforms your garage from a glorified storage unit into a space where you actually want to spend time building, fixing, and creating.
Whether you’re working with a single-car garage or blessed with a three-bay setup, I’ve tested enough layouts to know what works and what’s just Instagram fantasy.
So grab a coffee (or beer, no judgment here), and let’s talk about 10 garage workshop layouts that’ll make your neighbors jealous and your projects actually enjoyable.
Compact One-Wall Garage Workshop
Making Every Inch Count
Sometimes you’ve got to work with what you’ve got, right? The one-wall workshop setup saved my sanity when I moved into my current place with its laughably small garage. This layout dedicates one entire wall to your workshop while leaving the rest of the garage functional for, you know, actual garage stuff.
I mounted everything vertically on that single wall – workbench, tool storage, even my drill press. The key here? Going vertical like your life depends on it. Wall-mounted cabinets, magnetic tool strips, and pegboard panels become your best friends. My setup runs about 8 feet wide by 2 feet deep, but packs in more tools than you’d think possible.
The beauty of this layout shines when you need to park your car. Everything stays flush against the wall, no random table legs sticking out to ding your doors. Plus, cleanup takes literally minutes since everything has its designated spot on that one wall.
Essential Components for One-Wall Success
Here’s what makes this layout actually work:
• Fold-down workbench (seriously, game-changer)
• Wall-mounted power strip every 4 feet
• Overhead LED shop lights on adjustable arms
• Magnetic tool holders for frequently used items
• Stackable storage bins on wall-mounted rails
Want to know the best part? Setting this up costs way less than you’d expect. I spent about $500 total, including the fold-down bench I built myself from 2x4s and plywood.
U-Shaped Workshop for Small Spaces
The Three-Wall Wonder
Remember playing with those toy train sets where the tracks made a perfect U? That’s basically what we’re doing here, except with power tools instead of tiny locomotives. The U-shaped layout maximizes corner spaces that usually collect nothing but cobwebs and regret.
I helped my buddy Steve set up his U-shaped workshop last summer, and honestly, I’m still a bit jealous. The layout wraps around three walls, creating a natural workflow where you move from one station to the next. Cutting station on the left, assembly in the middle, finishing on the right – boom, production line efficiency in your garage.
The center stays open for larger projects or just moving around without doing that awkward workshop shuffle. You know the one – where you’re trying to squeeze past your table saw while carrying a full sheet of plywood? Yeah, this layout eliminates that nonsense.
Maximizing the U-Configuration
Strategic placement makes or breaks this setup:
• Position your most-used tools at waist height in the corners
• Install upper cabinets only on the back wall to avoid head-bumping
• Keep the entrance side lower for easy access
• Add a rolling tool cart for the center workspace
Corner Garage Workshop Layout

Working the Angles
Who says corners are wasted space? Not me, especially after discovering how perfect they are for workshop setups. The corner layout creates a cozy workspace that feels separate from the rest of your garage chaos.
This layout basically claims one corner of your garage as workshop territory. I’m talking about an L-shaped configuration that naturally creates different work zones. My current corner setup has the miter saw station on one wall and the main workbench on the adjacent wall – the workflow just makes sense.
Smart Corner Solutions
The trick with corner layouts? Diagonal placement of key equipment. Sounds weird, but hear me out:
• Place your main workbench at a 45-degree angle across the corner
• Install corner shelving units for maximum storage
• Use the walls behind for tool organization
• Add task lighting from both directions to eliminate shadows
FYI, corners naturally contain dust and debris better than other layouts. Less cleanup time means more building time, IMO.
Also Read: 10 Stylish Half Garage Gym Ideas You’ll Love Today
Foldable Workbench Garage Setup
The Transformer Workshop
Ever wished your workshop could just disappear when you need the space? Welcome to the magic of foldable workbenches. This setup prioritizes flexibility over permanent installations, and honestly, it’s perfect for renters or anyone sharing garage space with actual vehicles.
I built my first folding bench out of necessity – my wife made it clear that her car wasn’t living outside through another winter. Fair enough. The workbench folds flat against the wall, taking up maybe 4 inches of depth. When I need it, down it comes, instant workspace.
Building Your Folding Empire
Here’s what makes a foldable setup actually functional:
• Heavy-duty hinges rated for at least 200 pounds
• Removable legs or folding brackets for support
• Built-in power strip that stays with the bench
• Tool storage that works in both positions
• Locking mechanisms to prevent accidental folding
Don’t cheap out on the hardware here. That $15 savings on hinges won’t feel worth it when your bench collapses mid-project.
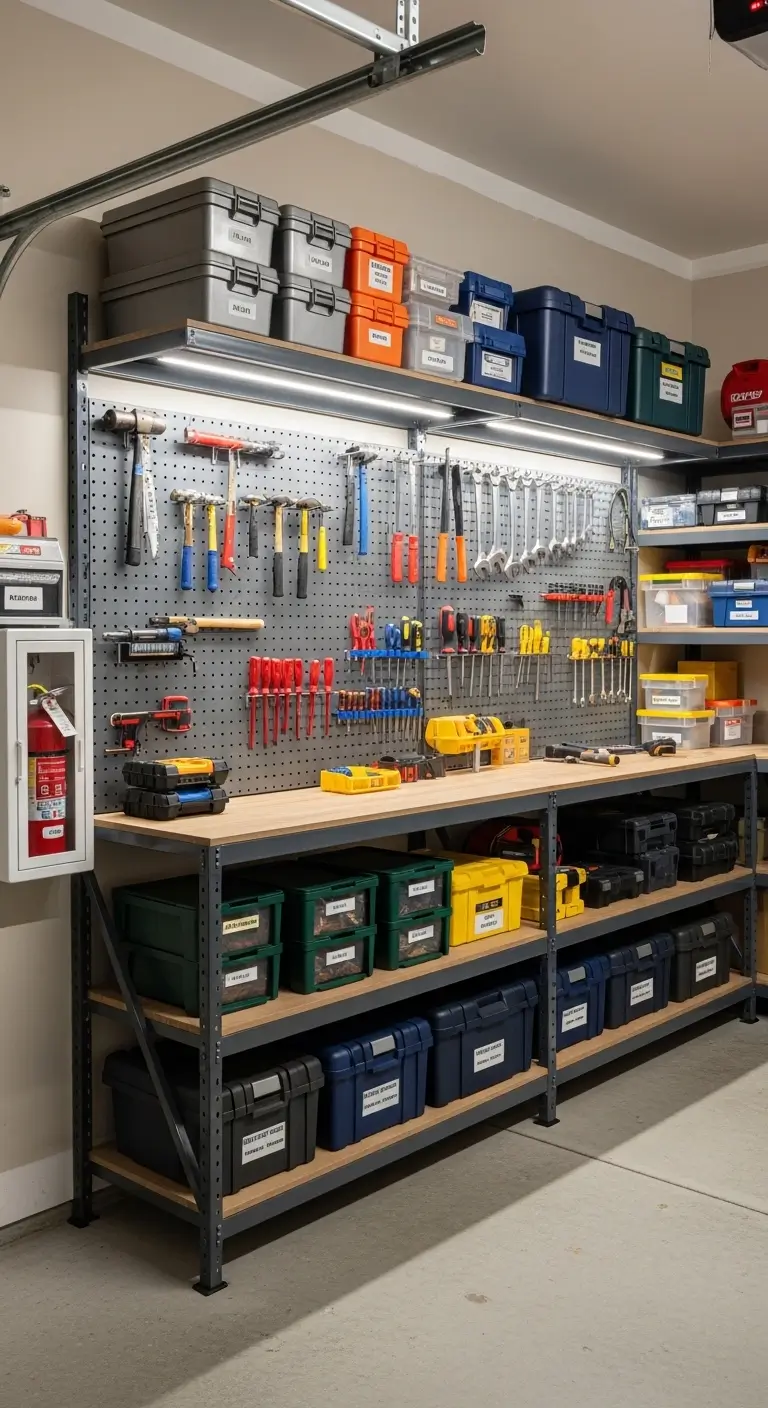
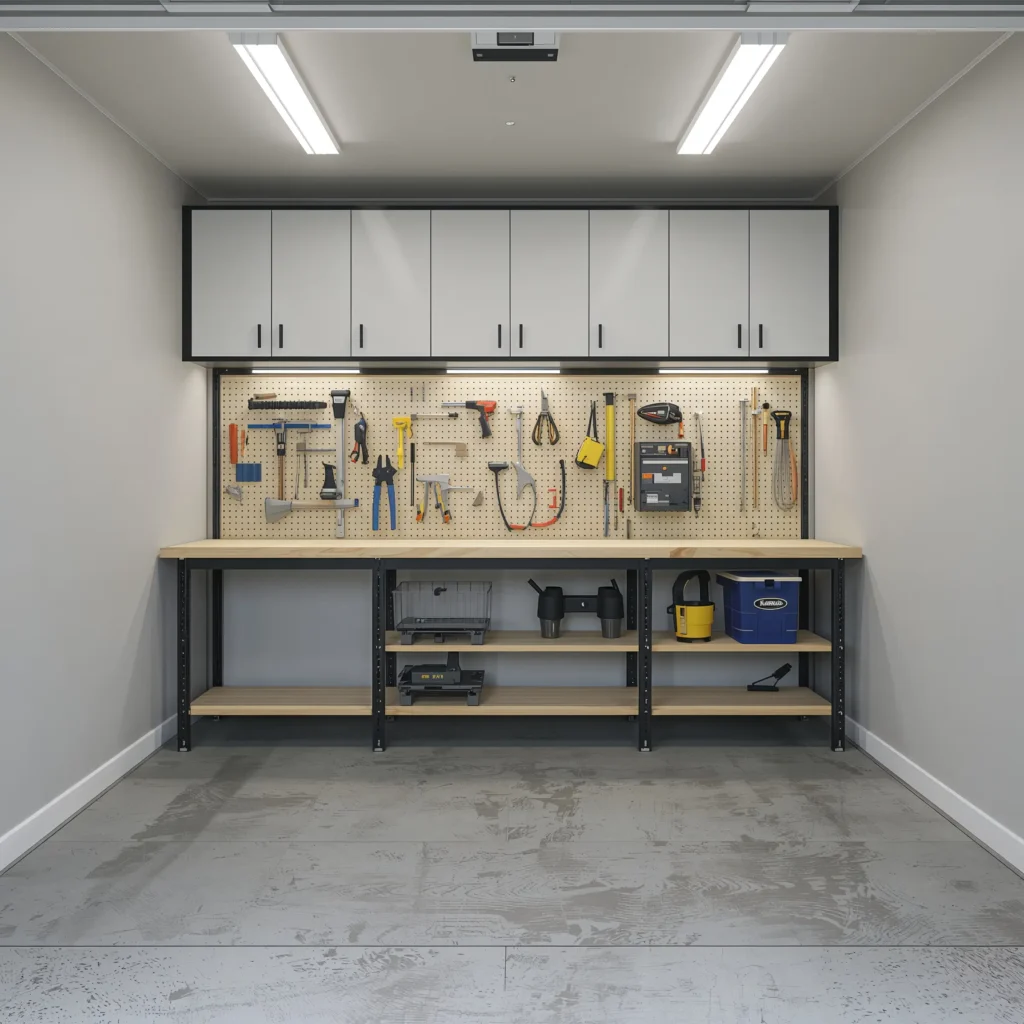
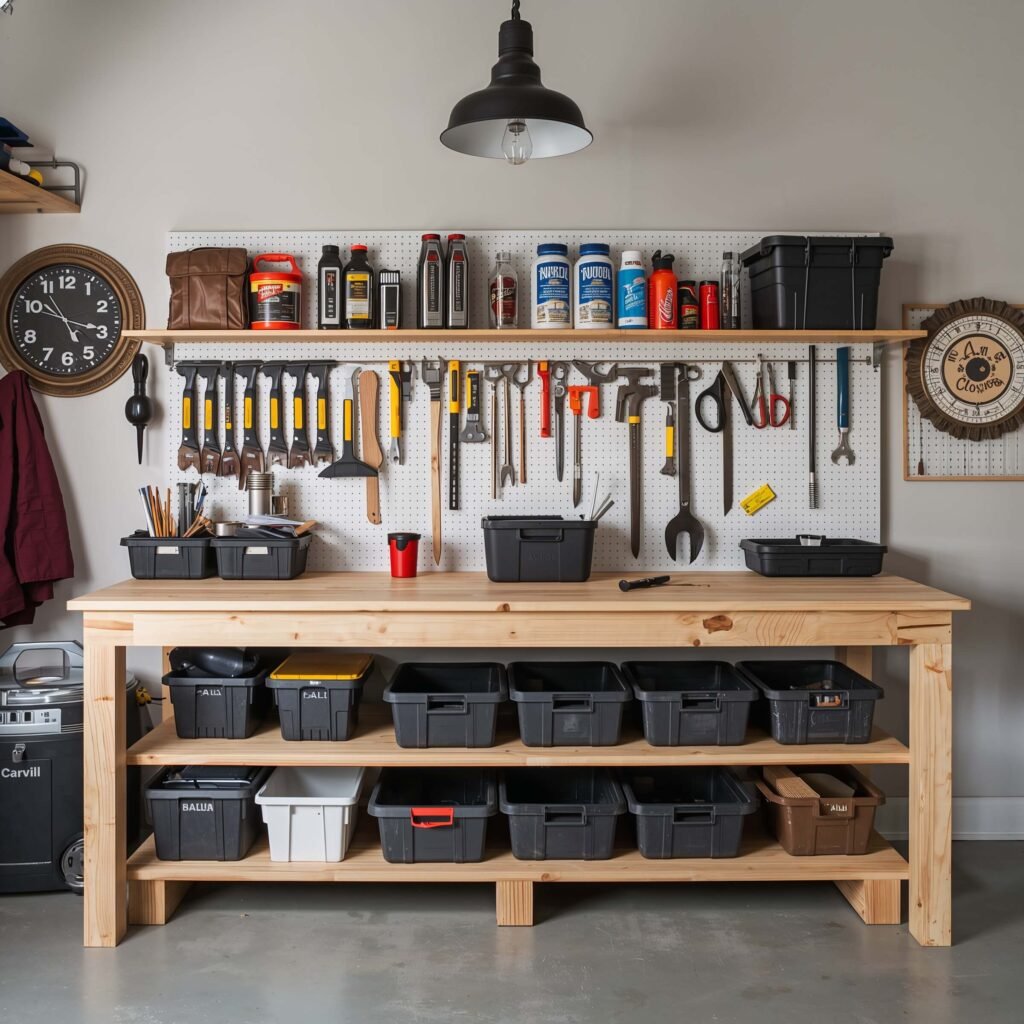
Minimalist Workshop with Pegboards
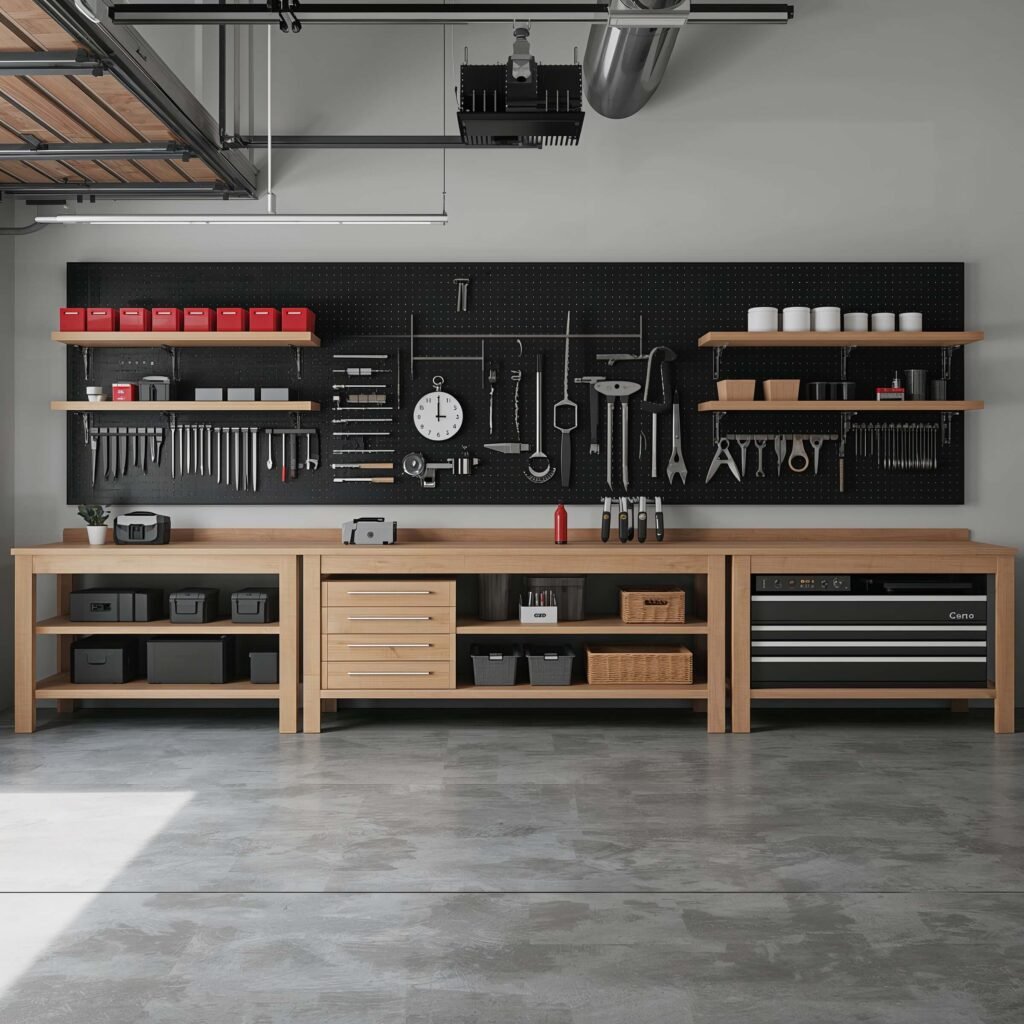
Less Stuff, More Function
Sometimes the best workshop isn’t the one with the most tools – it’s the one where you can actually find what you need. The minimalist pegboard approach changed how I think about workshop organization.
After years of accumulating tools I used maybe once, I finally purged. What remained? The essentials, all displayed on pegboard like a beautiful tool gallery. Every tool visible, accessible, and actually useful. No more digging through drawers wondering if I own a 9/16″ wrench (spoiler: I owned three).
Pegboard Perfection Tips
Creating an effective pegboard system requires some strategy:
• Use contrasting pegboard colors for different tool categories
• Outline tools with markers so you know what goes where
• Install pegboard at least 1 inch from the wall for hook clearance
• Add small shelves directly to pegboard for containers
• Keep 20% of your pegboard empty for new tools
The minimalist approach forced me to be intentional about every purchase. Do I really need that specialized tool, or can my existing gear handle it? Usually, it’s the latter.
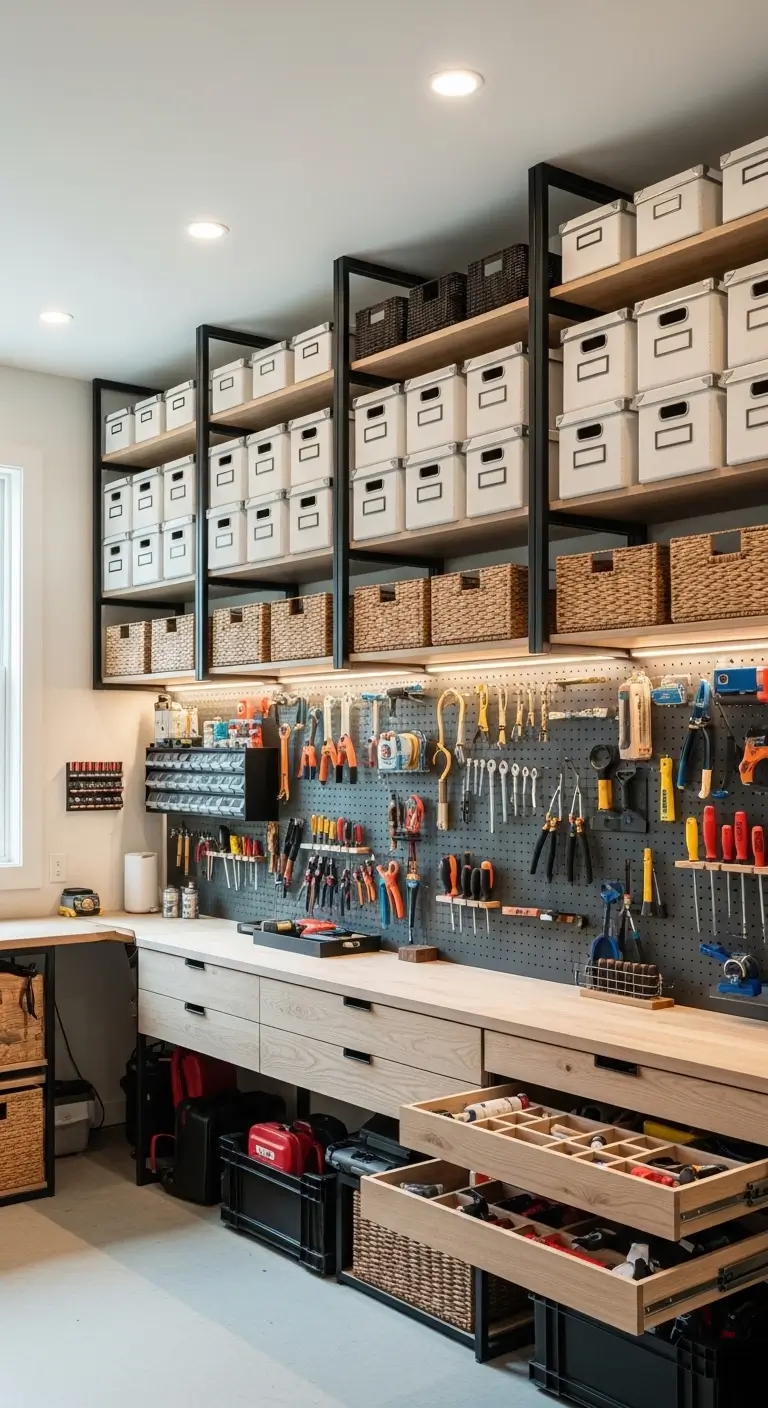
Multi-Level Storage Garage Workshop
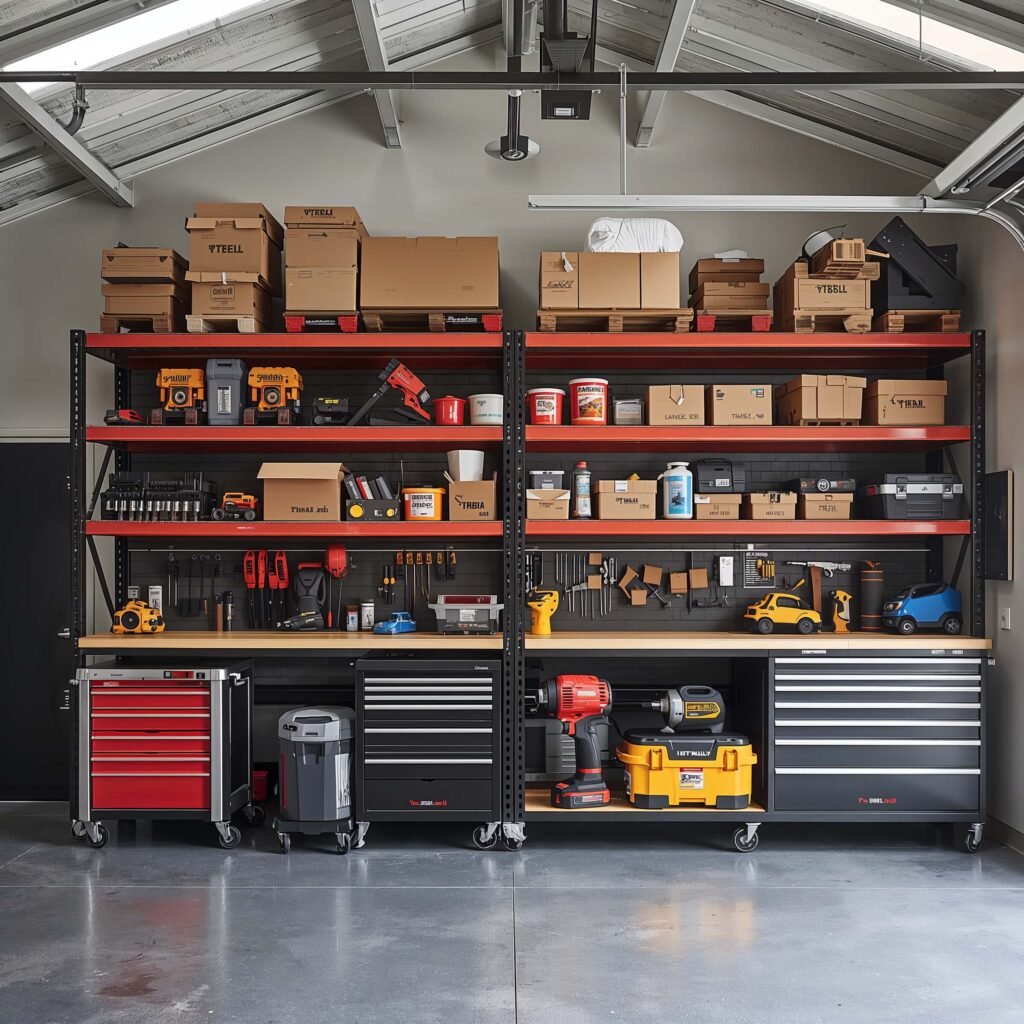
Thinking in 3D
Why limit yourself to floor space when you’ve got all that vertical real estate? Multi-level storage workshops basically stack your workspace like a delicious workshop sandwich.
My multi-level setup has three distinct zones: overhead storage for seasonal stuff, eye-level work and frequently-used tools, and lower storage for heavy items. Think of it like a department store, but instead of overpriced jeans, you’ve got router bits and sandpaper.
Level-Up Your Storage Game
Here’s how to nail the multi-level approach:
• Install ceiling-mounted storage systems for lightweight, occasional-use items
• Create a mezzanine platform if you have the height
• Use adjustable shelving to customize spacing
• Keep heavy tools and materials below waist level
• Add sliding bins for deep storage access
Safety tip: Always secure overhead storage properly. Nobody wants a kayak landing on their head mid-project 🙂
Also Read: 10 Incredible Garage Aesthetic Ideas and Modern Decor Tricks
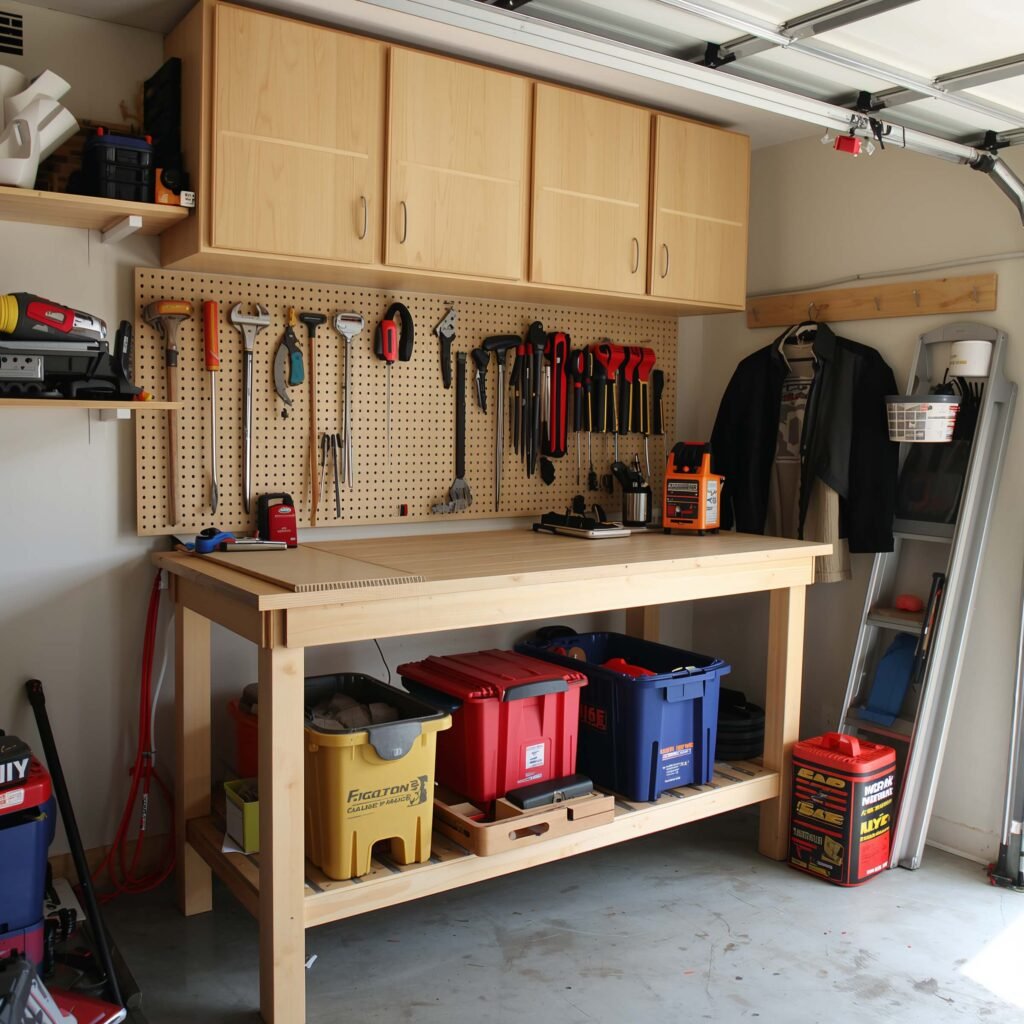
DIY Budget-Friendly Workshop Layout

Champagne Dreams, Beer Budget
Look, not everyone has thousands to drop on a workshop setup. When I started out, my entire tool budget was whatever I could scrape together from birthday money and selling old video games. The DIY budget layout proves you don’t need deep pockets to create a functional workspace.
Pallets became my first workbench (free from a local warehouse), old kitchen cabinets from a renovation became tool storage, and pegboard? That was actually closet organizer panels from a garage sale. Total investment for my first “real” workshop? Under $200.
Budget Hacks That Actually Work
Stretching your workshop dollars:
• Check Facebook Marketplace for free lumber and materials
• Repurpose old furniture into workshop storage
• Build your own workbench from 2x4s and plywood
• Use mason jars and magnets for small parts storage
• Install shop lights instead of expensive task lighting
Want to know a secret? Some of my favorite workshop features are still the DIY solutions I created when I was broke. They work just as well as the fancy stuff.
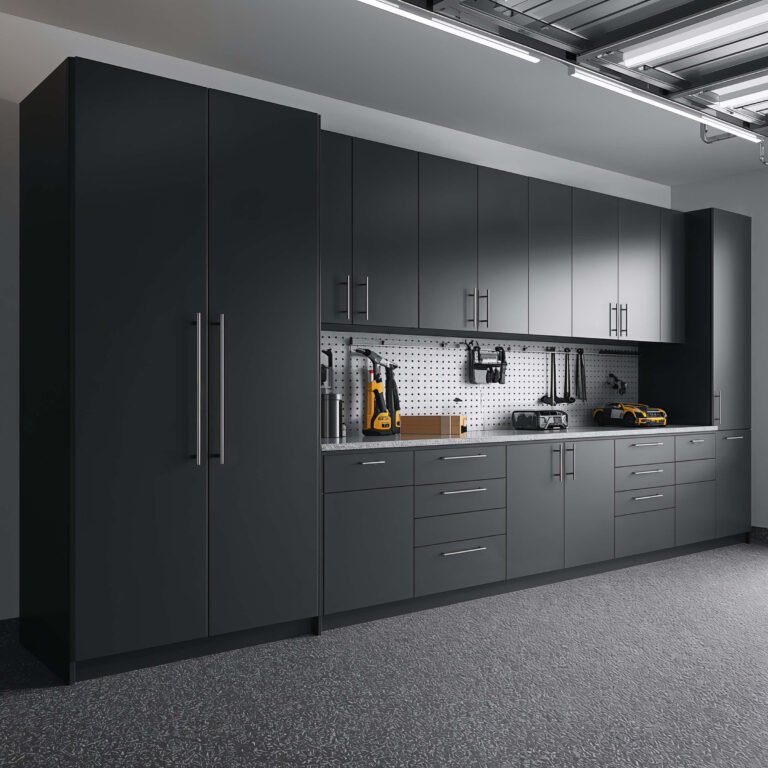
Modern Industrial Garage Workshop
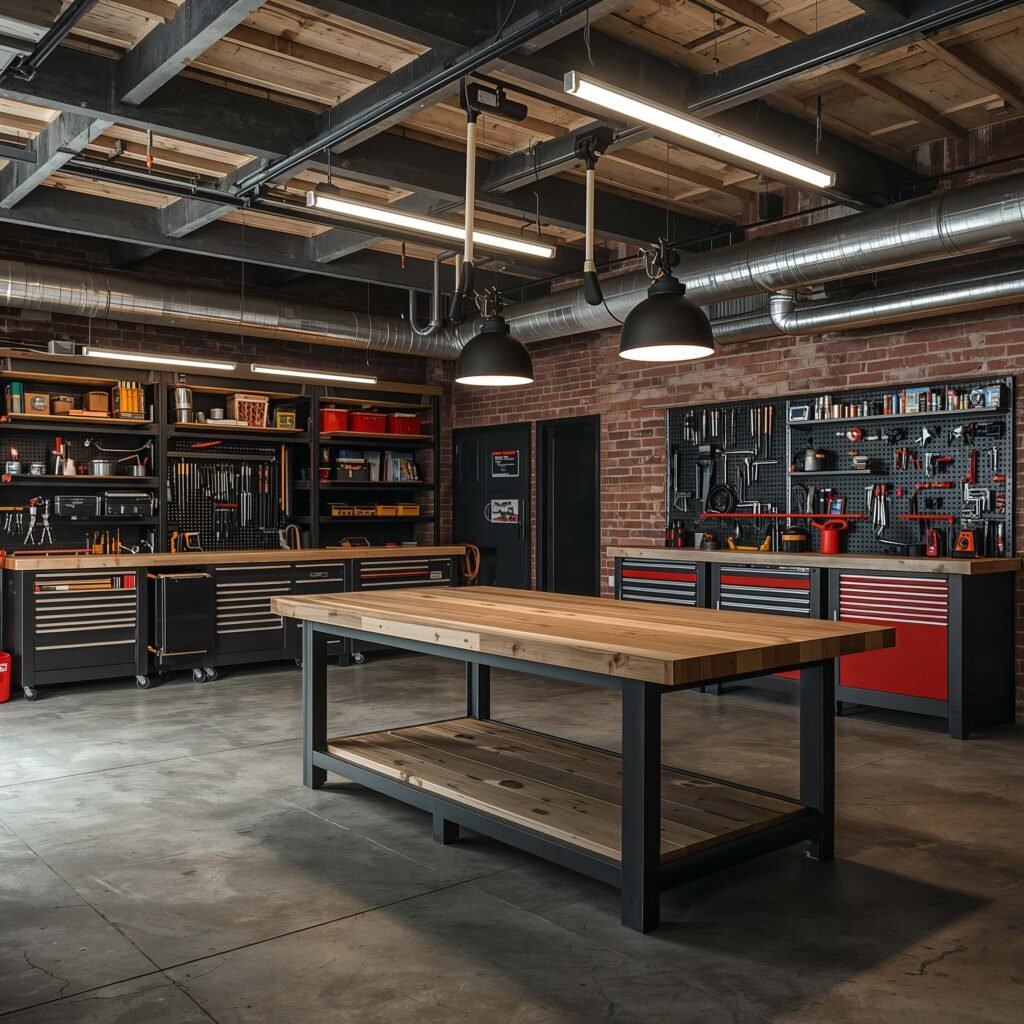
Concrete, Steel, and Serious Business
Sometimes you want your workshop to look like it means business. The modern industrial aesthetic combines function with that raw, unfinished look that screams “stuff gets built here.”
I went full industrial in my current setup after getting inspired by a local makerspace. Exposed metal shelving, concrete-look surfaces (actually painted MDF, but shh), and industrial pipe fixtures for tool storage. The whole vibe says “professional” without the professional price tag.
Achieving the Industrial Look
Key elements for that industrial feel:
• Metal shelving units instead of wood
• Concrete stain or epoxy floor coating
• Black pipe fittings for custom storage solutions
• Wire mesh panels for tool organization
• Edison bulb string lights for ambiance
The best part about industrial style? Scratches, dings, and stains add character instead of looking like damage. My workbench looks better beaten up than it did new.
Garage Workshop with Rolling Carts
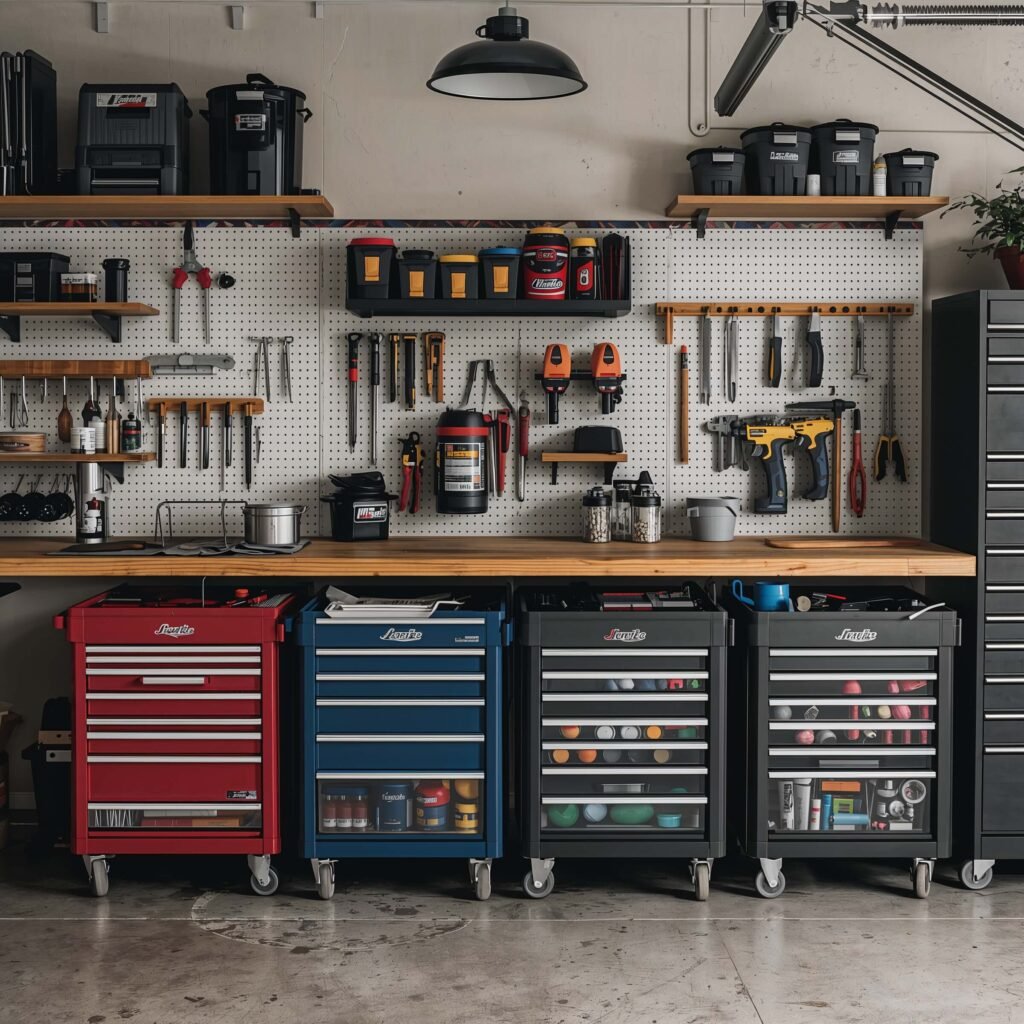
Mobile Command Center
Who decided workshops need to be stationary? Rolling cart workshops give you flexibility that fixed setups can only dream about. Need to work on the driveway today? Roll it out. Rain coming? Roll it back.
I’ve got three main rolling stations: woodworking, metalwork, and electronics. Each cart has its own tool set, so I’m not constantly walking back and forth. When I’m done, they nest together against the wall like helpful robots waiting for their next mission.
Building Your Rolling Fleet
Essential features for workshop carts:
• Locking casters rated for your load weight
• Drawer organizers to prevent tool chaos while moving
• Built-in power strips with retractable cords
• Fold-out work surfaces for extra space
• Magnetic strips or pegboard panels on sides
Pro tip: Get casters with brakes on all four wheels, not just two. Trust me on this one – learned it the hard way when my cart decided to go on an adventure down my sloped driveway.
Also Read: 10 Vibrant Garage Bar Ideas and Fun Party Corners
L-Shaped Workshop for Hobby Mechanics
The Gearhead’s Paradise
For those of us who spend weekends under the hood, the L-shaped layout creates perfect zones for both mechanical work and general projects. One leg handles automotive work, the other tackles everything else.
My L-shaped setup puts the “dirty work” section near the garage door (oil changes, brake work) while the cleaner woodworking and electronics area sits deeper in the garage. This natural separation keeps grease away from sawdust, and both away from sensitive electronics.
Optimizing Your L-Configuration
Making the L-layout work for mechanics:
• Position heavy equipment at the corner junction
• Install separate tool storage for automotive vs. other tools
• Add dedicated fluid storage with spill containment
• Include a parts washing station in the automotive section
• Create mobile creeper storage under the workbench
The corner where the two legs meet? That’s prime real estate for your tool chest or air compressor – easily accessible from both work zones.
Specialty Storage Solutions
What really makes the L-shaped layout sing for mechanics? Purpose-built storage. I installed a tire rack on one wall, transmission jack storage overhead, and a dedicated cabinet just for fluids and chemicals. Everything automotive has its place, separate from the woodworking gear.
Making Your Choice
After trying most of these layouts myself (and helping friends with the rest), here’s what I’ve learned: the best workshop layout is the one you’ll actually use. Sounds obvious, but you’d be surprised how many people build Instagram-worthy workshops that don’t match their actual needs.
Think about what you primarily work on. Are you restoring cars? The L-shaped mechanical layout makes sense. Building furniture? That U-shaped configuration gives you the workflow you need. Tight on space? Embrace the one-wall or foldable approach.
Don’t feel locked into one layout forever either. My workshop evolved from a basic corner setup to a full multi-level system as my skills (and tool collection) grew. Start simple, see what works, then expand from there.
Final Thoughts
Your garage workshop should inspire you to create, not frustrate you into procrastination. Whether you go minimal with pegboards or full industrial with rolling carts, make it yours. Add that vintage sign you love, paint the walls your favorite color, hang up that questionable motivational poster – whatever makes you want to spend time there.
The layouts I’ve shared aren’t rigid rules; they’re starting points. Mix and match elements, adapt to your space, and most importantly, don’t wait for the “perfect” setup to start building. Some of my best projects happened in my cramped, chaotic first workshop with tools scattered everywhere.
Remember, every master craftsperson started somewhere, usually in a space way less organized than what you’re planning right now. So pick a layout, grab some tools, and start creating. Your future self will thank you when you’re not searching for that 10mm socket for the hundredth time (though let’s be honest, it’ll still disappear occasionally – some mysteries of the universe can’t be solved by organization alone).
Now stop reading and go build something awesome. Your newly organized workshop is waiting!