10 Easy Simple Birthday Decor Ideas That Impress Everyone
Let’s be real – you’re probably here because someone’s birthday is coming up and you’re staring at your living room wondering how to transform it from “Tuesday night Netflix binge” to “Pinterest-perfect party paradise.”
I get it. We’ve all been there, scrolling through social media at 2 AM, wondering how everyone else makes their parties look so effortlessly amazing.
Here’s the thing: you don’t need a massive budget or a degree in interior design to throw a party that’ll have your guests asking “Who’s your decorator?” I’ve thrown my fair share of birthday parties (some epic wins, some… well, let’s not talk about the Great Balloon Disaster of 2023), and I’ve learned that the best decorations are often the simplest ones.
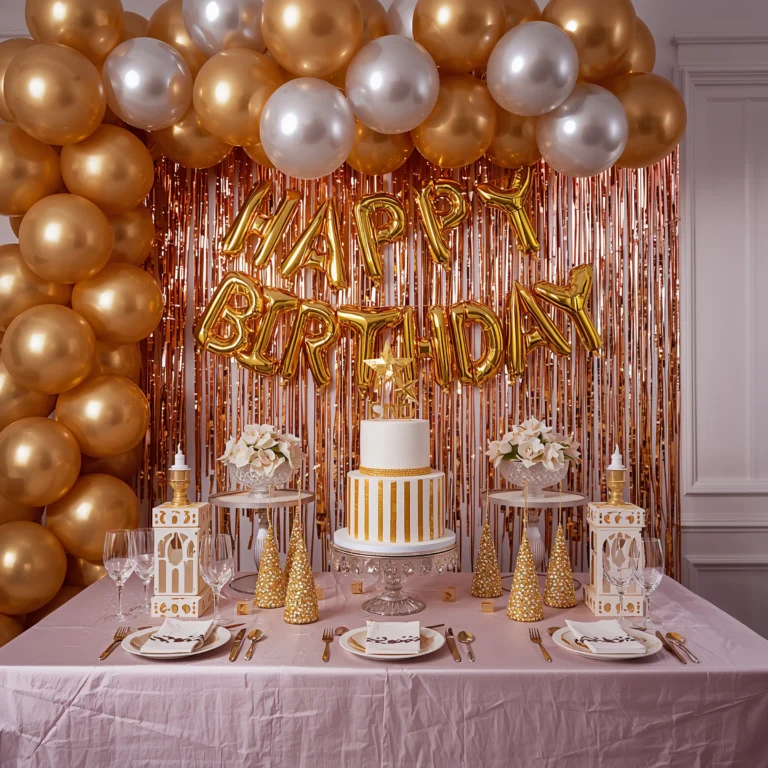
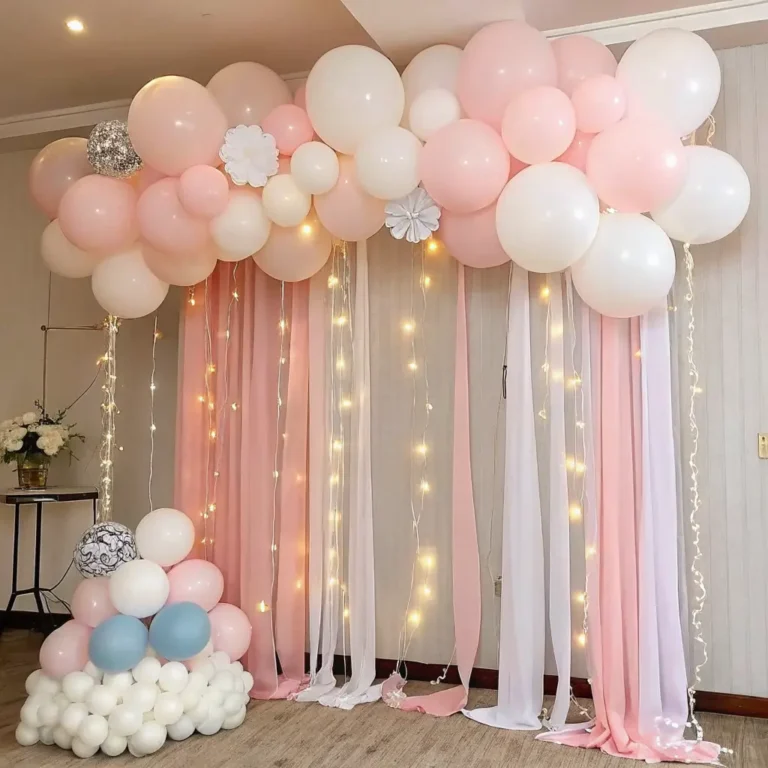
Balloon Garland Arch – Your Gateway to Party Perfection
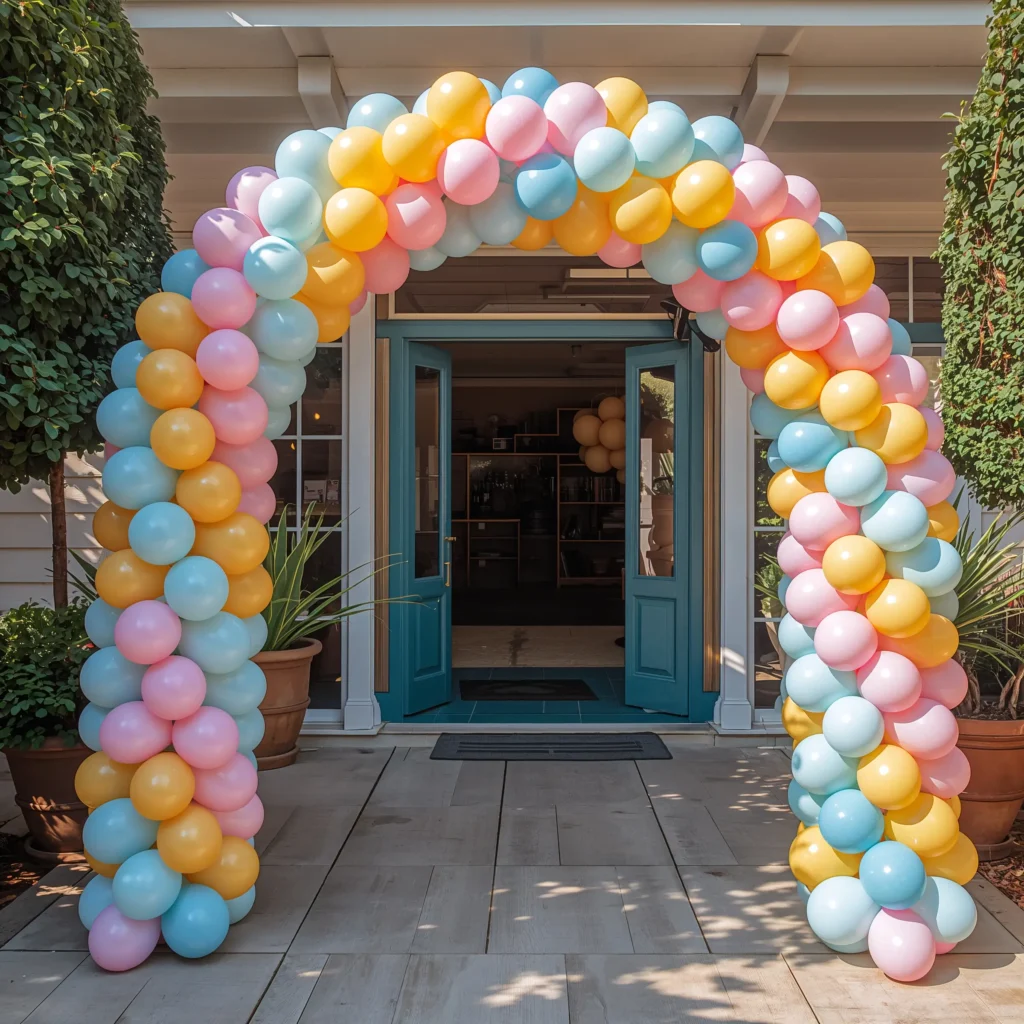
Remember when balloon arches were something you only saw at fancy events? Well, surprise! You can totally make one yourself, and it’s way easier than you think.
I discovered this little secret when I was planning my sister’s 25th birthday. Instead of spending $200 on a professional balloon artist, I grabbed a balloon decorating strip from Amazon for like $8 and went to town. The result? Pure magic.
Here’s what you’ll need:
- Balloon decorating strip (seriously, this thing is a game-changer)
- Balloons in 2-3 coordinating colors
- A balloon pump (your lungs will thank you)
- Command hooks for hanging
Start by inflating balloons in different sizes – this creates that organic, professional look. Thread them through the holes in the decorating strip, alternating colors and sizes. The beauty of this method is that it’s practically foolproof. Even if you mess up, it still looks intentional and artsy.
Pro tip: Make your arch the day before the party. Balloons actually look better after they’ve settled for a bit, and you’ll have one less thing to stress about on party day.
DIY Paper Flower Wall – Budget-Friendly Backdrop Brilliance
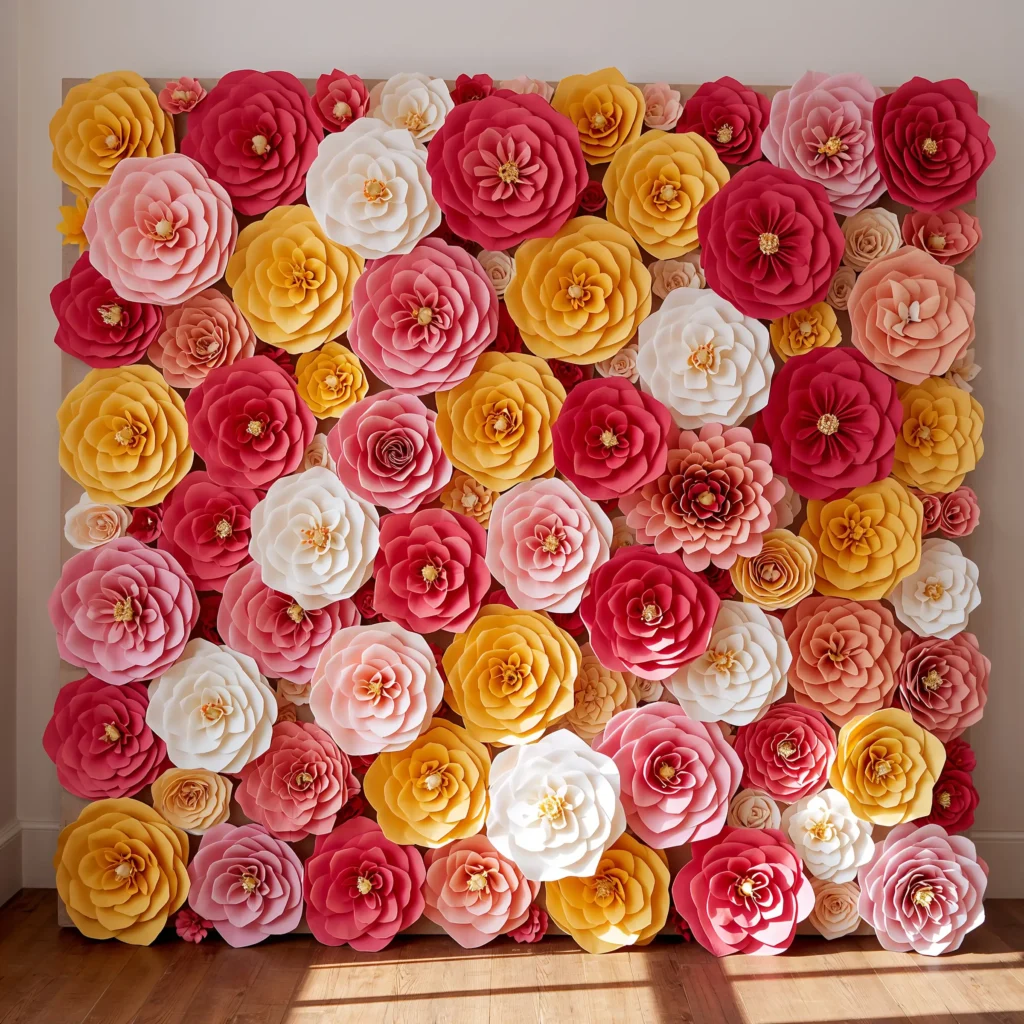
Okay, I’ll admit it – when I first heard about paper flower walls, I rolled my eyes so hard I nearly saw my brain. But then I tried making one for my mom’s 60th, and wow, did it deliver.
Paper flowers are having a serious moment, and for good reason. They photograph beautifully, they’re customizable to any color scheme, and they won’t wilt halfway through your party like real flowers might.
The secret to success:
- Use different paper weights for texture variety
- Mix large statement flowers with smaller filler blooms
- Don’t aim for perfection – slightly imperfect flowers look more natural
I like to make flowers in three sizes: dinner plate-sized showstoppers, salad plate medium blooms, and tiny accent flowers. Arrange them on a foam board or directly on the wall using removable adhesive strips. The whole project takes about 3-4 hours, but you can spread it out over a few evenings while binge-watching your favorite show.
Minimalist Table Centerpieces – Less Really Is More

Can we talk about how refreshing minimalist centerpieces are? After years of cramming every surface with decorations until guests couldn’t find their drinks, I’ve embraced the “less is more” philosophy, and my parties have never looked better.
The key to minimalist centerpieces is choosing one stunning element and letting it shine. Think a single statement candle, a small potted plant, or a geometric vase with one perfect bloom.
My go-to minimalist centerpiece formula:
- One beautiful vessel (could be a vintage glass, modern ceramic pot, or even a repurposed jar)
- One natural element (single flower, small succulent, or interesting branch)
- One light source (tea light, small candle, or battery-operated fairy lights)
The beauty of this approach? Your guests can actually see each other across the table, and you’re not constantly moving decorations so people can reach the snacks. Revolutionary, right? 🙂
Also Read: 10 Creative Birthday Party Decor Ideas for Stunning Setup
Color-Coordinated Streamers – The Comeback Kid of Party Decor
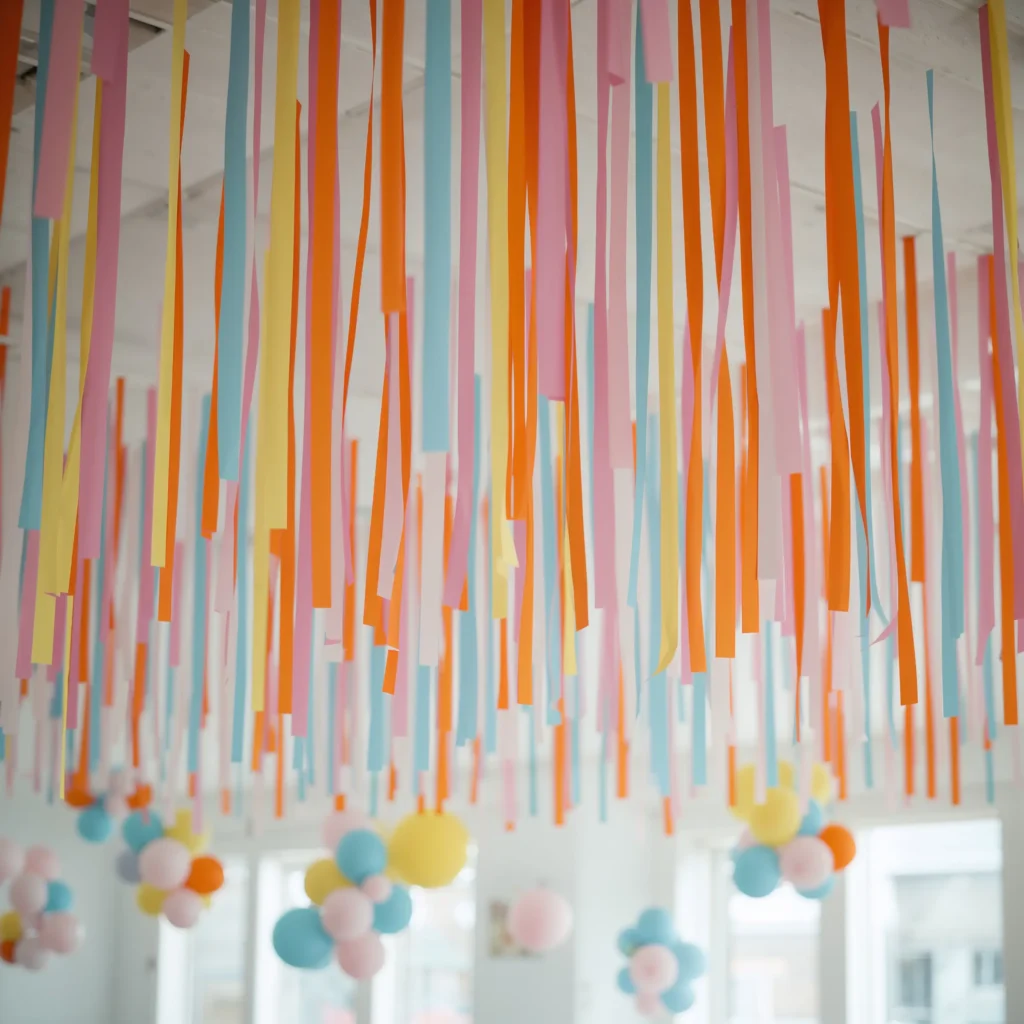
I know what you’re thinking – streamers are so elementary school birthday party. But hear me out! When done right, streamers can create some seriously sophisticated vibes.
The trick is treating them like fabric instead of cheap party supplies. Choose streamers in a cohesive color palette and use them strategically rather than just taping them randomly to walls.
Elevated streamer techniques:
- Create a flowing ceiling installation by gathering streamers at one point and letting them cascade down
- Twist different colored streamers together for a rope-like effect
- Use them as table runners for an unexpected pop of color
- Frame doorways or windows for a dramatic entrance
I once used metallic gold and blush pink streamers to create a backdrop that looked like it cost hundreds of dollars. Total investment? About $15 and an hour of my time. Sometimes the simplest solutions are the most effective.
Floating Balloon Ceiling – Whimsy Meets Wow Factor
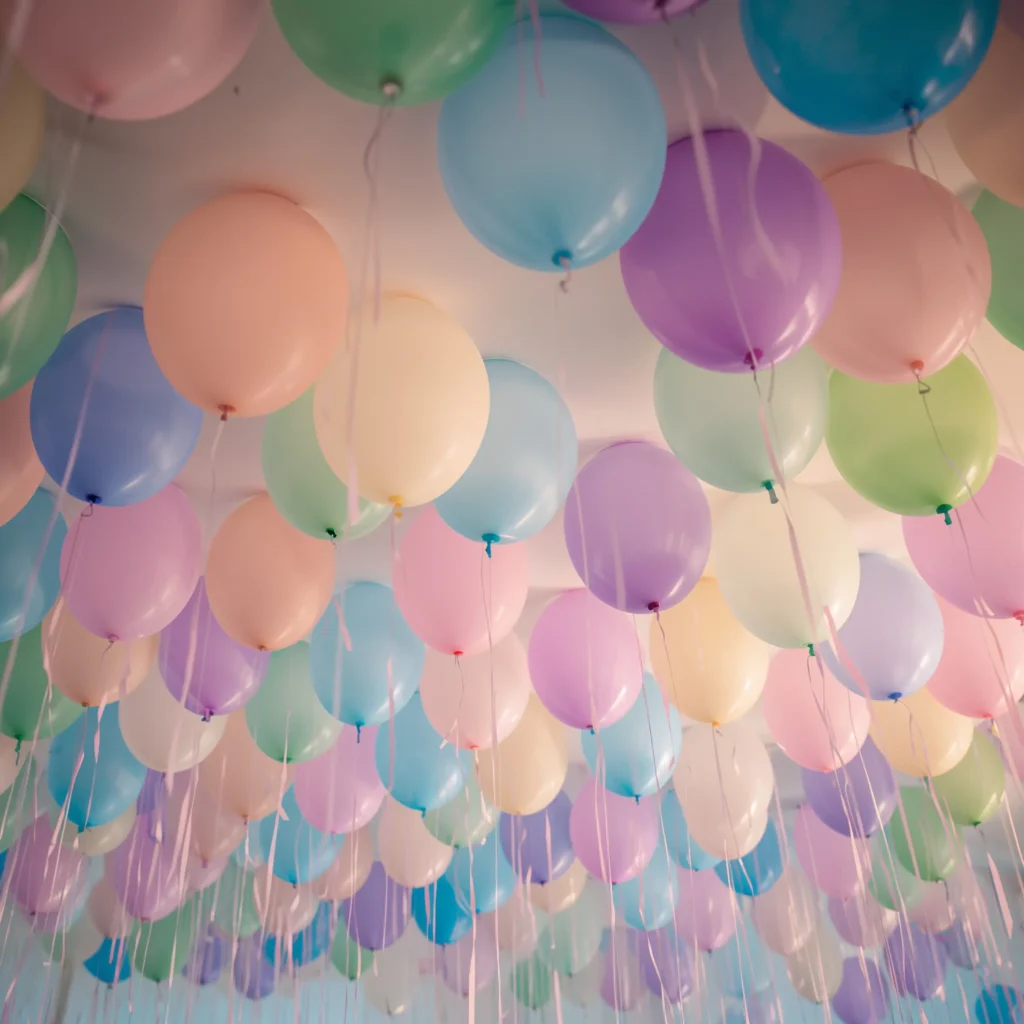
Picture this: your guests walk in and look up to see dozens of balloons gently floating against the ceiling, creating this dreamy, cloud-like canopy. It’s like stepping into a fairytale, and it’s surprisingly simple to achieve.
The secret is helium balloons with long, trailing ribbons in varying lengths. As people move through the space, the balloons sway gently, creating this magical, interactive element that photographs beautifully.
Pro tips for balloon ceiling success:
- Use balloons in odd numbers (groups of 3 or 5 look more natural)
- Vary the ribbon lengths so balloons hang at different heights
- Choose ribbons that complement your color scheme
- Consider adding small weights to some ribbons for gentle movement
FYI, this works especially well in rooms with standard 8-9 foot ceilings. If your ceilings are super high, you might need to get creative with the ribbon lengths or consider clustering the balloons in specific areas rather than spreading them throughout the entire ceiling.
Mason Jar Flower Vases – Rustic Charm That Actually Works
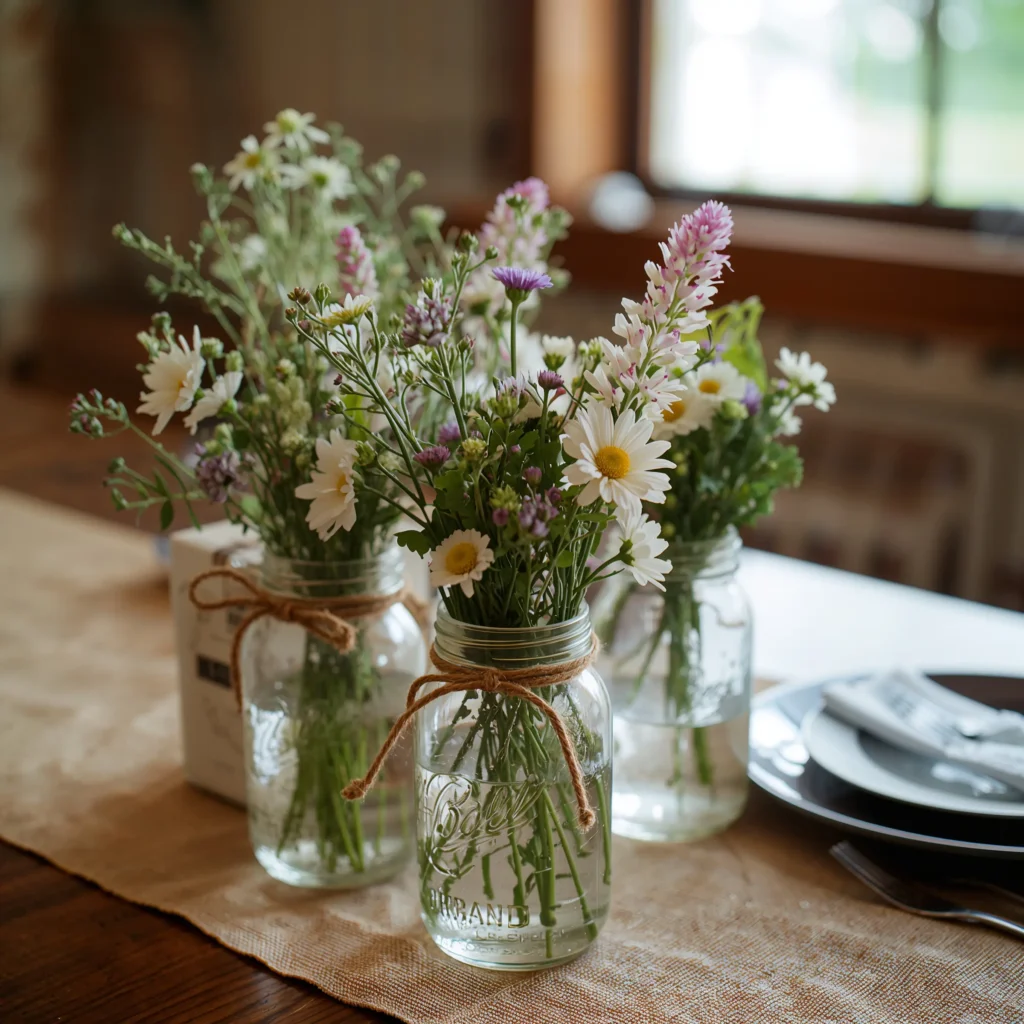
Before you groan about another mason jar craft project, let me explain why these actually deserve a spot at your party. Mason jars are the Swiss Army knife of party decor – they’re versatile, affordable, and they work with almost any theme.
I’ve used mason jars for everything from elegant dinner parties (filled with single white roses) to casual backyard celebrations (stuffed with wildflowers from the farmer’s market). The key is how you style them.
Ways to elevate your mason jar game:
- Wrap them in burlap and lace for rustic elegance
- Paint them with chalk paint for a modern matte finish
- Add fairy lights inside for a magical glow
- Group them in odd numbers for visual interest
The best part? Your guests can take them home as party favors. I always buy a few extra jars and let people create their own arrangements to take with them. It’s like a mini flower-arranging activity that doubles as a keepsake.
Also Read: 10 Amazing Birthday Decor for Him Ideas That Wow Everyone
Birthday Banner with Photos – Personal Touch That Packs a Punch
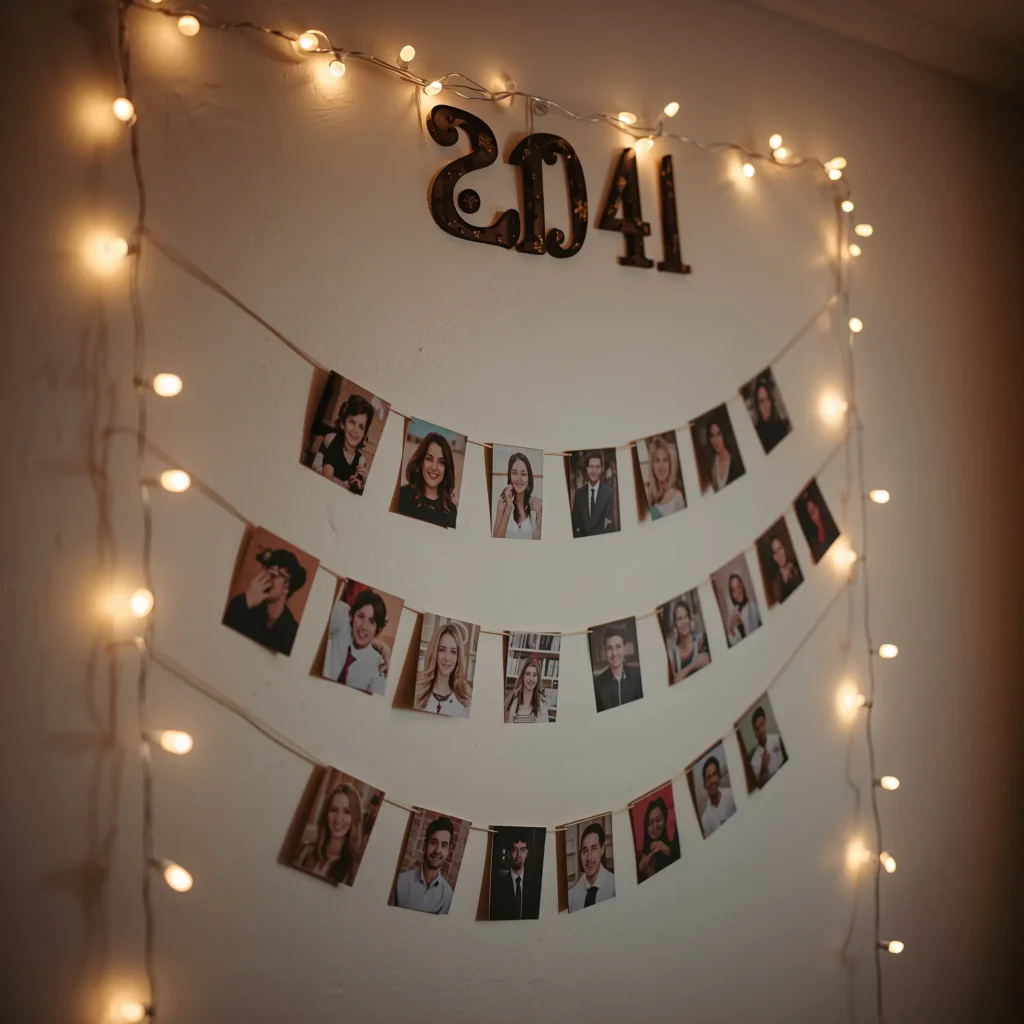
Generic “Happy Birthday” banners are fine, but photo banners? They’re conversation starters, memory makers, and instant mood boosters all rolled into one.
I started making photo banners after realizing that the best part of any birthday party is reminiscing about good times. Why not make those memories part of the decor?
Photo banner ideas that work:
- Chronological photos showing the birthday person’s journey through the years
- Pictures of the birthday person with each guest who’ll be attending
- Themed photos (travel adventures, funny moments, achievements)
- Polaroid-style prints for that vintage vibe
The easiest method is printing photos at your local pharmacy (they’re usually ready in an hour), then clipping them to string with mini clothespins. It takes maybe 30 minutes to assemble, but the impact lasts all night. Plus, the birthday person gets to keep all the photos afterward.
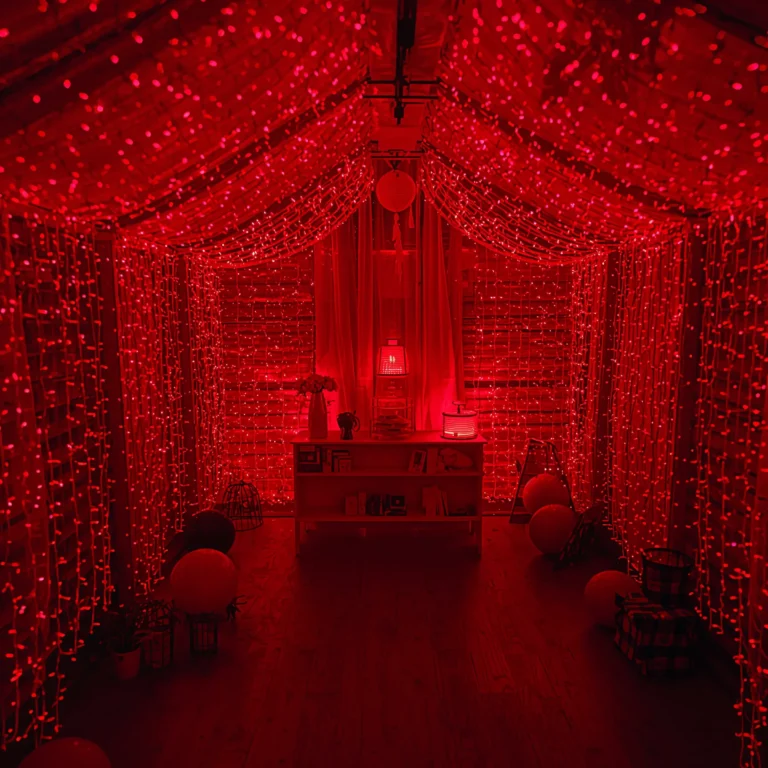
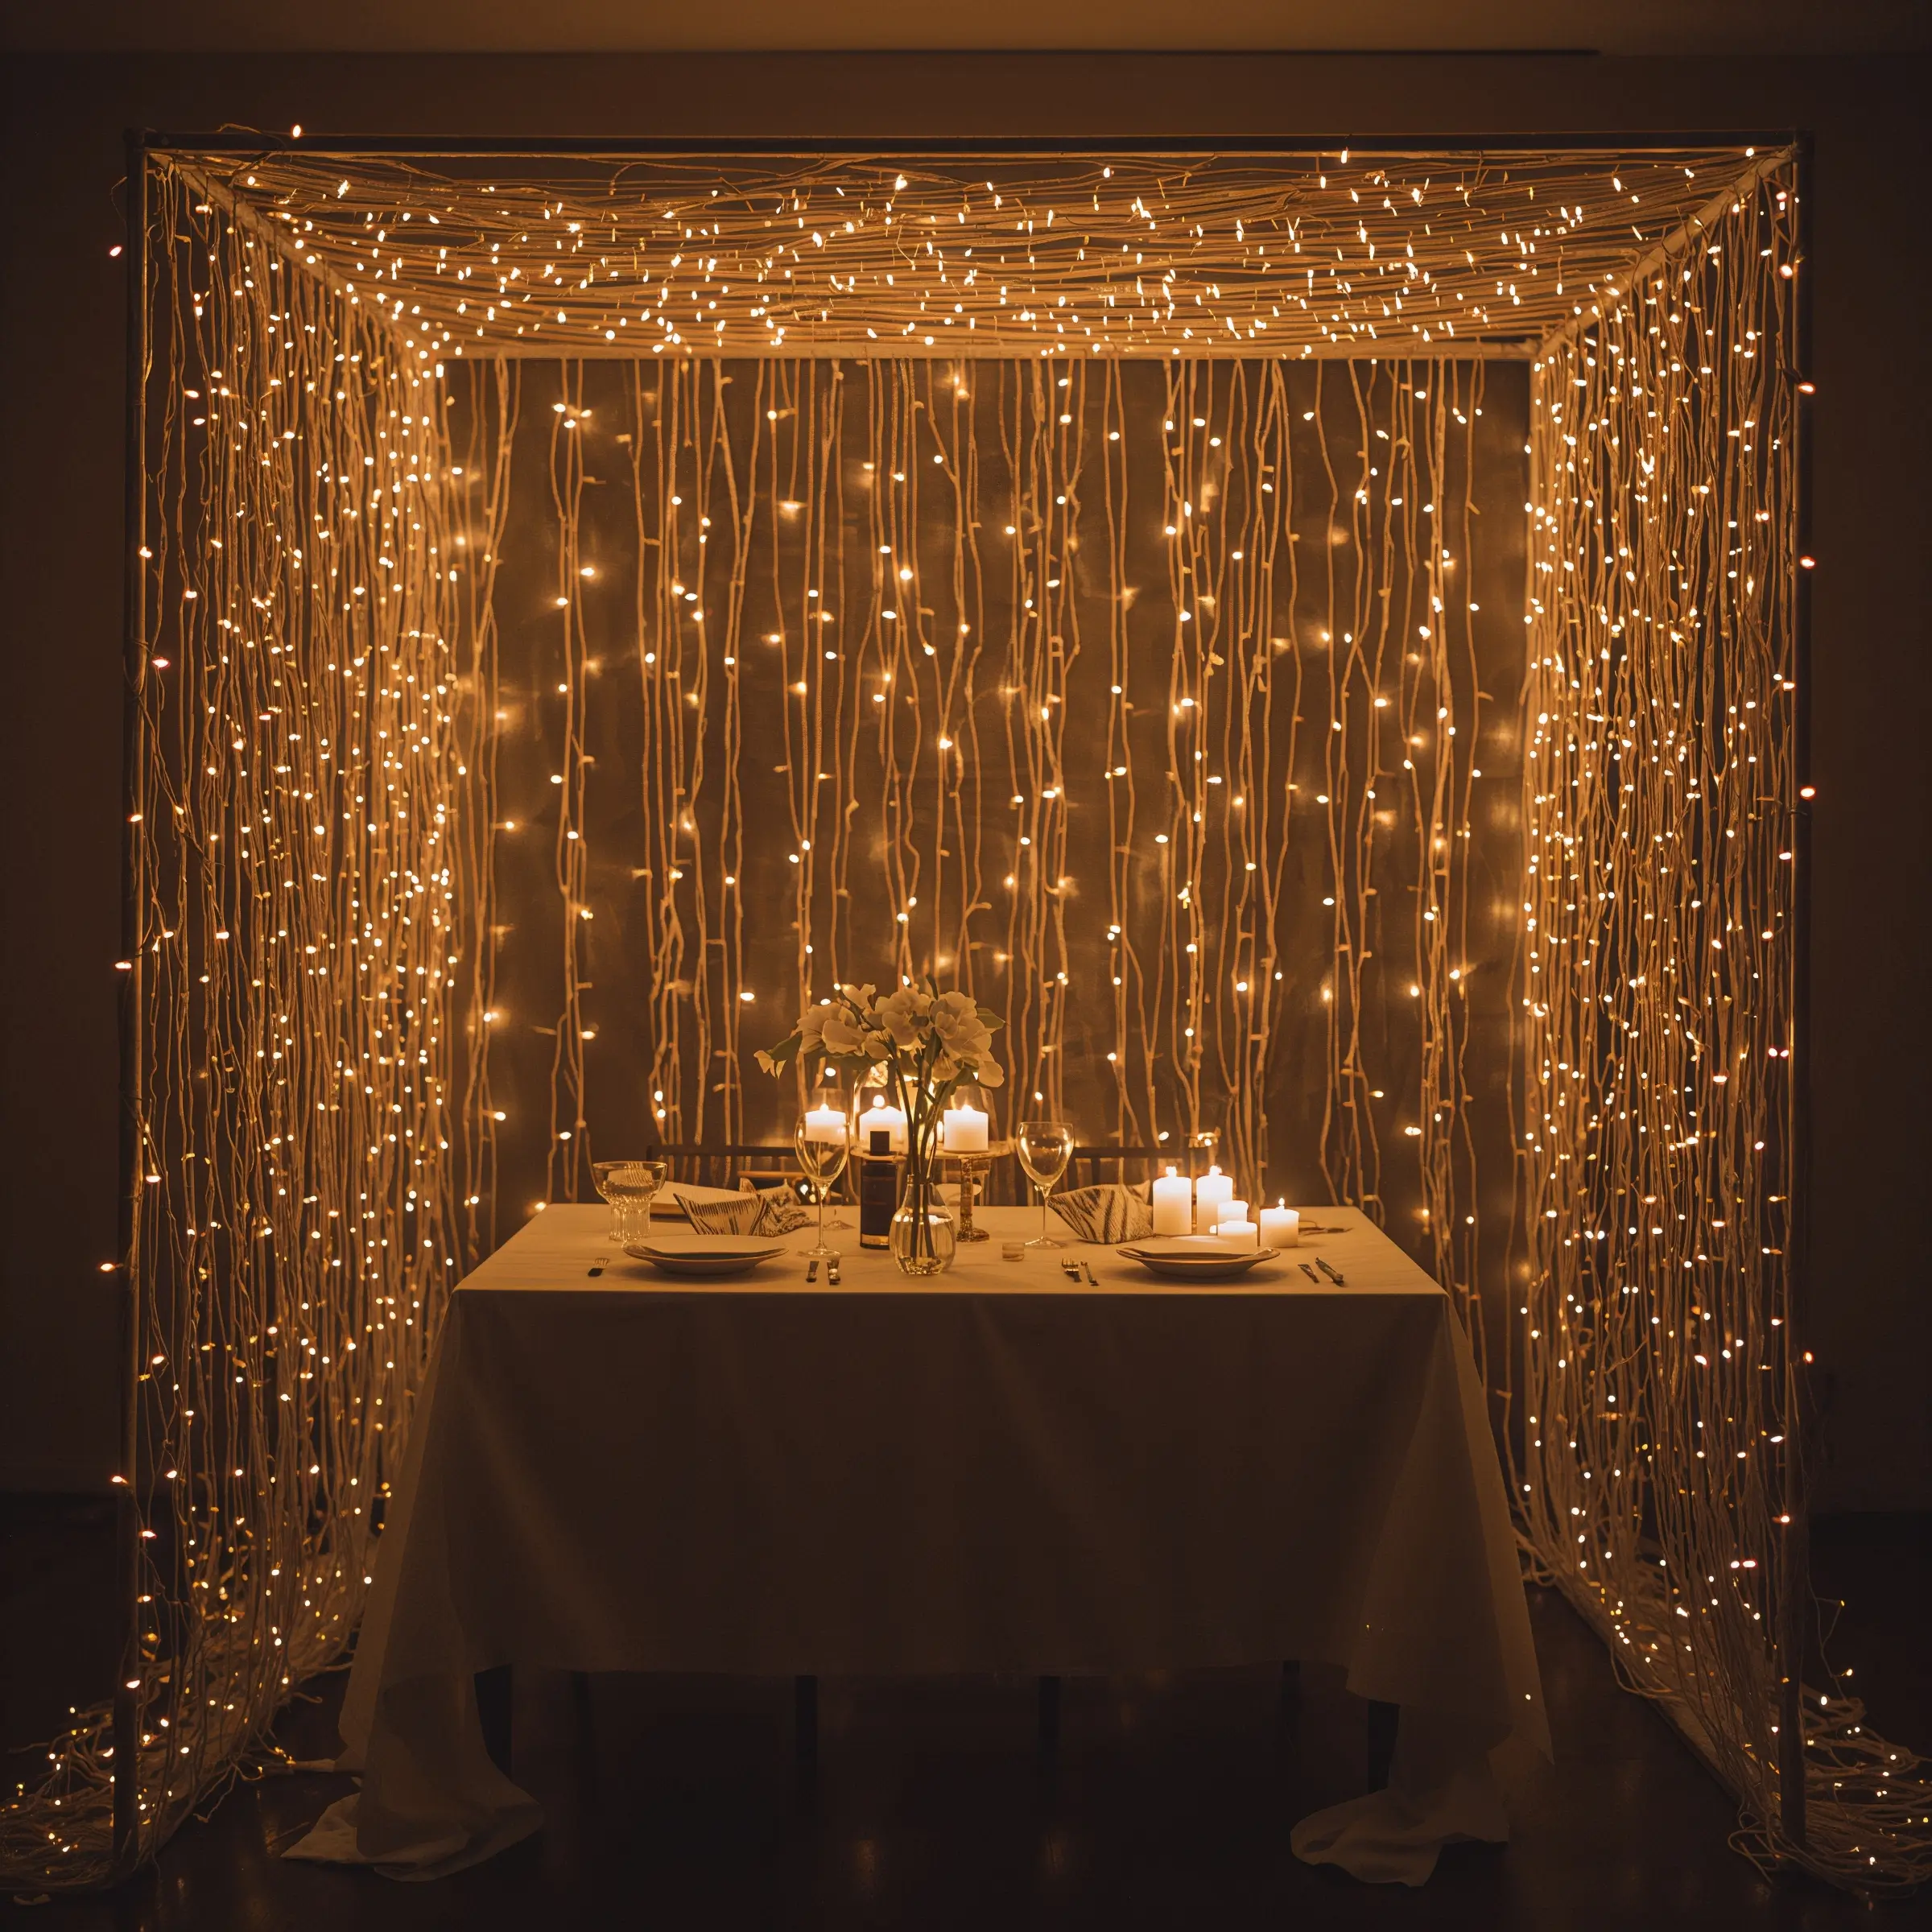
Twinkling Fairy Light Canopy – Instant Magic Maker
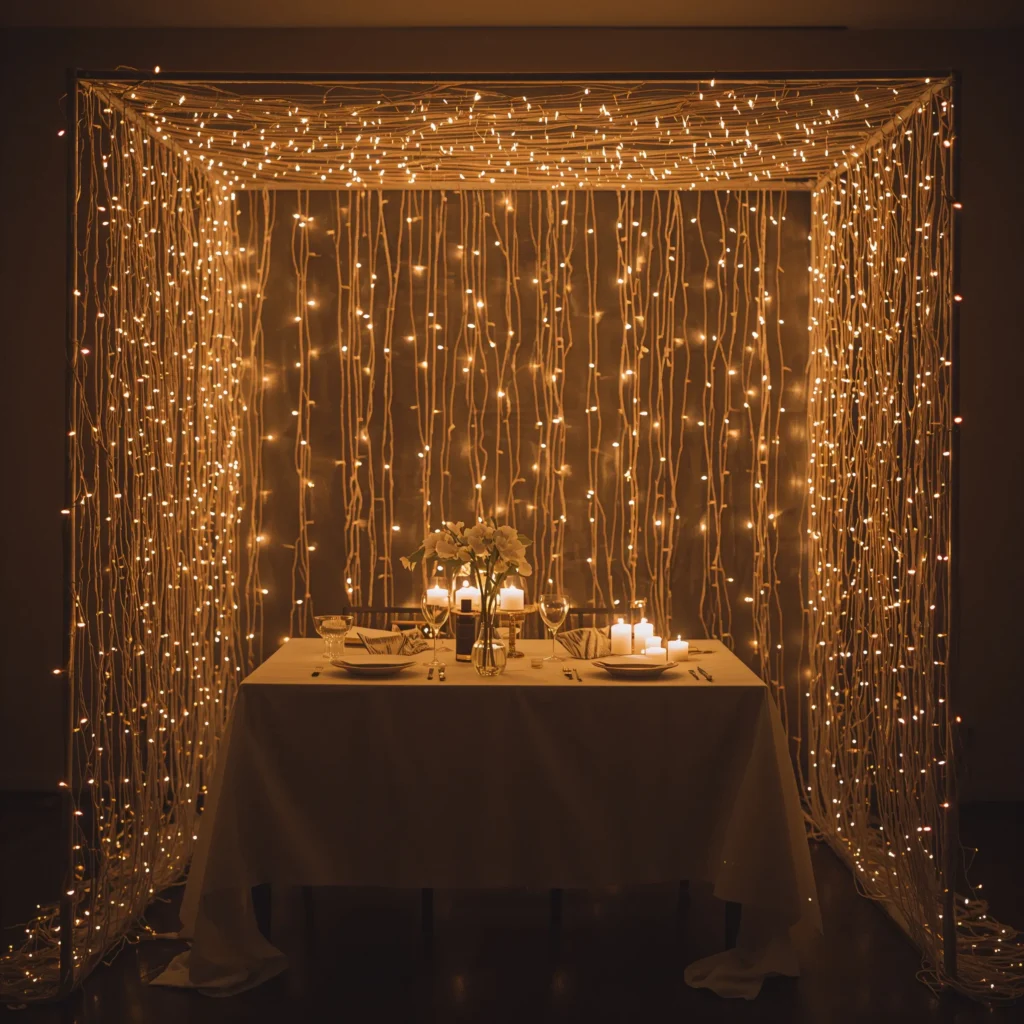
If there’s one decoration that can transform any space from ordinary to enchanting, it’s fairy lights. I’m talking about creating an actual canopy of twinkling lights that makes everyone feel like they’re dining under the stars.
The trick is thinking beyond just stringing lights around the room. Create layers, vary the heights, and use different types of lights for texture.
My fairy light canopy formula:
- Start with a base layer of warm white string lights
- Add battery-operated copper wire lights for delicate accents
- Include some larger bulb lights for focal points
- Use different hanging heights to create depth
I once transformed my friend’s basement into what looked like an outdoor garden party using nothing but fairy lights and some greenery. The lights reflected off the white walls and created this soft, romantic glow that made everyone look like they were in a movie. IMO, it’s the closest thing to actual magic you can buy at Target.
Personalized Cake Topper Display – The Sweet Centerpiece
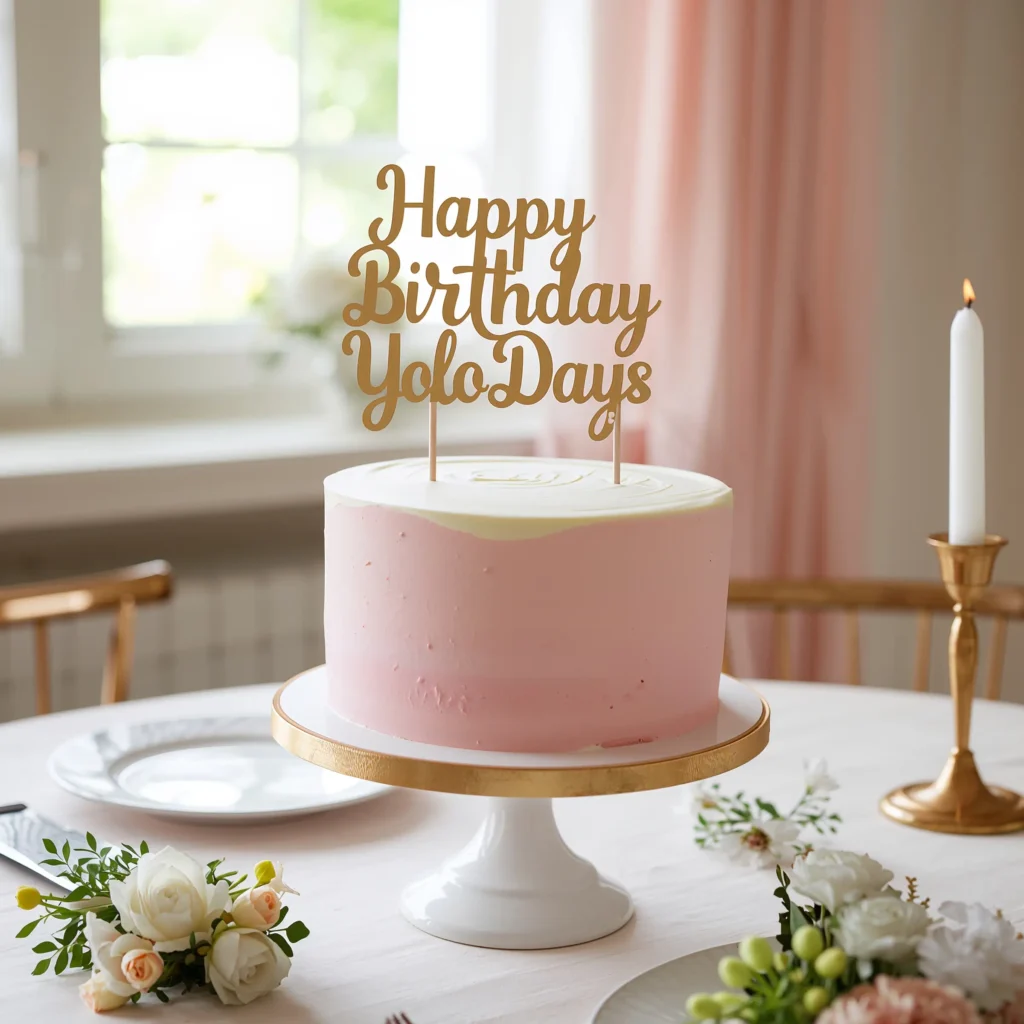
Let’s talk about cake toppers for a second. You know those little plastic “Happy Birthday” signs that come with store-bought cakes? Yeah, we can do better than that.
A personalized cake topper display isn’t just about the cake – it’s about creating a whole vignette that celebrates the birthday person. Think of it as a mini shrine to their awesomeness.
Elements of a great cake topper display:
- Custom topper with their name, age, or a meaningful phrase
- Coordinating cake stand or elevated platform
- Small decorative elements that reflect their personality
- Proper lighting to make it photo-ready
I love making toppers using cardstock and wooden skewers. You can create anything from elegant script names to fun shapes that represent the person’s hobbies or interests. For my brother’s birthday, I made a topper shaped like a guitar (he’s in a band), and it became the most photographed element of the entire party.
Also Read: 10 Stunning Minimal Birthday Decor Ideas for Elegant Celebrations
Ribbon Curtain Backdrop – Drama Without the Drama
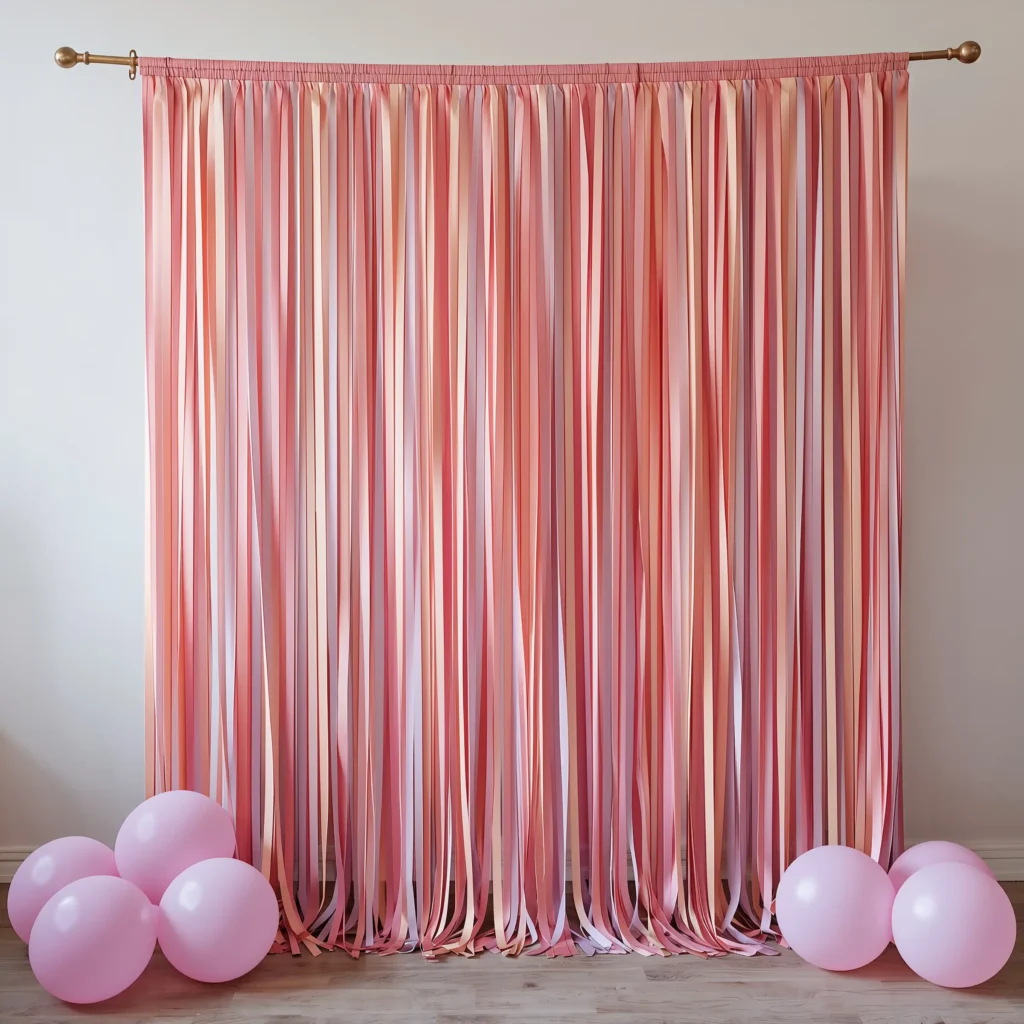
Want to create a stunning backdrop that looks like you hired a professional event planner? Ribbon curtains are your answer. They’re surprisingly simple to make, but they photograph like a million bucks.
The concept is straightforward: hang ribbons of varying lengths from a rod or string to create a flowing, textured backdrop. But the execution is where the magic happens.
Ribbon curtain success secrets:
- Use ribbons in different textures (satin, grosgrain, organza)
- Vary the lengths for an organic, flowing look
- Choose colors that complement your overall theme
- Consider adding some metallic ribbons for sparkle
I discovered this technique when I was planning a surprise party and needed something that would look amazing in photos but wouldn’t take forever to set up. The ribbon curtain delivered on both counts. It took about 45 minutes to assemble, but it looked like something from a high-end event space.
The best part? You can customize it for any theme or color scheme. I’ve made ribbon curtains in pastels for spring birthdays, jewel tones for fall celebrations, and metallics for New Year’s parties. Each one felt completely different, but the technique remained foolproof.
Bringing It All Together – The Art of Cohesive Party Decor
Here’s what I’ve learned after years of party planning wins and fails: the secret isn’t using every decoration idea you find on Pinterest. It’s choosing 3-4 elements that work together and executing them well.
Think about your space, your budget, and honestly, your energy level. Are you the type who loves spending a weekend crafting, or do you need decorations you can pull together the morning of the party? Both approaches can create amazing results – you just need to be honest about which one fits your life.
My foolproof party planning approach:
- Choose one statement piece (balloon arch, paper flower wall, or fairy light canopy)
- Add one personal element (photo banner or personalized cake topper)
- Include one simple but effective filler (streamers, mason jar vases, or minimalist centerpieces)
- Finish with ambient lighting (fairy lights work almost everywhere)
The goal isn’t perfection – it’s creating a space where people feel celebrated and happy. Some of my favorite party memories come from celebrations where half the decorations fell down or didn’t work as planned, but everyone was laughing and having a great time anyway.
Remember, the best party decoration is a room full of people who are excited to celebrate together. Everything else is just the pretty packaging around that joy. So pick the ideas that speak to you, give yourself permission to keep it simple, and focus on creating moments that’ll make everyone smile when they look back at the photos.
Trust me, your future self (and your guests) will thank you for choosing celebration over stress every single time.