10 Clever Basement Storage Ideas and DIY Organization Tips
You know that feeling when you open your basement door and immediately question your life choices? Yeah, we’ve all been there.
That overwhelming avalanche of Christmas decorations mixed with old paint cans and mystery boxes from 2007 doesn’t exactly spark joy. But here’s the thing – your basement doesn’t have to be the place where good intentions go to die.
I spent years treating my basement like a giant junk drawer until I finally snapped. One rainy Saturday, after tripping over a box of who-knows-what for the hundredth time, I decided enough was enough.
What I discovered changed everything: with the right storage solutions, your basement can actually become the most organized space in your entire house. Wild, right?
Let me share the ten storage ideas that completely transformed my basement from chaos central to organizational heaven.
Trust me, these aren’t your typical “just buy more bins” suggestions – we’re talking real, practical solutions that actually work.
Floating Shelves for Basement Walls
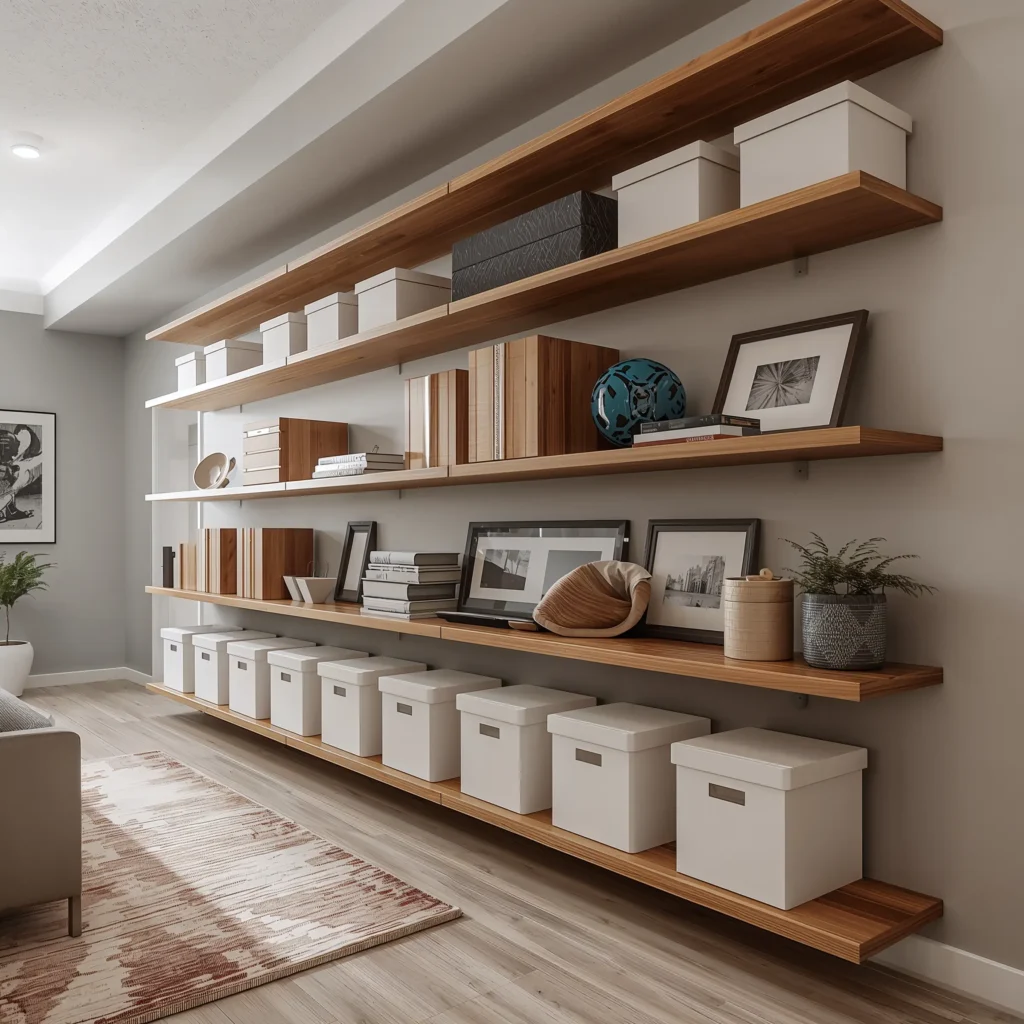
Remember when floating shelves were just for displaying your fancy dishes? Well, they’ve gotten a serious upgrade, and your basement walls are begging for them. I installed my first set three years ago, and honestly, I can’t believe I waited so long.
The beauty of floating shelves lies in their simplicity. They don’t eat up floor space, which is crucial when you’re already dealing with limited square footage. Plus, they make everything visible and accessible – no more digging through stacks of boxes to find your holiday lights.
Why Floating Shelves Work So Well
Here’s what makes them a game-changer:
- Zero floor footprint means more room for actually walking around
- Adjustable heights let you customize for different sized items
- Weight capacity of up to 50 pounds per shelf (with proper installation)
- Clean, modern look that actually makes your basement look intentional
I personally went with heavy-duty brackets rated for 75 pounds because, let’s be honest, storage tends to get heavier over time. The trick is hitting those wall studs – miss them, and you’ll have a very expensive pile of broken stuff on your floor.
Installation Tips That’ll Save Your Sanity
Finding studs in basement walls can be tricky, especially with older homes. I learned this the hard way when my first shelf attempt ended with a spectacular crash at 2 AM. (My wife was thrilled, as you can imagine.)
Use a quality stud finder and mark multiple points before drilling. If your walls are concrete or cinder block, you’ll need masonry anchors – don’t cheap out on these. The extra five bucks for good anchors beats replacing everything that crashes down later.
DIY Pallet Storage Units
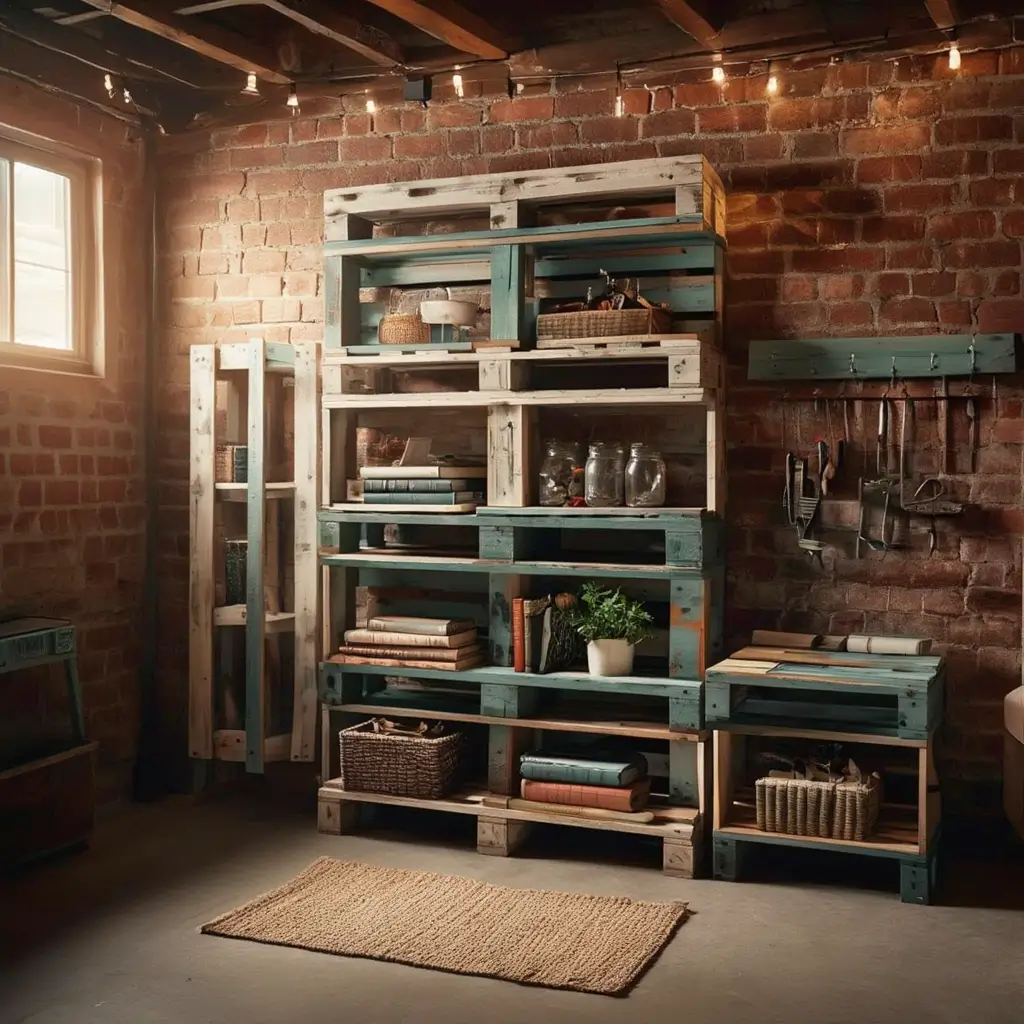
Okay, hear me out on this one. I know pallets seem like Pinterest gone wild, but they’re actually brilliant for basement storage. Free or dirt cheap, incredibly sturdy, and surprisingly versatile – what’s not to love?
Last summer, I snagged five pallets from a local warehouse for free. Two hours and some basic tools later, I had a storage system that would’ve cost me $300+ at any big box store. The best part? You can customize them exactly to your needs.
Building Your Pallet Empire
Here’s my go-to pallet storage setup:
- Vertical pallet dividers for storing plywood, drywall, or long items
- Stacked horizontal units creating instant shelving
- Wall-mounted pallets as tool organizers
- Modified pallet boxes for seasonal decorations
The key is choosing heat-treated pallets (look for the “HT” stamp). Skip the chemically treated ones unless you enjoy mysterious rashes and regret. Sand them down properly – splinters and storage don’t mix well.
Making Them Actually Look Good
I get it, raw pallets aren’t exactly aesthetic goals. But throw on a coat of stain or paint, and suddenly you’ve got industrial chic storage that looks intentional. I went with a dark walnut stain on mine, and visitors actually compliment them. Who compliments basement storage? Nobody, until now.
Under-Stair Storage Drawers
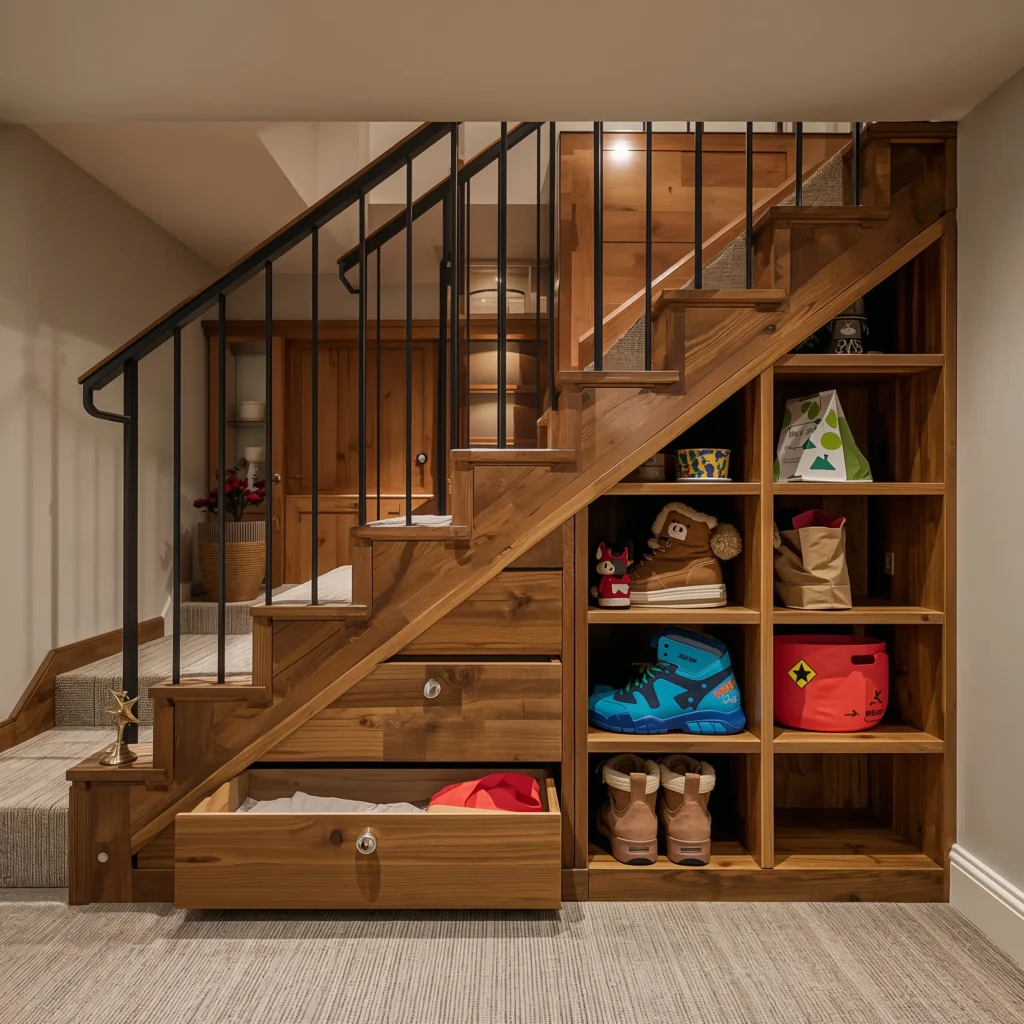
That awkward space under your basement stairs? It’s basically begging to become storage gold. Most people just shove random stuff under there and call it a day. But with some planning, you can turn it into the most efficient storage spot in your entire basement.
I installed pull-out drawers under my stairs two years ago, and it’s hands-down the best storage decision I’ve made. No more crawling on hands and knees with a flashlight, trying to find the camping gear.
Maximizing Every Inch
The triangular space creates natural zones:
- Deep drawers at the back for rarely used items
- Medium drawers in the middle for seasonal stuff
- Shallow drawers at the front for frequently accessed items
- Vertical slots along the sides for awkward shaped items
Building these yourself requires some decent carpentry skills, FYI. But if you’re handy with tools, you can create a custom system for under $200. Not handy? IKEA’s PAX system can be modified to fit – just did this for my brother’s place, and it looks amazing.
The Pull-Out Game Changer
Heavy-duty drawer slides are non-negotiable here. Spend the extra money on soft-close, full-extension slides rated for at least 100 pounds. Why? Because you’ll inevitably overload these drawers (we all do), and cheap slides will fail spectacularly.
I learned this lesson when my first set of economy slides gave out, sending Christmas ornaments cascading across the basement floor. The sound still haunts me. 🙂
Also Read: 10 Brilliant Cozy Basement Ideas to Transform Your Home
Basement Storage Cabinets with Doors
Sometimes you just need to hide the chaos behind closed doors, and that’s perfectly fine. Storage cabinets with doors offer that “out of sight, out of mind” peace that open shelving simply can’t provide.
After years of staring at exposed storage, I finally invested in proper cabinets for one wall of my basement. The visual calm it created was immediate – suddenly my basement looked like an actual room instead of a warehouse.
Choosing the Right Cabinets
Not all cabinets survive basement life. Here’s what actually matters:
- Moisture-resistant materials (plastic, metal, or treated wood)
- Adjustable shelving for flexibility
- Locking mechanisms if you’re storing anything valuable or dangerous
- Ventilation options to prevent that musty basement smell
I went with heavy-duty resin cabinets from Gladiator. Yeah, they cost more than the cheap stuff, but they’ve survived two basement floods without a scratch. The particle board cabinet I had before? It basically dissolved.
Organization Inside the Cabinets
Having doors doesn’t mean you can just throw stuff in randomly. Trust me, I tried that approach. Use these strategies instead:
Label everything – inside the doors, on shelves, on boxes. Future you will thank present you. I use a label maker because my handwriting looks like a doctor having a seizure, but whatever works.
Create zones within cabinets – tools in one, paint supplies in another, holiday decorations in a third. Mixing categories leads to that frustrating “I know it’s in here somewhere” dance we all hate.
Hanging Storage Baskets
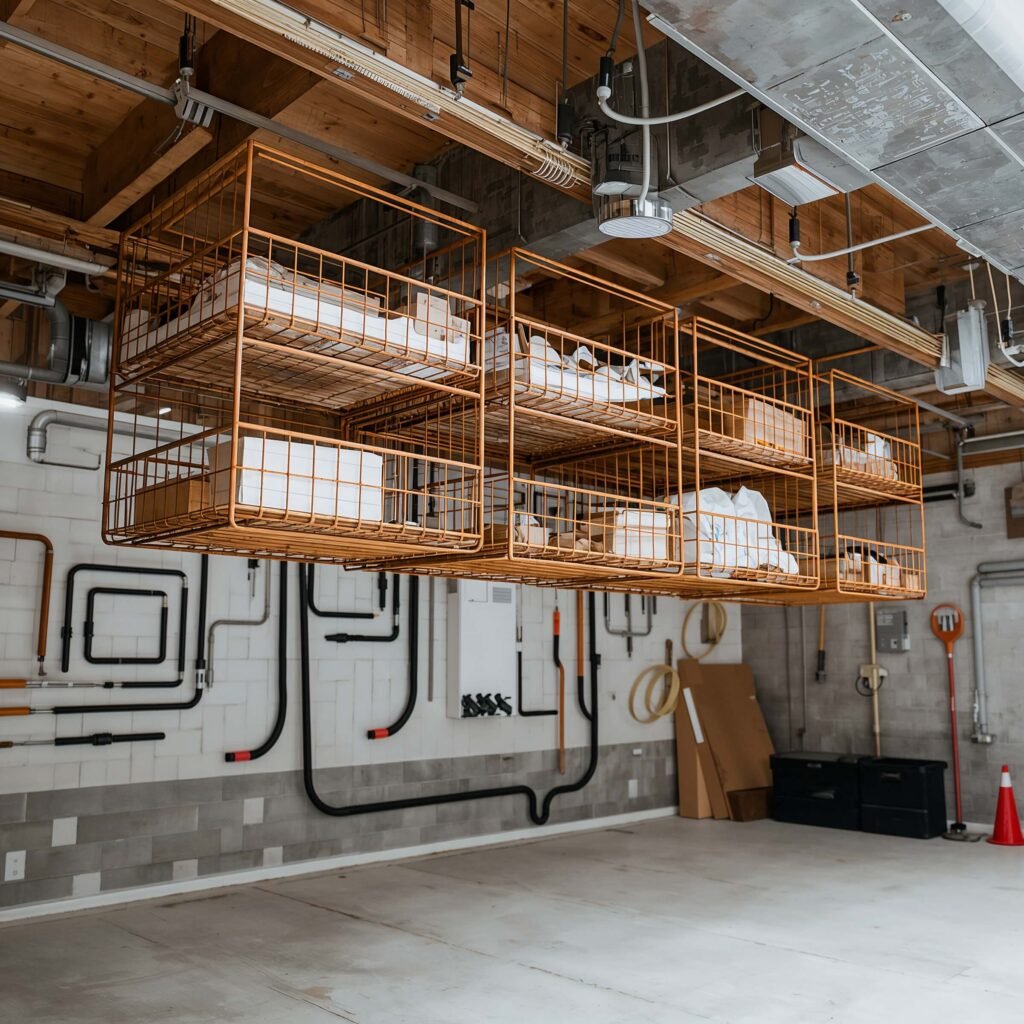
Wire baskets hanging from your basement ceiling joists might seem old school, but they’re having a serious comeback. And for good reason – they use space that literally nothing else can touch.
I installed a track system with sliding baskets last year, and it’s been a game changer for lightweight, bulky items. Pool noodles, sleeping bags, inflatable holiday decorations – all that awkward stuff that never fits anywhere finally has a home.
The Right Way to Hang ‘Em
Here’s what works:
- Heavy-duty ceiling hooks rated for at least 50 pounds
- Coated wire baskets to prevent rust
- Pulley systems for heavier items you need to access regularly
- Clear labeling visible from below
The track system I use lets me slide baskets along the ceiling, which is clutch when I need to access stuff stored behind them. It’s like a storage ballet up there, except less graceful and more practical.
What Actually Belongs Up There
Not everything should live in ceiling storage. Keep it light and seasonal – think camping gear, holiday decorations, empty coolers. Heavy stuff belongs closer to the ground unless you enjoy concussions.
I once stored paint cans in ceiling baskets. Ever had a gallon of semi-gloss fall on your head? Zero stars, would not recommend.
Pegboard Tool Organization
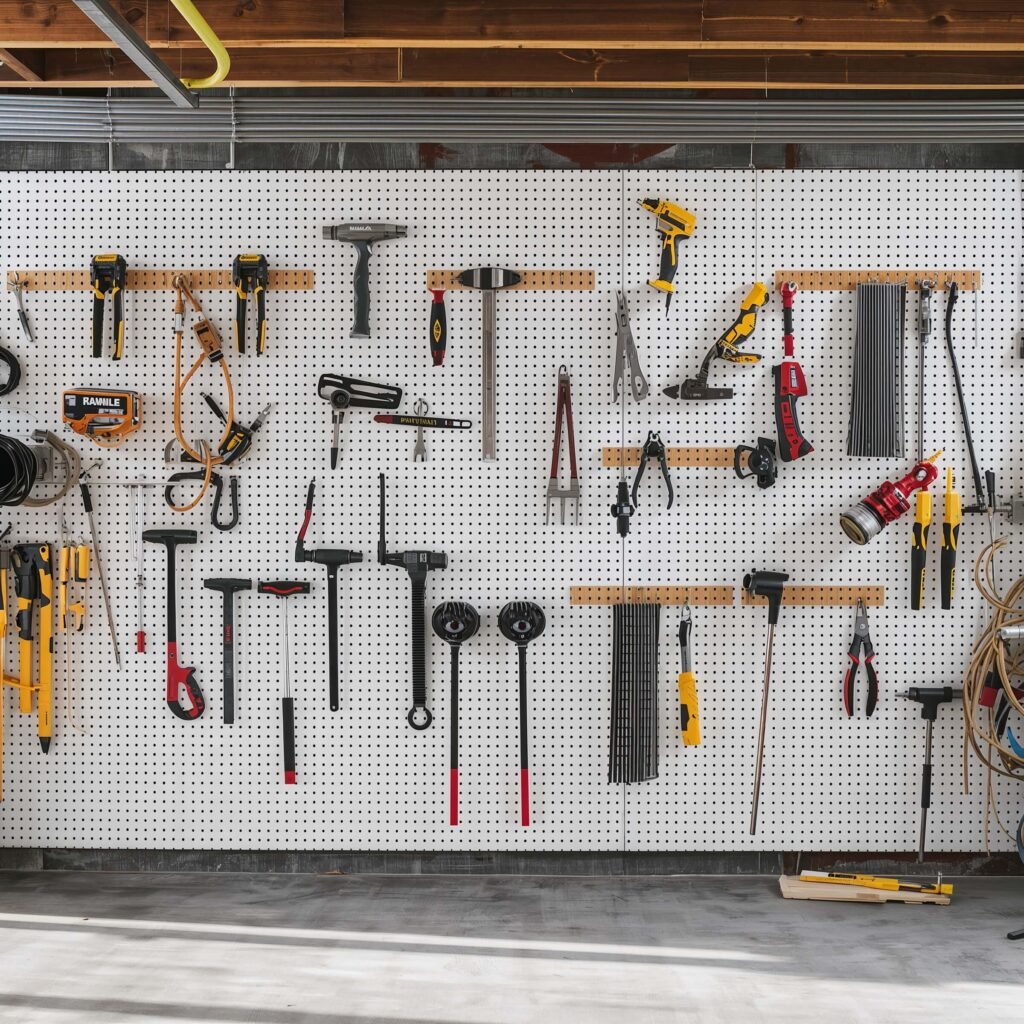
Pegboard might feel like your dad’s garage circa 1985, but there’s a reason it’s still around – it flat-out works. Modern pegboard systems have evolved way beyond the basic brown hardboard though.
My pegboard wall started as a small 4×4 section and has since expanded to cover an entire wall. It’s basically tool organization porn at this point, and I’m not even sorry.
Modern Pegboard Options
Forget that flimsy brown stuff. Today’s options include:
- Metal pegboard for serious weight capacity
- Plastic systems with custom accessories
- Slat wall alternatives for a cleaner look
- Modular panels you can reconfigure as needed
I went with steel pegboard panels from Wall Control. They’re pricey but hold everything from my hammer collection (yes, I have a collection) to my circular saw. The powder coating comes in different colors too – I chose black because it hides dirt and looks badass.
Pegboard Organization Strategies
Group tools by function, not size. All electrical stuff together, all painting supplies together, all measuring tools together. It seems obvious, but you’d be surprised how many people organize by what “looks good” together.
Leave growth space between groupings. You’ll acquire more tools (it’s inevitable), and cramming them in ruins your whole system. I learned this after my third pegboard reorganization in six months.
Use specialty holders for awkward items. Those generic hooks work for basic stuff, but specialized holders for things like drill bits, extension cords, and spray cans make a huge difference. Yeah, they cost more, but the organization is worth it.
Also Read: 10 Awesome Minecraft Basement Ideas and Cozy Underground Rooms
Storage Bench with Hidden Compartments
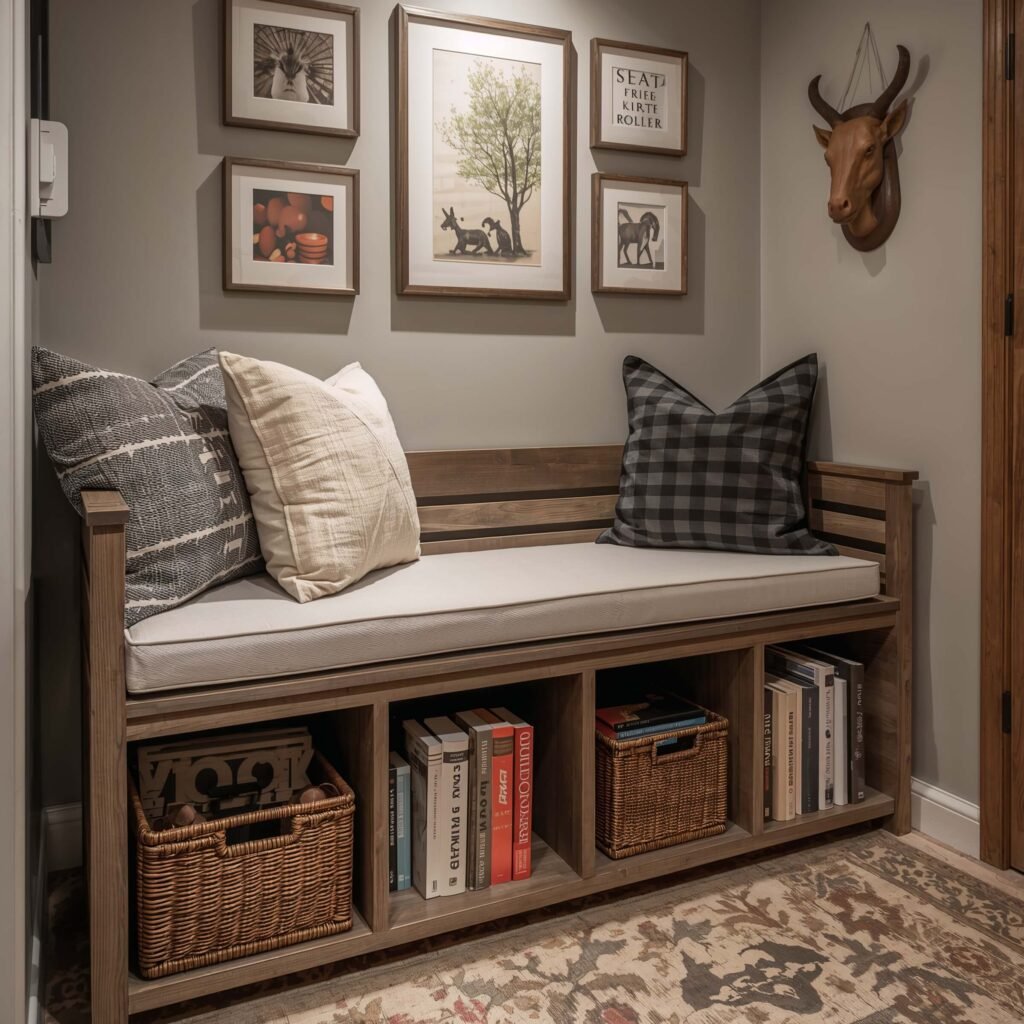
A storage bench in your basement might sound weird, but hear me out. You need somewhere to sit when putting on work boots or sorting through boxes. Why not make that seat pull double duty?
I built mine from an old kitchen cabinet and some 2x4s. Total cost: about $50. Storage value: priceless. It holds all my painting supplies, and nobody even knows they’re there.
Building vs. Buying
DIY benches let you customize dimensions perfectly. My basement has a weird alcove that standard benches wouldn’t fit. Building my own meant utilizing every inch of that space.
If DIY isn’t your thing, plenty of ready-made options exist:
- Entryway benches with cubbies underneath
- Ottoman storage benches with lift-up tops
- Mudroom lockers with bench seating
- Piano benches with storage (surprisingly perfect size)
What to Store Inside
The bench location determines its contents. Near your workshop? Tool storage. By the stairs? Seasonal footwear. In your hobby corner? Craft supplies.
Mine lives by my workbench and holds:
- Paint brushes and rollers
- Drop cloths
- Tape varieties
- Small paint cans
- Sandpaper organization system
The key is keeping related items together. Nothing worse than having to check three different storage spots for one project.
Clear Plastic Stackable Bins
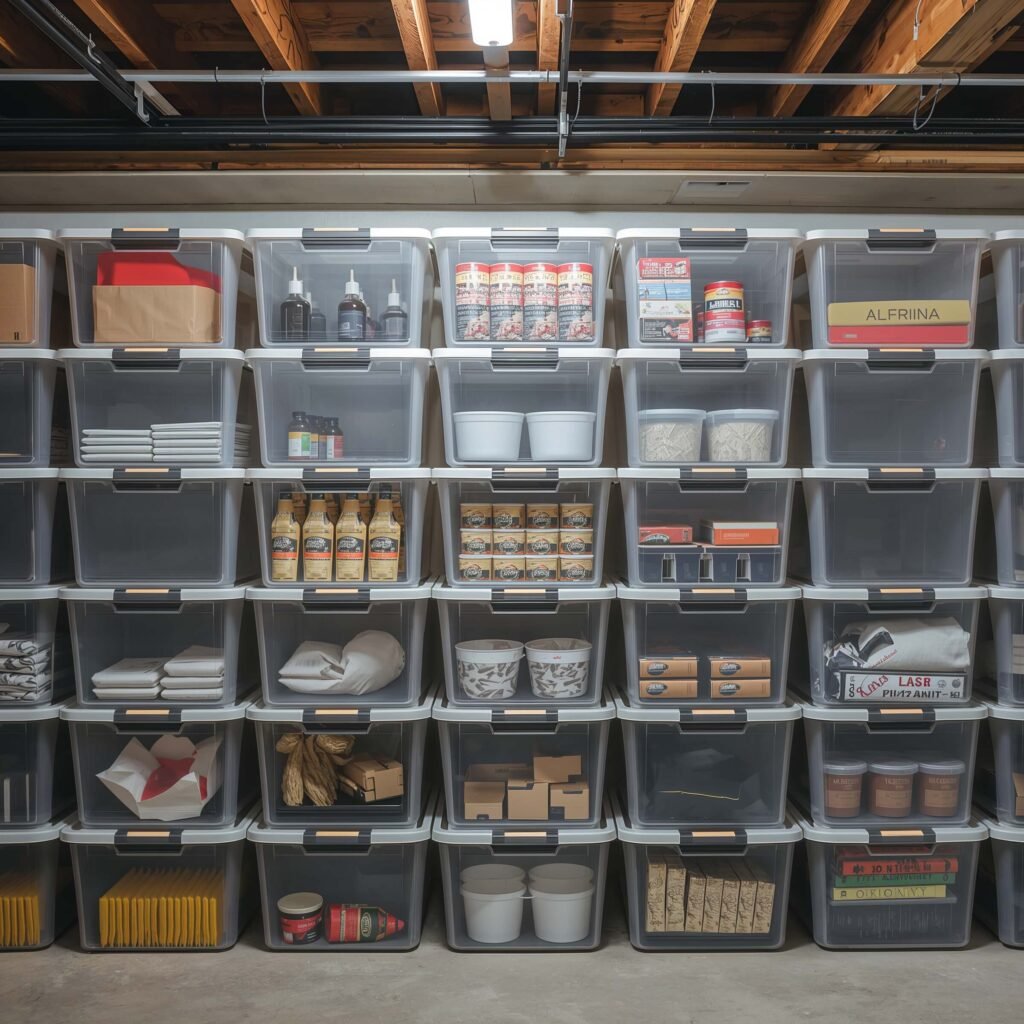
I know, I know – plastic bins are the most basic storage solution ever. But there’s a reason they’re everywhere: they work. The trick is using them strategically, not just buying random sizes and hoping for the best.
After years of the mismatched bin disaster, I finally committed to one brand and size system. Revolutionary? No. Life-changing? Actually, yes.
The Clear Bin Advantage
Visibility changes everything. Those opaque bins might look cleaner, but you’ll forget what’s inside within a week. Clear bins eliminate the “mystery box” syndrome that plagues most basements.
Here’s my bin strategy:
- Same brand throughout for perfect stacking
- Three sizes maximum (small, medium, large)
- Weathertight seals for moisture protection
- Reinforced corners for heavy stacking
I use Sterilite’s gasket boxes exclusively now. They’re not the cheapest, but they stack perfectly and actually keep moisture out. IMO, the extra cost beats dealing with moldy Christmas decorations.
Labeling Like a Pro
Even with clear bins, labels are mandatory. I use a two-part system: general category on the front (“Holiday – Christmas”) and detailed contents on top. When bins are stacked, you can still see what’s what.
Color-coding helps too. All holiday stuff gets red labels, all camping gear gets green, all kids’ outgrown clothes get blue. It sounds anal, but finding stuff takes seconds now instead of hours.
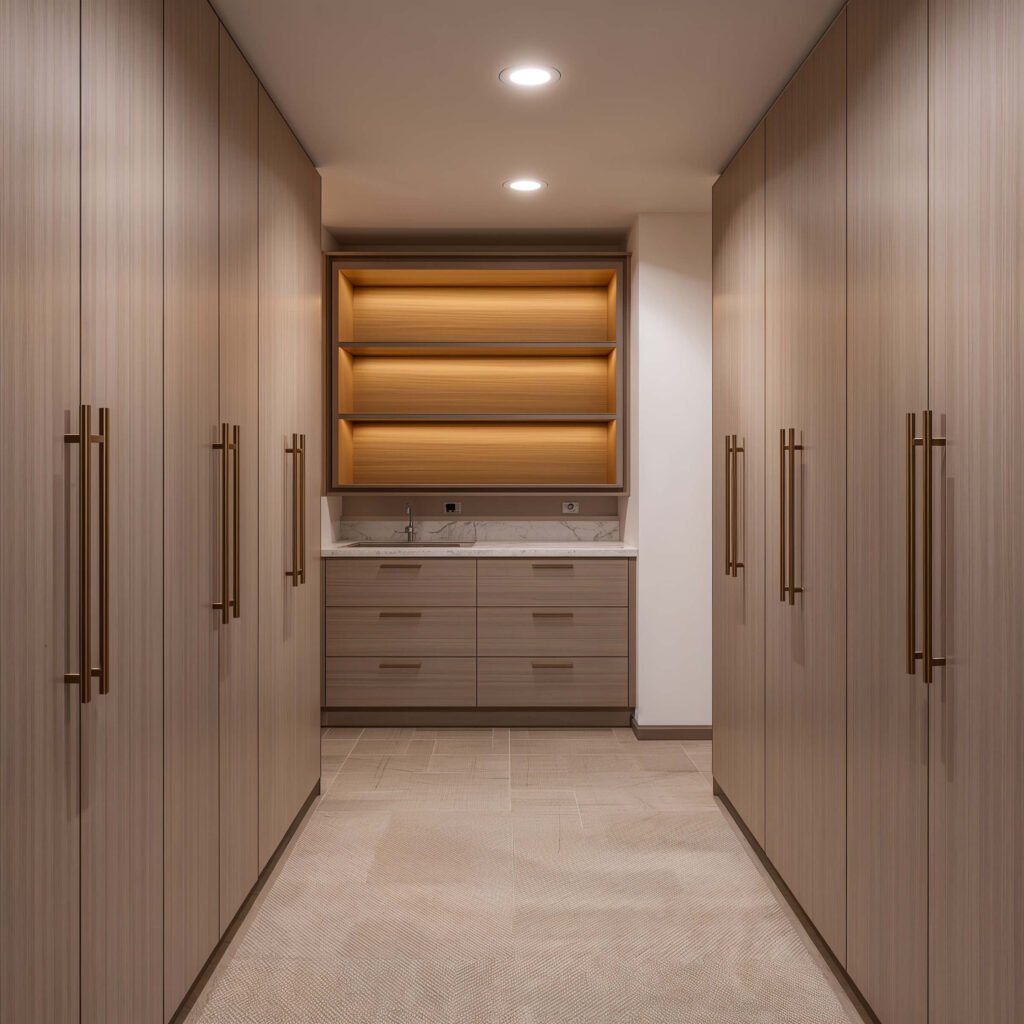
Basement Closet Conversion Ideas
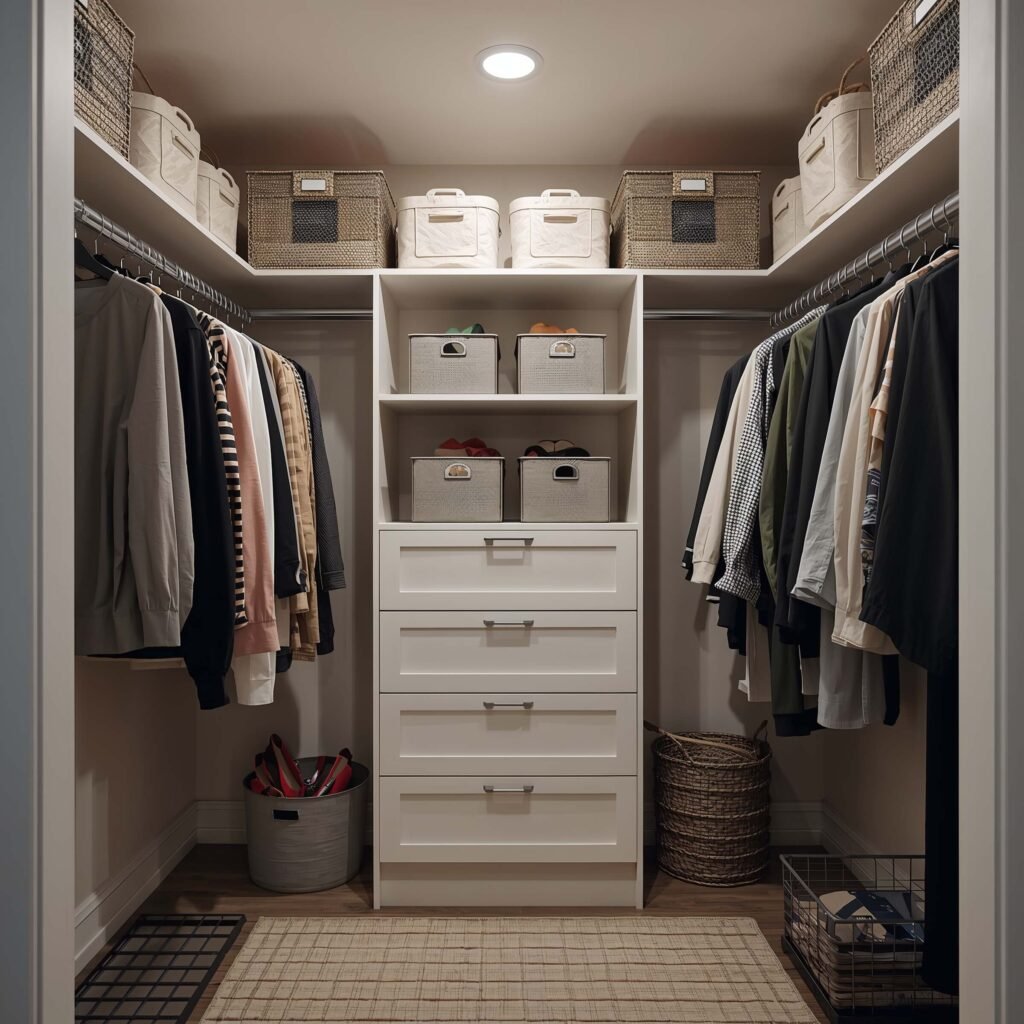
Got an awkward corner or unused space in your basement? Time to build a closet. Not a fancy walk-in situation – we’re talking practical, enclosed storage that maximizes vertical space.
I converted a 4×6 dead space behind my stairs into a closet, and it now holds more than my entire garage used to. The power of vertical storage with doors is seriously underrated.
Planning Your Closet Space
Start with what you need to store:
- Long items need hanging space
- Boxes need shelving
- Seasonal items can go up high
- Frequently used stuff stays at eye level
My closet breakdown:
- Top shelf: Holiday decorations (accessed twice a year)
- Upper hanging rod: Rarely worn coats
- Middle shelves: Labeled bins of kids’ clothes
- Lower hanging rod: Frequently used outdoor gear
- Floor: Shoe racks and sports equipment
Building on a Budget
Closet organizer kits make this stupid easy. For under $200, you get everything needed for a basic setup. I used ClosetMaid’s kit and installed it in an afternoon.
Add a simple door (even a curtain works), and boom – instant closet. Bi-fold doors work great for tight spaces. I splurged on mirror doors, which made my basement feel twice as big. Worth every penny.
Don’t forget lighting inside. Battery-powered LED strips with motion sensors cost like $20 and prevent the dreaded “black hole closet” effect. Trust me, fumbling in the dark gets old fast.
Also Read: 10 Inspiring Basement Stairs Ideas and Modern Upgrades
Rolling Storage Carts
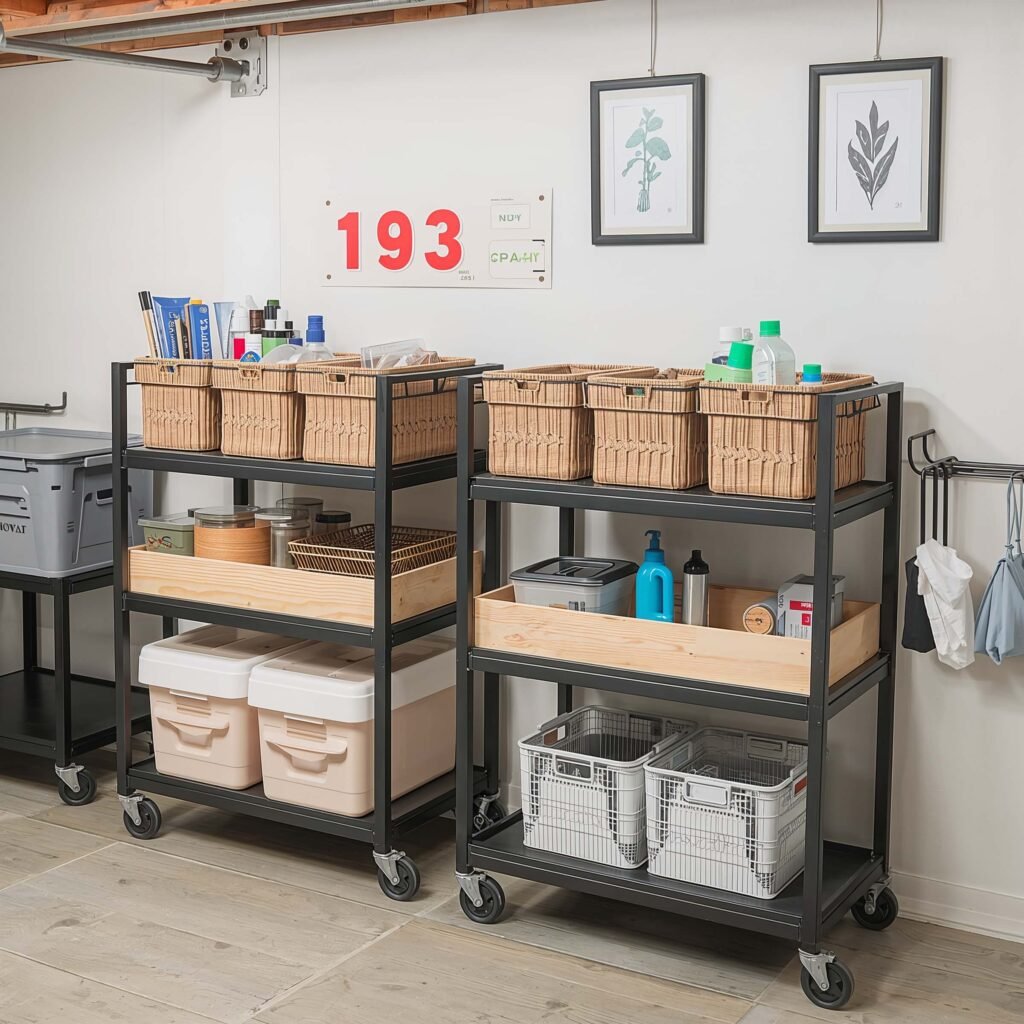
Mobile storage sounds fancy, but it’s really just putting wheels on everything. And honestly? It’s genius. Being able to move storage around transforms how you use your basement space.
My basement doubles as a workshop and holiday decoration staging area. Rolling carts let me reconfigure the space in minutes instead of hours. Can’t really do that with built-in shelving.
Types of Rolling Storage
Not all carts are created equal:
- Metal utility carts for heavy tools and supplies
- Drawer carts for small parts and hardware
- Wire shelving units on wheels for lighter items
- Under-shelf rolling drawers for existing stationary units
I have three metal carts from Husky that have survived everything I’ve thrown at them (sometimes literally). The locking wheels are crucial – nothing worse than chasing a runaway cart across your basement.
Strategic Cart Placement
Think about workflow when positioning carts. My painting supplies cart lives against the wall but rolls out when I’m working on projects. Tool cart stays by the workbench but moves to wherever I’m fixing something.
Create parking spots for each cart. I outlined spaces with tape on my floor – sounds neurotic, but it keeps things organized. Plus, everyone knows exactly where stuff belongs, not just me.
The modular approach means you can start with one cart and expand as needed. Way better than committing to a massive storage system that might not work for your space.
Making It All Work Together
Here’s the thing about basement storage – no single solution fixes everything. You need a combination that works for your specific space, stuff, and lifestyle. My setup combines seven of these solutions, and they work together beautifully.
The floating shelves hold frequently used items at eye level. Pallet units store lumber and large materials. Under-stair drawers hide seasonal decorations. Storage benches provide seating and concealed storage. Clear bins on metro shelving organize everything else. Pegboard keeps tools visible and accessible. Rolling carts provide flexible workspace storage.
What matters most? Starting somewhere. Pick one area, implement one solution, and build from there. Rome wasn’t built in a day, and neither is perfect basement storage.
The Bottom Line
Your basement doesn’t have to be the family dumping ground. With these storage solutions, it can become the most organized, functional space in your house. I went from basement shame to basement pride in about six months, and you can too.
The best part? Most of these solutions cost less than a single piece of “proper” furniture. We’re talking maximum impact for minimum investment. And unlike that exercise equipment gathering dust upstairs, you’ll actually use these storage solutions every day.
Start small, think vertical, and remember – the goal isn’t Pinterest perfection. It’s creating a basement that actually works for your life. Mine isn’t going to win any design awards, but I can find anything in under 30 seconds. In the storage world, that’s basically winning the lottery.
So grab some coffee, pick your first project, and get ready to transform that basement chaos into organized bliss. Your future self (and anyone who helps you move) will thank you.