15 Simple Cardboard DIY Room Decor Ideas Anyone Can Do
You know that pile of Amazon boxes sitting in your garage? Yeah, the one you keep telling yourself you’ll recycle “next week”? Well, I’ve got news for you – those boxes are basically free decor gold waiting to transform your space.
And before you roll your eyes thinking cardboard decor sounds like something from a college dorm nightmare, trust me on this one.
I stumbled into cardboard crafting when I moved into my first apartment and realized furniture costs more than my monthly rent.
Desperate times called for creative measures, and honestly? Some of my cardboard pieces get more compliments than my actual furniture. Go figure!
Geometric Cardboard Wall Art
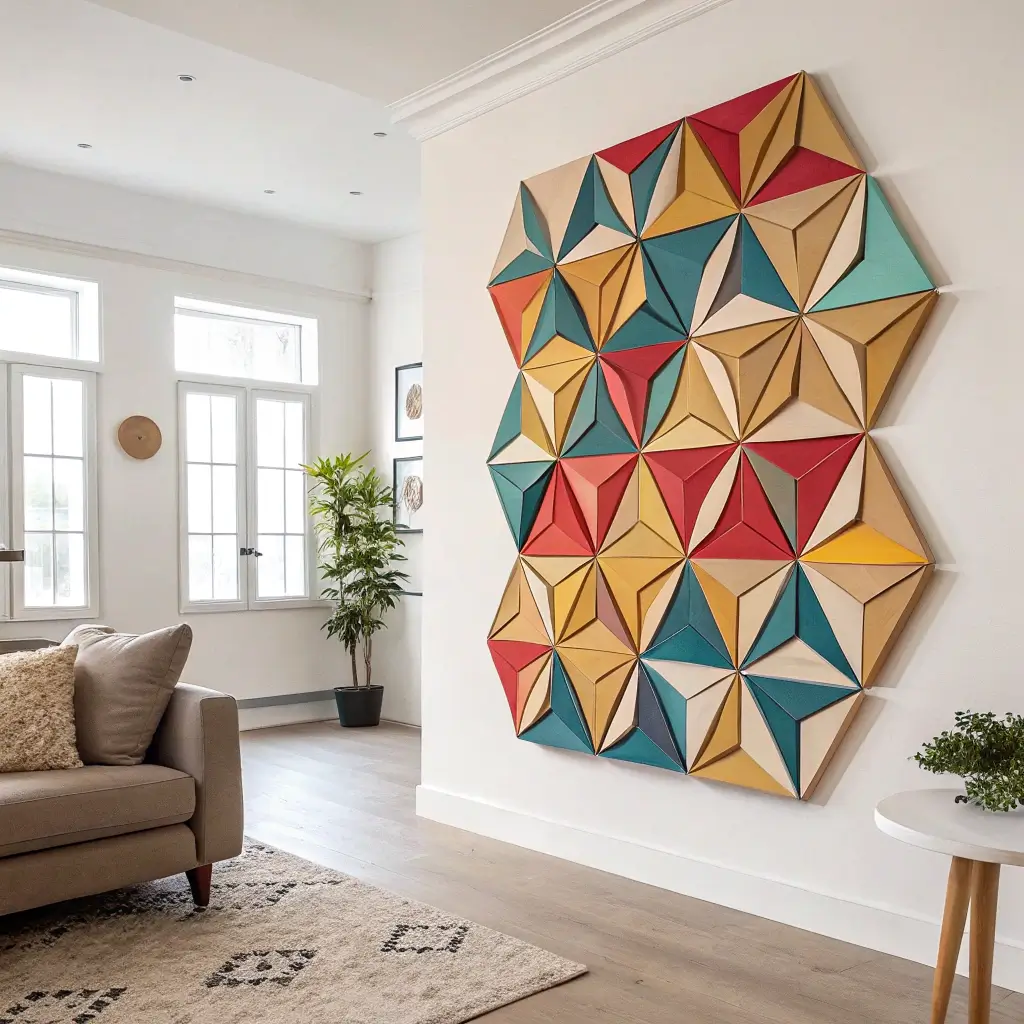
Let’s kick things off with something that’ll make your walls look like you hired an interior designer (spoiler: you didn’t). Geometric wall art from cardboard hits different when you nail the execution.
Getting the Basics Right
First things first – grab your sharpest X-acto knife because clean edges make or break this project. I learned this the hard way when my first attempt looked like a kindergarten craft gone wrong. You’ll want corrugated cardboard for this one; the texture adds depth that flat cardboard just can’t match.
Creating geometric patterns starts with simple shapes:
- Triangles (easiest to cut and arrange)
- Hexagons (trendy and sophisticated)
- Diamonds (perfect for creating optical illusions)
- Mixed shapes (for that abstract gallery vibe)
Assembly Tips That Actually Work
Here’s where most people mess up – they slap pieces together without planning. Sketch your design first, even if your drawing skills peaked in third grade. I arrange my pieces on the floor before committing to the wall because repositioning cardboard covered in hot glue? Not fun.
Pro tip: Paint your cardboard pieces before assembly. Metallic spray paint turns basic cardboard into something that looks suspiciously expensive. Gold and copper work especially well against white walls.
Cardboard Floating Shelves
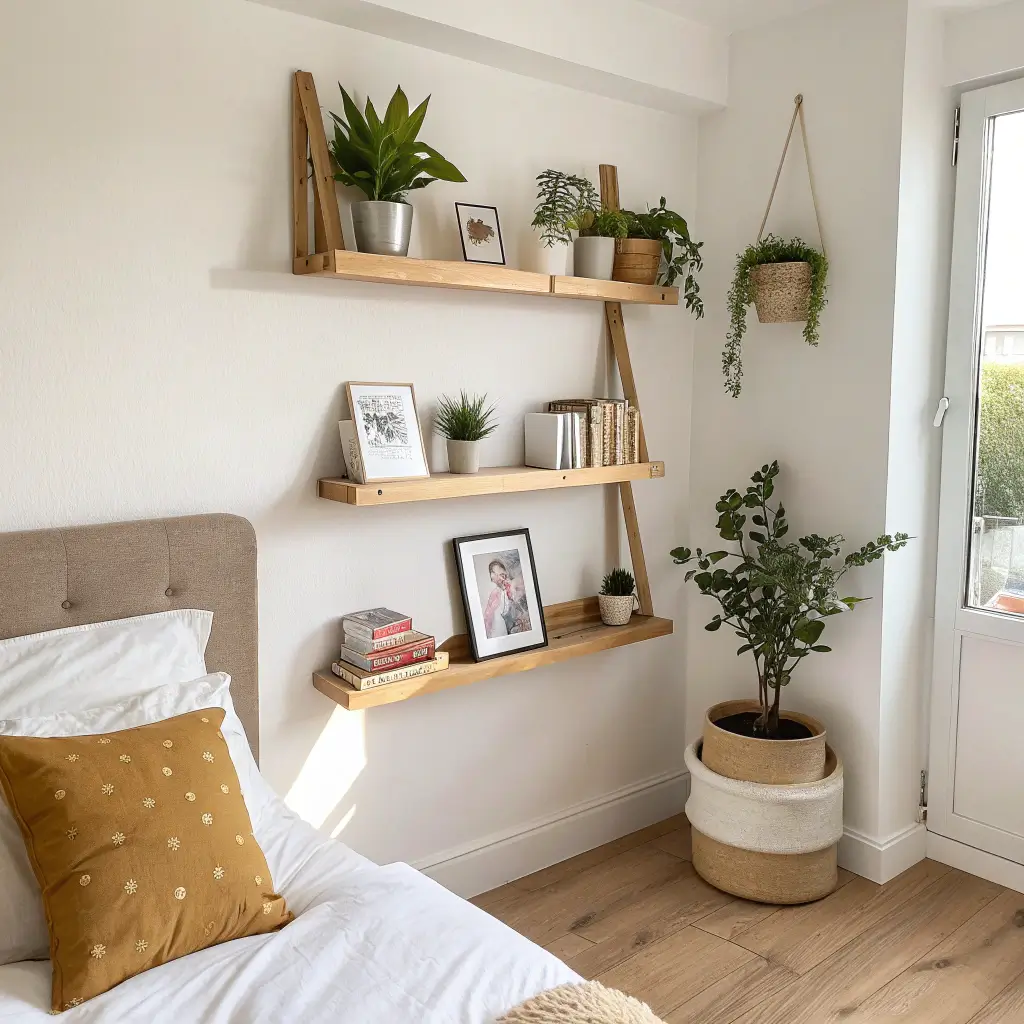
Who says floating shelves need to cost a fortune? These cardboard versions hold lightweight items perfectly and nobody will know they’re not “real” shelves unless they touch them.
The Secret to Sturdy Shelves
The trick here is layering multiple pieces of corrugated cardboard – think cardboard sandwich. Three to four layers glued together create surprising strength. I’ve had mine holding succulents and small books for over a year now.
You’ll need:
- Heavy-duty corrugated cardboard
- Wood glue (yes, it works on cardboard)
- L-brackets for mounting
- Paint or contact paper for finishing
Making Them Look Legit
Cover your shelves with wood-grain contact paper and watch people’s minds get blown when you tell them it’s cardboard. The edges need special attention – use a thin strip of actual wood veneer or carefully painted edges to sell the illusion.
Mount them using actual wall brackets hidden underneath. This distributes weight properly and prevents that sad drooping effect nobody wants to see.
3D Cardboard Letters for Wall
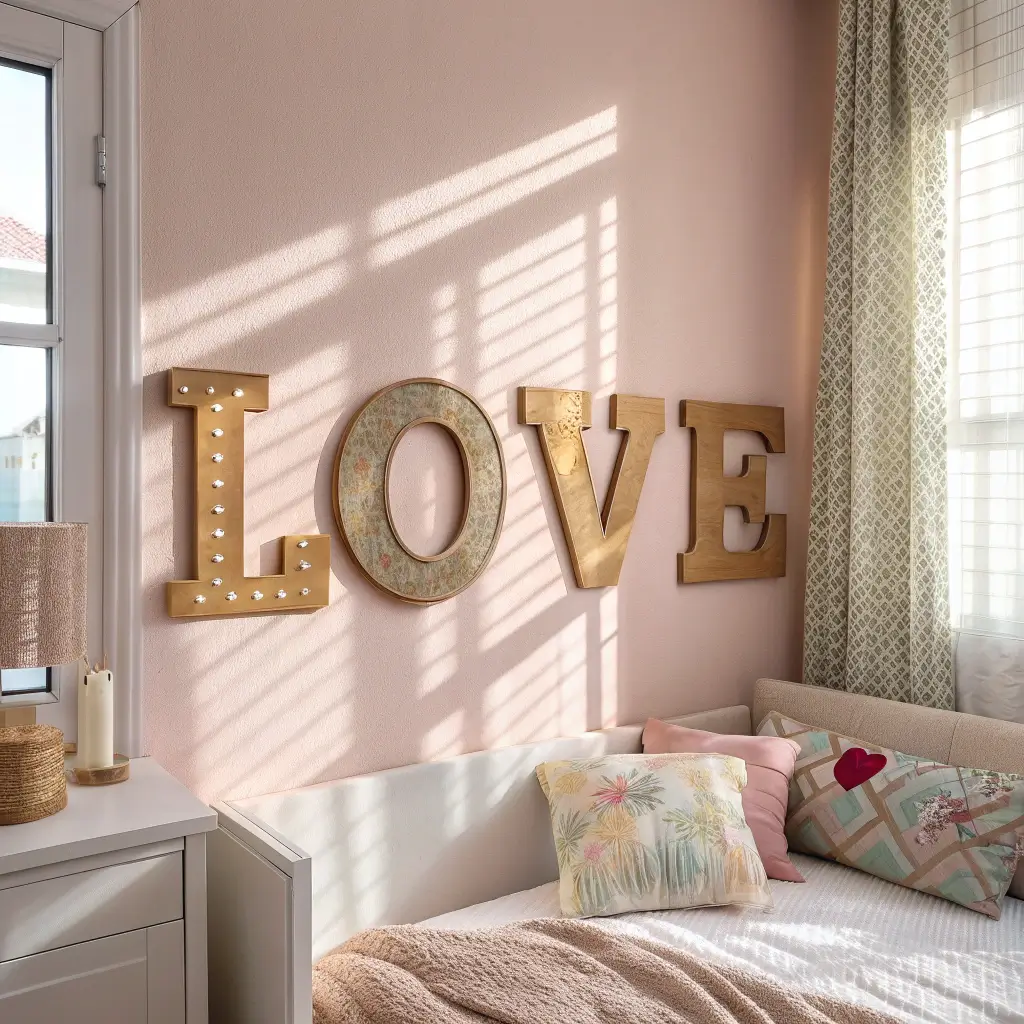
Remember when everyone was obsessed with those marquee letters? Well, cardboard versions cost approximately nothing and look just as Instagram-worthy.
Building Letters That Pop
Start with two identical letter cutouts for the front and back. The magic happens with the strips connecting them – these create your 3D effect. Width matters here; I recommend 3-4 inches for standard wall letters.
Cut strips all the same width and score them where they need to bend around curves. Letters with straight edges (like E, F, H) are beginner-friendly. Save the S’s and G’s for when you’ve leveled up your skills.
Finishing Touches
Here’s where you can get creative:
- Wrap in yarn for a cozy texture
- Cover in fabric that matches your room
- Paint and add string lights for that marquee effect
- Decoupage with book pages for a literary vibe
Also Read: 15 Inspiring DIY Living Room Decor Ideas for Small Spaces
DIY Cardboard Lampshade
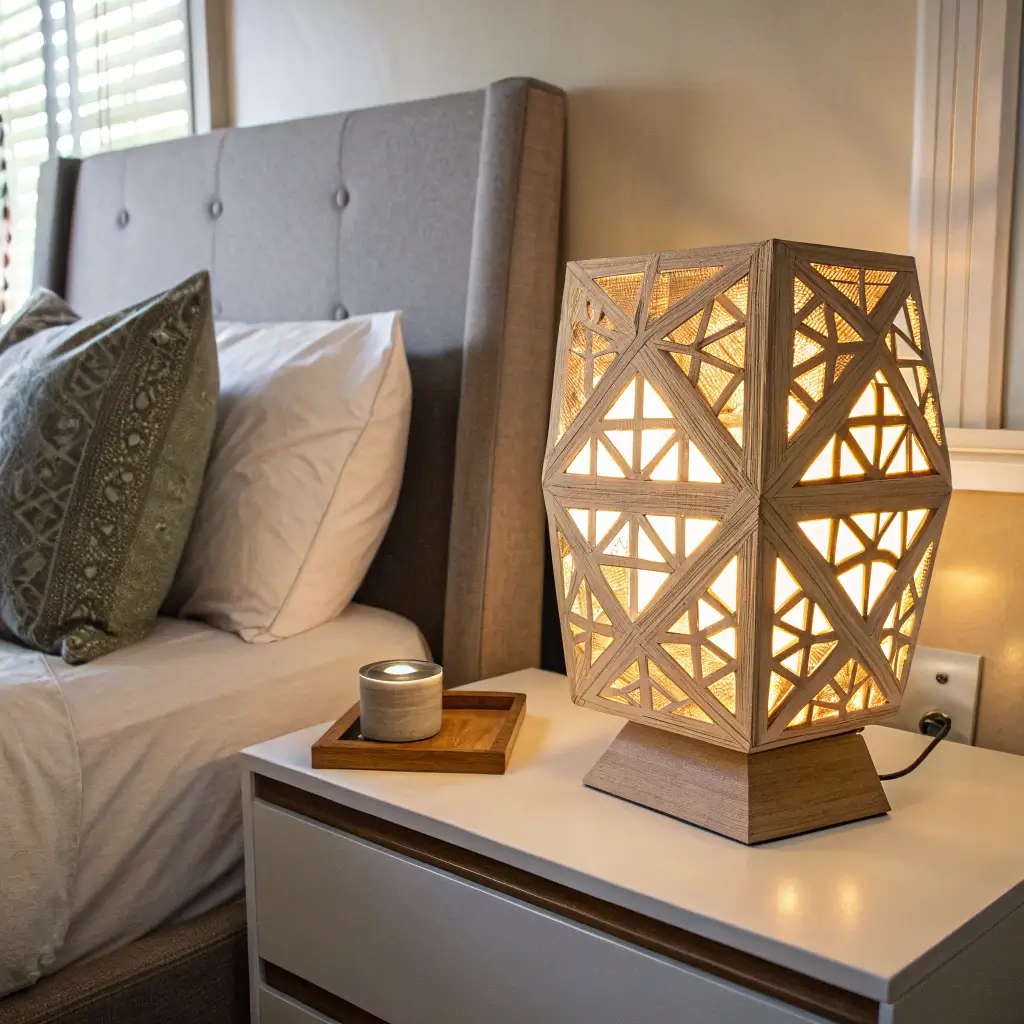
Okay, this one shocked me too – cardboard lampshades actually work beautifully. Just keep them away from hot bulbs (LED only, folks!).
Safety First, Style Second
Before we get crafty, let’s talk safety because nobody wants their mood lighting to become a fire hazard. LED bulbs only – they stay cool and won’t turn your masterpiece into kindling. Keep at least 6 inches between bulb and cardboard.
Design Options That Shine
The beauty of cardboard lampshades lies in their versatility:
- Geometric cutouts create amazing shadow patterns
- Layered circles give a mid-century modern feel
- Accordion folds diffuse light beautifully
- Woven strips add texture and interest
I made a dodecahedron shade (yes, I had to Google how to spell that) and people literally ask where I bought it. The key is precise cutting and patient assembly.
Cardboard Jewelry Organizer
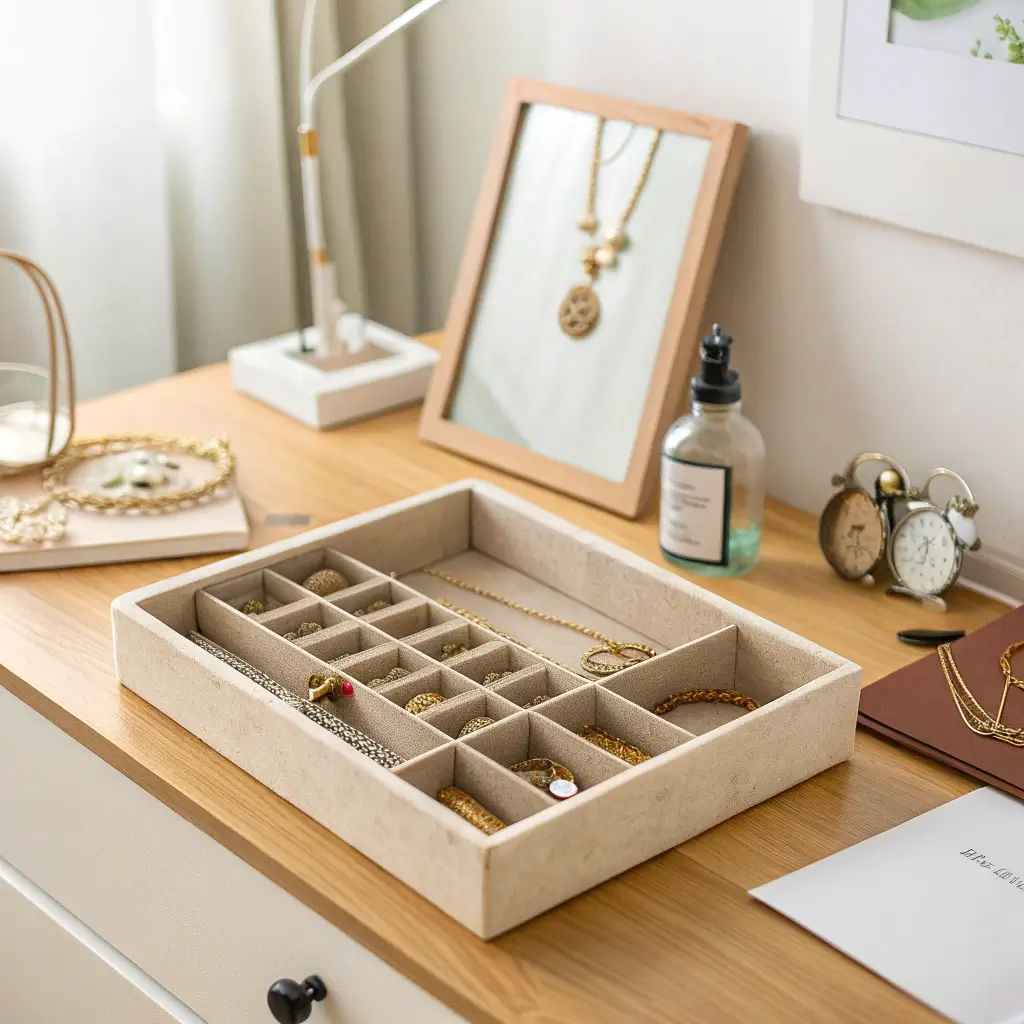
Ever spend 20 minutes untangling necklaces? Yeah, me too. This cardboard solution changed my morning routine completely.
Building Your Custom System
The beauty here is complete customization. Measure your jewelry first – long necklaces need different spacing than chokers. I created different sections:
- Tall hooks for necklaces
- Small compartments for rings
- Slanted rows for earrings
- Deep boxes for bracelets
Making It Pretty
Cover the whole thing in decorative paper or fabric that matches your room. I used velvet fabric remnants from a craft store – total cost: $3. The soft texture also protects delicate jewelry from scratches.
Add small cardboard tubes (toilet paper rolls work perfectly) covered in fabric for bracelet storage. Cut them lengthwise and they become perfect cuff holders.
Cardboard Photo Frames
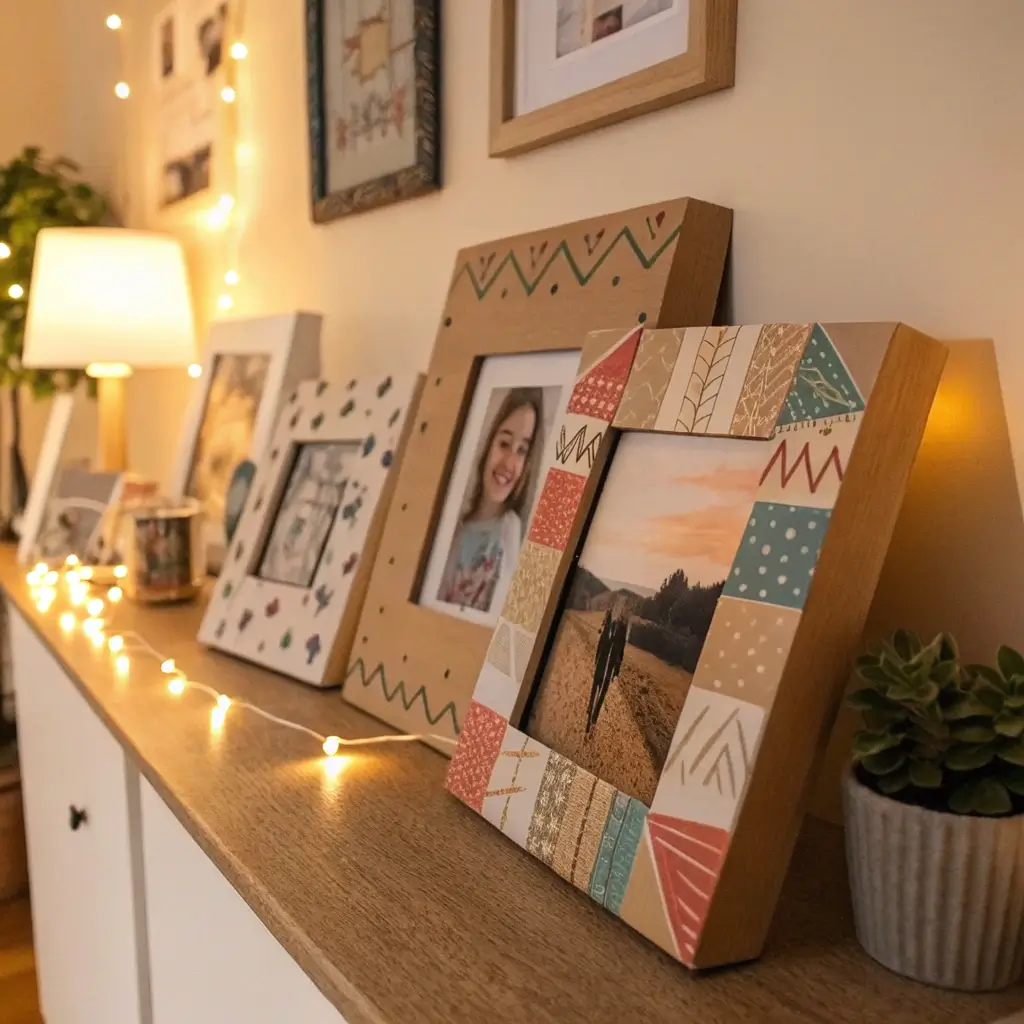
Why buy frames when cardboard ones look just as good? Plus, you can customize sizes for those weird-shaped prints that never fit standard frames.
Creating Professional-Looking Frames
The secret sauce? Layering different cardboard textures. Use corrugated for the back, smooth cardboard for the mat, and textured cardboard for the frame itself. This creates depth that flat frames lack.
Cut your mat opening slightly smaller than your photo for that professional overlap. Nobody likes seeing photo edges peeking through!
Decoration Ideas
- Wrap in twine for rustic charm
- Paint and distress for vintage vibes
- Cover in fabric to match your decor
- Add paper flowers for 3D interest
Also Read: 15 Easy Room Decor Bedroom DIY Ideas That Save Money
Cardboard Desk Organizer

My desk used to look like a office supply store exploded. Now? Everything has its place thanks to custom cardboard organizers.
Designing for Your Needs
Start by auditing your desk mess (we all have one). What needs organizing? Pens? Papers? That collection of USB cables you swear you’ll need someday? Design compartments accordingly.
I created different heights for different items:
- Tall sections for rulers and scissors
- Medium slots for notebooks
- Small compartments for paperclips
- Angled sections for viewing papers
Reinforcement Strategies
Desk organizers take abuse, so reinforcement is crucial. Double-wall the bottom and use corner brackets cut from extra cardboard. The dividers need to be glued at both bottom and sides for stability.
Cover everything in contact paper for durability and easy cleaning. Spilled coffee on cardboard? Not pretty. Spilled coffee on laminated cardboard? Just wipe it off 🙂
Cardboard Plant Holders
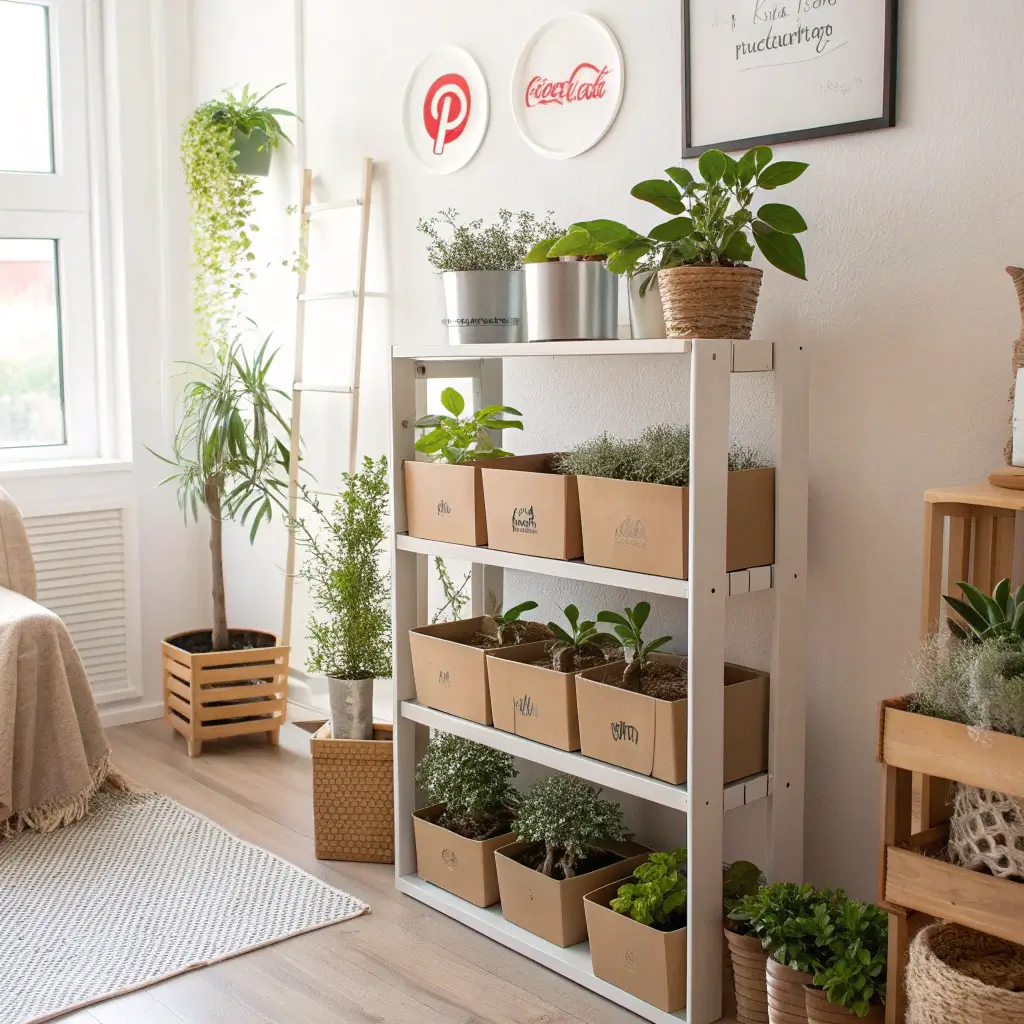
Want that urban jungle vibe without dropping hundreds on ceramic planters? Cardboard planters deliver the look for basically nothing.
Waterproofing Is Key
Obviously, plants need water and cardboard hates water. Here’s the workaround: line your cardboard planters with plastic. I use thick garbage bags or repurpose plastic containers inside the cardboard shell.
For extra protection, coat the inside with mod podge or clear sealant. Two coats minimum, three if you’re an overwaterer like me.
Style Options
- Geometric planters for succulents
- Hanging planters with macrame-style cardboard strips
- Tiered plant stands for herb gardens
- Decorative cache pots to hide ugly plastic pots
Cardboard Wall Clock
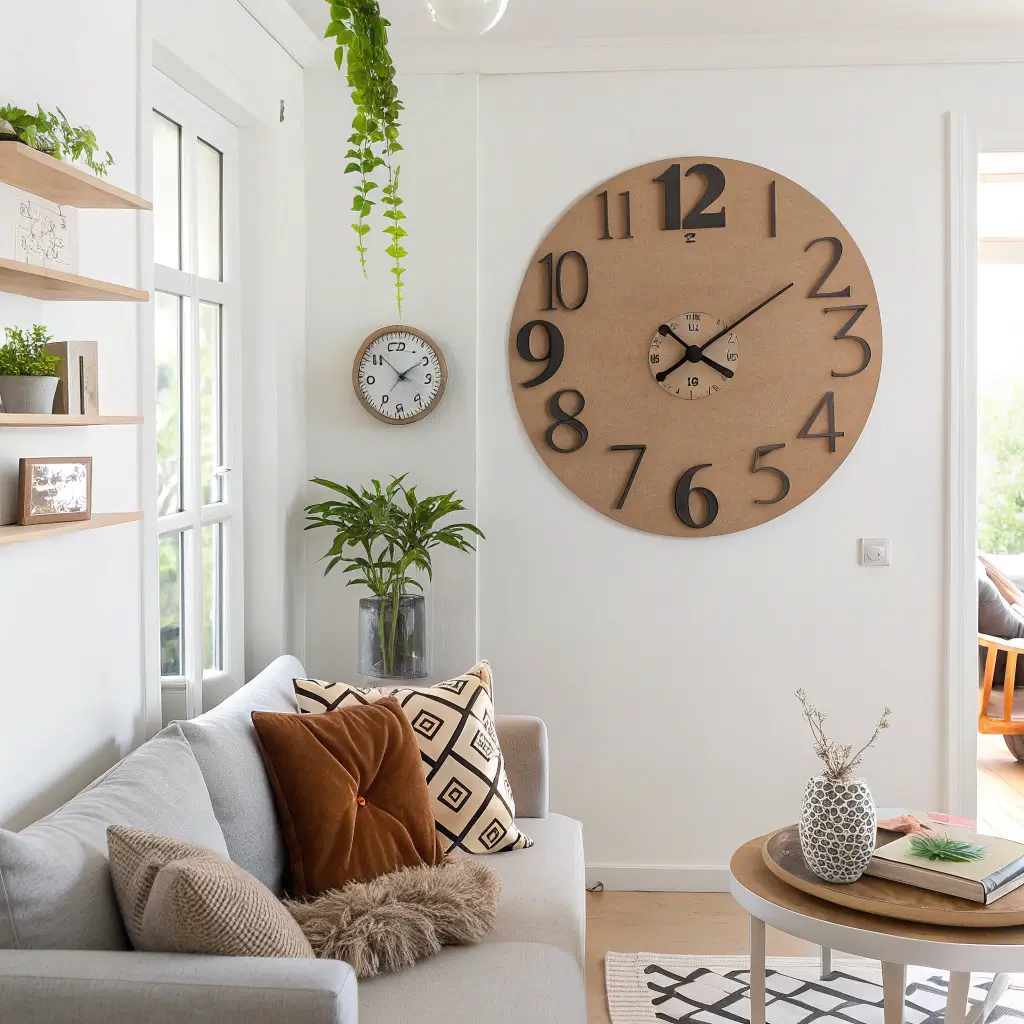
This project makes people do double-takes. “Wait, that’s cardboard?” Yep, and it actually tells time!
The Mechanism Matters
Buy a basic clock mechanism kit (about $5 online). The rest? Pure cardboard creativity. The mechanism needs a stable base, so use multiple layers of cardboard glued together for the clock face.
Design Possibilities
Ever wanted a 3-foot wide clock? Now you can have one! I made mine with:
- Roman numerals cut from gold-painted cardboard
- Geometric shapes marking the hours
- A sunburst design that doubles as wall art
- Layered circles creating a 3D effect
The hands need to be lightweight – single layer cardboard works best. Paint them a contrasting color so you can actually read the time.
Also Read: 15 Easy DIY Aesthetic Room Decor Ideas to Try This Weekend
Cardboard Room Divider
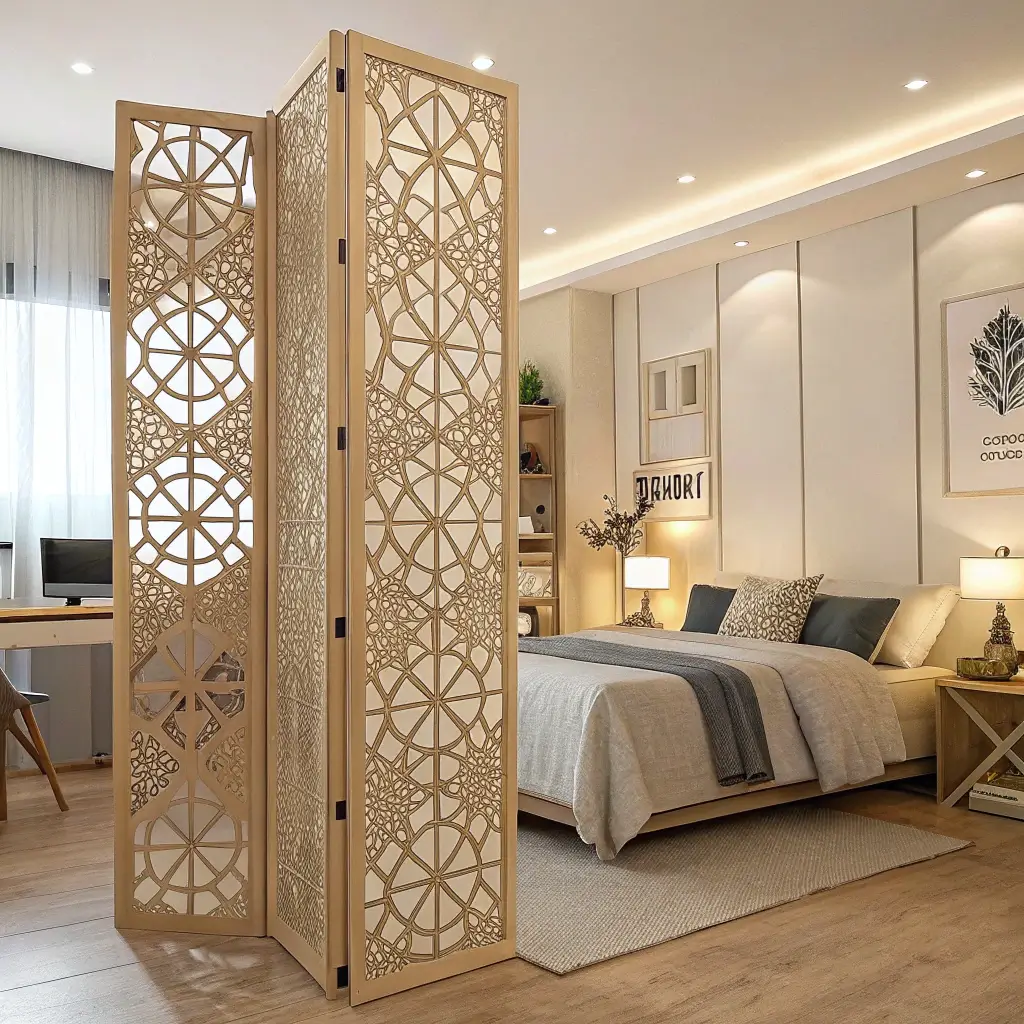
Living in a studio? Need to separate your WFH space? Cardboard dividers offer flexibility without the commitment of actual walls.
Structural Integrity
This isn’t your average cardboard project – we’re building furniture here. Use honeycomb cardboard if you can find it (packaging from large appliances often uses this). Otherwise, laminate regular corrugated cardboard until it’s at least half an inch thick.
Connect panels with:
- Heavy-duty tape hinges for folding screens
- Cardboard brackets for fixed dividers
- Rope or ribbon for decorative joining
Making It Functional
Why stop at dividing space? Add functionality:
- Cut windows for light flow
- Add pockets for magazine storage
- Include shelving on one or both sides
- Create patterns with cutouts for visual interest
Cardboard Mirror Frame
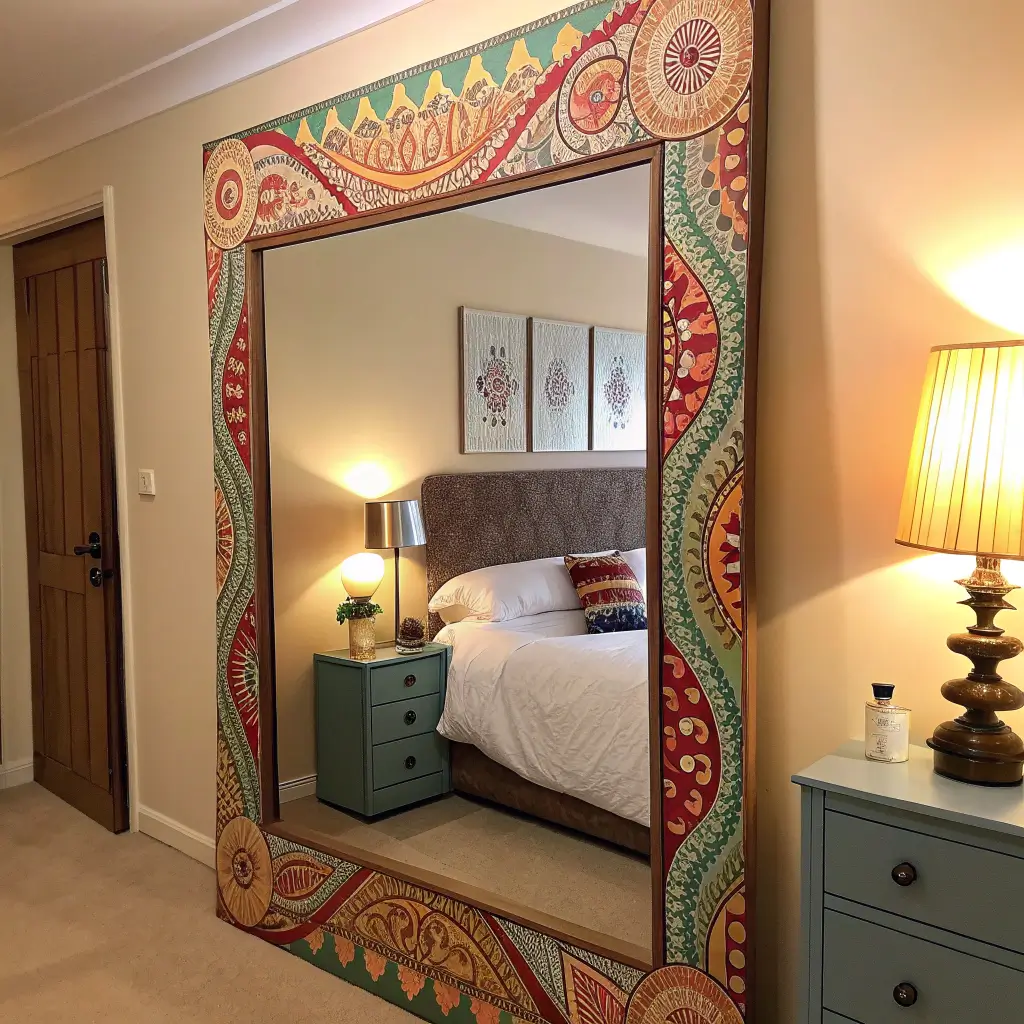
That basic mirror from Target? It’s about to get a serious upgrade. Cardboard frames add personality without the weight (or cost) of traditional frames.
Creating Dimension
Flat frames are boring. Build outward with:
- Layered cardboard creating stepped effects
- Rolled cardboard tubes forming patterns
- Cut shapes arranged in designs
- Textured cardboard for visual interest
Securing the Mirror
Here’s where people usually mess up – don’t glue the mirror directly to cardboard. Create a recessed groove or use mirror clips. The cardboard should frame the mirror, not support it.
I learned this after my first attempt ended with a cracked mirror. RIP bathroom mirror, you taught me valuable lessons.
Cardboard Headboard Design
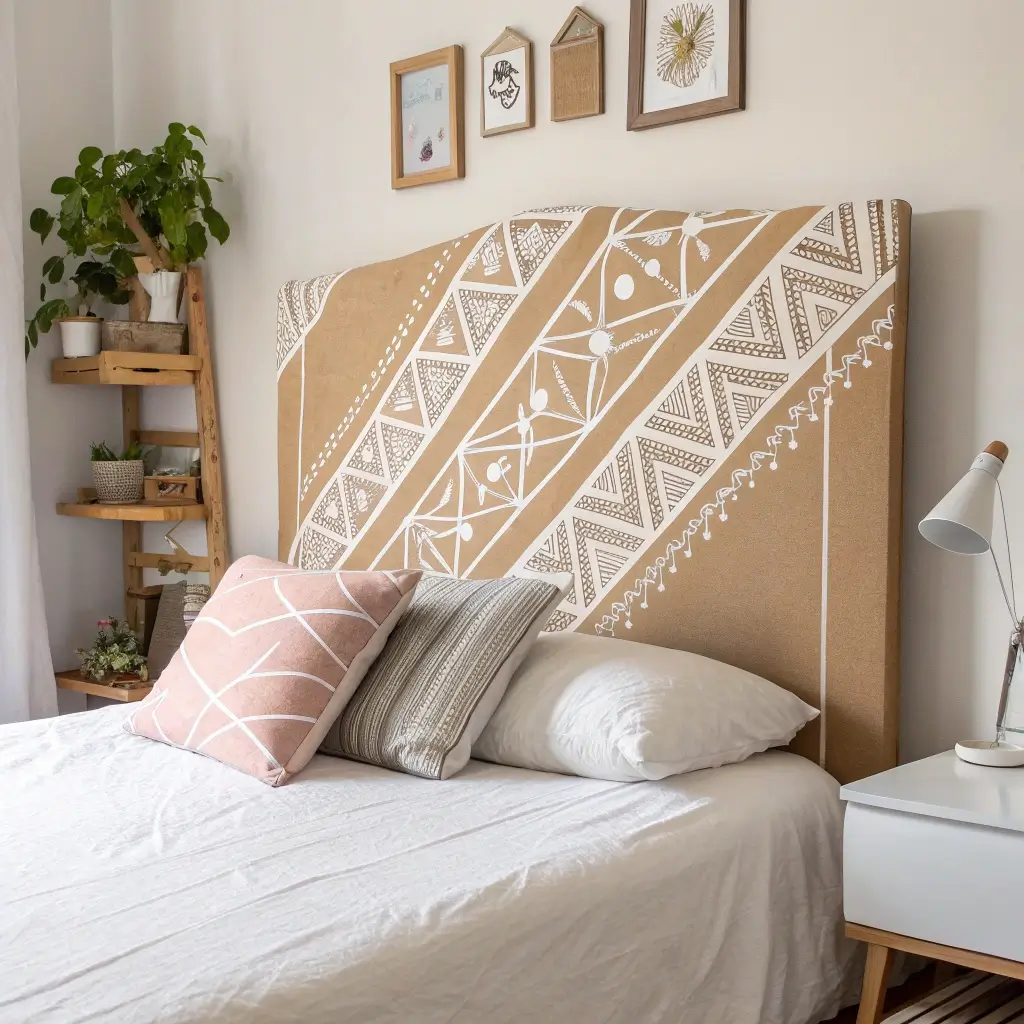
Can’t afford that tufted headboard you’ve been eyeing? Make one from cardboard that looks just as bougie.
Building Big
Headboards need serious structure. Create a grid system using:
- Vertical supports every 12 inches
- Horizontal bracing for stability
- Corner reinforcements to prevent warping
- Wall mounting brackets for security
Design Ideas That Wow
- Geometric patterns using different cardboard heights
- Faux tufted design with covered buttons
- Shelf headboard combining storage and style
- Modular hexagons you can rearrange
Cover the whole thing in fabric for that upholstered look. IMO, nobody needs to know it’s cardboard underneath!
Cardboard Bookshelf Nooks
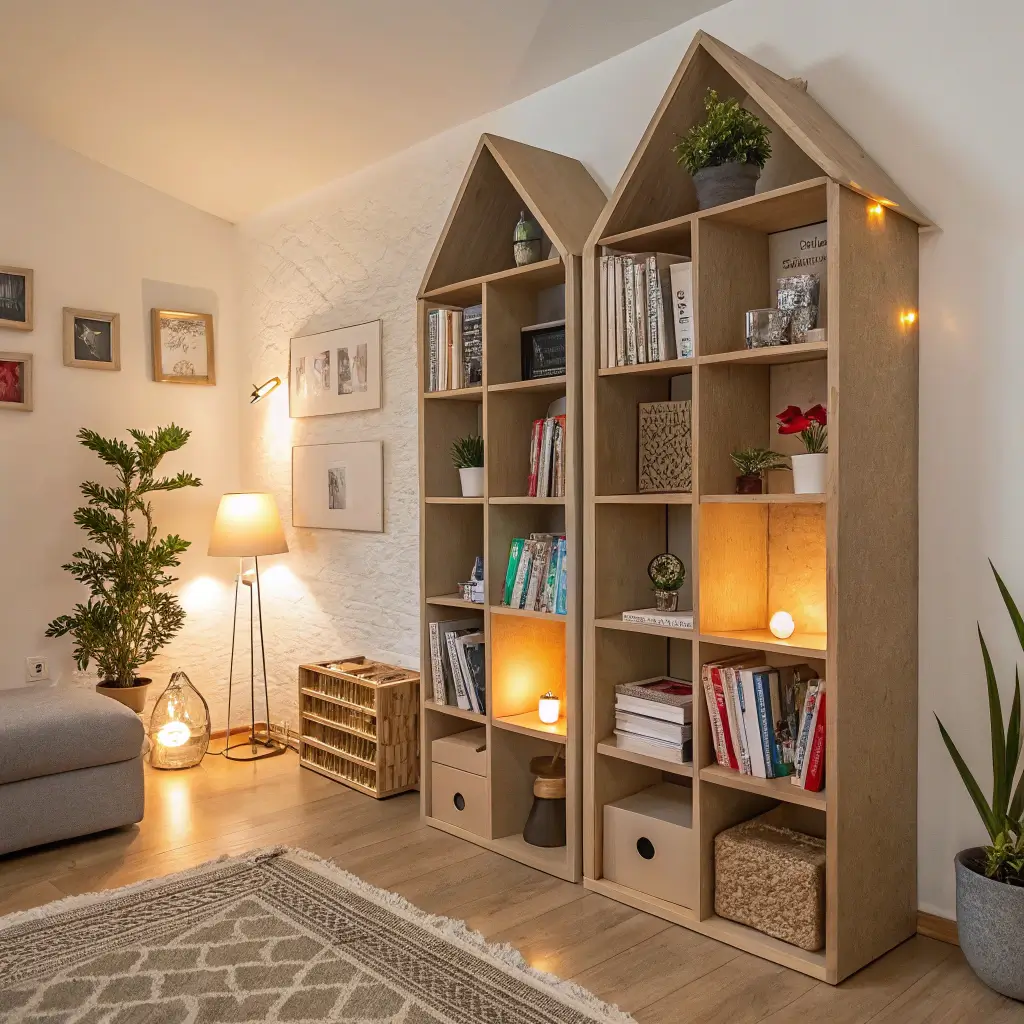
These little reading corners make any room feel like a cozy library. Plus, they’re perfect for small spaces.
Engineering Your Nook
Think triangular supports – they’re the strongest shape in nature and in cardboard construction. Build your frame using triangular braces at stress points.
The shelves themselves need:
- Multiple cardboard layers
- Edge reinforcement
- Weight distribution considerations
- Proper wall anchoring
Customization Options
Make it yours with:
- Built-in reading light holder
- Cup holder for your coffee
- Magazine racks on the sides
- Hidden storage compartments
Cardboard Decorative Boxes
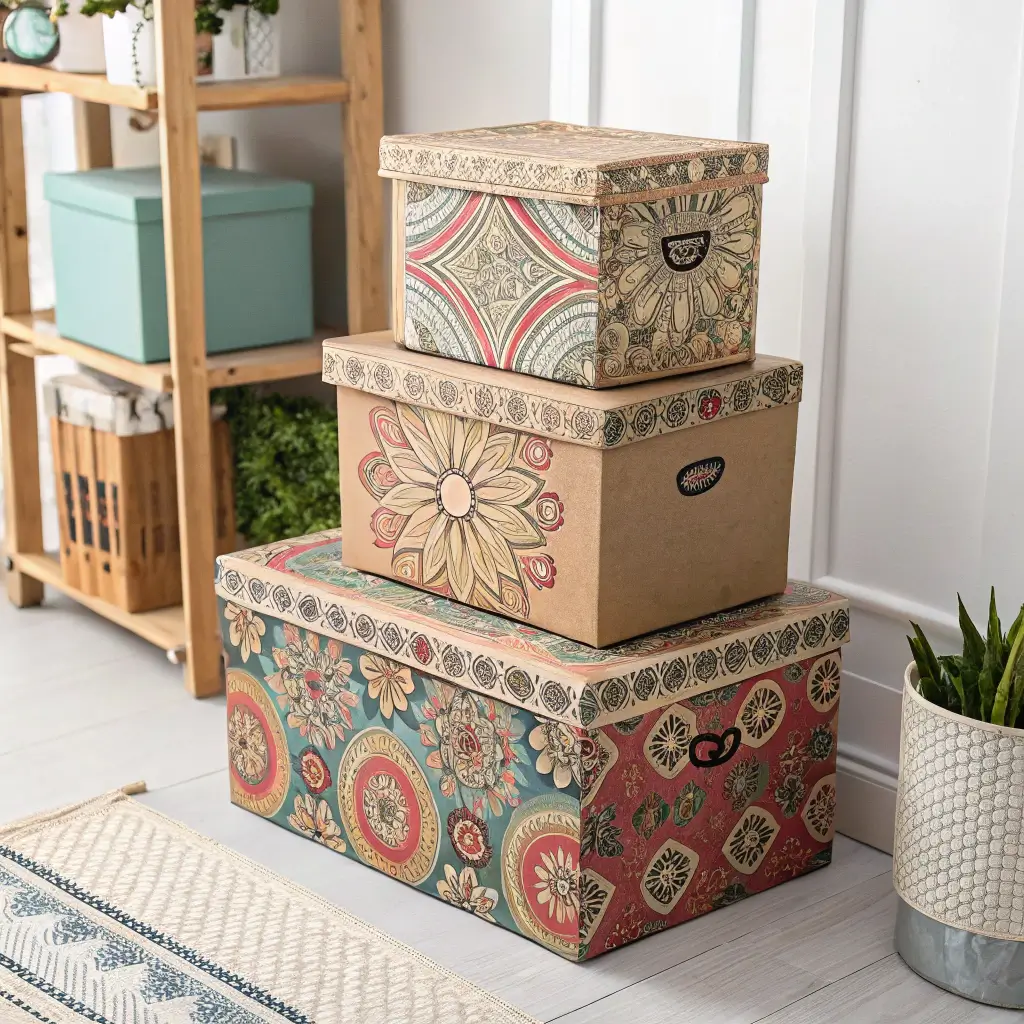
These aren’t your moving boxes anymore. We’re talking decorative storage that looks intentional.
Box Building Basics
Start with sturdy base construction:
- Score fold lines for crisp edges
- Use bone folder for professional creases
- Apply glue to entire surfaces, not just edges
- Reinforce corners with triangle supports
Decoration Techniques
- Decoupage with vintage maps or sheet music
- Fabric covering for soft texture
- Paint effects like ombre or marble
- Mixed media adding buttons, ribbons, or dried flowers
Cardboard Wall Hanging Patterns
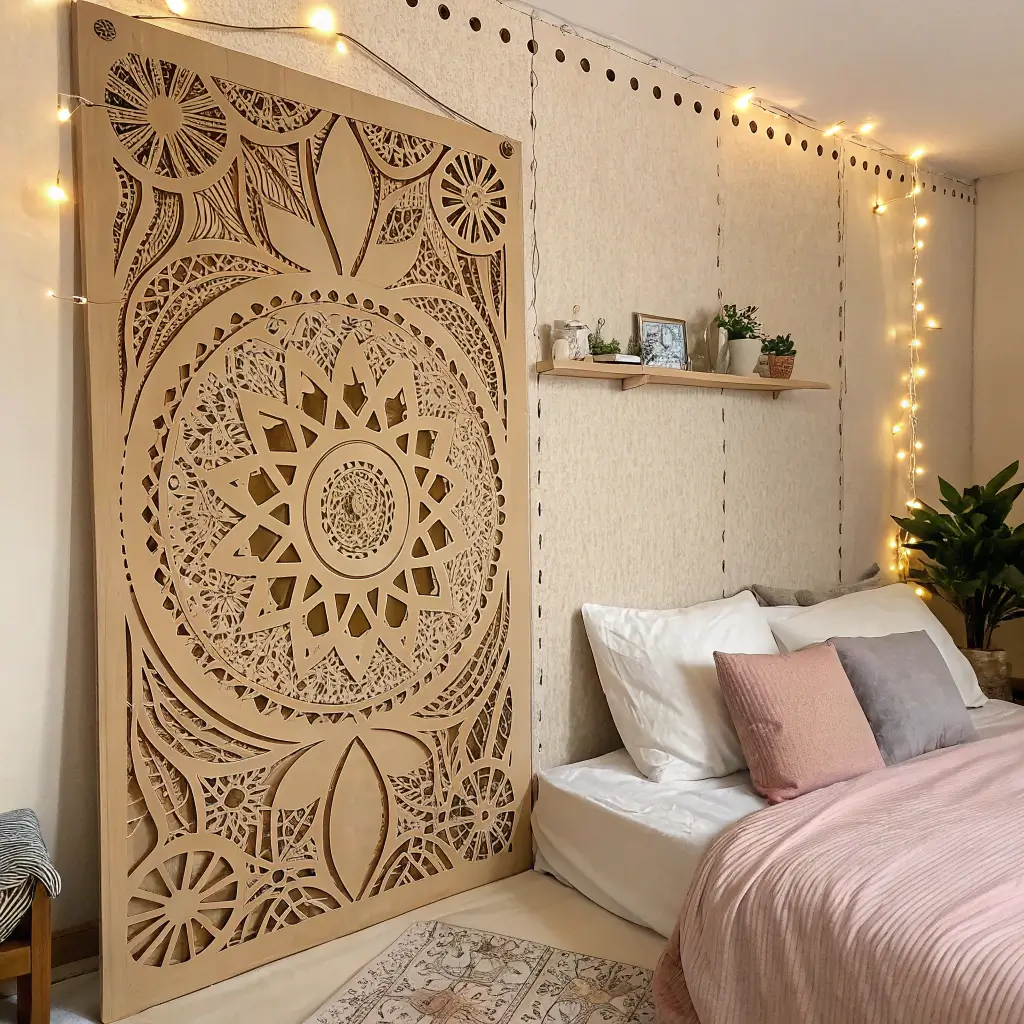
Last but definitely not least, wall hangings that’ll make your space look like you actually know what you’re doing with decor.
Creating Visual Impact
The key is repetition and rhythm. Choose a shape and repeat it in patterns:
- Cascading sizes from large to small
- Color gradients using paint or paper
- Alternating textures and finishes
- Mixed materials incorporating string or fabric
Installation Tips
Mount using:
- 3M strips for lightweight pieces
- Picture hanging wire for heavier designs
- Direct wall mounting with small nails
- Suspended systems from ceiling or curtain rods
FYI, spacing matters more than you think. Use painter’s tape to mark positions before committing.
Wrapping This Cardboard Journey Up
So there you have it – fifteen ways to turn trash into treasure without breaking the bank or your sanity. The best part about cardboard crafting? If you mess up, you’re out exactly zero dollars. Just grab another box and try again.
These projects taught me that creativity beats budget every time. My apartment looks personally curated and intentional, not like I’m trying to adult on a shoestring budget (even though I totally am).
Start with one project – maybe those geometric wall pieces or a simple photo frame. Once you see how easy it is and how good it looks, you’ll be hooked. Before you know it, you’ll be eyeing every cardboard box like it’s potential decor.
Who knew those Amazon boxes could become conversation starters instead of recycling bin fillers? Now when someone compliments my decor, I get to drop the bomb that it’s cardboard and watch their minds explode. That reaction? Priceless. Way better than any store-bought decor could ever be.
Ready to start your cardboard revolution? Grab that X-acto knife and let’s turn some boxes into beauties. Your walls (and wallet) will thank you!


