10 Easy Christmas Door Decorating Contest Ideas to Copy Today
Okay, let’s be real here – you’ve just signed up for your office or neighborhood’s Christmas door decorating contest, and now you’re sitting there wondering what you’ve gotten yourself into. Sound familiar? I’ve been there, trust me. Last year, I watched my neighbor transform her basic apartment door into what looked like Santa’s personal entrance, while I stood there with a roll of wrapping paper and some scotch tape thinking I was being creative.
The good news? You don’t need to be Martha Stewart or have an arts degree to create a door that’ll make everyone stop and stare. I’ve spent the last three years obsessing over door decorating contests (weird hobby, I know), and I’ve discovered that the best designs aren’t always the most complicated ones. Sometimes, you just need the right idea and a solid game plan.
Candy Cane Wonderland Door
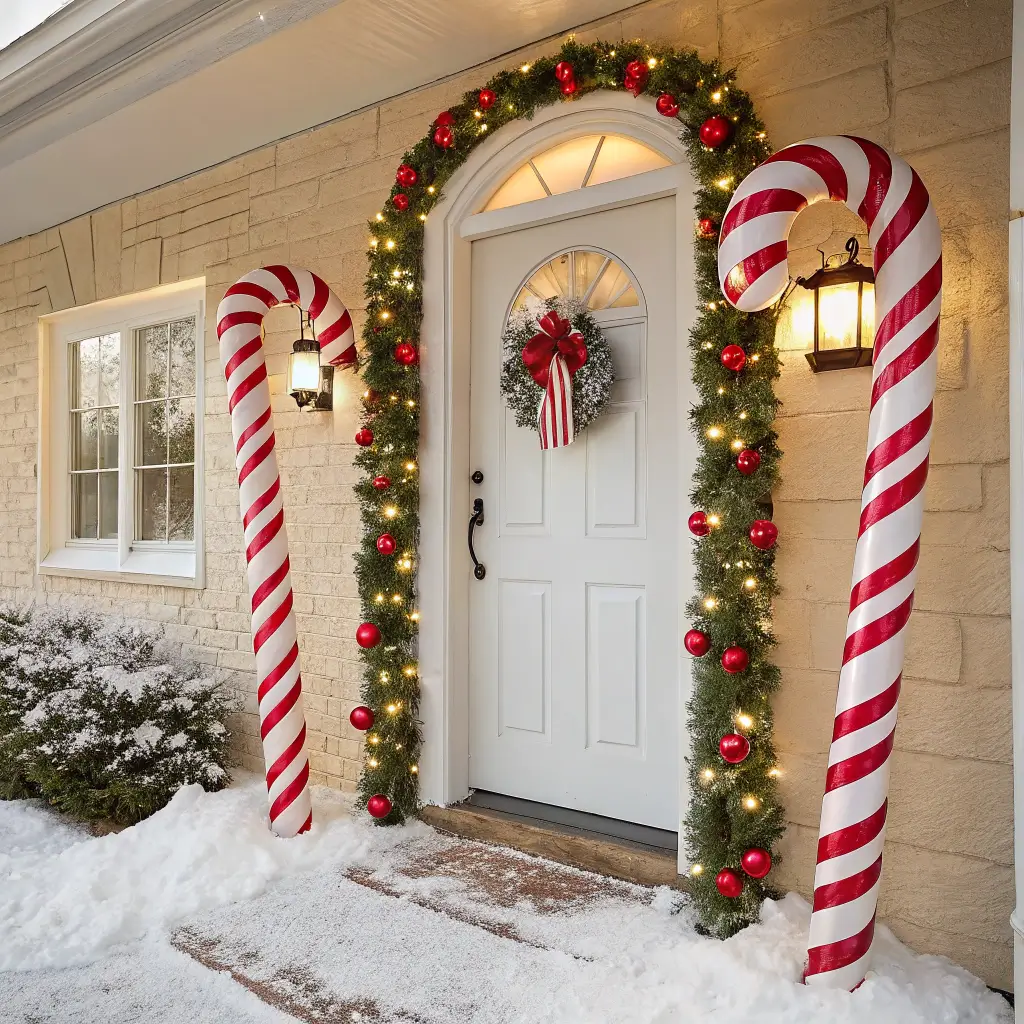
Let me start with my personal favorite – the Candy Cane Wonderland. Why do I love it so much? Because it’s basically impossible to mess up, and everyone immediately gets that warm, fuzzy Christmas feeling when they see it.
Materials You’ll Need
Here’s what you’ll grab from the store:
- Red and white striped wrapping paper (at least 3 rolls)
- White poster board or foam boards
- Red ribbon (wide works best)
- Plastic candy canes (various sizes)
- Clear packing tape
- Double-sided mounting tape
- Optional: battery-operated string lights
Creating Your Candy Cane Paradise
Start by covering your entire door with the striped wrapping paper. I learned the hard way that you should work from top to bottom, overlapping each sheet slightly. Pro tip: Use double-sided tape on the edges – it looks way cleaner than visible tape marks everywhere.
Next, cut large candy cane shapes from your poster board. Make them different sizes because uniformity is boring, right? I usually make about 5-7 candy canes ranging from 12 inches to 24 inches tall. Paint or cover them with alternating red and white stripes if you’re feeling ambitious.
The magic happens when you arrange these candy canes at different angles across your door. Think of it like you’re creating a candy cane forest that fell from the sky. Add the plastic candy canes between the larger ones, and suddenly you’ve got depth and dimension that’ll make judges take notice.
The Finishing Touches
Create a “path” using cotton batting at the bottom of your door – instant snow effect! If you really want to go all out (and why wouldn’t you?), weave battery-operated lights through your candy canes. The gentle glow makes everything look magical, especially in those dark December afternoons.
Snowy Village Miniature Door
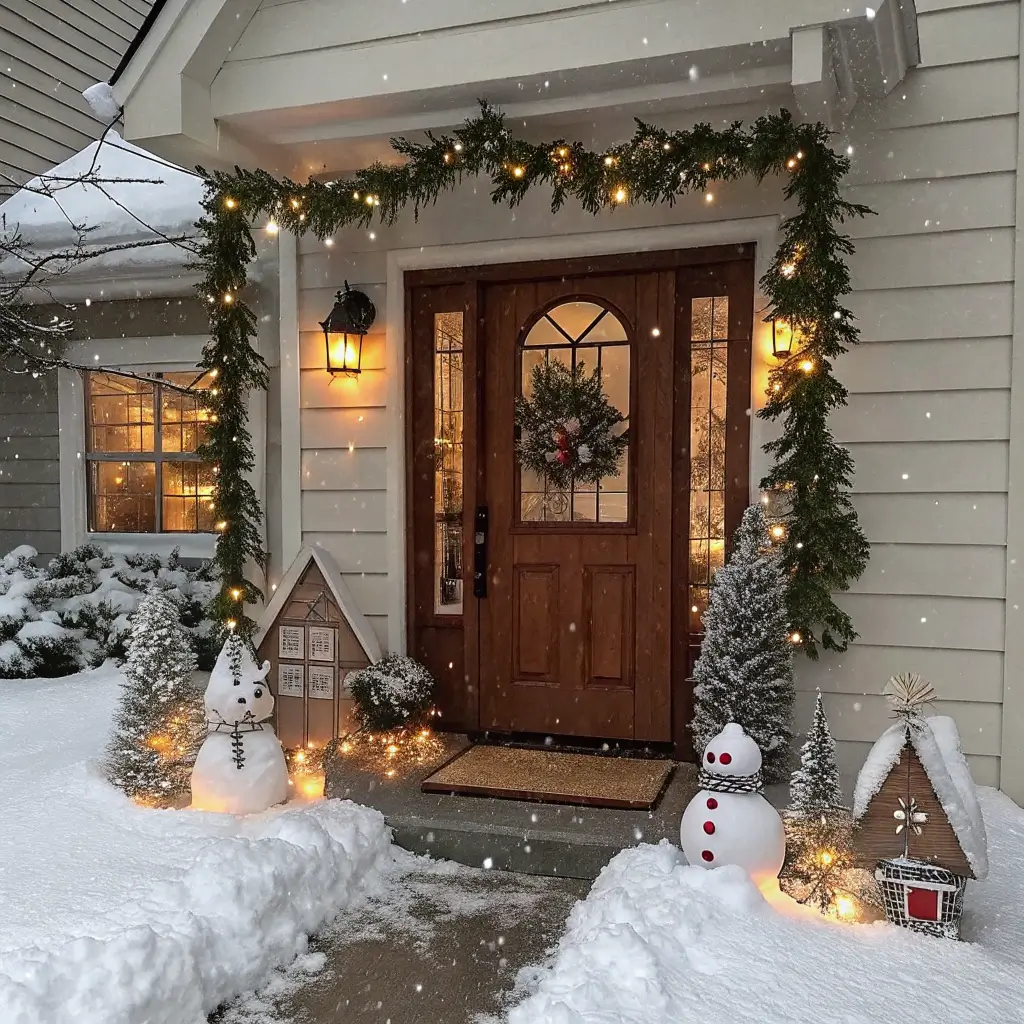
Ever wanted to feel like a giant looking down at a tiny Christmas village? This door design gives you exactly that feeling, and honestly, it’s addictive to create.
Building Your Village Foundation
First things first – you need a snowy background. Cover your door with light blue paper or fabric. Don’t worry about it being perfectly smooth; snow isn’t perfect in real life either. I actually crumple mine slightly before applying it for texture.
Cut mountain shapes from white poster board for the background. Layer them at different heights about two-thirds up your door. These create depth and make your village look nestled in the mountains.
Creating Miniature Magic
Here’s where things get fun. You’ll need:
- Small cardboard boxes (jewelry boxes work great)
- Construction paper in various colors
- Cotton balls or batting for snow
- LED tea lights
- Miniature bottle brush trees
- Small figurines (check dollar stores!)
Transform those boxes into houses by wrapping them in colored paper. Cut out tiny windows and doors – use yellow paper behind the windows to create that cozy lit-from-within effect. I’m telling you, this detail makes people lean in closer every single time.
Arrange your houses at the bottom third of your door, varying the heights by placing some on small platforms. Scatter the bottle brush trees between houses, dust everything with fake snow (or pulled-apart cotton balls), and add your figurines doing wintery activities.
Secret Weapon Alert
Want to know what really sells this design? Add a tiny “Welcome to Christmas Village” sign at the top. People lose their minds over miniature signs – it’s weirdly universal.
Giant 3D Christmas Gift Bow Door
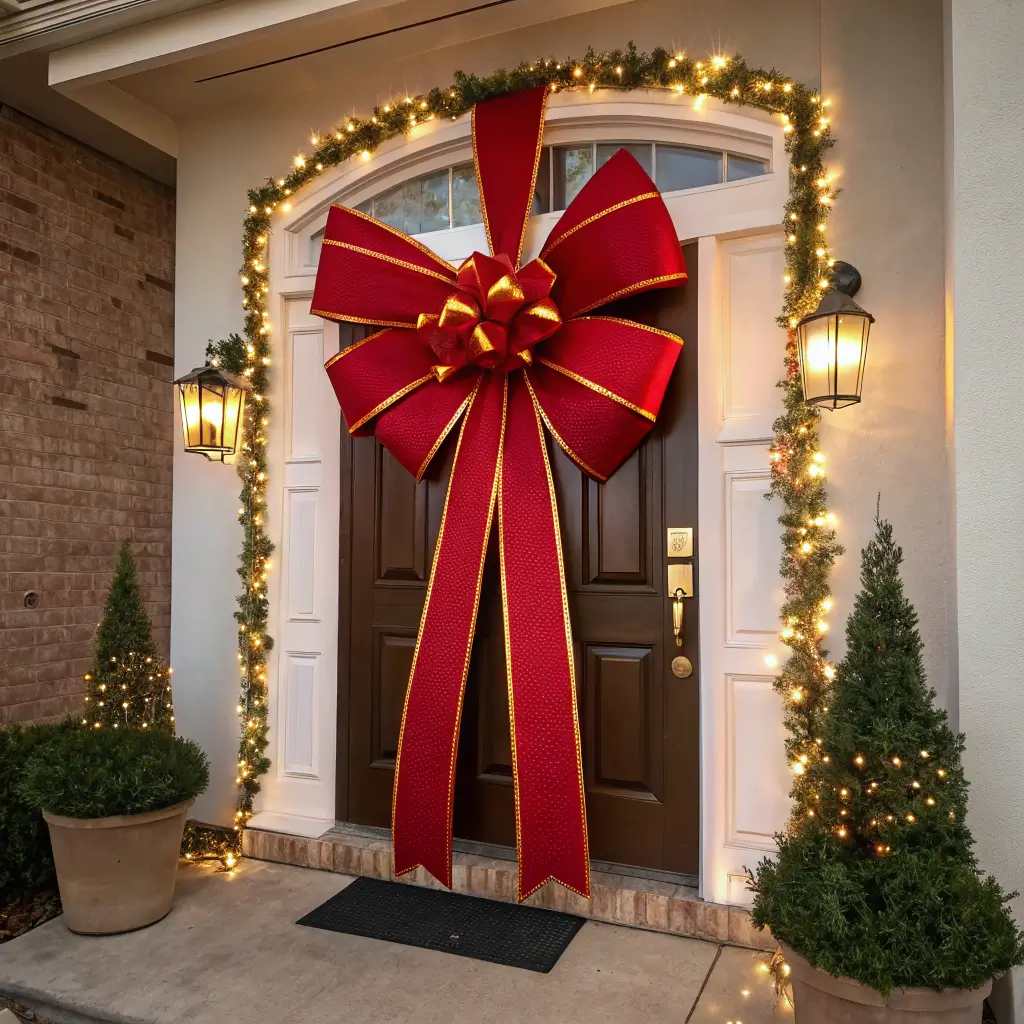
This one’s for those of you who love making a statement. Your door literally becomes a giant present, and who doesn’t want to walk through a gift every day?
The Box Setup
Cover your entire door with one solid color of wrapping paper. I prefer metallic gold or deep red, but honestly, any festive color works. The key is making sure it’s completely smooth and uniform – this is your gift box, so treat it like one.
Add “ribbon” strips running vertically and horizontally across your door using contrasting colored paper or actual wide ribbon. These should intersect in the center of your door where your bow will sit.
Constructing the Show-Stopping Bow
You need:
- 2-3 yards of wired ribbon (minimum 4 inches wide)
- Cardboard for backing
- Hot glue gun
- Patience (just being honest here)
Create loops with your ribbon, making each loop about 8-10 inches long. You’ll need about 8-10 loops for a full-looking bow. Secure each loop to your cardboard backing with hot glue. The trick is to angle each loop slightly differently so your bow looks full and dimensional.
Once your bow is complete, mount it at the intersection of your ribbon strips. Add long ribbon tails that cascade down your door – movement makes everything more interesting.
Why This Works Every Time
People can’t resist the psychological appeal of a giant present. It triggers that childhood excitement, and judges eat that stuff up. Plus, it photographs beautifully for social media (because let’s be honest, that’s half the reason we do this).
Also Read: 10 Brilliant Christmas Entryway Table Decor Ideas Quick Glam
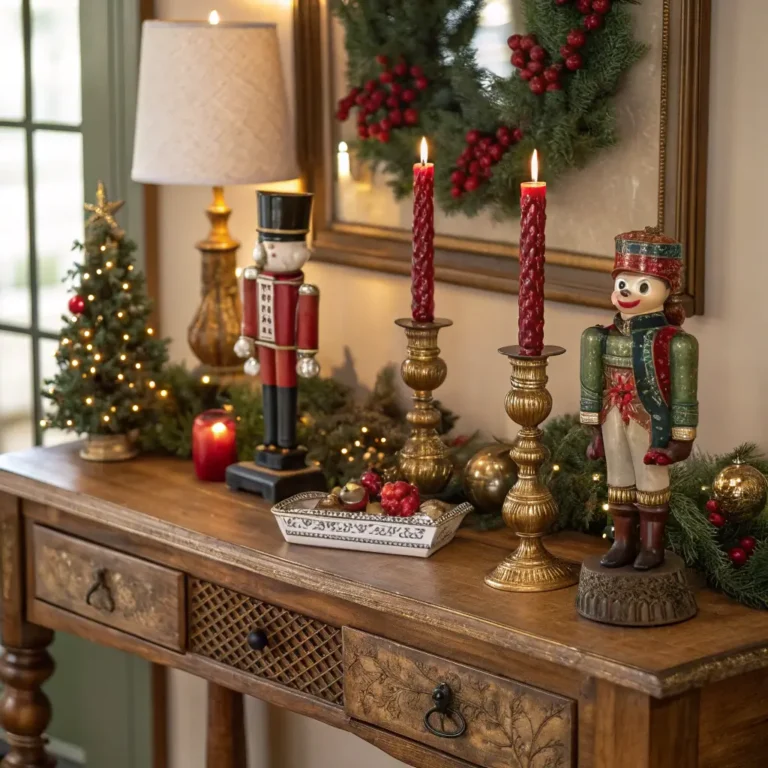
Nutcracker Soldier Guard Door
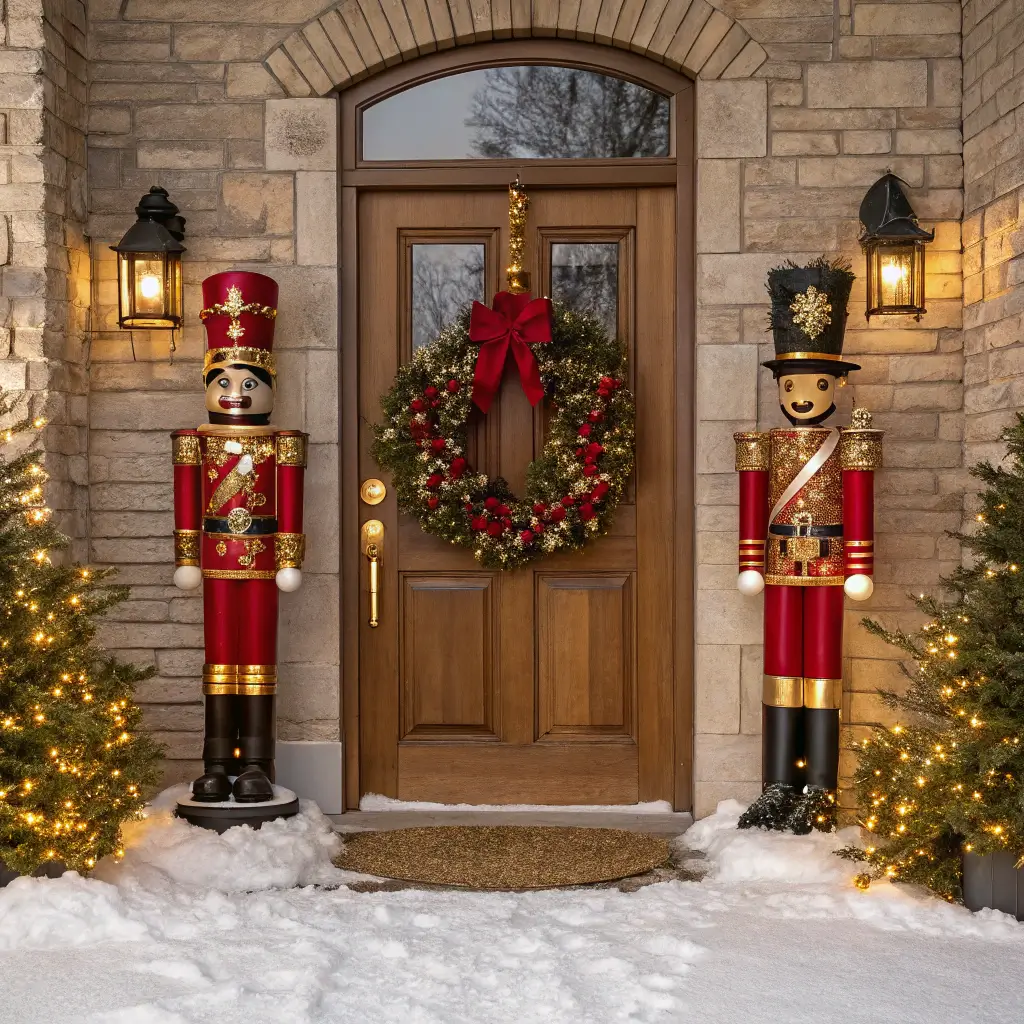
Want your door to look like it’s being protected by Christmas’s most famous soldiers? This design never fails to impress, and it’s easier than you’d think.
Creating Your Soldiers
You don’t need artistic skills for this – I promise. Start with two large pieces of poster board for each nutcracker (you’ll want at least two guards flanking your door).
Each nutcracker needs:
- Black rectangle for the hat
- Flesh-toned circle for the face
- White mustache and eyebrows
- Red jacket body
- Black belt
- White or black pants
- Black boots
Cut out these shapes and assemble them like a paper doll. The beauty is that nutcrackers are supposed to look stylized and geometric, so perfect proportions aren’t necessary.
Positioning Your Guards
Mount your nutcrackers on either side of your door frame, not on the door itself. This creates the illusion that they’re actually guarding the entrance. Make them at least 4 feet tall – bigger is definitely better here.
Add gold paper buttons, epaulettes, and belt buckles. These metallic touches catch the light and add that royal guard feeling. Don’t forget their rifles – cardboard paper towel tubes wrapped in black paper work perfectly.
The Door Itself
Keep the actual door simple with a deep green or red background. Add a banner across the middle that says “Santa’s Guard Post” or “Official North Pole Entrance.” Sometimes the supporting elements make the main attraction pop even more.
Rustic Farmhouse Holiday Wreath Door
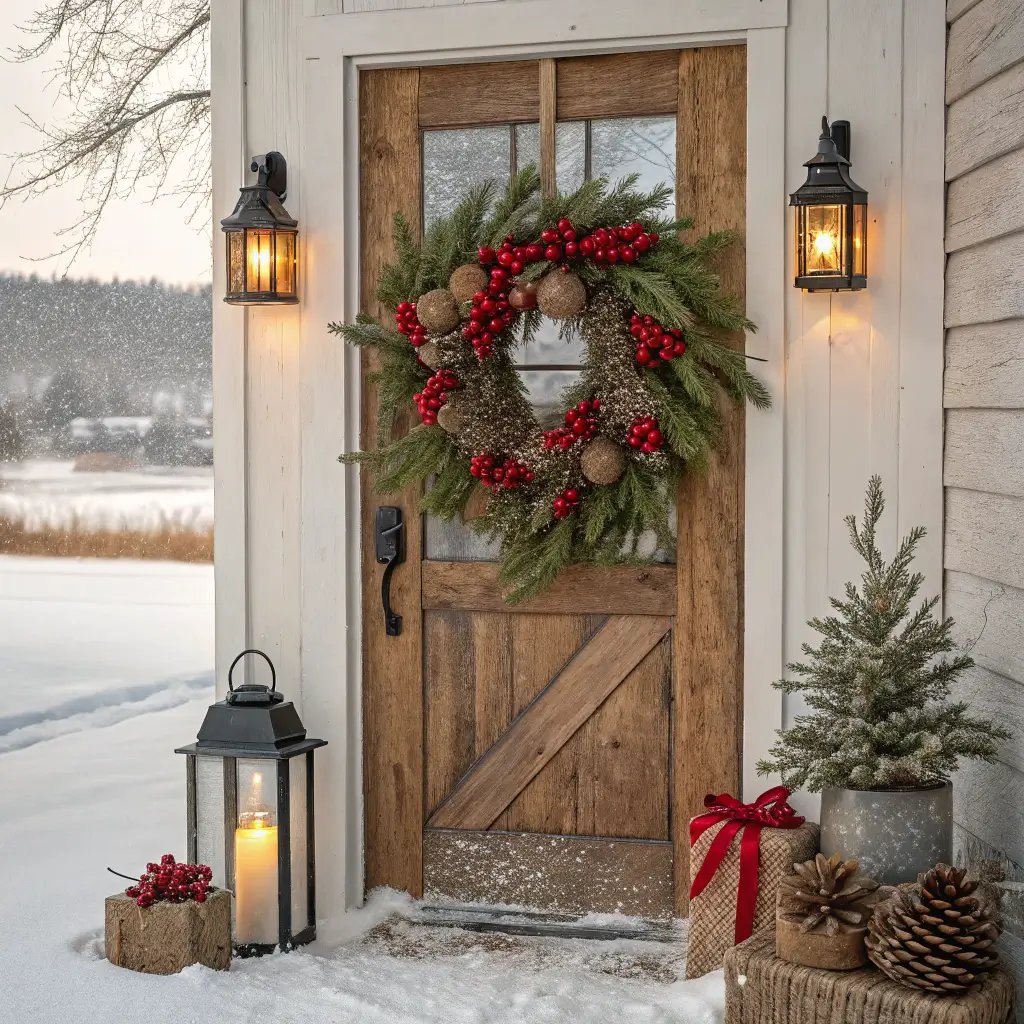
Not everyone wants flashy and bright. If you’re more of a Joanna Gaines than a Vegas showroom type, this rustic approach will speak to your soul.
Building Your Base
Forget store-bought wreaths. Make your own using a wire coat hanger bent into a circle and wrapped with burlap ribbon. It takes about 20 minutes and looks infinitely better than those plastic things from the store.
Layer in natural elements:
- Pine branches (real or quality fake)
- Cotton stems
- Dried orange slices
- Cinnamon sticks
- Pinecones
The key to farmhouse style is controlled messiness. Nothing should look too perfect or symmetrical. I literally close my eyes sometimes when placing elements to avoid overthinking it.
Adding Farmhouse Charm
Create a wooden sign (or fake it with brown poster board) that says something like “Merry Christmas Y’all” or “Peace on Earth.” Distress the edges with sandpaper or brown marker for that authentic weathered look.
Wrap battery-operated lights with warm white bulbs through your wreath. None of that multi-colored stuff – we’re going for cozy cabin vibes here, not disco fever.
The Supporting Cast
Don’t stop at just the wreath. Add buffalo check ribbon as a bow, hang vintage-style ornaments, or attach small mason jars with LED candles inside. The goal is to make people feel like they’re approaching a countryside cottage, even if you live in a third-floor apartment.
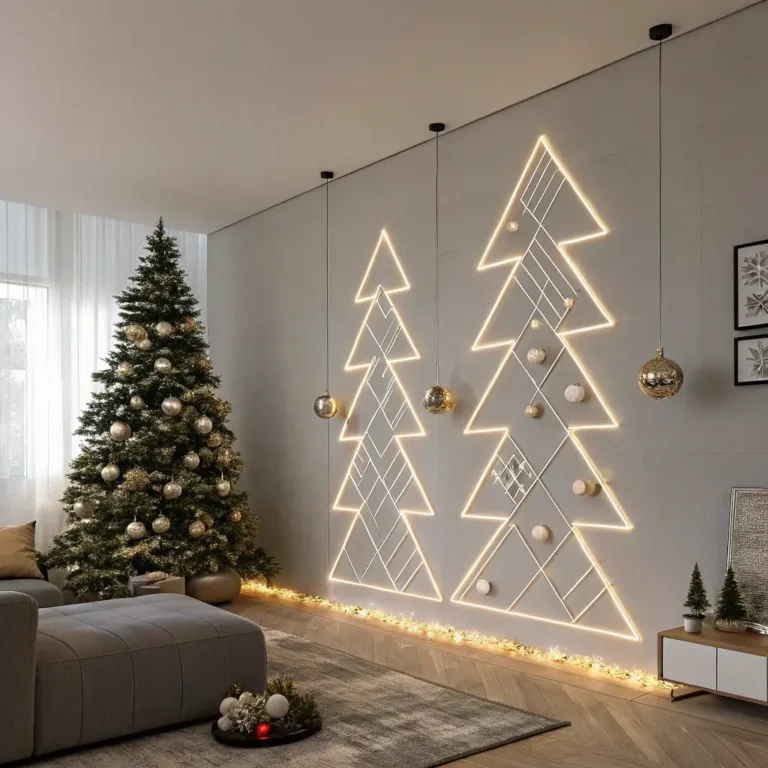
Glittering Icicle Lights Door
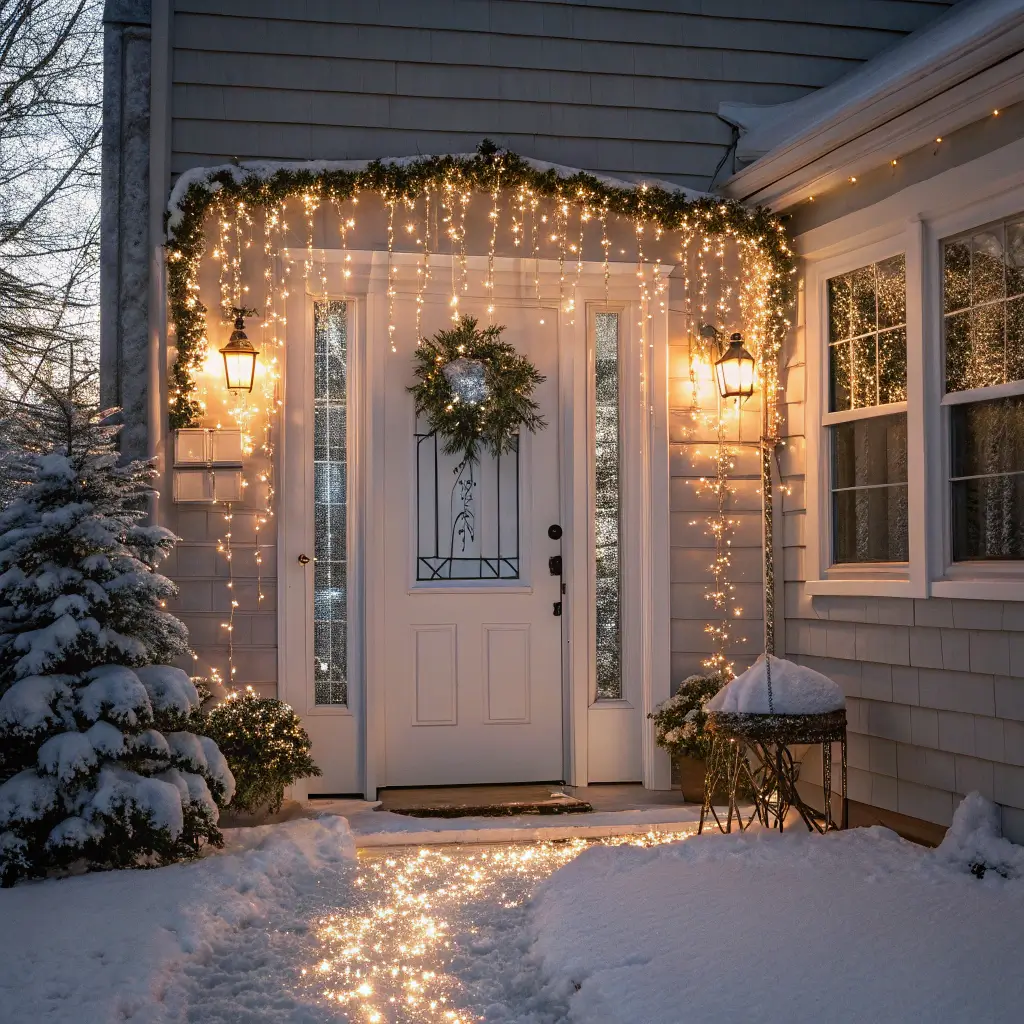
This design is all about sparkle and drama. If you’ve ever wanted your door to look like Elsa from Frozen decorated it, here’s your chance 🙂
Creating the Frozen Effect
Start with a white or pale blue door covering. Add irregular patches of iridescent cellophane or holographic paper to create the illusion of ice. Don’t make it uniform – ice never is.
Cut icicle shapes from silver poster board or reflective mylar. Vary the lengths dramatically – some should be just a few inches while others can be over two feet long. The irregularity is what makes it look natural.
Lighting Is Everything
This design lives or dies by its lighting. String white or blue LED icicle lights along the top of your door frame. Let them drape naturally – fighting against gravity never works.
Layer in some standard string lights behind your mylar icicles. When people walk by, the movement creates this amazing shimmer effect that’s absolutely mesmerizing.
Adding Depth and Dimension
Sprinkle iridescent glitter over everything while the glue is still wet (do this outside unless you want to be finding glitter until next Christmas). Add some 3D snowflakes at varying heights using fishing line. The movement adds life to your frozen wonderland.
IMO, this design works best when you go completely over the top with the sparkle. There’s no such thing as too much shimmer here.
Also Read: 10 Elegant Window Christmas Decor Ideas for Winter Style
Vintage Christmas Postcard Door

Feeling nostalgic? This design taps into everyone’s love of Christmas past, and it’s surprisingly moving when done right.
Collecting Your Materials
You’ll need:
- Printouts of vintage Christmas postcards (find free ones online)
- Aged-looking paper or tea-stained regular paper
- Red and green ribbons
- Old-fashioned ornaments
- Twine or hemp rope
Print your postcards on cardstock and age them with tea or coffee if they look too new. I actually crumple mine slightly and smooth them out for that authentic vintage feel.
Creating the Gallery
Arrange your postcards in an overlapping collage pattern across your door. Don’t line them up perfectly – vintage collections are never that organized. Connect them with ribbons and twine like they’re being displayed on an old-fashioned bulletin board.
Add “postage stamps” cut from Christmas wrapping paper in the corners. Write “Season’s Greetings” or “Happy Holidays” in cursive across the top using a calligraphy pen or printout.
The Nostalgic Details
This is where you can really ham it up. Add paper doilies, vintage-style bells, or even old family Christmas photos if you’re feeling brave. Create a small “mailbox” from a cardboard box where people can leave holiday cards.
The goal is to make people stop and actually read your door. It’s interactive art that tells a story.
Santa’s Workshop Elf Door
Transform your entrance into the hardest-working spot in the North Pole. Kids absolutely lose it over this design, and adults secretly love it too.
Setting the Workshop Scene
Cover your door with “wood grain” paper or brown wrapping paper drawn with wood grain lines. Add a sign that says “Santa’s Workshop – Elves Only!” or “Toy Testing in Progress.”
Create tool cutouts from cardboard:
- Hammers
- Saws
- Paintbrushes
- Measuring tape
Paint them in bright, toy-like colors because elf tools aren’t boring human tools.
Building Your Elf Team
Cut out elf shapes from poster board – just simple triangular bodies with circles for heads. Give each elf a different colored outfit and unique pointed hat. Add cotton ball pom-poms to their hats and shoes.
Position them around your door like they’re actively working. One can be “hammering” near the top, another “painting” on the side. Create speech bubbles with funny elf comments like “Only 10 days until Christmas!” or “Need more glitter!”
Workshop Details That Sell It
Add a partially completed toy list on clipboard paper. Create “blueprints” for toys with simple drawings. Scatter cotton “snow” that’s supposedly from the North Pole tracked in on elf boots.
The more details you add, the more time people spend looking at your door. That’s always a good thing in a contest.
Winter Woodland Animal Scene Door
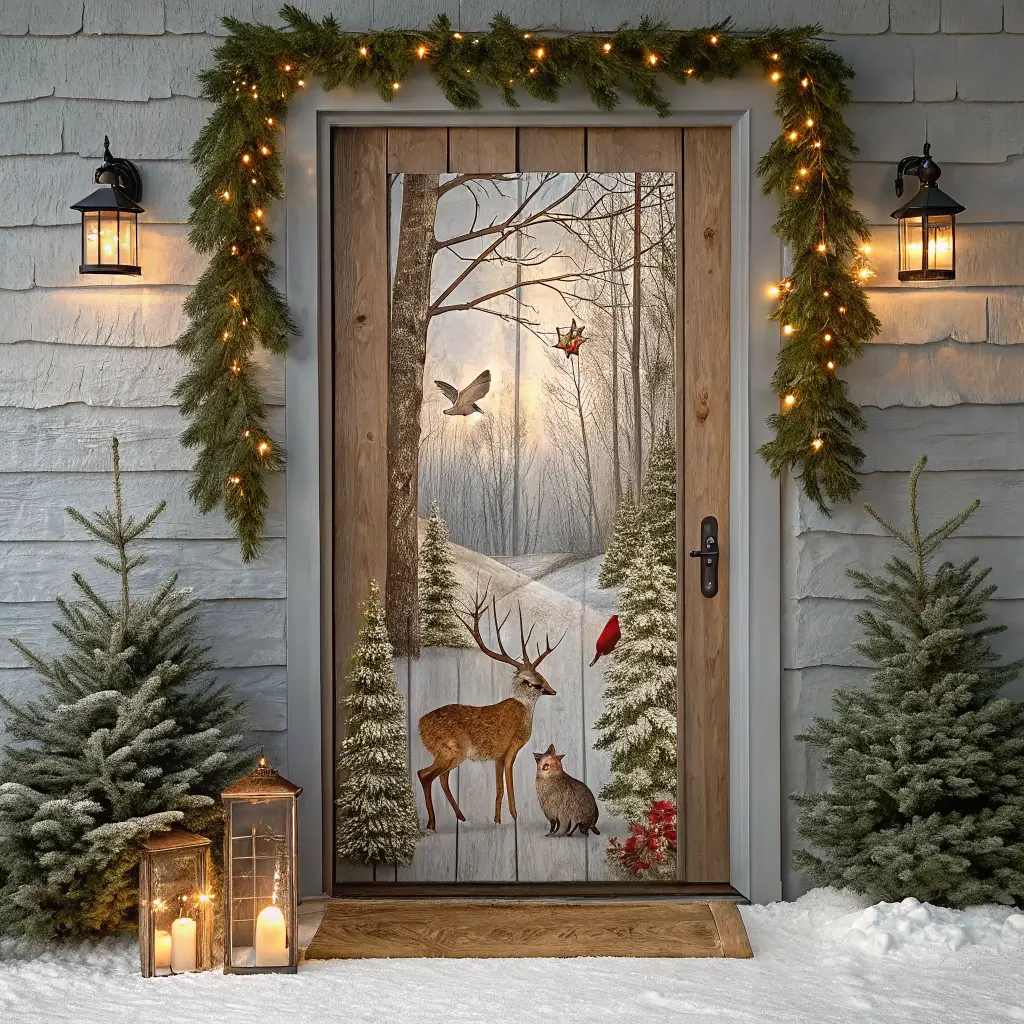
This design brings the magic of a winter forest right to your doorway. It’s whimsical without being childish, natural without being boring.
Creating Your Forest
Start with a dark blue background for that twilight forest feeling. Cut tree silhouettes from black or dark brown paper – make them different heights and slightly overlapping. The layering creates depth that makes your forest look real.
Add white “snow” on the tree branches using cotton, white paint, or paper. Don’t make it too perfect – snow clumps and falls unevenly in nature.
Populating Your Woodland
Cut out animal shapes:
- Deer (obviously)
- Rabbits
- Foxes
- Owls
- Cardinals (that pop of red is crucial)
Position your animals throughout the scene like they’re having their own winter gathering. Maybe the fox is looking up at the owl, or the rabbits are gathered near the bottom like they’re sharing warmth.
Magical Touches
Add tiny LED lights as “stars” in your dark blue sky. Create a moon from metallic silver paper. Scatter small pinecones spray-painted white at the base of your trees.
Want to really sell it? Add animal tracks in the “snow” at the bottom of your door using a marker or cutouts. It suggests movement and life even in a static display.
Also Read: 10 Heartwarming Vintage Christmas Images 1950s Ideas for Inspiration
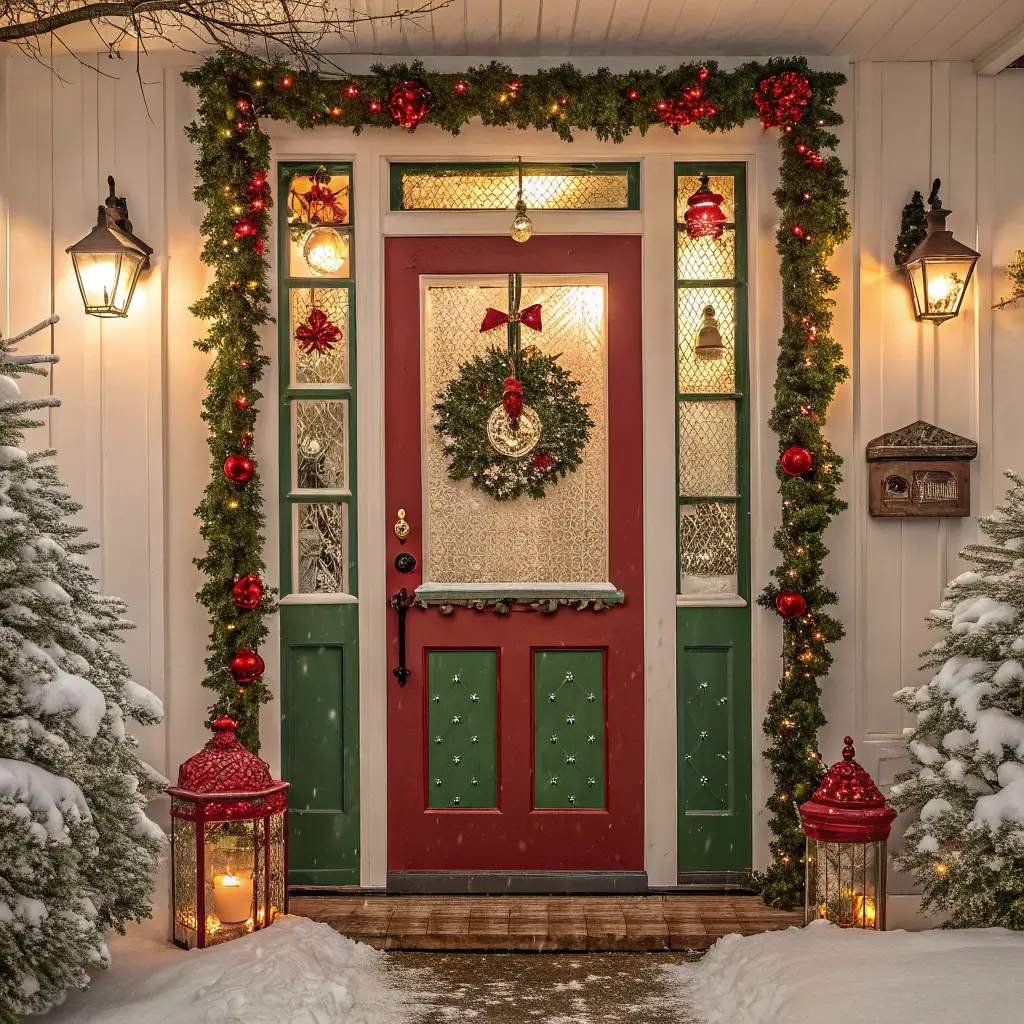
Red & Gold Elegant Holiday Door
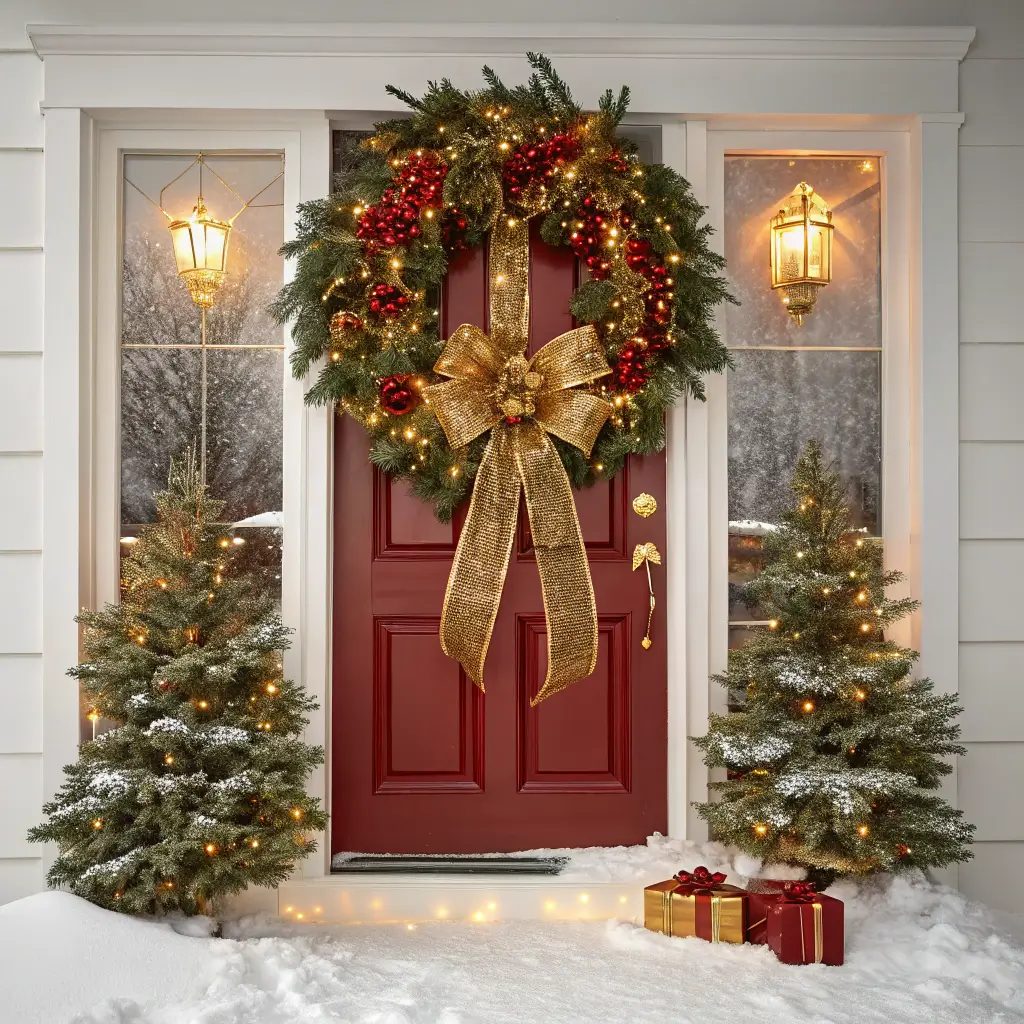
Sometimes you want to go full glamour, and this design delivers that high-end department store window feeling.
Establishing Elegance
Cover your door in deep red velvet paper or fabric. The texture immediately elevates everything. If velvet’s not in the budget, deep red wrapping paper with a subtle pattern works too.
Create a border using gold ribbon or paper – think picture frame style. This frames your door and makes it look intentional and finished.
Luxe Decorative Elements
Layer in these elements:
- Gold paper poinsettias
- Red and gold ornament clusters
- Metallic gold branches
- Burgundy ribbon bows
- Pearl garland strings
Arrange everything symmetrically. Unlike our farmhouse door, elegance usually means balance and intention. Create a focal point at eye level with your largest decorative element.
The Finishing Statement
Add a monogrammed initial in gold at the center of your door. Or go with a simple “Joy” or “Peace” in elegant gold lettering. Less is often more with elegant designs – every element should feel purposeful, not cluttered.
String warm white lights sparingly through your design. You want a gentle glow, not a Christmas explosion. Think candlelight dinner, not rock concert.
Making Your Door a Winner
After three years of doing this, I’ve learned what separates the winners from the “thanks for participating” crowd. First, commit fully to your theme. Half-hearted attempts always show. If you’re doing vintage, everything should feel vintage. If you’re going elegant, don’t throw in a random cartoon reindeer because you had one lying around.
Second, lighting changes everything. Seriously, even the simplest design looks amazing with proper lighting. Battery-operated LEDs are your best friend here – no one wants to see extension cords ruining the magic.
Third, think about your door from different distances. What catches the eye from down the hallway? What details reward someone who comes closer? The best doors work at every distance.
Finally, don’t forget the practical stuff. Your door still needs to open (usually), so secure everything properly. Nothing ruins Christmas magic faster than decorations falling off every time someone walks through.
Remember, the best door decoration is the one that makes you smile every time you see it. These contests are supposed to be fun, not stressful. Pick a design that speaks to you, add your own twist, and enjoy the process. Who knows? You might just find yourself as obsessed with door decorating as I am.
And hey, even if you don’t win, you’ve got an Instagram-worthy entrance that’ll make your delivery person’s day. That’s a win in my book :/