12 Creative DIY Ideas for Your Bathroom Remodel
Alright, let’s talk bathrooms. That small, often-neglected room where we start and end our days. Maybe yours is stuck in a past decade (avocado green, anyone?), or perhaps it’s just… blah. Functional, but with all the personality of a wet wipe. I get it.
A full-blown, hire-a-contractor remodel can cost more than your first car, which is why so many of us are turning to the wonderful, sometimes frustrating, world of DIY.
But where do you even start? The thought can be overwhelming. Do you tear everything out? Just slap on a new coat of paint and call it a day? I’ve been there, trust me. I’ve had projects go brilliantly and others that ended with me swearing at a piece of plumbing at 2 AM.
Through it all, I’ve learned that with a bit of creativity, some solid planning, and the right ideas, you can transform your bathroom into a space you actually love without needing a second mortgage.
So, grab your virtual toolbelt, and let’s walk through 12 creative DIY ideas that will take your bathroom from “meh” to magnificent. I’ll share my wins, my fails, and all the practical advice you need to make it happen.
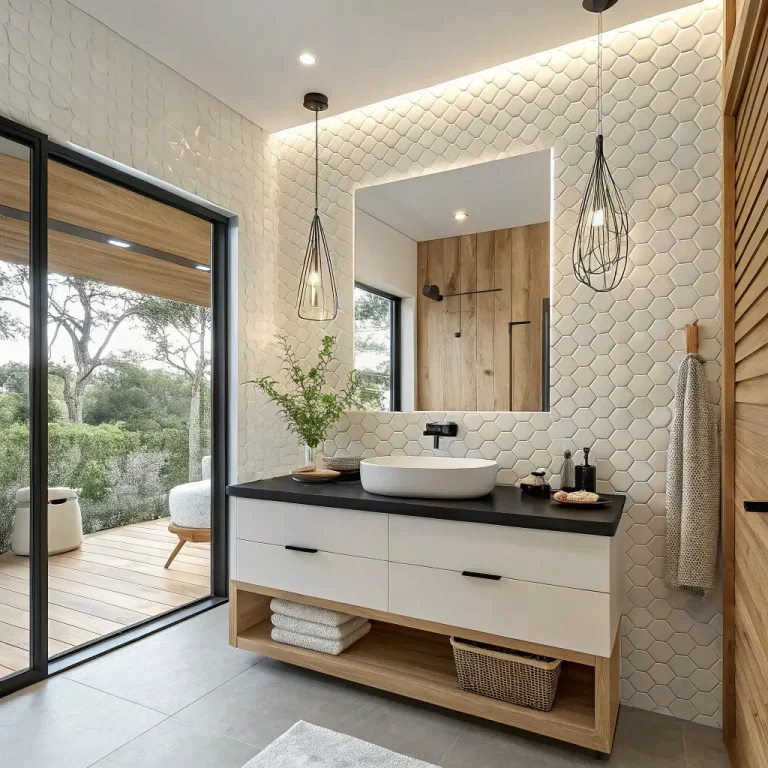
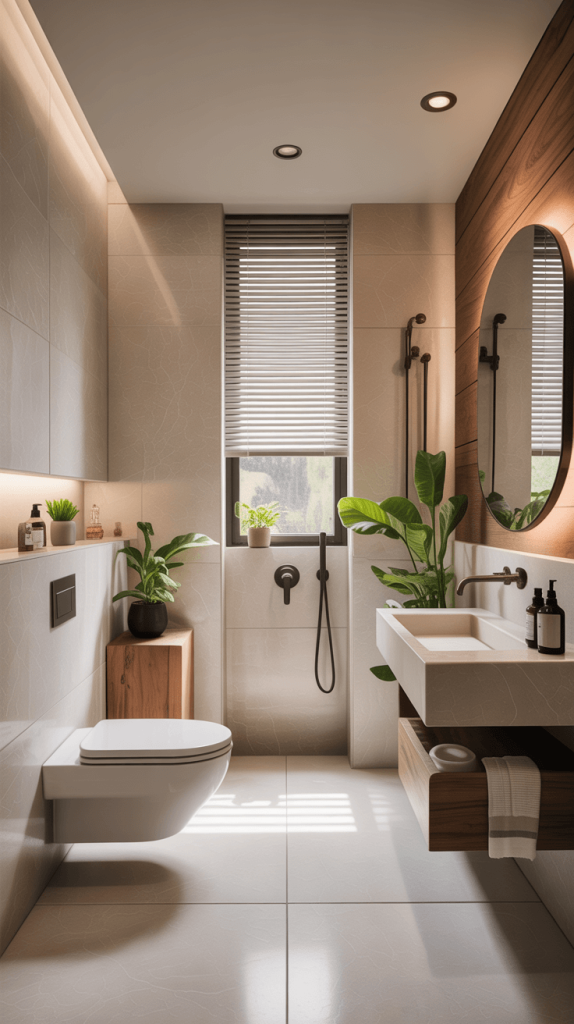
Creating a Functional Vanity Area
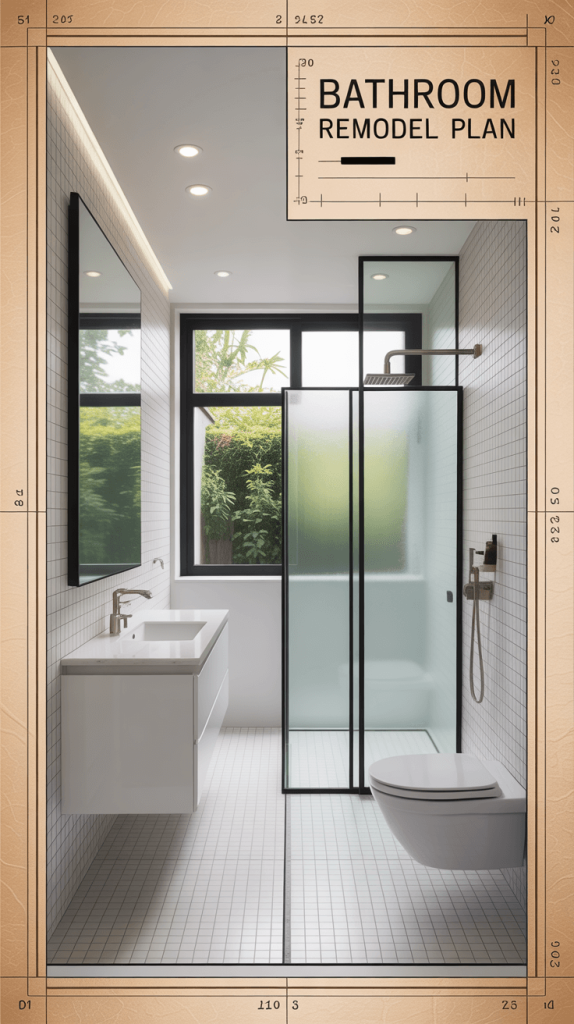
Before you even think about swinging a sledgehammer, you need a plan. I cannot stress this enough. A bathroom remodel is a 3D puzzle where all the pieces cost money and need to connect to water lines and drains. Mess this up, and you’re in for a world of expensive headaches.
Start by measuring. Everything. Get the dimensions of the room, the door swing, the location of the plumbing stack, the vent, everything. Draw a simple bird’s-eye view sketch. This is your bible for the entire project.
Now, think about flow. Is there enough room to open the shower door? Can you access the towel rack without doing a pirouette around the toilet? The classic rule is to maintain at least 21 inches of clearance in front of all fixtures. This isn’t just for comfort; it’s a safety thing, too.
- Software is your friend: Don’t worry if you can’t draw. Free apps like RoomScan or planner programs from big-box stores can help you create a digital layout. Playing with fixtures in a virtual space is way cheaper than buying the wrong vanity and finding out it blocks a door.
- Consider the “Wet Zone”: Keep your shower, tub, and sink areas grouped together if possible. This simplifies plumbing and can save you a ton on labor and materials if you’re moving pipes.
Ever wondered why some bathrooms just feel right? It’s almost always because someone took the time to nail the layout first.
Selecting Color Schemes and Materials
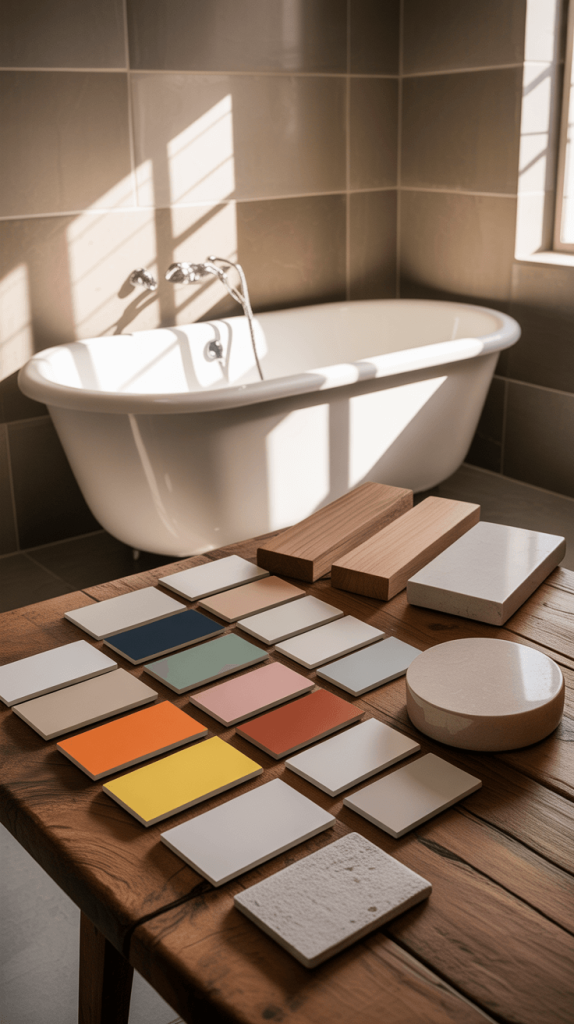
This is the part everyone looks forward to. It’s cathartic! It’s also incredibly messy and where you can do the most unseen damage if you’re not careful.
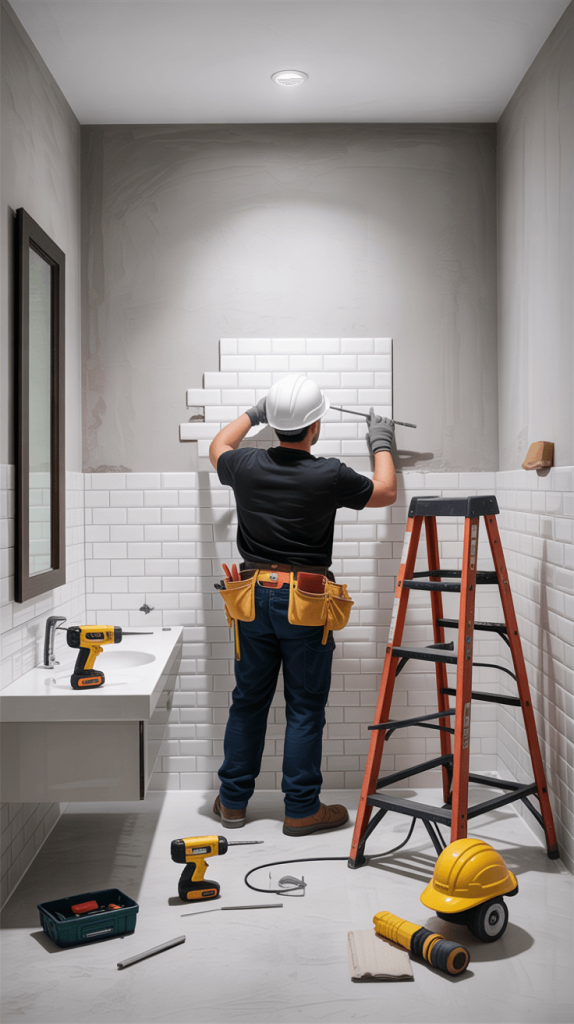
First, and this is non-negotiable: SHUT OFF THE WATER. Locate the shut-off valves for your sinks and toilet. For the whole bathroom, there’s usually a main valve you need to find. Test it. Flush the toilet, turn on the sink. Make sure nothing is flowing. Then, shut off the power to the bathroom at your circuit breaker. Water + electricity = a very bad day.
Now, for the fun part:
- Protect everything: Seal the door to the bathroom with plastic sheeting and painter’s tape to contain the dust monster. Cover the floor of your hallway. You’ll thank me later.
- Remove fixtures carefully: Start with the easy stuff—mirror, toilet paper holder, towel bars. Then move to the sink vanity. Disconnect the plumbing (have a bucket ready for residual water!) and carefully remove it. The toilet is next. After disconnecting, plug the sewer hole with a rag immediately. Trust me, you do not want to smell those gases.
- Tiles and walls: For tile, you’ll need a hammer drill or a small sledgehammer and a pry bar. WEAR SAFETY GOGGLES. Pieces will fly everywhere. Be mindful of what’s behind the walls—you don’t want to accidentally whack a pipe.
The goal here isn’t just to destroy; it’s to create a clean, blank slate for your masterpiece. Take your time and do it right.
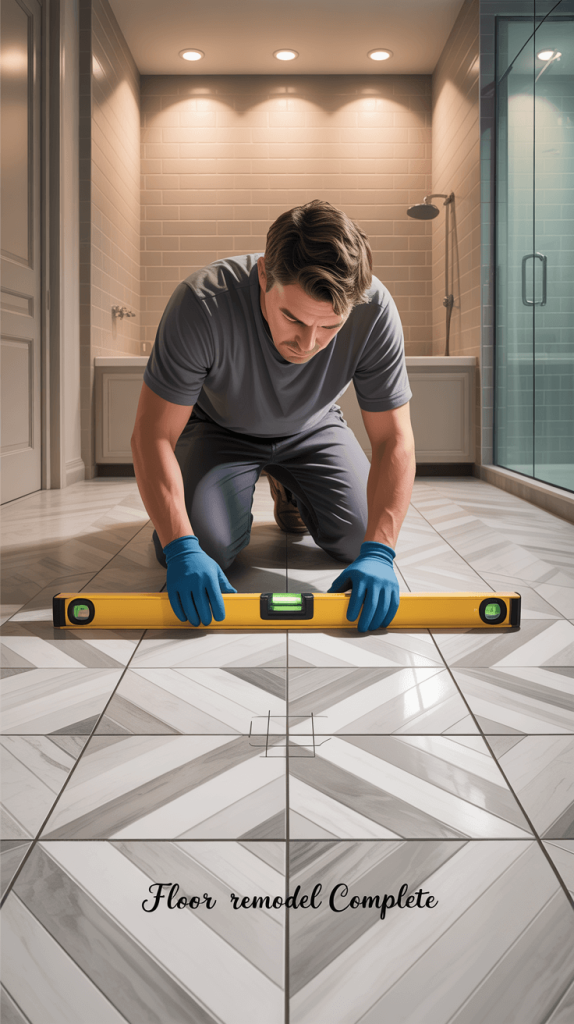
Installing New Flooring
This is where your bathroom gets its personality. Your color palette and material choices will dictate whether the space feels like a modern spa, a cozy cottage retreat, or a bold, artistic statement.
- Light and Airy: If you have a small bathroom, light colors are your best friend. Think soft whites, light grays, pale blues, and seafoam greens. They reflect light and make the space feel larger. Pair this with natural materials like light wood tones and white marble (or a very convincing porcelain imitation—my personal go-to for budget-friendliness).
- Moody and Dramatic: Got a bigger space or just love a bold look? Don’t be afraid of dark, saturated colors. Navy blue, charcoal gray, or even a deep forest green on the walls can look incredibly luxurious. Pair it with matte black fixtures and brass accents for a seriously chic vibe. I did this in my powder room and it’s everyone’s favorite room in the house.
- Mixing Textures: Color isn’t just about paint. It’s about texture. Combine smooth porcelain tiles with a shiplap wall, a woven seagrass basket, and some polished chrome. The contrast is what makes a design feel layered and expensive.
Pro tip: Always get samples! Paint a large swatch on the wall and look at it at different times of day. Order tile samples and see them in your own lighting. The way a color looks on a screen is almost never how it looks in your home.
Also Read: 15 Unique Bathroom Remodel Ideas for Every Budget
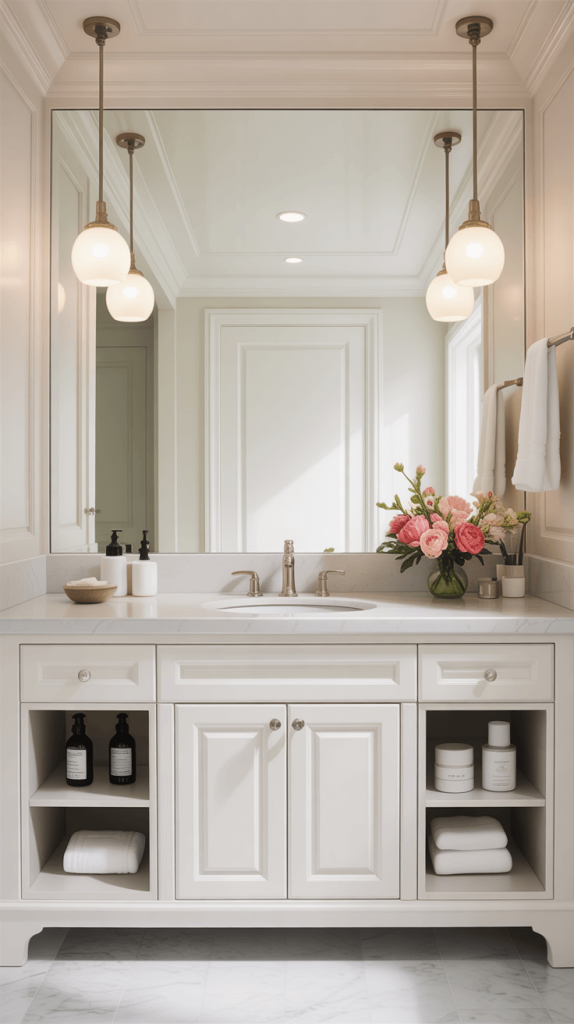
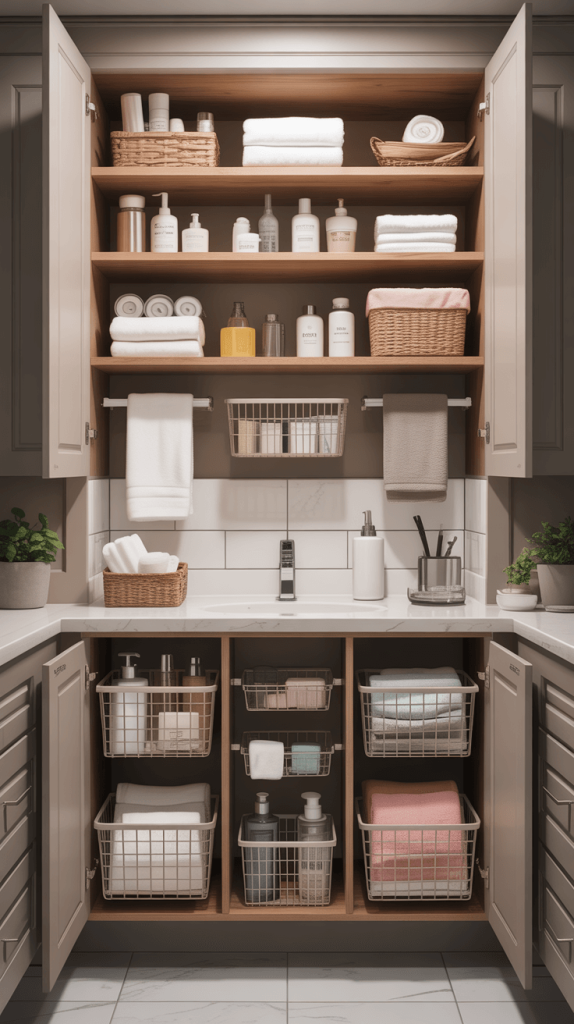
Cabinetry and Storage Solutions
Bathroom floors take a beating. They deal with water, humidity, dropped hair products, and… well, life. Your choice needs to be equal parts stylish and durable.
- Luxury Vinyl Plank (LVP): IMO, this is the MVP of DIY bathroom flooring. It’s 100% waterproof, incredibly durable, soft underfoot, and a dream to install. Most options are click-lock, floating floors, meaning you don’t even need glue. You can get looks that mimic expensive hardwood, stone, or ceramic tile for a fraction of the cost and installation hassle.
- Porcelain or Ceramic Tile: A classic for a reason. It’s tough, water-resistant, and easy to clean. The downside? The installation is more advanced. You need to work with thinset mortar, a notched trowel, and grout. It’s also hard and cold underfoot (though radiant heating mats can solve that—a luxurious DIY add-on!).
- Sheet Vinyl: The budget-friendly workhorse. Modern sheet vinyl has come a long way and can look really great. Installation involves spreading adhesive and carefully rolling it out, which can be tricky for a beginner to get perfectly smooth and bubble-free.
Whatever you choose, ensure it has a textured, non-slip surface, especially in the shower area. Safety first, always.
Demolition and Preparation Steps
Let’s be real: bathroom clutter is the worst. Q-tips, lotions, half-used products—it all needs a home. Smart storage is what separates a good bathroom from a great one.
- The Vanity: This is your storage anchor. If your existing vanity is structurally sound but just ugly, consider refacing it. You can paint it (use a specialty cabinet paint for durability) and swap out the hardware for an instant upgrade. New knobs and pulls are like jewelry for your cabinetry; they make a huge difference.
- Open Shelving: A huge trend for a reason. It’s accessible, affordable, and makes the room feel more open. Use floating wood shelves above the toilet or next to the mirror. Style them with pretty towels, baskets for smaller items, and a plant or two. Just commit to keeping it tidy—open shelving shows everything.
- Medicine Cabinet Upgrade: That boring, flat mirror? Swap it for a deep medicine cabinet with a mirror front. You gain storage for medicines and toiletries without losing an inch of space. They come in incredible styles now, from ultra-modern frameless designs to vintage-inspired pieces.
- Niche-tastic: If you’re re-tiling your shower, build in a niche! It’s a recessed shelf within the wall that holds shampoo and soap. It keeps your shower organized and looks built-in and professional. It’s a simple framing and waterproofing project that has a massive payoff.
Updating Lighting Fixtures
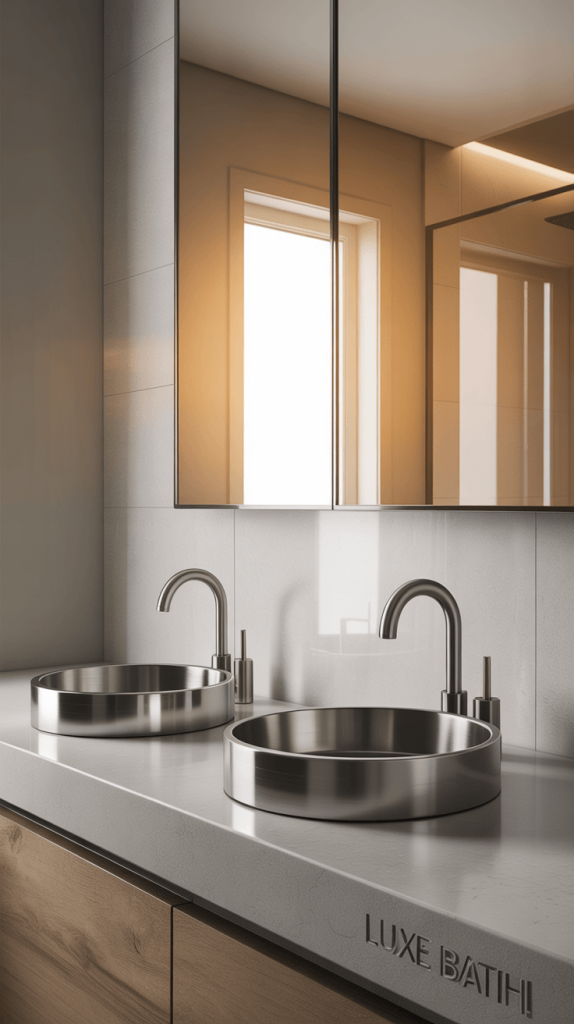
The vanity area is where the magic happens—brushing teeth, doing hair, attempting to apply makeup without your glasses on. Functionality is key.
- Countertop Choices:
- Quartz: Non-porous, durable, low-maintenance, and comes in every color and pattern imaginable. It’s a fantastic choice, though on the pricier side.
- Solid Surface: A good mid-range option. It’s seamless and repairable if scratched.
- Butcher Block: Brings warmth and a natural element. But it requires diligent sealing to protect it from water damage. I made this mistake once. Once.
- Sink Styles:
- Undermount: My personal favorite. Sleek, modern, and you can wipe water and crumbs directly from the counter into the sink.
- Drop-In: The easiest to install. The lip sits on top of the counter, which can get grimy over time.
- Vessel: Sits on top of the counter. Makes a big style statement but can be awkward for kids to use and creates a higher splash zone.
- The Mirror: Go big! A large mirror, or even a mirror covering the entire wall behind the vanity, will amplify light and make the space feel huge. Add sconces on either side for the perfect, shadow-free lighting for grooming.
Also Read: 10 Budget-Friendly Ideas for a Stunning Bathroom Remodel
Planning Your Bathroom Layout
Bad bathroom lighting is a crime. That harsh, overhead-only light that casts shadows on your face? It’s time to evict it.
- Layer Your Light: You need more than one light source.
- Ambient: This is the overall light in the room, usually from a ceiling fixture.
- Task: This is the critical light for your vanity area. Sconces mounted at eye level on either side of the mirror are the gold standard. They provide even, flattering light across your face, eliminating shadows.
- Accent: A small light over the shower or a dimmable can light over the tub can set a relaxing mood.
- Color Temperature Matters: That “warmth” of light is measured in Kelvins (K). For a bathroom, you want a clean, bright light that mimics daylight. Aim for bulbs in the 3000K to 4000K range. This provides true color rendering, so you don’t walk outside looking like you applied your makeup in a disco.
Swapping out a light fixture is a very manageable DIY project—just make sure the power is OFF at the breaker before you touch a single wire.
Choosing the Right Fixtures
Faucets, showerheads, and towel bars might seem like small details, but they tie the whole room together. This is where you can really define your style: modern, traditional, industrial, or farmhouse.
- Finish Finishes: Mixing metals is totally acceptable now, but do it with intention. Pick a dominant finish (like brushed nickel for your faucet and showerhead) and then an accent finish (like matte black for your towel rings and toilet paper holder).
- Water Efficiency: This isn’t just an eco-friendly move; it’s a wallet-friendly one. Look for WaterSense-labeled faucets and showerheads. They use less water without sacrificing pressure. Modern low-flow showerheads are amazing—you won’t even notice the difference.
- The Shower System: If you’re upgrading your shower, consider a shower system with a hand shower. It makes cleaning the tub so much easier and is great for pet baths or rinsing hair. Installing one involves some basic plumbing know-how, but it’s absolutely within reach for a determined DIYer.
Adding Decorative Touches
Going green in the bathroom is easier than ever, and it often means saving some green, too.
- Low-Flow Everything: We already touched on this, but it’s worth repeating. A low-flow toilet can save thousands of gallons of water per year. Dual-flush models give you an option for every situation :).
- Ventilation: A good exhaust fan is crucial. It pulls out moisture, which prevents mold and mildew, protecting your health and your new investment. Get a fan that’s sized correctly for your bathroom’s square footage and make sure it vents to the outside, not just into your attic.
- Sustainable Materials: Look for options like:
- Bamboo: A fast-growing grass that’s incredibly sustainable. Great for vanities, shelving, and accessories.
- Recycled Glass: Used in beautiful countertops and tiles.
- Reclaimed Wood: Adds instant character and history to a space. Just make sure it’s properly sealed for a wet environment.
Budgeting for Your Remodel
This is where your bathroom becomes a home. Decorating is what injects your soul into the space.
- Textiles: Towels, bath mats, and shower curtains are an easy way to add color and pattern. Don’t be matchy-matchy. Layer different textures and complementary patterns.
- Artwork: Yes, in the bathroom! A framed print, a small collection of photos, or even a cool vintage sign can add personality. Just make sure it’s not a valuable original, as humidity can damage it.
- Plants: They literally breathe life into a room. They purify the air and add a beautiful organic touch. Choose humidity-loving plants like ferns, pothos, or snake plants that thrive in bathroom conditions.
- Accessories: Soap dispensers, toothbrush holders, and trays. Consolidate these into a cohesive style rather than a bunch of mismatched items. A simple wood tray can corral your everyday items and make them look intentional.
Also Read: 10 Small Bathroom Ideas Featuring Stunning Bathtubs
Final Inspection and Touch-Ups
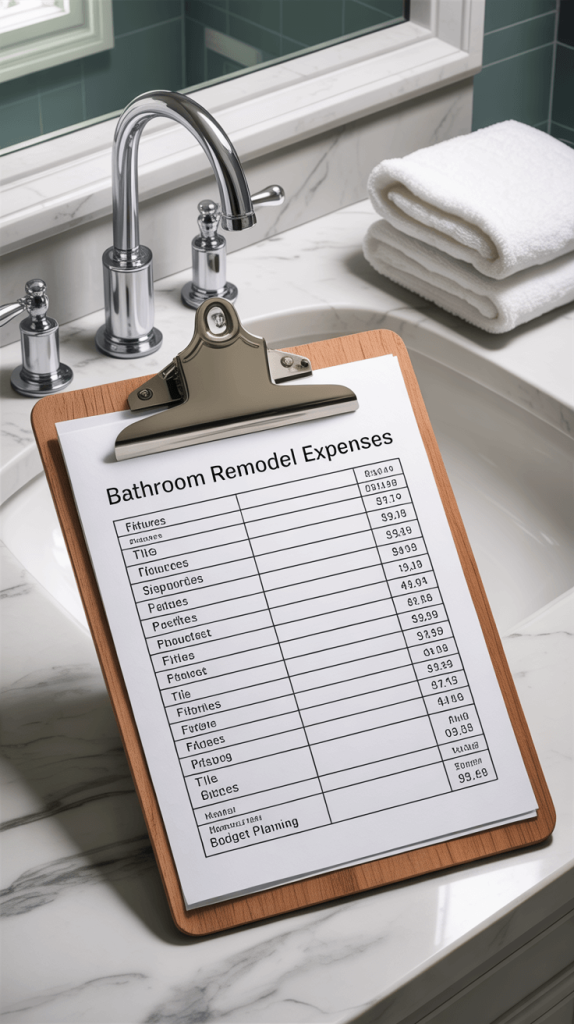
Let’s have a real talk about money. DIY saves on labor, but materials still cost. The number one cause of DIY stress is blowing your budget.
- Get Quotes: Even though you’re doing the work yourself, price out the materials. Go to a few stores, check online retailers. Get real numbers for everything on your list.
- The 20% Rule: Add a contingency of at least 20% to your total budget. You will find something behind a wall that needs fixing. A pipe will need replacing. A tile will break. It’s not a matter of if, but when.
- Prioritize: Make a list of must-haves and nice-to-haves. If your budget gets tight, you know what you can sacrifice. Maybe that fancy heated towel rack gets shelved for Phase 2, but you won’t compromise on your waterproof flooring.
FYI, my biggest budget mistake was not factoring in the cost of tools I didn’t own. Renting or buying a wet saw, a hammer drill, and other specialty tools can add up. Factor that in!
Incorporating Eco-Friendly Features
12. Final Inspection and Touch-Ups: The Last 10% Takes 90% of the Time
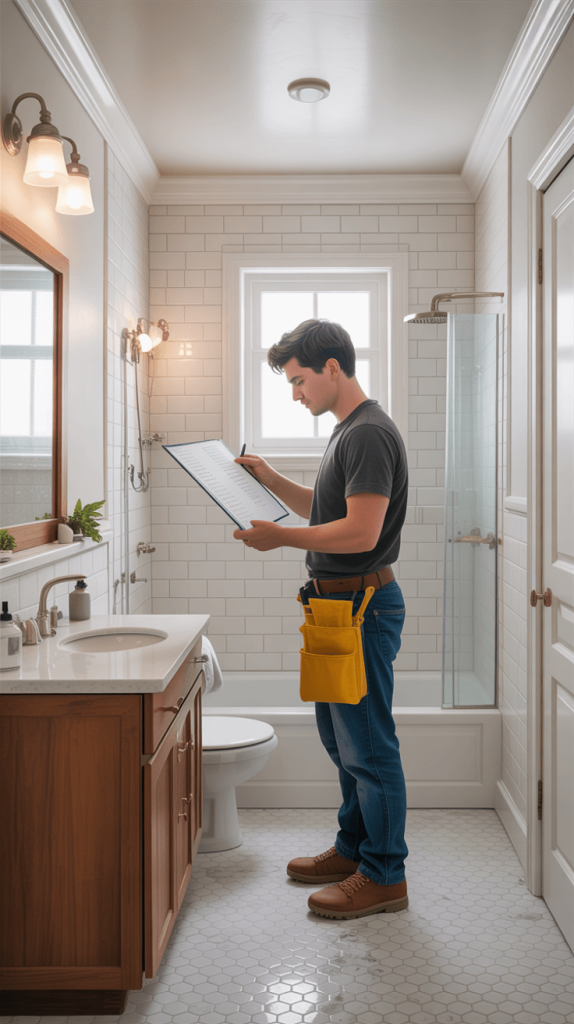
You’re so close! The big stuff is done. But it’s the final details that elevate a project from “DIY” to “did they really do that themselves?”
- Grout and Caulk: These are the finishing touches that make everything look clean and professional. Run a smooth, clean bead of silicone caulk around all the joints: where the tub meets the tile, the vanity meets the wall, the toilet meets the floor. This seals out water and gives a pro finish.
- The Punch List: Walk through the room with a notepad and a critical eye.
- Is there a drip of paint on the trim?
- Is a cabinet door slightly misaligned?
- Does a switch plate need to be tightened?
- Are all the grout lines uniform and clean?
- Test Everything: Turn the water back on, slowly. Check for leaks under every connection. Flip the power back on and test every light and outlet. Flush the toilet. Run the shower. Celebrate that nothing is leaking! 🙂
Conclusion
You did it. You actually did it. You took a vision and a lot of trips to the hardware store and created something amazing with your own two hands.
A bathroom remodel is no small feat, and you should be incredibly proud.
Now, go run a bath, light a candle, and enjoy your beautiful new sanctuary. You’ve more than earned it.