15 Amazing DIY Crafts Room Decor Ideas to Brighten Your Space
So you’re staring at your blank walls thinking they need some serious personality, right? I totally get it. Walking into a crafts room that looks like a sterile hospital ward kills creativity faster than spilling coffee on your latest project.
The good news? You don’t need to blow your entire paycheck at fancy home decor stores when you’ve got two hands and some basic supplies lying around.
Let me share 15 ridiculously simple DIY decor ideas that transformed my crafts room from boring to brilliant.
And yes, I actually made all of these myself – some turned out Instagram-worthy, others… well, let’s just say Pinterest lied about the difficulty level. But hey, that’s part of the fun!
Paper Flower Accent Wall
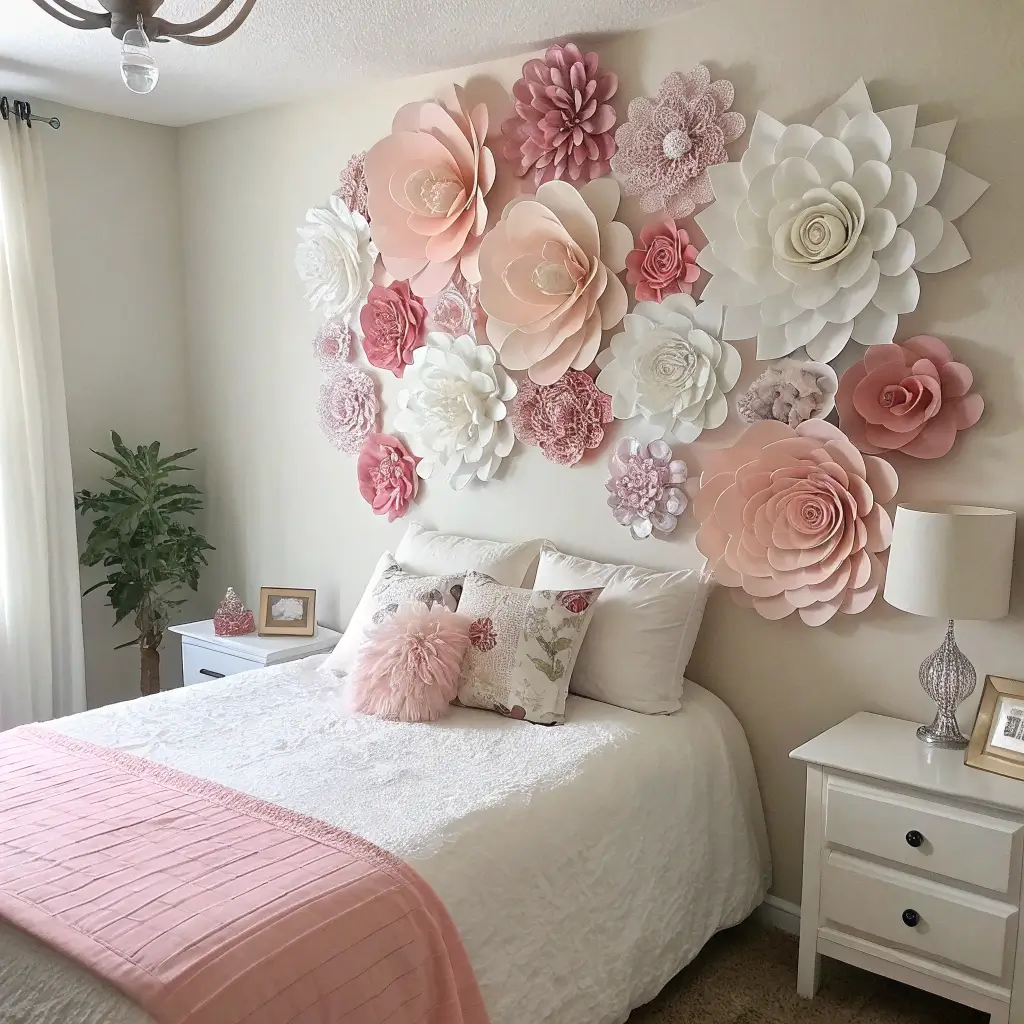
Remember when everyone went nuts over those massive paper flower backdrops at weddings? Well, I brought that magic straight into my crafts room, and you absolutely should too. Creating a paper flower accent wall takes patience, but the payoff makes every paper cut worth it.
Start with cardstock in your favorite colors – I went with blush pinks and corals because apparently I’m basic like that. You’ll need templates (free ones everywhere online, FYI), scissors, hot glue, and about three Netflix episodes worth of time. The trick? Make flowers in varying sizes from 6 inches to 18 inches across. This creates depth that flat walls desperately need.
Getting the Layout Right
Here’s where most people mess up – they start gluing flowers randomly without planning. Don’t be that person. Arrange your flowers on the floor first, take a photo, then transfer that design to your wall. I learned this the hard way after creating what looked like a floral tornado on my first attempt.
Mount your largest flowers first as anchor points, then fill in with medium and small blooms. Pro tip: double-sided mounting tape works better than nails for lightweight paper flowers, and it won’t destroy your wall when you inevitably redesign next month.
Cardboard Wall Art Panels
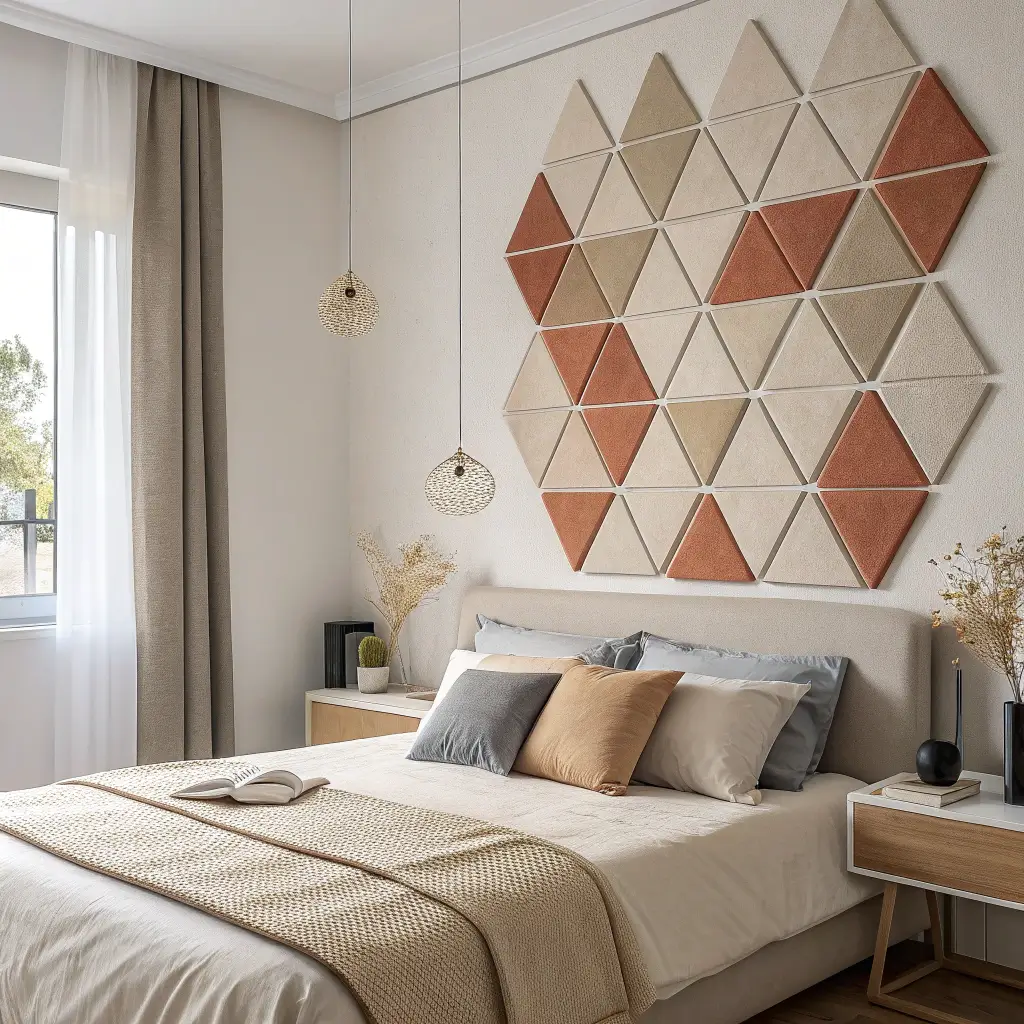
Who knew Amazon boxes could become legitimate art? Creating geometric cardboard panels costs basically nothing and looks like you hired an interior designer. I’ve fooled plenty of visitors with these bad boys.
Cut cardboard into triangles, hexagons, or whatever shape speaks to you. Paint them in coordinating colors – I chose a gradient from dark navy to soft gray. The key? Consistent spacing between panels creates that professional gallery wall effect. Mount them with command strips arranged in patterns that make sense to your eye.
Adding Dimension
Want to level up? Layer smaller painted pieces on top of larger ones for a 3D effect. I added metallic accents with gold leaf on some edges, and suddenly my recycled cardboard looked boutique-worthy. Sometimes I catch myself admiring them and forgetting they started as toilet paper delivery boxes.
Fairy Light Photo Grid

This one’s a crowd favorite, and honestly, it should be. Creating a fairy light photo grid combines two things everyone loves: twinkly lights and memories. Plus, you can switch out photos whenever you want without committing to frames.
String battery-powered fairy lights in a grid pattern across your wall using small hooks or clear pushpins. I made mine about 4×4 feet, but adjust based on your space. Attach photos with mini wooden clothespins – way cuter than regular clips, trust me. The warm glow from the lights makes every photo look professionally shot, even that blurry one from last year’s craft fair.
Making It Interactive
Here’s my favorite part: I keep blank cards and markers nearby so friends can write notes or doodles to add to the display. My grid constantly evolves with new memories, making it feel alive rather than static. Isn’t that what a creative space should feel like anyway?
Also Read: 15 Inspiring Easy DIY Room Decor Ideas for Small Rooms
DIY Yarn Wall Hanging
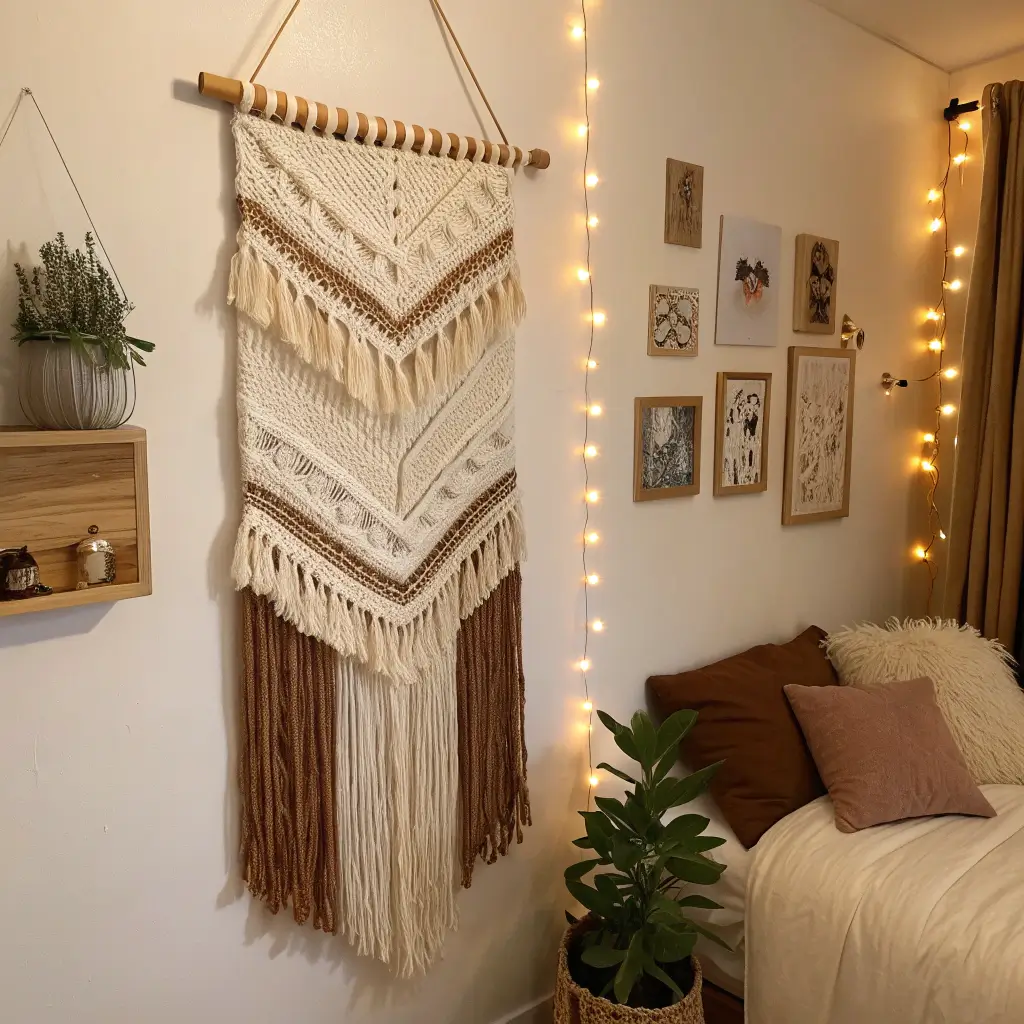
Macramé might seem intimidating, but creating a simple yarn wall hanging requires exactly zero fancy knots. I’m talking about the kind of wall art that looks complex but takes about as much skill as braiding hair.
Grab a wooden dowel (or sturdy branch if you’re feeling rustic), and various textures of yarn. I mixed chunky wool with thin cotton and even threw in some metallic thread because why not? Cut lengths about three times longer than your desired final length – you’ll thank me later when you’re not running short mid-project.
The No-Knot Method
Loop yarn over your dowel, pull the ends through the loop, and boom – you’ve attached it. Repeat across the dowel with different colors and textures. Trim the bottom into a V-shape, straight line, or my personal favorite – intentionally uneven lengths for that organic vibe. Add beads or feathers if you’re feeling extra, though honestly, simple often looks best.
Painted Mason Jar Lanterns

Mason jars are basically the Swiss Army knife of DIY decor. Transforming them into painted lanterns gives you customizable lighting that sets the perfect crafting mood. I’ve made about twelve of these, and each one has its own personality.
Paint the outside of jars with translucent glass paint – this lets light through while adding color. I created an ombré effect by diluting paint with more medium as I moved up the jar. Drop in battery-operated tea lights or fairy lights, and suddenly you’ve got ambient lighting that doesn’t scream “I raided my grandmother’s canning supplies.”
Hanging vs. Tabletop
Can’t decide between hanging or tabletop lanterns? Make both! I wrapped wire around jar rims to create hangers for some, while others sit pretty on shelves. Group odd numbers together (three or five work best) for maximum visual impact. The flickering lights make late-night crafting sessions feel magical instead of exhausting.
Washi Tape Geometric Wall Design
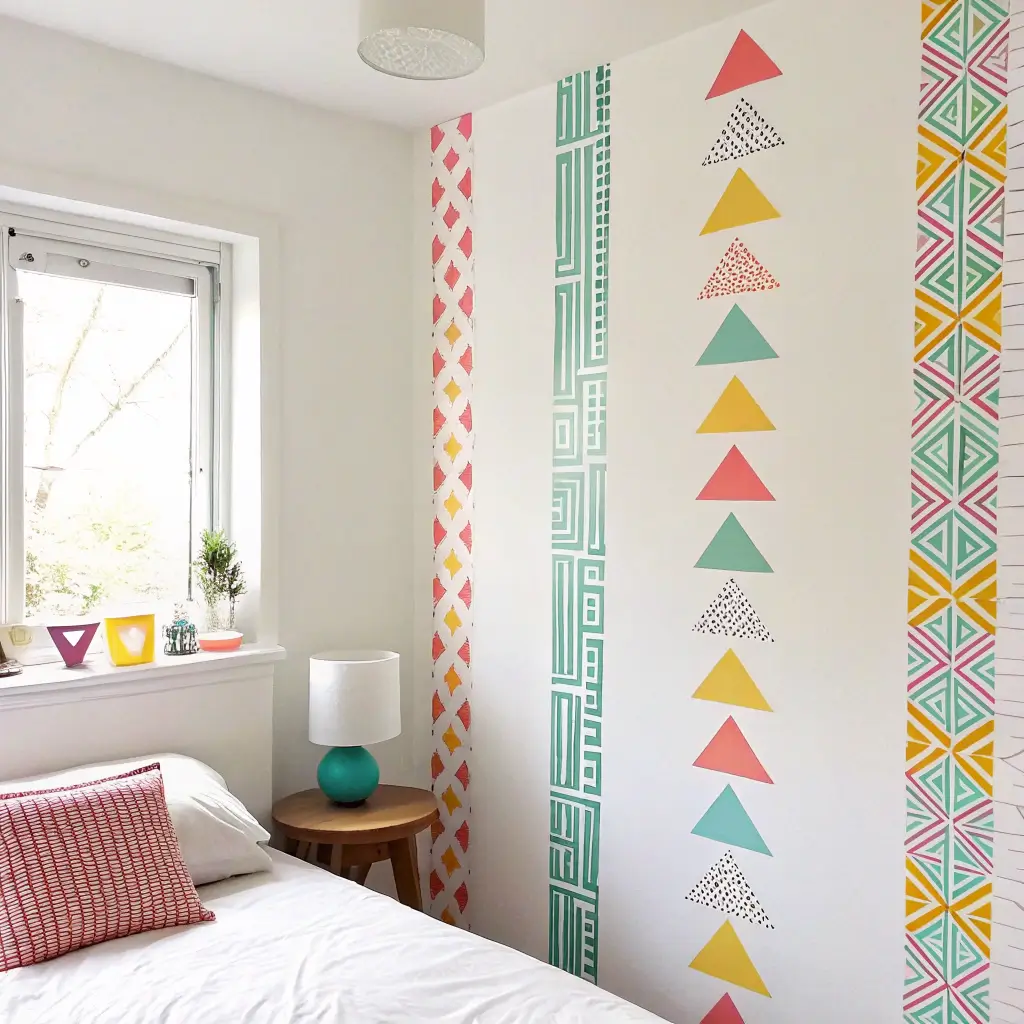
Washi tape might be the most underrated decorating tool ever invented. Creating geometric wall designs with it requires zero artistic ability and even less commitment – perfect for renters or chronic redesigners like myself.
Map out your design with pencil marks first. I went for interconnected triangles because they’re forgiving if your lines aren’t perfectly straight (spoiler: mine never are). Apply tape following your marks, pressing firmly at edges to prevent peeling. The beauty? Instant transformation that peels off clean when you’re over it.
Color Coordination Tips
Stick to 2-3 colors max unless you want your wall looking like a rainbow exploded. I chose black, white, and gold for a sophisticated look that doesn’t compete with my actual craft supplies. Create larger shapes by combining multiple strips, or keep it minimal with single lines forming abstract patterns.
Also Read: 15 Budget-Friendly Room Decor DIY Ideas You’ll Love
Recycled Bottle Plant Holders
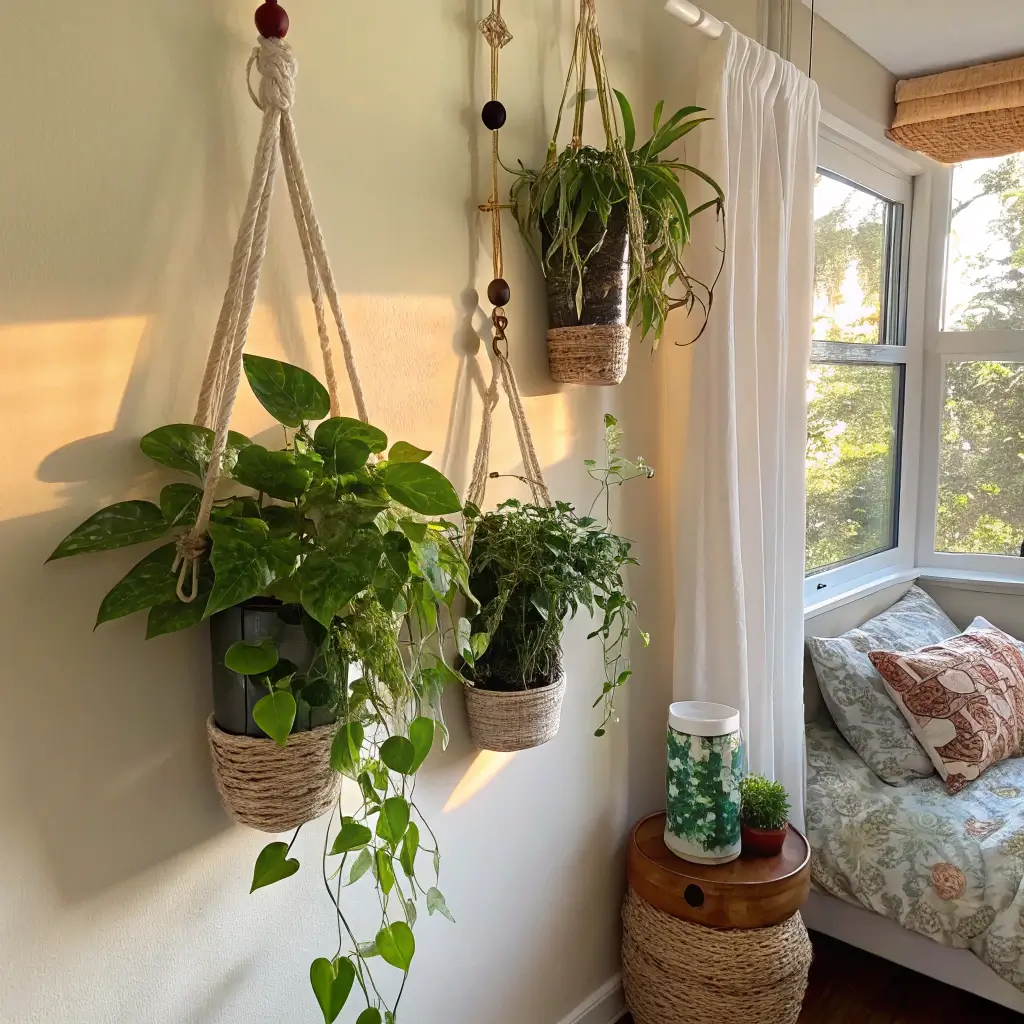
Plastic bottles destined for recycling make surprisingly chic hanging planters when you give them a makeover. I’ve converted everything from soda bottles to laundry detergent containers into green havens for my crafts room.
Cut bottles in half, keeping the bottom portion. Sand the cut edges smooth (safety first, people). Paint them with acrylic paint mixed with primer for better adhesion – learned that tip after my first attempt flaked off within a week. Punch drainage holes and add small rocks before soil to prevent root rot.
The Hanging System
Create a macramé-style holder with twine, or go simple with holes punched near the rim and string threaded through. I hung mine at different heights near my window for a cascading garden effect. Pothos and spider plants thrive in these, BTW, and they’re practically indestructible for fellow black-thumb crafters.
DIY Fabric Hoop Wall Decor
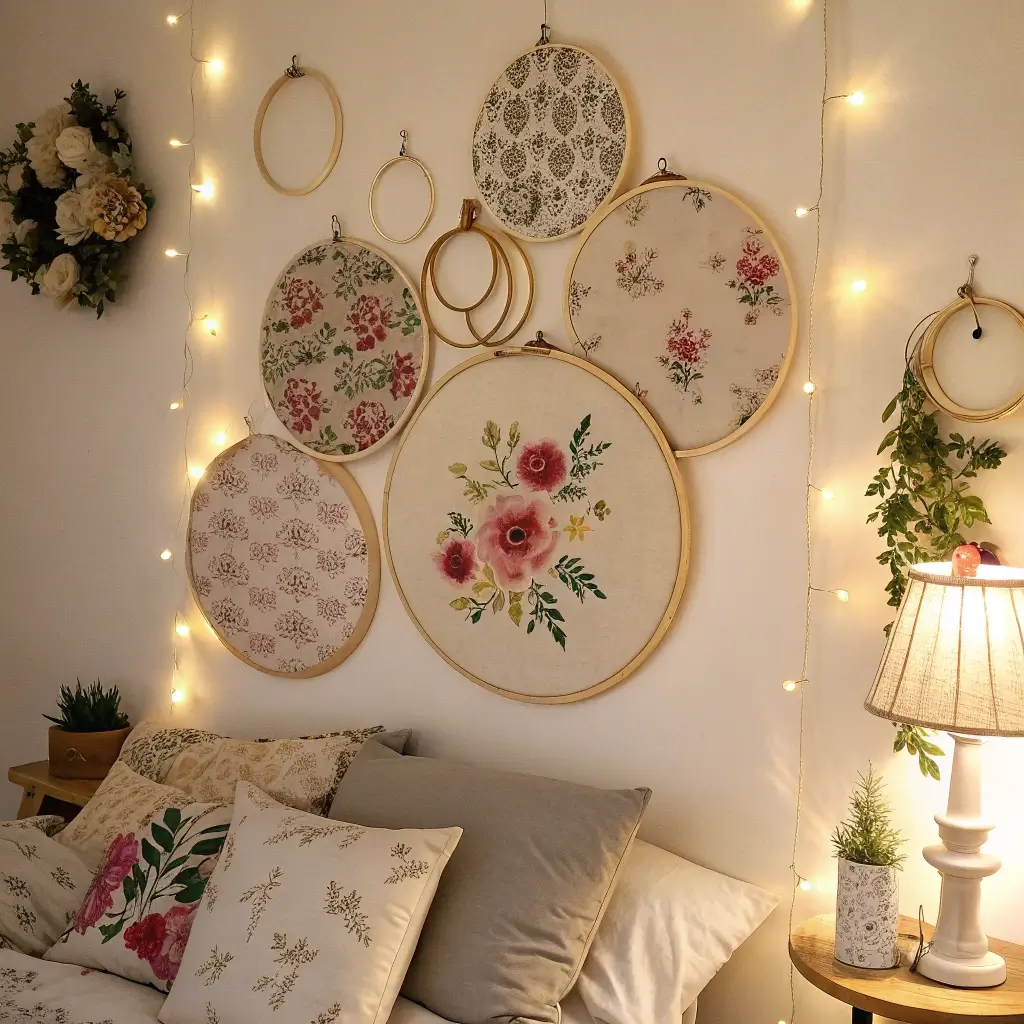
Embroidery hoops aren’t just for needlework anymore. Using them as frames for fabric art creates texture and interest that flat prints can’t match. Plus, you probably have a stash of pretty fabric scraps begging for purpose, right?
Stretch fabric taut in hoops of various sizes. I mixed patterns – florals with geometrics, solids with prints – because matching is overrated IMO :). The key is finding a common color thread that ties everything together. Arrange hoops in an organic cluster rather than rigid rows for a more artistic feel.
Beyond Basic Fabric
Want to get fancy? Layer sheer fabric over patterned fabric for depth. Add buttons, lace trim, or small embroidered details to some hoops. I even pressed dried flowers between two pieces of sheer fabric in one hoop – talk about bringing nature indoors!
Cardboard Frame Mirror Decor

That plain mirror hanging in your crafts room? Time for a serious glow-up. Creating a decorative cardboard frame transforms boring mirrors into statement pieces without the statement price tag.
Cut cardboard into a frame shape larger than your mirror. I went for a sunburst design because apparently I’m living in the 70s now. Paint it, cover it with fabric, or go wild with decoupage using book pages or sheet music. The layering technique works great here – build up dimensions by gluing smaller decorated pieces onto your base frame.
Mounting Without Damage
Attach your frame to the mirror using strong double-sided tape around the edges. This method means you can change frames seasonally without committing to permanent alterations. My summer frame features bright tropical papers, while winter gets cozy with buffalo plaid fabric.
Also Read: 15 Fun DIY Room Decor Ideas and Cozy Bedroom Tips
Origami Butterfly Wall Display
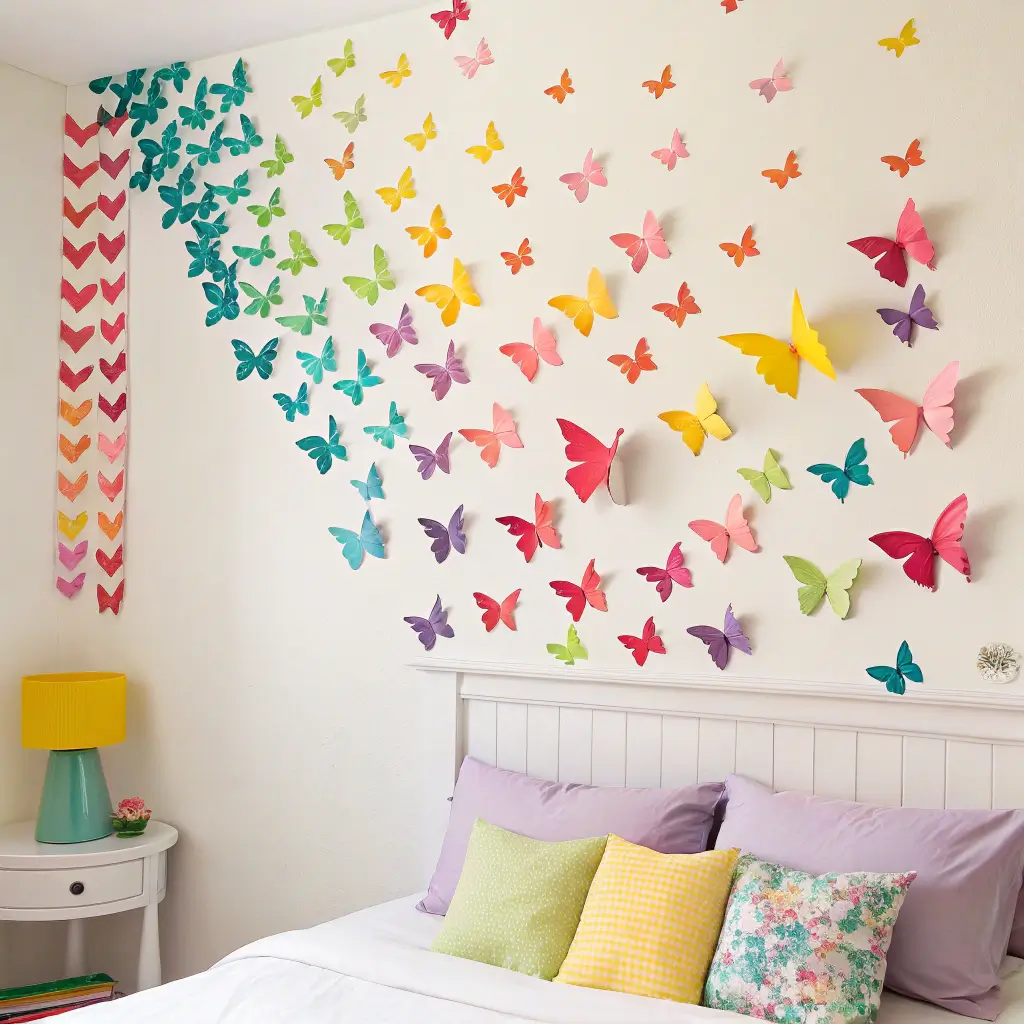
Creating an origami butterfly swarm sounds complicated but requires exactly one skill: following YouTube tutorials. I made fifty butterflies in an afternoon while binge-watching true crime documentaries. Multi-tasking at its finest.
Use origami paper, scrapbook paper, or even magazine pages for eco-friendly options. Vary your butterfly sizes from tiny 2-inch wingspan to impressive 6-inch beauties. The magic happens in the arrangement – start with a concentrated cluster that gradually disperses across your wall, like they’re actually flying somewhere.
Installation Tricks
Double-sided foam tape gives butterflies dimension, making them appear to hover off the wall. Angle some wings up, others down, for realistic movement. I added a few metallic butterflies for sparkle because everything’s better with a little bling, honestly.
DIY Cork Board Art Wall

Cork boards don’t have to look like boring office supplies. Transforming them into artistic display pieces gives you functional decor that actually enhances your space. My cork board wall has become the command center of my crafts room.
Cover cork tiles with fabric or decorative paper, leaving some natural for contrast. Arrange tiles in a pattern – I chose a checkerboard effect with alternating covered and natural tiles. The combination creates visual interest while maintaining the practical pin-able surface you need.
Making It Multifunctional
Here’s where it gets good: add small shelves, hooks, or containers to some tiles. I attached tiny mason jars for holding pushpins and small supplies. String runs between tiles create additional hanging space for lightweight items. This isn’t just decor; it’s organized inspiration at its finest.
Hand-Painted Quote Canvas

Sometimes you need daily motivation staring you in the face. Creating hand-painted quote canvases lets you surround yourself with words that actually mean something to you, not just generic “Live, Laugh, Love” nonsense.
Choose quotes that genuinely inspire your creativity. I painted “Done is better than perfect” because perfectionism kills more projects than lack of skill ever will. Use pencil to sketch letters lightly first – nobody freehands perfect typography on the first try. Layer paint colors for depth, adding shadows or highlights to make letters pop.
Typography Without Fear
Can’t letter to save your life? Print quotes, transfer to canvas using graphite paper, then paint over the traced lines. I won’t tell if you won’t. Mix fonts within one quote for visual interest, or keep it clean with single typography. Both work depending on your room’s vibe.
DIY Hanging Paper Lanterns
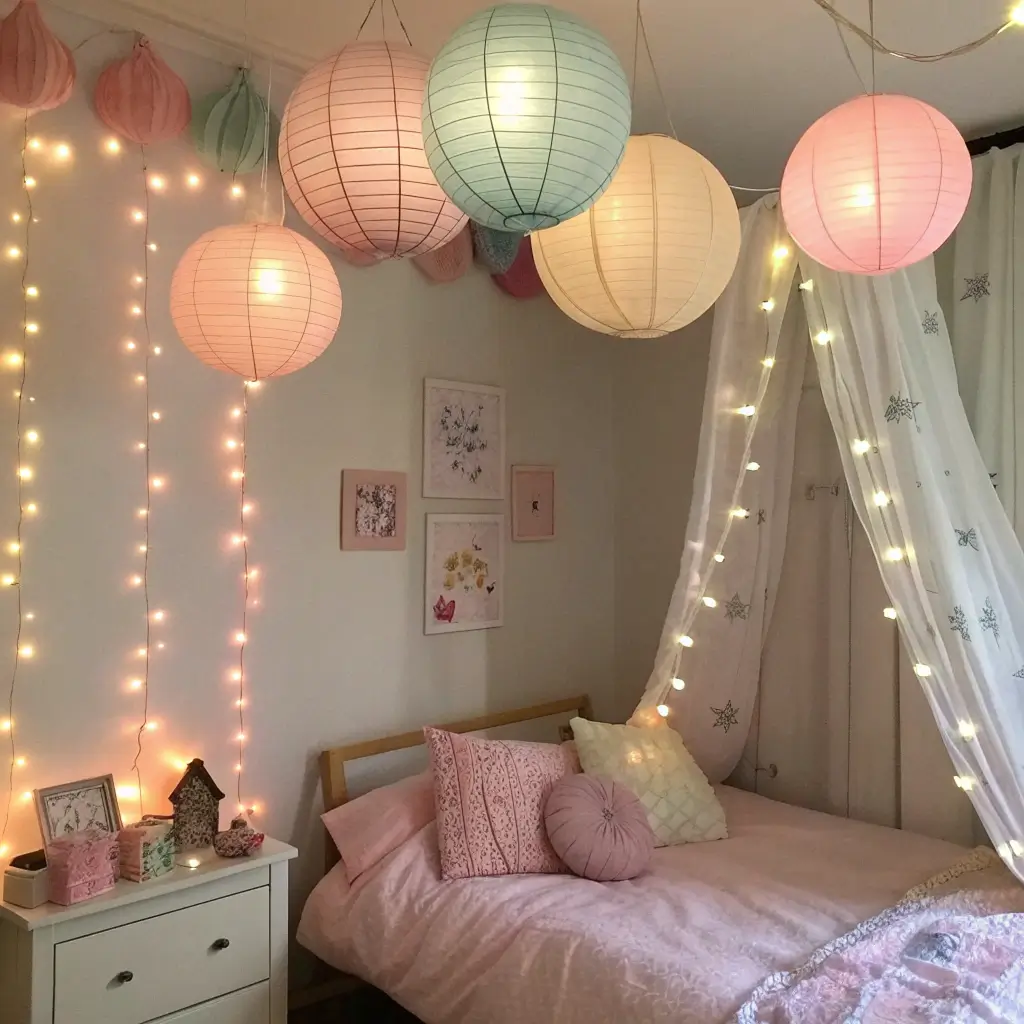
Paper lanterns bring soft, diffused lighting that overhead fixtures can’t match. Making your own means customizing colors and sizes to perfectly complement your space. Plus, they’re ridiculously affordable compared to store-bought versions.
Start with paper lantern frames (or make frames from wire) and tissue paper in your chosen colors. I created an ombré effect by overlapping different colored tissues. The trick is using spray adhesive for smooth application without wrinkles. Nobody wants lumpy lanterns.
Clustering for Impact
Hang lanterns at varying heights using fishing line for an invisible suspension effect. Group them in odd numbers over your main work area. I added battery-operated LED bulbs inside some for actual lighting, while others remain purely decorative. The mix keeps things interesting without overwhelming the space.
Jute Rope Wall Shelves
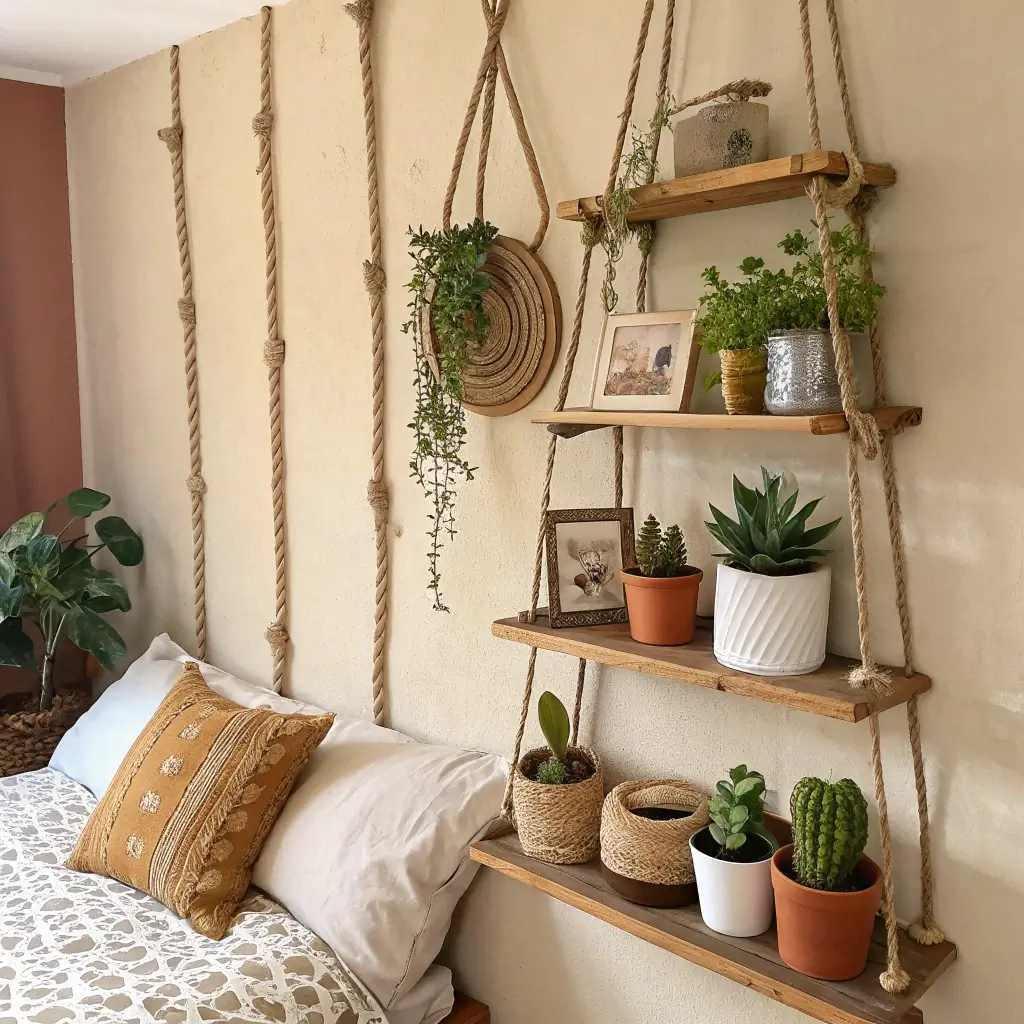
Floating shelves are great, but jute rope shelves add that rustic charm that makes a crafts room feel cozy rather than clinical. I built three of these for under $20 total, and they’re holding strong six months later.
Use reclaimed wood or buy basic boards from the hardware store. Sand smooth, stain or paint as desired. Drill holes in corners, thread thick jute rope through, and knot underneath. The key measurement is ensuring all four rope lengths match, or you’ll have wonky shelves (ask me how I know).
Styling Your Shelves
Keep styling simple to let the shelves themselves shine. I display small plants, vintage scissors in a jar, and rotating craft projects. The natural rope texture adds warmth that metal brackets could never achieve. These shelves practically beg for mason jars and succulent arrangements.
Scrap Fabric Pom-Pom Garland
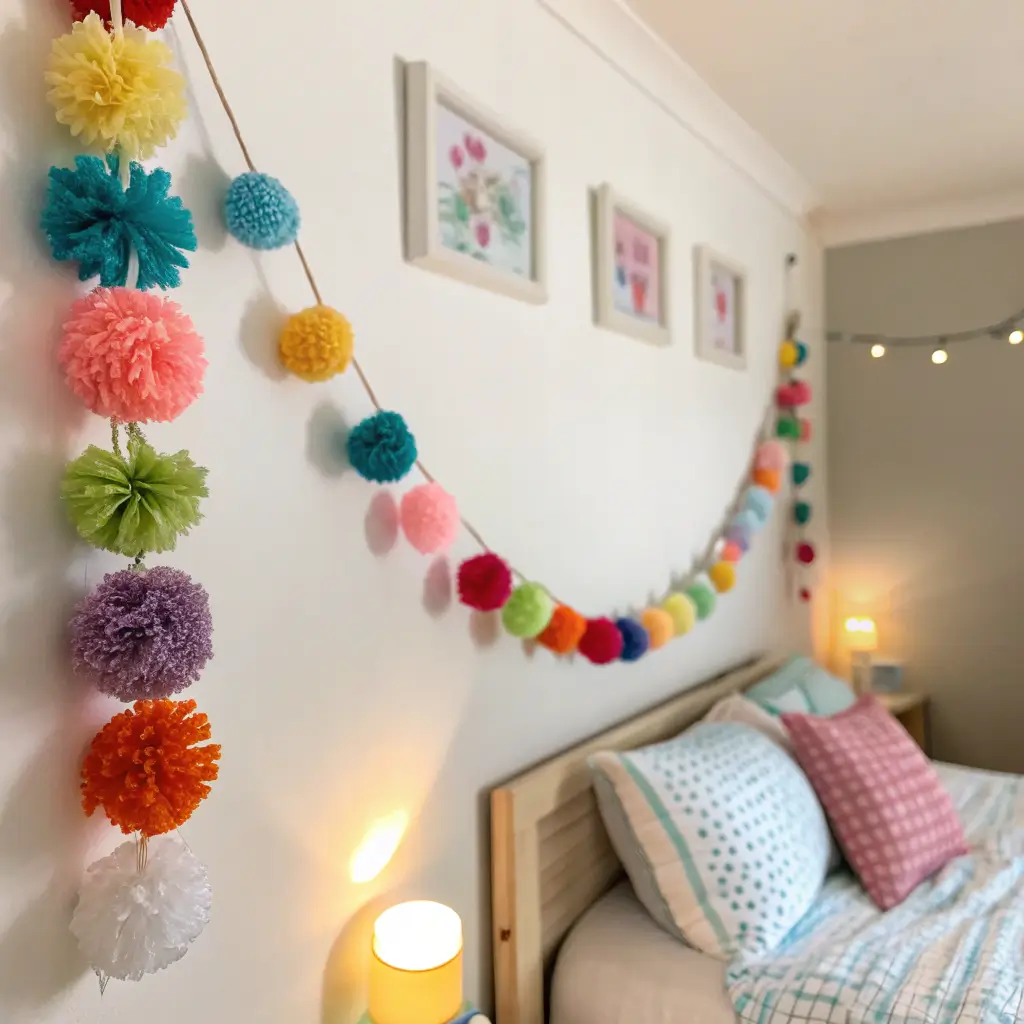
Last but definitely not least, fabric pom-pom garlands bring playful energy to any crafts room. They’re also the perfect project for using up those fabric scraps you’ve been hoarding. We all have that bag, don’t pretend you don’t.
Cut fabric strips about 1 inch wide and 6-8 inches long. Tie them onto a long piece of twine, alternating colors and patterns. Push tied pieces close together for full, fluffy poms. The messier, the better – this isn’t about perfection but texture and whimsy.
Strategic Placement
Drape garlands across windows, around doorways, or along shelving edges. I strung mine above my main workspace for a constant reminder that crafting should be fun. Make seasonal versions to swap out – pastels for spring, jewel tones for fall. The lightweight nature means you can hang them literally anywhere with just tape or tiny pins.
Wrapping Up Your Room Transformation
So there you have it – fifteen ways to transform your crafts room from “meh” to “magnificent” without selling a kidney. The best part about all these projects? You can start with one and gradually add more as inspiration strikes. My room evolved over several months, and honestly, the process was just as enjoyable as the result.
Remember, your crafts room should inspire you, not stress you out. Pick projects that speak to your style, modify them to fit your skill level, and don’t worry if things don’t turn out Pinterest-perfect. Some of my favorite pieces are the ones that went slightly sideways but ended up uniquely mine.
The real magic happens when you stop trying to recreate someone else’s space and start building one that reflects your creative spirit. These walls should tell your story, showcase your journey, and most importantly, make you excited to sit down and create. Whether you tackle all fifteen projects or cherry-pick your favorites, you’re already on your way to a space that feels genuinely, authentically yours.
Now grab those scissors, fire up that glue gun, and show those blank walls who’s boss. Your future creative self will thank you every time you walk into your newly transformed sanctuary. Happy crafting, friend – can’t wait to see what you create!


