10 Stylish DIY Garage Storage Ideas for an Organized Garage
Remember that time you spent 45 minutes looking for a Phillips head screwdriver in your garage, only to find it three weeks later under a pile of Christmas decorations? Yeah, me too. My garage used to look like a hardware store exploded inside a thrift shop during an earthquake.
Last summer, I finally snapped. After tripping over a rake for the hundredth time (and inventing some creative new curse words), I decided enough was enough. Three months and about $500 later, my garage went from disaster zone to organized paradise.
The best part? I built every single storage solution myself, and none of it required advanced carpentry skills or a second mortgage.
These 10 DIY storage ideas transformed my chaos cave into a space where I can actually find things AND park my car. Wild concept, right? Whether you’re drowning in tools, sporting equipment, or random stuff you swear you’ll use someday, these solutions will get your garage under control without breaking the bank.
Wall-Mounted Tool Organizer
Let’s start with the game-changer that freed up 90% of my floor space: wall-mounted tool storage. Your walls are just sitting there doing nothing while your tools pile up everywhere else. Time to put them to work.
The French Cleat System Magic
I discovered French cleats last year, and honestly, they’re like the Swiss Army knife of wall storage. Here’s why they’re absolutely brilliant:
- Infinitely adjustable – move tool holders anywhere on the wall
- Crazy strong – each cleat holds up to 75 pounds
- Dirt cheap – just need 45-degree cuts on 2x4s
- Customizable – make holders for any tool shape
Building my French cleat wall cost me $60 in lumber. I covered an 8-foot section, and now every tool has its perfect spot. My neighbor saw it and immediately copied the entire system. Imitation is the sincerest form of “damn, that’s smart.”
Building Custom Tool Holders
Creating specific holders for each tool sounds complicated, but it’s stupid simple:
- Trace your tool onto scrap wood
- Cut out the shape with a jigsaw
- Attach a cleat to the back
- Hang it anywhere on your wall system
I made custom holders for my circular saw, drill set, and even my weird specialty wrenches. Everything displays face-out, so I grab exactly what I need without digging through drawers.
Overhead Garage Storage Rack
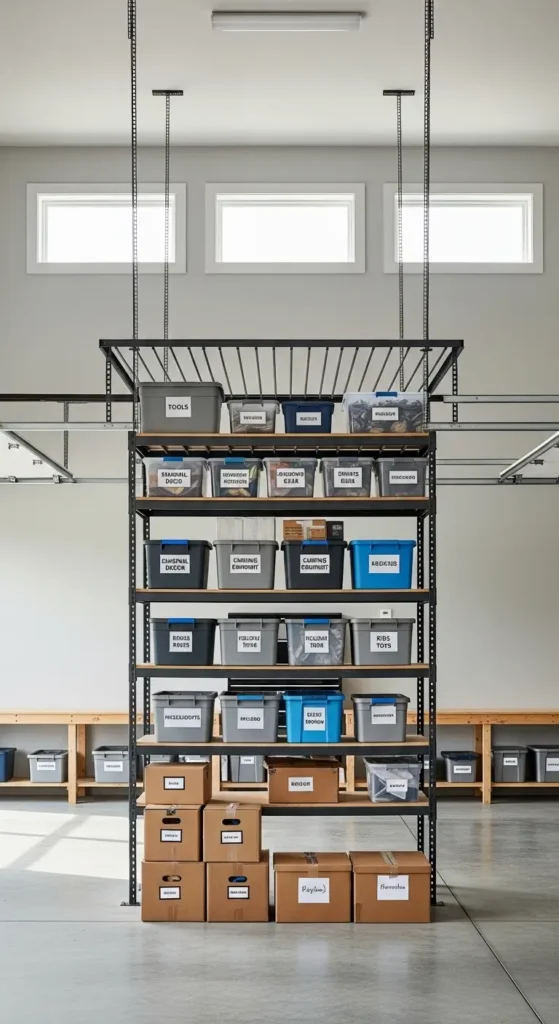
Look up. See all that wasted space between your car roof and ceiling? That’s where your seasonal decorations, camping gear, and “I might need this someday” boxes belong.
The Ceiling Storage Strategy
Installing overhead storage literally doubles your garage capacity. I built mine for $150 using:
- 2x4s for the frame (way cheaper than metal systems)
- 3/4-inch plywood for the platform
- Heavy-duty eye bolts and chain for support
- Lag screws into ceiling joists (find them or regret it)
My overhead rack holds 400 pounds of Christmas decorations, camping equipment, and boxes of who-knows-what. The key is mounting into actual joists – drywall anchors won’t cut it unless you enjoy watching your storage crash onto your car hood.
Safety First (Seriously)
Don’t be that person on the evening news. Follow these rules:
- Test weight gradually – start with light boxes
- Use safety cables as backup support
- Keep heavy items near the mounting points
- Label everything visible from below
I learned the labeling lesson after climbing up three times looking for Halloween decorations. Now everything has huge labels facing down. Work smarter, not harder.
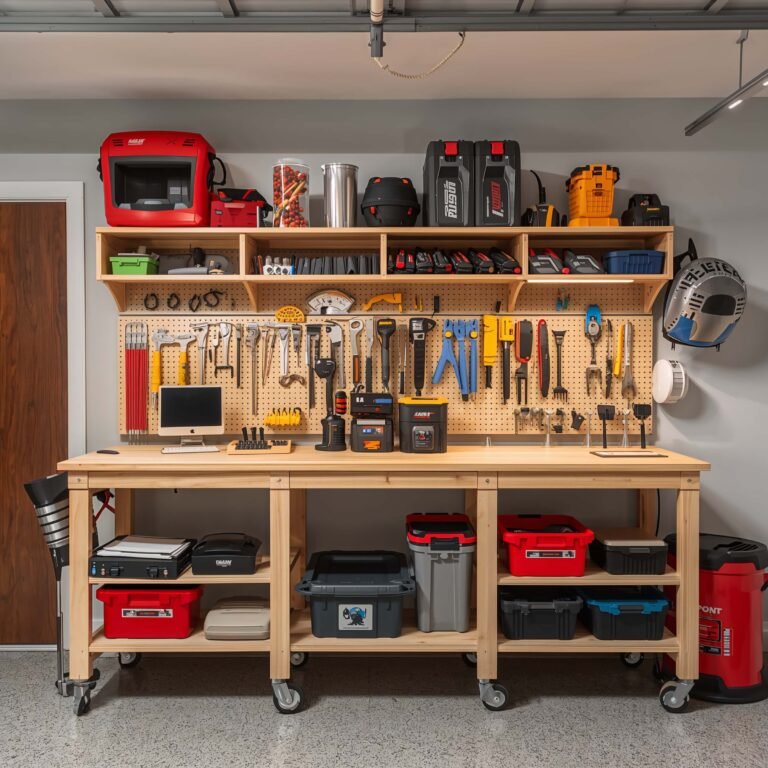
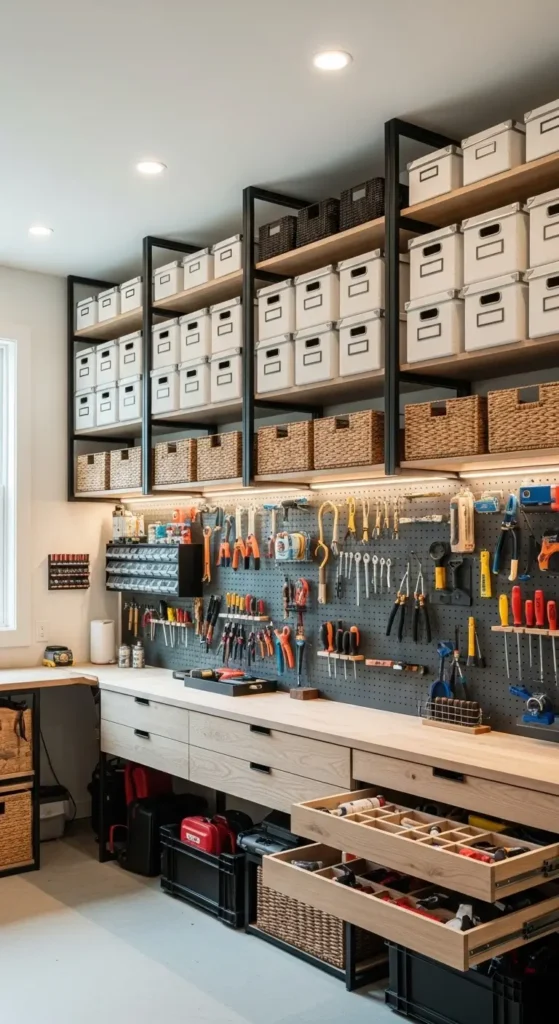
Pegboard Storage System

Pegboard might seem old-school, but modern pegboard systems are actually stylish AND functional. Gone are the days of sad, saggy pegboard that dumps your tools every time you sneeze nearby.
Choosing the Right Pegboard
Not all pegboard is created equal:
- Metal pegboard – strongest but priciest
- Wood pegboard – middle ground, paintable
- Plastic pegboard – lightweight, won’t rust
- Wall Control panels – the Cadillac of pegboard
I went with Wall Control metal panels in black. Cost more than traditional pegboard? Yes. Do I regret it? Not even slightly. These things hold my 20-pound sledgehammer without breaking a sweat.
The Organization System That Works
Here’s my pegboard philosophy that keeps things actually organized:
- Group by function – all electrical tools together, all measuring tools together
- Outline tools with marker for easy return
- Use varied hooks – bins for small parts, shelves for boxes
- Leave growth space – you’ll acquire more tools (trust me)
My pegboard spans 8 feet and holds 47 different tools. I can grab what I need in seconds and, more importantly, put it back in the right spot. My wife says it looks like a tool museum. I take that as a compliment.
Also Read: 10 Simple Garage Mudroom Ideas for Clean and Tidy Homes
DIY Bike Rack Solution
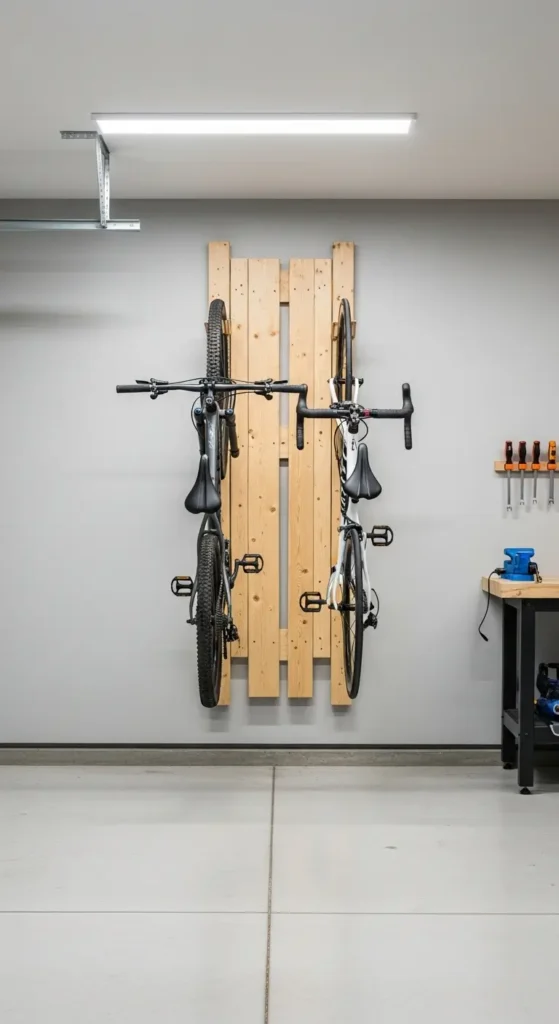
Bikes are garage organization nightmares. They’re huge, awkwardly shaped, and somehow always fall over at the worst possible moment. My DIY bike rack solved all of that for under $40.
The Vertical Bike Storage Hack
Storing bikes vertically saves massive floor space. I built a simple system using:
- 2×4 lumber frame attached to wall studs
- Rubber-coated hooks (protect your rims)
- Spacing of 24 inches between bikes
- Different heights for adult and kid bikes
My family’s five bikes now take up 4 feet of wall space instead of sprawling across the entire garage. The kids can even hang their own bikes – game changer for teaching responsibility.
Alternative Bike Storage Methods
Depending on your garage layout, consider these options:
- Ceiling pulley systems – great for seasonal storage
- Horizontal wall mounts – bikes become wall art
- Floor stands – portable but less space-efficient
- Behind-door racks – uses dead space brilliantly
I tried the pulley system first but kept forgetting bikes were above my head. Nearly got a concussion twice. Wall mounting wins for daily-use bikes, IMO.
Modular Storage Shelves
Modular shelving adapts as your storage needs change. Build it once, reconfigure it forever. Plus, it looks way more intentional than random shelves slapped on walls.
The Modular System Design
My modular system uses a simple track-and-bracket approach:
- Wall-mounted vertical tracks every 32 inches
- Adjustable brackets that lock into tracks
- Cut-to-fit shelves from plywood or melamine
- Mix of shelf depths for different items
The beauty is flexibility. Need more space for paint cans? Move a shelf. Got new power tools? Adjust the height. It’s like garage Tetris, but everything actually fits.
Cost-Effective Building Tips
Keep costs down without sacrificing quality:
- Buy tracks in bulk – cheaper per foot
- Use plywood instead of melamine – half the price
- Skip the fancy brackets – basic ones work fine
- Paint everything the same color for cohesion
My entire modular system (12 feet wide, 6 shelves) cost $180. The equivalent from a big box store? $500 minimum. Plus, mine is exactly the size I needed.
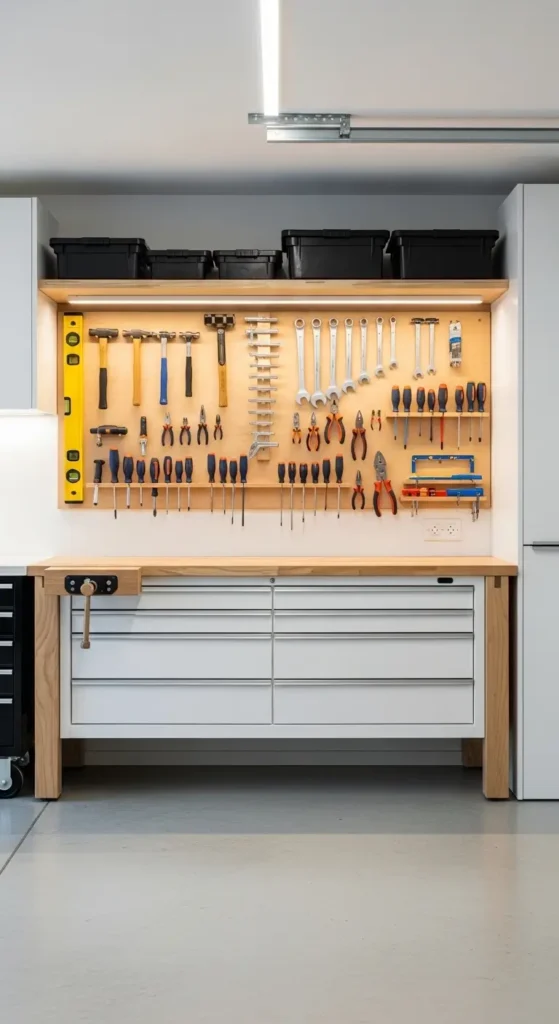
Sliding Storage Drawers
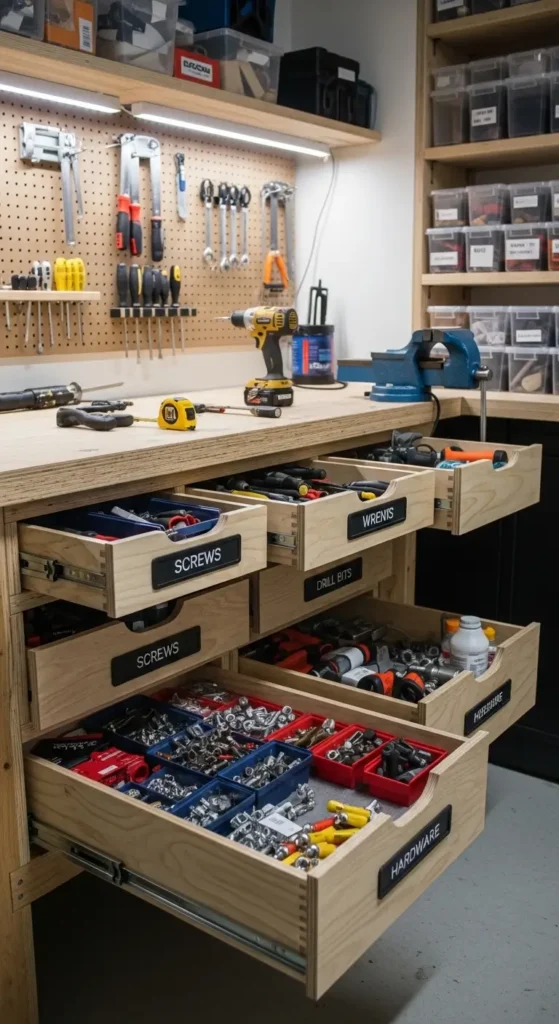
Under-workbench storage usually means crawling on your knees with a flashlight. Sliding drawers changed that completely. Now I access everything without the yoga positions.
Building Drawer Boxes
Don’t overthink drawer construction:
- 1/2-inch plywood for sides and bottom
- Wood glue and screws – no fancy joinery needed
- Full-extension slides – worth the extra cost
- Handles from cabinet hardware section
I built six drawers in an afternoon. Each one holds different categories: electrical supplies, plumbing parts, fasteners, etc. The full-extension slides let me see everything without emptying the entire drawer.
The Organization Inside
Maximize drawer efficiency:
- Dividers from cardboard or thin wood
- Small containers for tiny parts
- Labels on drawer fronts AND inside
- Foam liner to prevent sliding
My fastener drawer has 24 compartments made from cut-down Amazon boxes. Free organizers that work perfectly. Sometimes the simple solution is the best solution.
Also Read: 10 Practical Garage Loft Ideas for Easy Storage Upgrades
PVC Pipe Tool Holders
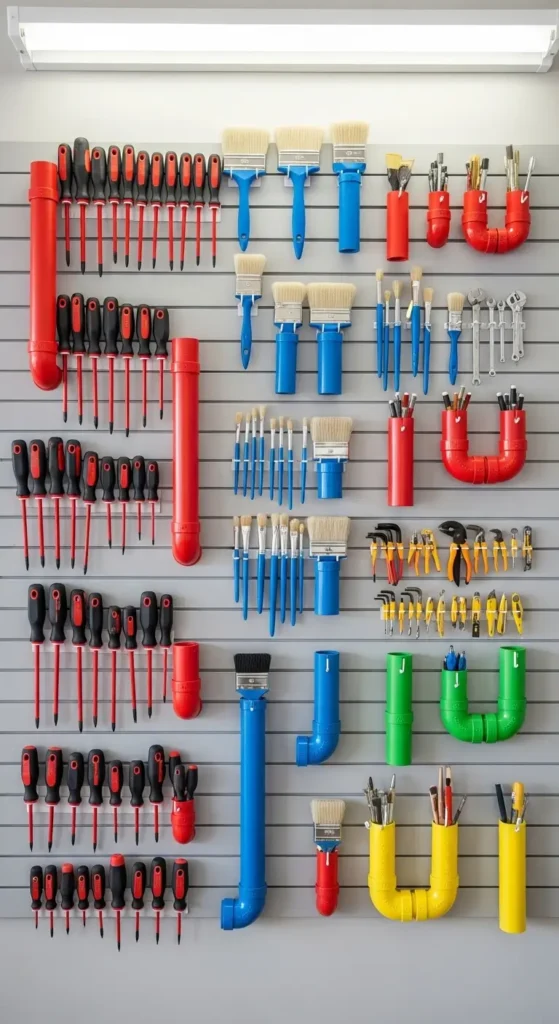
PVC pipe is the duct tape of garage organization – cheap, versatile, and surprisingly attractive when done right. I use it for everything from drill bit storage to garden tool organization.
The Drill Bit Organizer
This $10 project revolutionized my drill bit chaos:
- Cut 2-inch PVC into 4-inch lengths
- Angle cuts at 45 degrees for easy access
- Glue pipes together in ascending size order
- Mount to wall or inside cabinet door
Each pipe section holds different bit sizes. I can grab the right bit instantly instead of dumping out that jumbled drawer we all have. You know the one.
Creative PVC Solutions
PVC possibilities are endless:
- Vertical tubes for storing dowels and trim
- Horizontal racks for clamps and tools
- Curved sections for extension cords
- Large diameter for sports equipment
My favorite hack? Large PVC mounted horizontally with slots cut in the top. Perfect for storing levels, rulers, and anything long and skinny. Looks weirdly professional for something made from plumbing supplies.
Repurposed Cabinet Storage
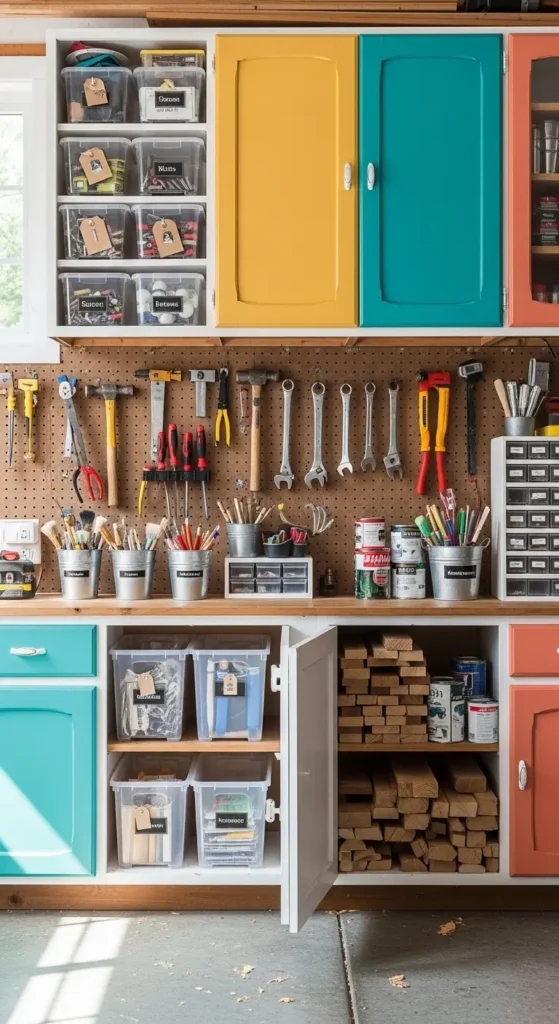
Before you drop hundreds on new garage cabinets, check Craigslist for old kitchen cabinets. People literally give them away during renovations.
The Kitchen Cabinet Transformation
I scored a complete set of oak cabinets for free (just had to haul them away). Here’s how I transformed them:
- Thorough cleaning with degreaser
- Fresh paint in garage-appropriate gray
- New hardware from the bargain bin
- Added locks on chemical storage cabinets
These cabinets now hold all my automotive supplies, paint, and dangerous stuff I keep away from kids. They look intentionally industrial, not like kitchen cast-offs.
Maximizing Cabinet Storage
Make old cabinets work harder:
- Add pull-out drawers to deep cabinets
- Install door organizers for small items
- Remove some doors for open shelving
- Stack cabinets for floor-to-ceiling storage
My repurposed cabinet wall cost me $75 total (paint, hardware, and gas to pick them up). New garage cabinets of the same size? Try $800. That math makes me happy every time I open them 🙂
Hanging Garden Tool Organizer
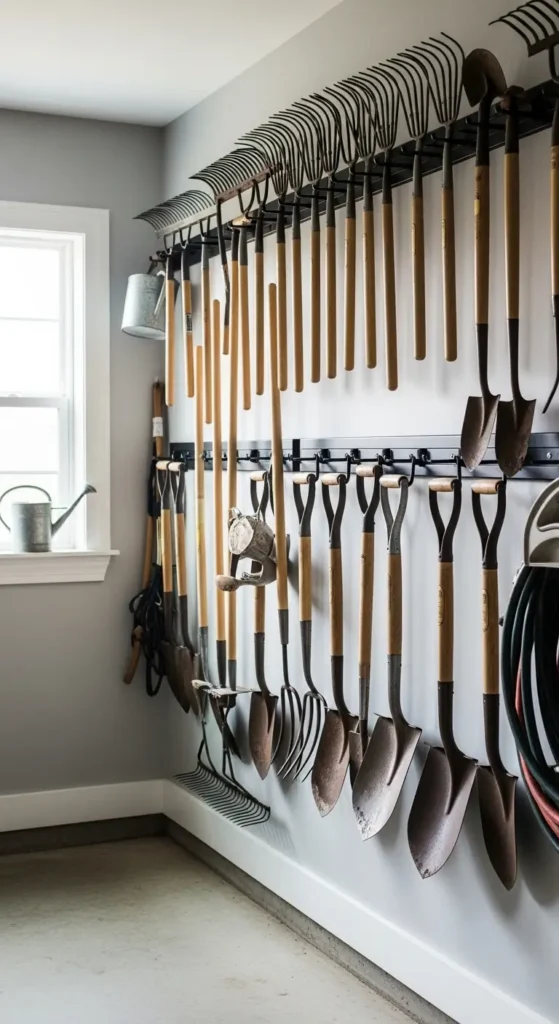
Garden tools are weird shapes that never lean properly against walls. They’re constantly falling, creating domino effects of destruction. A hanging organizer stops the madness.
The Simple Rail System
My hanging system couldn’t be simpler:
- 2×4 rail mounted horizontally at shoulder height
- Heavy-duty hooks every 6 inches
- Spring clips for smaller tools
- Bungee cords for awkward items
Twenty tools now hang in a 6-foot section. Each tool has its designated hook, and I can see everything at once. No more shovel avalanches when I grab the rake.
Advanced Hanging Solutions
Level up your tool hanging game:
- Double rails for long and short tools
- Magnetic strips for metal hand tools
- Rotating hooks for seasonal swapping
- Labels under each hook for family compliance
The labeling seems excessive until someone hangs the hedge trimmer where the leaf blower goes. Then chaos ensues. Labels prevent the chaos. Learn from my mistakes.
Also Read: 10 Inspiring Garage Floor Ideas and Modern Transformations
Corner Shelving Units
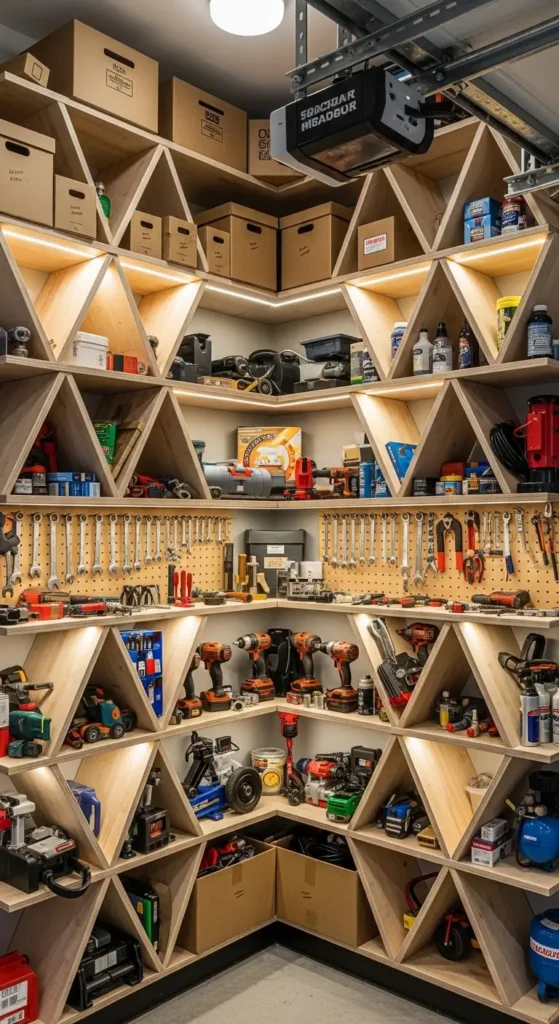
Corners are dead space in most garages. Corner shelving brings them back to life and adds surprising amounts of storage.
Building Corner Shelves
Corner shelves require different thinking:
- 45-degree supports maximize corner space
- Triangular shelves fit perfectly
- Multiple tiers use vertical space
- Open design prevents dark corners
I built a 5-tier corner unit from scrap plywood and 2x2s. Total cost: $30. It holds paint cans, spray lubricants, and all those random bottles that used to clutter my workbench.
The Corner Storage Strategy
Use corners strategically:
- Frequently used items at eye level
- Heavy stuff on lower shelves
- Seasonal items up high
- Similar items grouped together
My corner shelves follow a simple rule: if I haven’t used it in six months, it moves up a shelf. If it reaches the top shelf and sits for a year, it’s gone. This system naturally filters out the junk.
Making It All Come Together
After implementing all these storage solutions, my garage went from embarrassing disaster to neighborhood showpiece. People actually ask for tours. That’s not normal, but I’ll take it.
The biggest lesson I learned? Start with one project and build momentum. I began with the French cleat wall, and seeing those organized tools motivated me to tackle the overhead storage. Then the pegboard. Then everything else.
Here’s the thing about DIY garage storage – it’s addictive. You organize one area, and suddenly, every cluttered corner bothers you. But that’s good! Channel that energy into building solutions that work for YOUR stuff, YOUR space, and YOUR budget.
Don’t feel like you need to copy these ideas exactly. Mix and match, adapt to your needs, steal the parts that work. My garage storage is constantly evolving because my needs change. That’s the beauty of DIY – you built it, so you can modify it.
The total investment for all my storage solutions? About $800 spread over three months. The satisfaction of walking into an organized garage every morning? Worth way more than that. Plus, I can actually park both cars inside now. In my neighborhood, that’s basically winning at life.
So grab some tools (which you’ll soon be able to find easily), pick a project, and start building. Your future organized self will thank you every single time you walk into that garage. And hey, if you need that Phillips head screwdriver, you’ll know exactly where to find it.