15 Genius Galley Kitchen Remodel Ideas for a Stylish, Space-Saving Upgrade
Alright, let’s have a real talk about galley kitchens. That long, narrow corridor you call a cooking space.
he one where you can practically high-five someone across the aisle if you both stretch. I get it.
Sometimes it feels less like a kitchen and more like a glorified hallway where you just happen to keep the good knives.
But here’s the secret I’ve learned from remodeling my own “culinary alleyway”: Galley kitchens are absolute genius.
No, really! They’re the workhorses of the kitchen world. Super efficient, everything is within reach, and with a few clever tweaks, they can transform from a cramped afterthought into the stylish, hyper-functional heart of your home.
I’ve been there, staring at those two parallel lines of cabinets, wondering how to make it feel bigger, brighter, and just… better.
After a deep dive into design blogs, many conversations with contractors, and a fair share of my own trial and error, I’ve gathered the absolute best ideas to make it happen.
So, grab a coffee (you’ll probably have to make it in that very kitchen we’re about to upgrade), and let’s dive into these 15 genius galley kitchen remodel ideas.
15 Genius Galley Kitchen Remodel Ideas
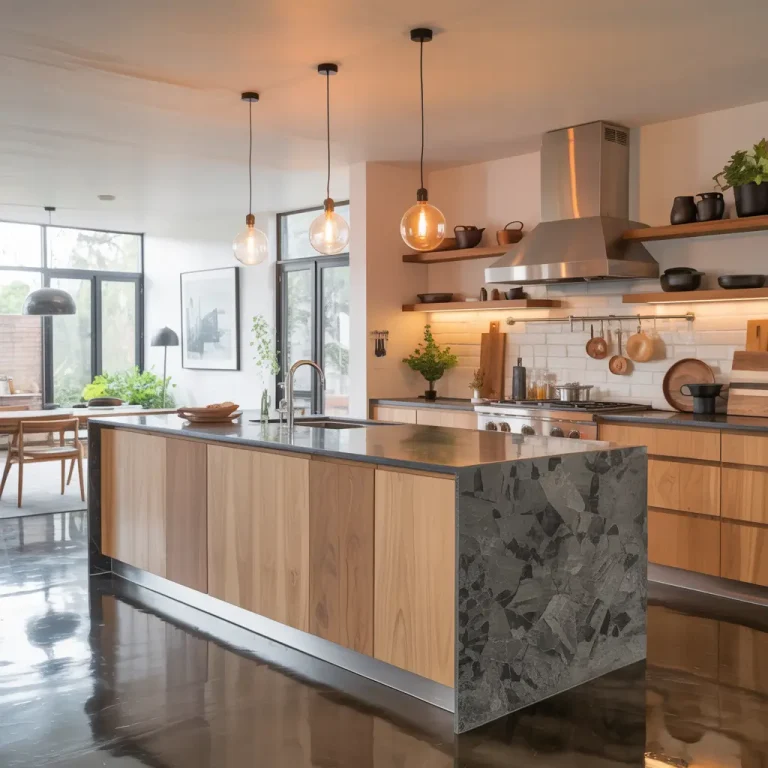
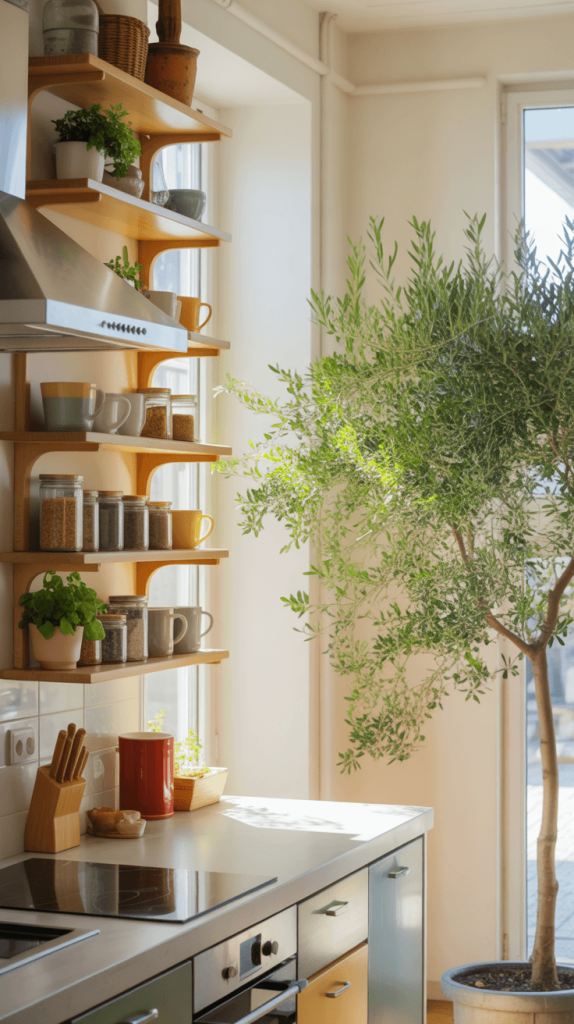
1. Open Shelving for a More Airy Feel
Let’s start with one of the easiest ways to visually punch a hole through the walls: ditching some upper cabinets for open shelving.
Why it works: Solid cabinet doors, especially dark ones, can feel heavy and imposing. They visually block the wall, making the space feel closed in. Replacing a section of them with open, floating shelves creates a sense of openness and airiness. It literally opens up the sightlines, making your kitchen feel instantly larger.
How to Nail It:
- Don’t go overboard. You still need closed storage for the mismatched mugs and the giant pasta pot you use twice a year. I’d suggest replacing the upper cabinets on just one side of the galley.
- Style, but don’t clutter. This is your chance to show off your beautiful dishware, a few cookbooks, or a nice plant. Keep it curated. A cluttered shelf defeats the purpose.
- Choose your materials wisely. Thin, metal-framed shelves feel light and modern. A chunky wood slab can add warmth and a rustic touch. Match the shelf hardware to your faucet and cabinet pulls for a cohesive look.
Ever wondered if you’re neat enough to pull this off? I thought the same thing. But it actually forces you to keep your prettiest items organized and accessible. It’s a feature that keeps you honest!
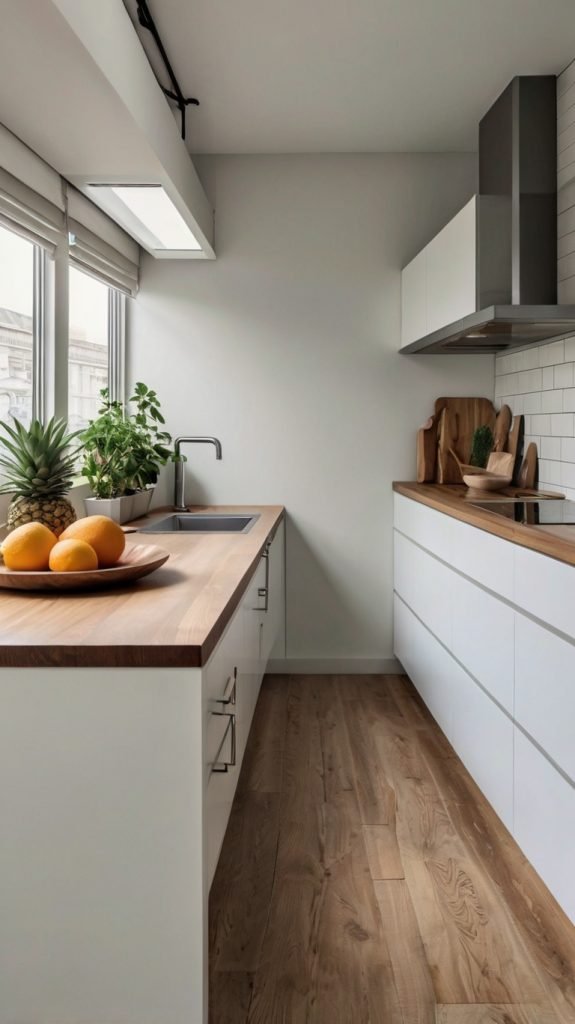
2. Use Lighter Colors for Cabinets and Walls
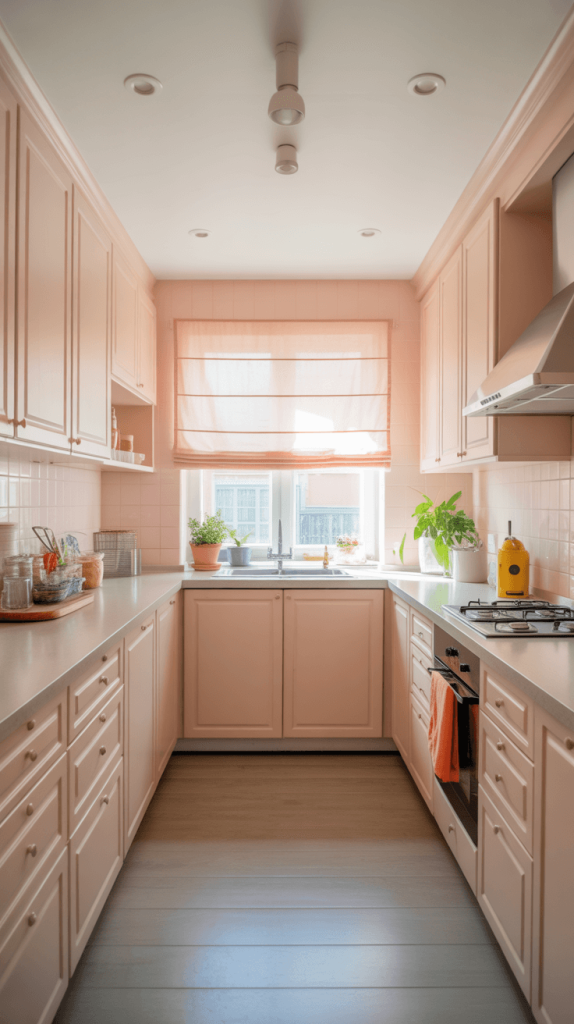
This is Interior Design 101, but it’s absolutely critical in a galley kitchen. Dark colors absorb light and make walls feel like they’re closing in on you. Light colors do the opposite.
Why it works: Lighter shades reflect natural and artificial light around the room, creating a brighter, more open atmosphere. It’s the simplest optical illusion in the book, and it works every single time.
Your Game Plan:
- All-White Everything: A classic for a reason. White cabinets, white walls, and a white ceiling will maximize light reflection like nothing else. Add texture with a marble-look quartz countertop or a light wood floor to keep it from feeling sterile.
- Soft Pastels and Warm Neutrals: Not a fan of stark white? Try soft sage green, pale sky blue, or warm greige (gray+beige). These colors still feel light and airy but add a touch of personality.
- Two-Tone Cabinets: This is a fantastic trick. Use a lighter color on your upper cabinets (to keep the sightline up top feeling open) and a slightly darker, but still mid-tone, color on the bottom. This grounds the space without overwhelming it.
3. Maximize Vertical Storage with Tall Cabinets
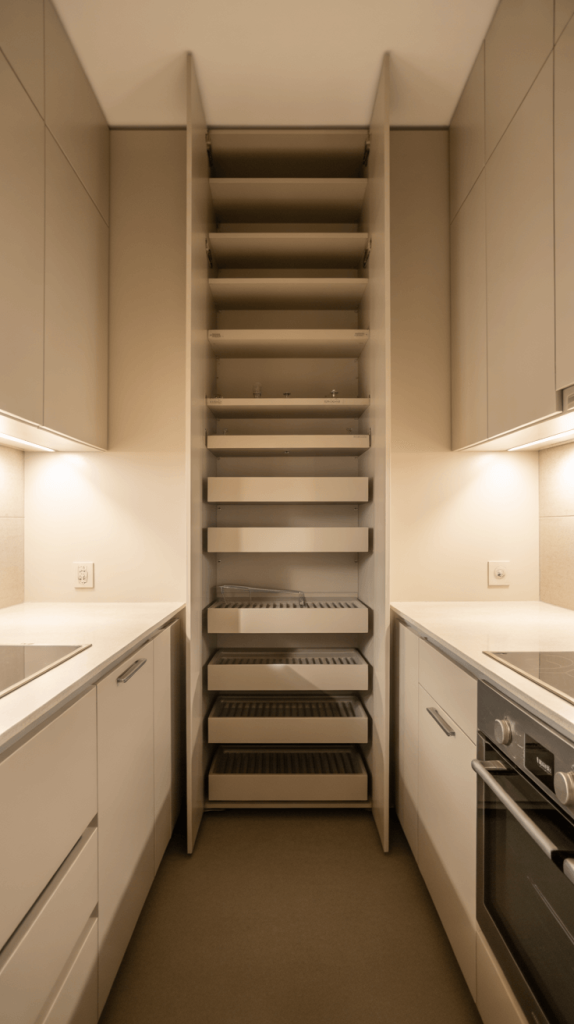
When you can’t build out, you build up. Floor space is your most precious commodity in a galley, so you have to exploit every single inch of vertical real estate.
Why it works: Tall cabinets, especially ones that go all the way to the ceiling, provide a massive amount of storage without eating into your narrow floor plan. They also draw the eye upward, emphasizing the height of the room and making it feel grander.
Pro Tips:
- Eschew the Dusty Top: Seriously, get cabinets that go to the ceiling. That gap between the top of your cabinets and the ceiling is just a dusty no-man’s-land that makes the room feel shorter.
- Use the Top Shelves Smartly: Okay, so you can’t reach the top shelf. Who can? That’s prime real estate for items you only need once in a blue moon—the Thanksgiving platter, the punch bowl, the canning supplies. Keep a stylish step stool tucked away nearby.
- Integrate Appliances: A tall cabinet is the perfect spot for a built-in oven or a sleek refrigerator paneled to match your cabinetry. Streamlining the look reduces visual chaos.
Also Read: 15 Budget-Friendly Kitchen Remodel Ideas
4. Install a Sliding Door to Open Up Space
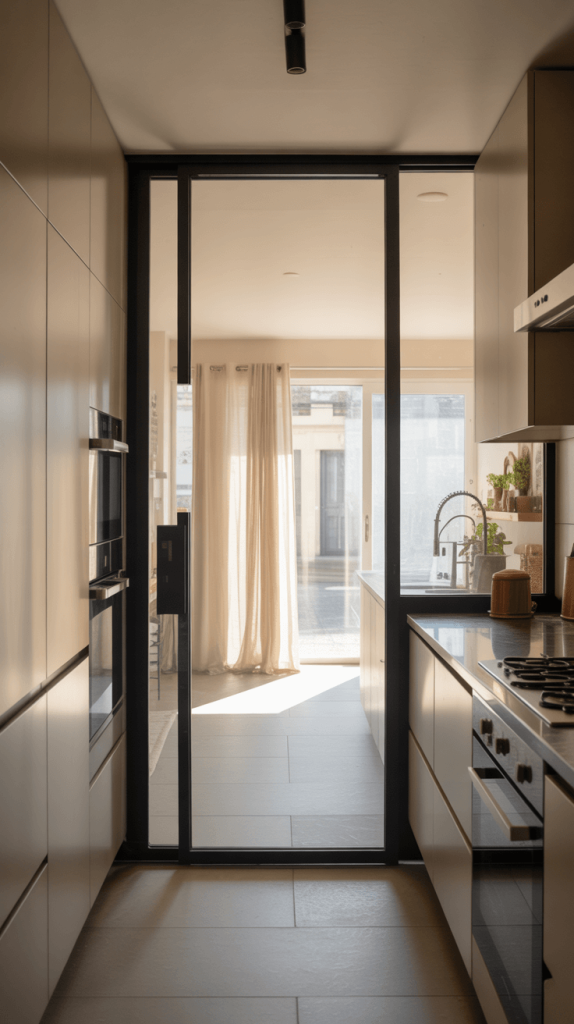
How do you enter your kitchen? If it’s through a standard door that swings inward, you’re losing a huge amount of functional space to its arc. It’s a kitchen pet peeve of mine.
Why it works: A sliding door, like a pocket door that disappears into the wall or a barn door that slides along it, completely eliminates the issue of door swing. This frees up the entire floor plan and creates a much more flexible entryway.
Things to Consider:
- Pocket Doors: These are the ultimate space-savers because they vanish into the wall cavity. They require some structural work to install but are 100% worth it for a clean, uninterrupted look.
- Barn Doors: These are a more cosmetic fix and can add a huge dose of style. Just ensure the wall you’re mounting it on has enough clear space for the door to slide open fully.
5. Incorporate Reflective Materials to Add Light
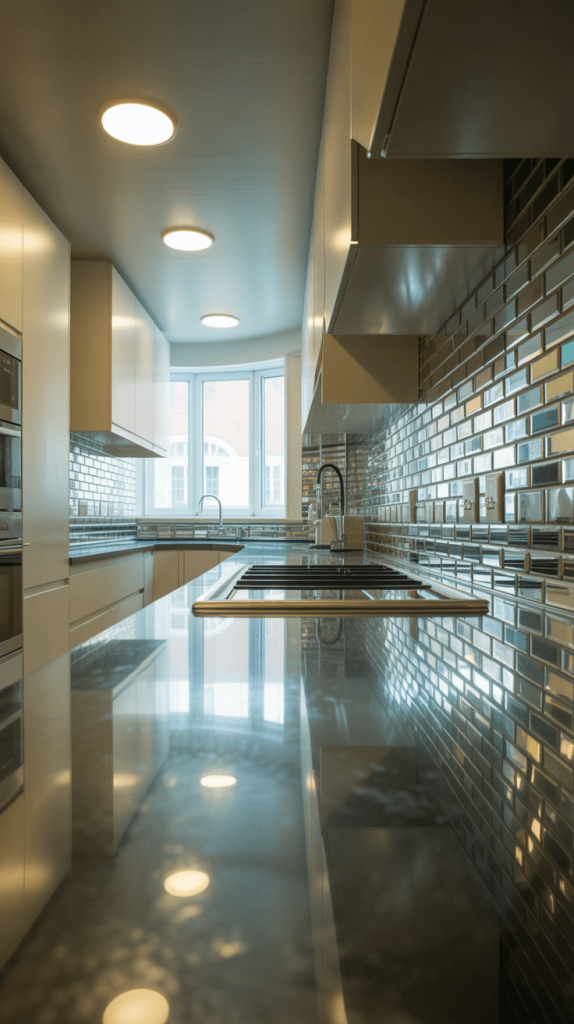
You want to bounce light around like a pinball machine. The more reflections, the brighter and more spacious your kitchen will feel.
Why it works: Reflective surfaces take whatever light source you have—whether it’s a window or your under-cabinet lighting—and multiply its effect.
Shiny Ideas to Steal:
- A Glossy Backsplash: A high-gloss subway tile or a sleek sheet of glass or stainless steel will work wonders.
- Mirrors: I know, a mirror in the kitchen? But hear me out. A strategically placed mirror, perhaps as a section of your backsplash or on the end of a cabinet run, can double the visual space in an instant. It’s a powerful trick.
- Metallic Finishes: Choose glossy or polished finishes for your faucet, cabinet hardware, and light fixtures. A chrome or polished nickel tap will catch and throw more light than a matte black one.
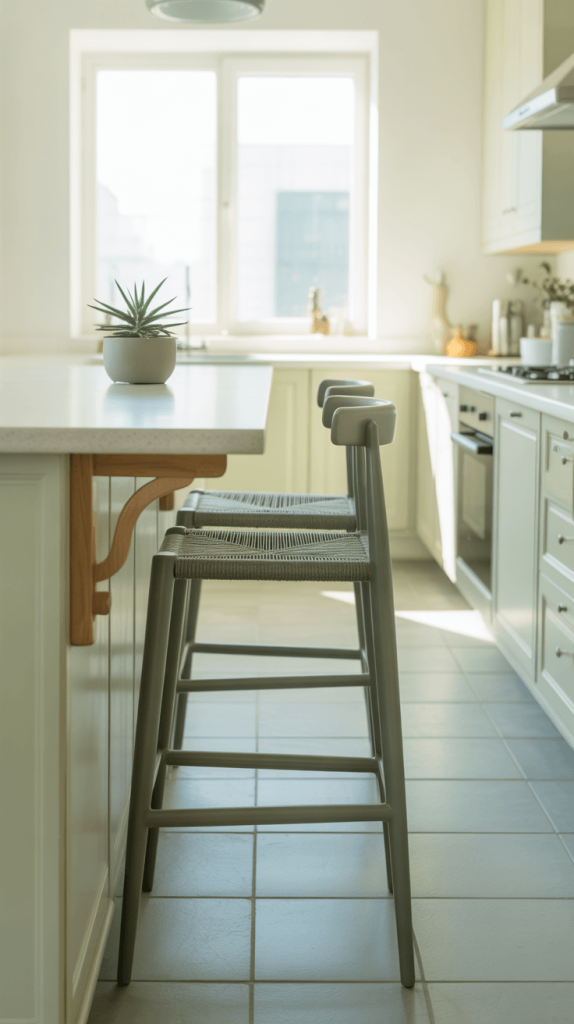
6. Add a Kitchen Island with Wheels

“An island? In a galley kitchen?” Yes, but with a caveat: it needs to be on wheels.
A stationary island can turn your efficient galley into an impassable obstacle course.
Why it works: A mobile island, or a kitchen cart, provides all the benefits of an island—extra prep space, additional storage, a potential eating spot—without the permanent commitment. When you need it, you roll it into the center. When you’re having people over and need the floor space, you tuck it against a wall or into a corner.
What to Look For:
- Sturdy Wheels with Locks: This is non-negotiable. You don’t want your island doing a slow drift across the floor while you’re trying to chop an onion.
- Added Features: Look for one with a butcher block top, a lower shelf for baskets, or even a towel bar on the side. I found one with a wine rack, and it was a game-changer for my entertaining setup.
Also Read: 15 Creative Small Kitchen Remodel Ideas to Maximize Space & Style
7. Install Pull-Out Countertop Extensions
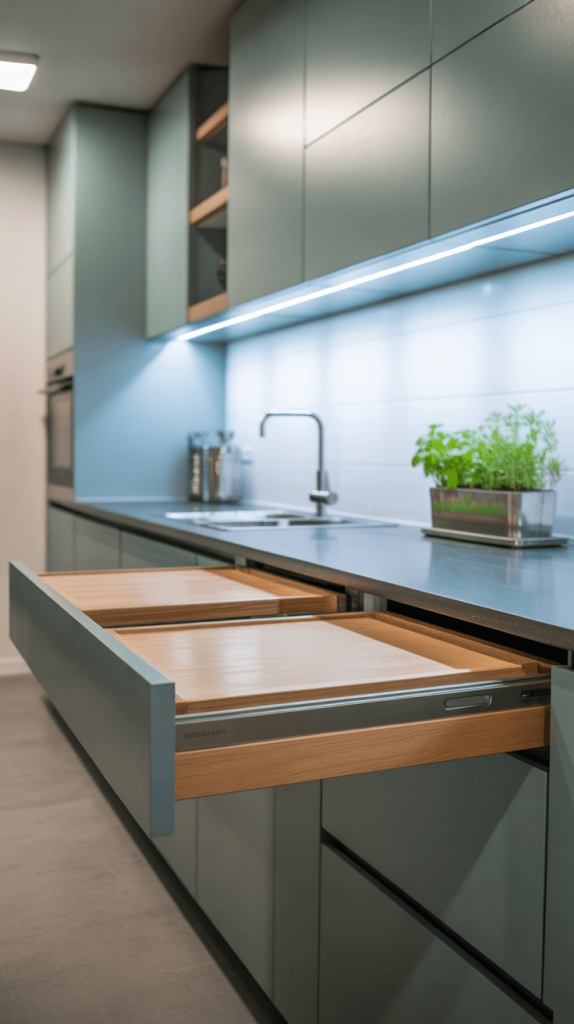
This idea is pure magic for small kitchens. You know how sometimes you just need six more inches of counter space to lay out a cooling rack or set down grocery bags?
Why it works: These clever mechanisms are hidden within your existing cabinet footprint. With a simple pull, a section of your countertop slides out, extending your workspace exactly when you need it. When you’re done, it slides right back in, disappearing seamlessly.
The Best Uses:
- Next to the Sink or Stove: The perfect spot for a landing zone for hot pans or draining dishes.
- As a Mini Breakfast Bar: If it’s sturdy enough, you can pull it out and slide a barstool underneath for a quick coffee spot. Just make sure there’s enough room to walk past when it’s extended!
8. Add Under-Cabinet Lighting for Extra Illumination
Overhead lighting alone casts shadows right where you need light the most: on your counters. Under-cabinet lighting is not just a luxury; in a galley kitchen, it’s a necessity.
Why it works: It directly illuminates your primary work surfaces, making food prep safer and easier. It also adds a beautiful, ambient glow that makes the whole kitchen feel warmer and more inviting, effectively pushing the walls back visually.
Your Lighting Options:
- LED Strip Lights: The modern go-to. They provide even, continuous light, are energy-efficient, and can often be hardwired for a super clean look.
- Puck Lights: Small, circular lights that you can space out under your cabinets. They create more of a spotlight effect, which is great for highlighting specific areas.
- Battery-Powered Stick-On Lights: A fantastic and affordable DIY solution if you’re not ready to wire anything. The technology has gotten really good!
9. Create a Multi-Purpose Breakfast Bar
If your galley kitchen has a dead end (and not a doorway), you have a golden opportunity. Instead of a blank wall, why not create a casual dining spot?
Why it works: It utilizes what would otherwise be wasted space, adding crucial seating without blocking the main thoroughfare. It’s perfect for quick meals, homework, or keeping the cook company.
How to Build It:
- A Countertop Overhang: If you have base cabinets at the end of the run, simply extend the countertop out by 12-15 inches to create a cantilevered bar. Just make sure it’s properly supported!
- A Freestanding Table: A small, narrow table pushed against the end wall can serve the same purpose with less construction.
- A Fold-Down Table: For the ultimate space-saver, install a wall-mounted table that folds flat against the wall when not in use.
Also Read: 15 Kitchen Remodel On A Budget Ideas for a Stunning Transformation
10. Opt for Custom Cabinets with Built-In Features
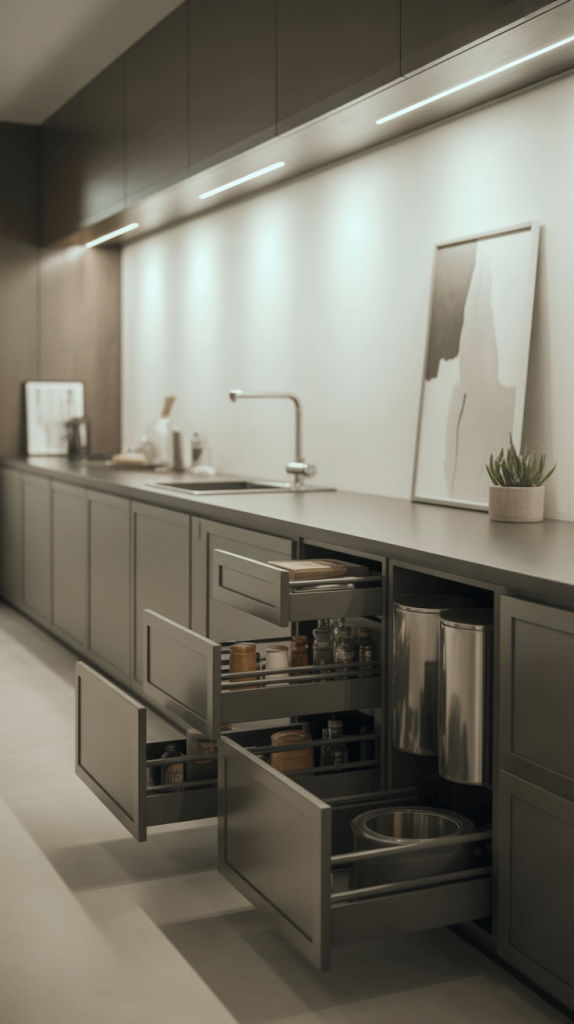
While stock cabinets are cheaper, custom or semi-custom cabinetry allows you to build hyper-efficient storage solutions that fit your exact space and needs.
IMO, this is where the real magic happens in a galley kitchen remodel.
Why it works: Custom cabinets mean zero wasted space. You can design them to accommodate every pot, pan, and appliance perfectly, getting rid of clutter and making your kitchen infinitely more functional.
Genius Built-Ins to Consider:
- Pull-Out Pantry Shelves: These narrow units can slide into a space as small as 12 inches wide but hold a staggering amount of canned goods and dry goods.
- Tray and Lid Dividers: Finally, a organized home for those annoying baking sheets and pot lids.
- Appliance Garages: A small cabinet with a roll-up or flip-up door that hides your toaster and blender, keeping your countertops clear.
- Cutlery and Utensil Organizers: Deep drawers with custom dividers make finding everything a breeze.
11. Use a Bold Accent Wall to Add Personality
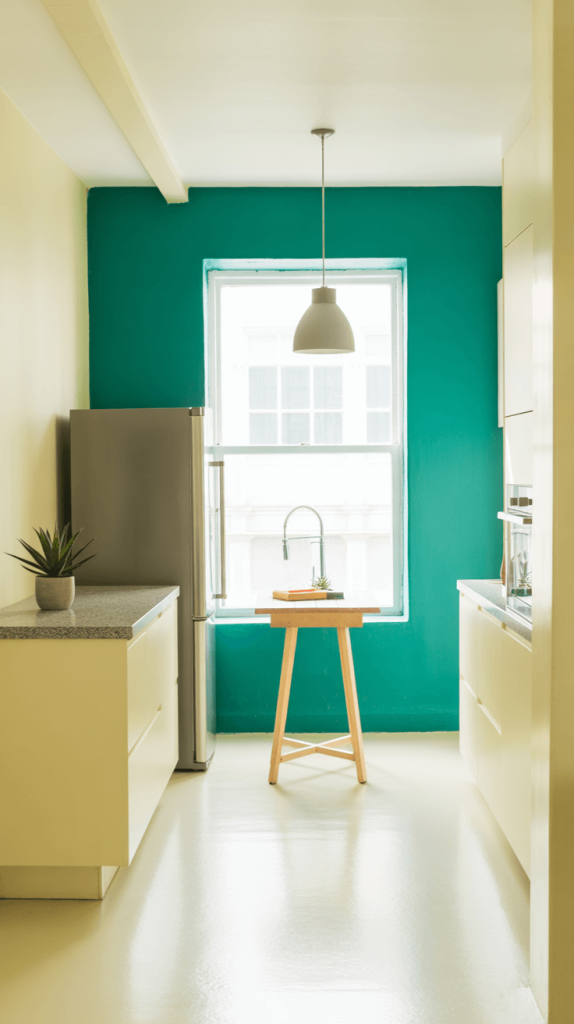
Wait, didn’t we just say to use light colors? Yes, but rules are made to be broken strategically.
A single, bold accent wall can add a massive dose of personality without making the room feel smaller.
Why it works: It creates a focal point that draws the eye down the length of the kitchen, emphasizing its linear nature in a stylish way. It’s a controlled burst of drama.
How to Do It Without Overwhelming the Space:
- Pick the Right Wall: The wall at the far end of the galley is the perfect candidate. It’s like a finishing point for the eye.
- Choose a Saturated Color: Go for a deep emerald green, a navy blue, or a moody charcoal. These colors actually have a receding effect, making that far wall feel like it’s stepping back.
- Use Patterned Tile: A bold, patterned tile on the backsplash of just one side can serve as your accent, creating a stunning visual without painting at all.
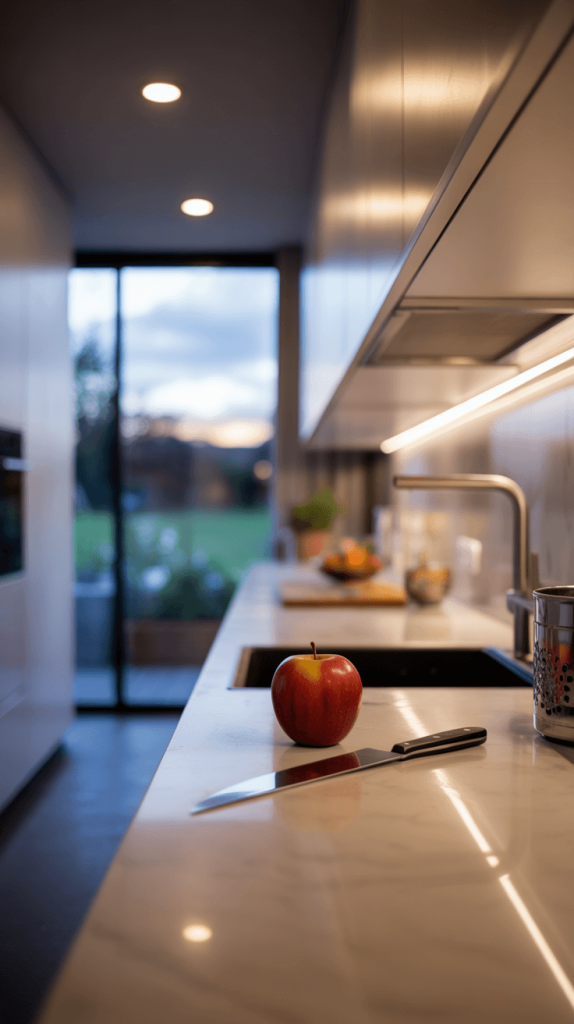
12. Go Minimal with Your Decor
A galley kitchen is not the place for your extensive collection of rustic chicken figurines. Clutter is the enemy of a small space.
Why it works: A clean, minimalistic approach reduces visual noise. With fewer items on display, the architecture, colors, and materials you’ve chosen can shine, making the space feel calm, organized, and much larger.
The Minimalist Mindset:
- Clear Countertops: Keep out only your most beautiful and most-used items. That might be a ceramic knife block, a beautiful stand mixer, and a wooden bowl for fruit. Everything else goes in a cabinet.
- Streamlined Hardware: Choose simple, clean-lined cabinet pulls and knobs.
- Cohesive Color Palette: Stick to two or three main colors throughout to create a harmonious, uninterrupted flow.
13. Install a Built-In Desk or Work Nook
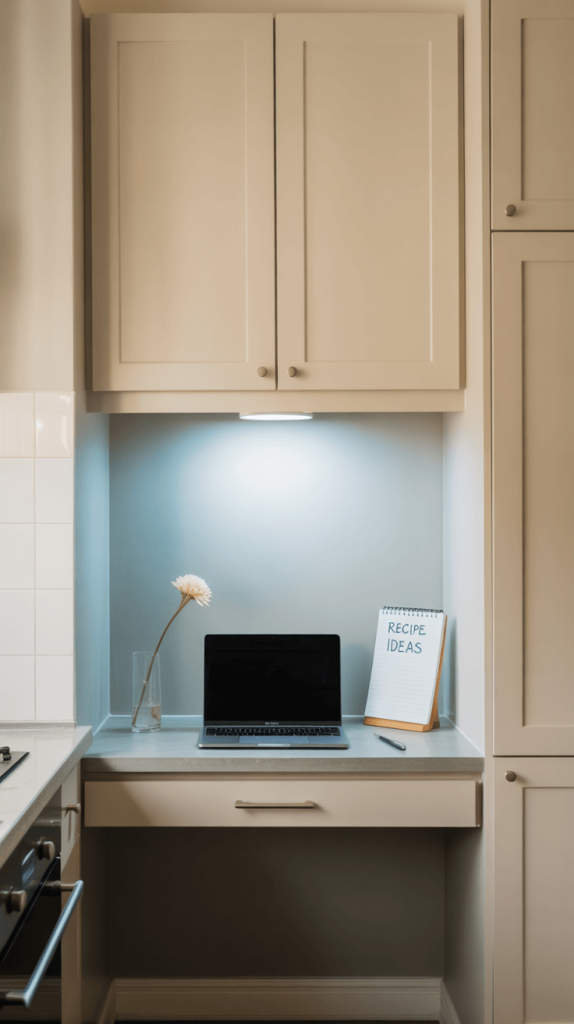
Remember that dead-end wall we talked about for the breakfast bar? If you work from home, you could use that space for something even more valuable: a tiny home office.
Why it works: It’s all about multi-functional spaces. This utilizes negative space for a purpose that’s increasingly important, giving you a dedicated spot to pay bills or take a video call without taking over another room in the house.
Making it Work:
- A shallow floating shelf can serve as a desk.
- A small piece of countertop can be notched between two cabinets.
- Just ensure you have an outlet nearby for charging laptops and phones!
14. Consider Open Concept for a Bigger Feel
This is the big guns. If you’re doing a full-scale renovation and your layout allows it, removing a wall to open your galley kitchen to an adjacent living or dining room can be transformative.
Why it works: It completely obliterates the closed-in feeling of a galley. By borrowing visual space from the next room, your kitchen will instantly feel twice its actual size. The social benefits are huge, too—you’re no longer cut off from your guests while you cook.
A Major Caveat:
This is not a DIY project. You must consult a structural engineer or a qualified contractor to determine if the wall is load-bearing. Removing a load-bearing wall requires installing a support beam, which is complex and expensive. But if you can do it? Wow, does it ever work.
15. Invest in Smart Appliances for Efficiency

Finally, let’s talk tech. In a small kitchen, every appliance needs to pull its weight. Smart appliances aren’t just about being cool; they’re about maximizing efficiency.
Why it works: They help you manage your space and your time better. A smart oven can preheat on your commute home. A smart fridge can help you keep inventory of what’s inside, preventing overbuying and wasted food (and wasted space!).
Space-Saving Smart Ideas:
- Slender Appliances: Many brands now make dishwashers and refrigerators that are narrower than standard, giving you back precious inches.
- Combo Units: Look into appliances like oven ranges with built-in air fryers or microwaves that also function as convection ovens. One appliance, multiple functions. It’s the ultimate space saver.
Conclusion
Whew! That was a lot, but honestly, we’ve only just scratched the surface. The most important takeaway? Your galley kitchen isn’t a limitation; it’s a blank canvas for some seriously clever design.
You don’t have to implement all 15 of these ideas. Maybe just start with one or two that really spoke to you.
Paint those cabinets a bright white. Install some under-cabinet lighting. Maybe just declutter your counters. Small changes can have a massive impact.
The goal is to create a space that works for you. A place that feels open, bright, and a joy to cook in.
So, what are you waiting for? That dream kitchen isn’t going to design itself. Get out there and start creating the stylish, space-saving galley of your dreams. You’ve totally got this