How to Paint a Ceiling Smoothly and Quickly
Look, I get it. You’re staring up at that dingy ceiling thinking, “How hard could this possibly be?” Well, friend, let me stop you right there. Painting a ceiling ranks somewhere between assembling IKEA furniture and doing your own taxes on the frustration scale – totally doable, but you’ll probably question your life choices halfway through.
I’ve painted more ceilings than I care to remember, and each time I swear it’ll be my last. Yet here I am, sharing my hard-earned wisdom with you because, honestly, hiring a professional for this job feels like admitting defeat.
Plus, once you nail the technique, you’ll feel like Michelangelo (minus the artistic genius and the Sistine Chapel, but you get the idea).
Why Your Ceiling Needs a Fresh Coat (Besides the Obvious)
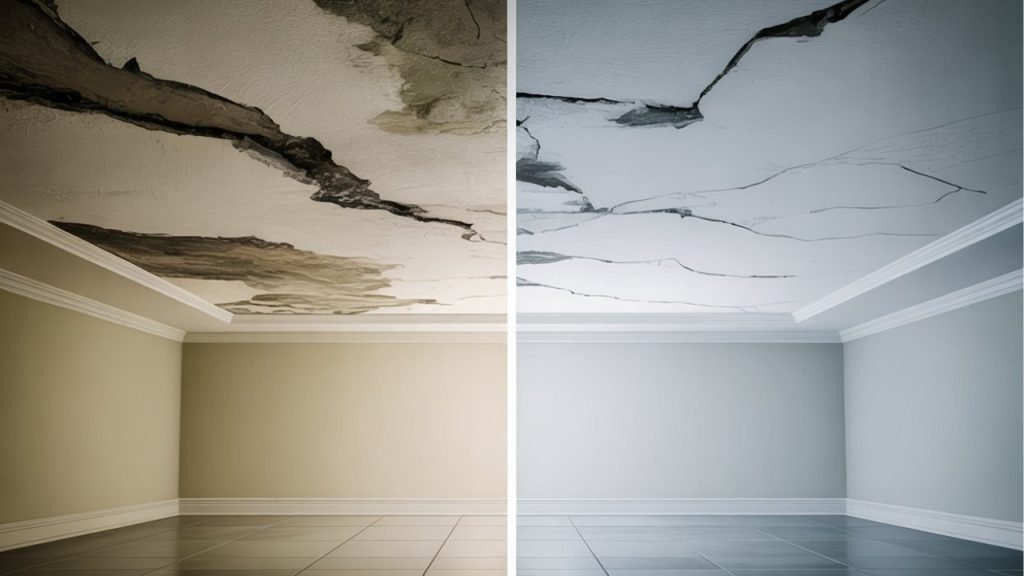
Ever noticed how ceilings seem to age in dog years? One day they’re pristine white, the next they’re sporting mysterious stains and cobwebs like they’re auditioning for a haunted house.
Ceilings take more abuse than we realize cooking fumes, dust, that time you opened a champagne bottle too enthusiastically… they’ve seen it all.
The thing is, a fresh ceiling paint job transforms a room faster than any Instagram filter. It reflects light better, makes your space feel bigger, and covers up whatever questionable decisions the previous homeowner made.
I once moved into a place where the bedroom ceiling was painted dark purple. Purple! Who does that?
Getting Your Act Together: Tools and Materials

The Non-Negotiables
Before you even think about cracking open that paint can, you need the right arsenal. Trust me, trying to paint a ceiling with whatever random brush you found in the garage leads to disaster. Here’s what you actually need:
Essential Tools:
- Extension pole (your back will thank you)
- 9-inch roller frame with ½ to ¾ inch nap
- Angled brush for cutting in (2.5 inches works great)
- Paint tray and liners
- Drop cloths (plastic for furniture, canvas for floors)
- Painter’s tape (the good stuff, not the dollar store special)
- Ladder (step stool won’t cut it)
Materials You’ll Need:
- Ceiling paint (yes, it’s different from wall paint)
- Primer (if you’re covering stains or dark colors)
- Spackling compound for repairs
- Sandpaper (120-grit usually does the trick)
The Nice-to-Haves
Want to make your life easier? These extras help:
- Paint tray liner (saves cleanup time)
- Paint can opener (using a screwdriver gets old fast)
- Wet rags for quick cleanup
- Safety goggles (paint in the eye isn’t fun)
- Old clothes you don’t mind ruining
Choosing the Right Paint (It Actually Matters)
Here’s where people mess up – they grab whatever white paint catches their eye and call it a day. Ceiling paint differs from wall paint in crucial ways. It’s thicker, splatter-resistant, and typically comes in flat or matte finishes that hide imperfections better.
Flat vs. Eggshell: The Great Debate
Most pros recommend flat paint for ceilings, and they’re not wrong. Flat paint hides every bump, crack, and wonky drywall seam like a champ. But here’s my hot take: if you’ve got a bathroom or kitchen ceiling, go with eggshell. Sure, it shows more imperfections, but it handles moisture and cleaning way better.
I learned this the hard way when my flat-painted bathroom ceiling started looking like a science experiment after six months of hot showers. Never again.
Color Choices Beyond Basic White
Who says ceilings must be white? Well, probably your realtor, but hear me out. A subtle tint can work wonders:
- Soft gray makes a room feel modern
- Pale blue creates an airy, open feeling
- Warm beige adds coziness without darkness
Just remember – the darker you go, the lower your ceiling appears. Unless you live in a converted warehouse loft, maybe skip the charcoal gray.
Prep Work: The Part Everyone Hates But Can’t Skip
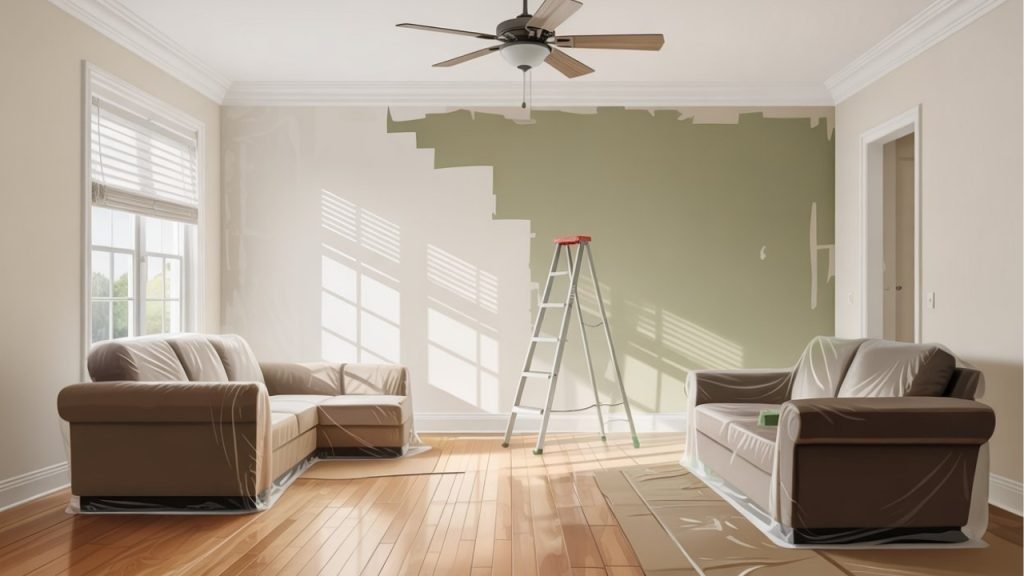
Clearing the Battlefield
First things first – everything must go. And I mean everything. That ceiling fan you think you can work around? Take it down. The smoke detector? Remove it. Light fixtures? Yep, those too.
Moving furniture completely out beats trying to work around it. Can’t move that massive couch? Push it to the center and cover it like your life depends on it. Paint drops have this magical ability to find the one uncovered spot on your $2000 sofa.
Fixing the Crimes Against Drywall
Walk around with your neck craned up (fun times) and mark every crack, hole, and ding with painter’s tape. Now comes the tedious part:
- Fill small holes with spackling compound
- Let it dry completely (patience, grasshopper)
- Sand smooth with 120-grit sandpaper
- Wipe clean with a damp cloth
For bigger cracks, you might need mesh tape and joint compound. Is this annoying? Absolutely. Will you regret skipping it? Even more absolutely.
The Great Cleaning Mission
Nobody talks about this, but dirty ceilings repel paint like teenagers avoid chores. Mix some warm water with a tiny bit of dish soap and wipe down the entire ceiling. Pay special attention to kitchen ceilings – they’re usually coated in a film of cooking grease you can’t even see.
Let everything dry completely. I’m talking bone dry. Painting over moisture creates bubbles, and nobody wants a bubble ceiling unless you’re going for that “abandoned building” aesthetic.
Priming: Your Secret Weapon
“Do I really need primer?” you ask, hoping I’ll say no. Sorry to disappoint, but primer makes everything else easier. It’s like the foundation under makeup – nobody sees it, but it makes the final result look professional.
When You Absolutely Need Primer
- Covering water stains (they’ll bleed through regular paint)
- Going from dark to light colors
- Painting over new drywall
- Dealing with nicotine stains (gross but common)
Application Tips That Actually Work
Apply primer the same way you’ll apply paint – with the roller in long, parallel strokes. Work in 4×4 foot sections to maintain a wet edge. This prevents those ugly lap marks that scream “amateur hour.”
FYI, tinted primer saves you paint coats later. If you’re going from dark to light, get your primer tinted to about 50% of your final color. Game changer.
The Main Event: Actually Painting the Ceiling
Cutting In Like a Pro
This separates the rookies from the veterans. Cutting in means painting the edges where the ceiling meets the walls with a brush before rolling. Some people swear by painter’s tape, others free-hand it. I’m team tape because I’ve seen too many wobbly lines ruin otherwise decent paint jobs.
Load your angled brush about halfway, tap off excess (don’t wipe – that removes too much paint), and paint a 2-3 inch border around the entire room. Work in sections so the cut-in area stays wet for blending with the roller.
Rolling Technique That Won’t Kill Your Neck
Here’s where that extension pole earns its keep. Attach your roller, extend the pole to a comfortable length, and prepare for a workout. The key? Don’t look straight up the entire time – you’ll get dizzy and probably fall off the ladder.
The W Pattern Method:
- Load your roller evenly (not dripping but well-coated)
- Start in a corner and roll a large W pattern
- Fill in the W without lifting the roller
- Smooth out with parallel strokes
- Move to the next section, slightly overlapping
Work across the narrow width of the room, not the length. This keeps your wet edge manageable and prevents those dreaded lap marks.
The Second Coat Situation
One coat never cuts it. I don’t care what the paint can promises – you need two coats minimum. Sometimes three if you’re covering something dark or dealing with new drywall.
Wait for the first coat to dry completely. The can says two hours, but I give it four because I’m paranoid like that. Check for missed spots (there are always missed spots) and hit them first before rolling the entire ceiling again.
Also Read: How to Paint Kitchen Cabinets Easily for a Fresh New Look
Dealing with Textured Ceilings (The Special Hell)

Popcorn Ceilings: The Bane of Existence
Got popcorn ceilings? My condolences. These textured nightmares require special handling:
The Spray Method (if you’re feeling brave):
- Rent an airless sprayer
- Thin the paint slightly (10-20% water)
- Spray in overlapping passes
- Prepare for overspray everywhere
The Roll Method (for the rest of us):
- Use a thick-nap roller (1¼ inch minimum)
- Load extra paint
- Roll gently to avoid knocking off texture
- Accept that it’ll take forever
Whatever you do, don’t try to brush popcorn ceilings. You’ll pull off chunks of texture and create bald spots that’ll haunt your dreams.
Orange Peel and Knockdown Textures
These textures are way more forgiving than popcorn. Use a ¾-inch nap roller and work in smaller sections. The texture hides imperfections well, so you can relax a bit about perfect coverage.
Advanced Techniques for the Overachievers
Creating Faux Finishes
Want to get fancy? Try these techniques:
- Sponging: Dab a second color over the base for depth
- Color washing: Diluted paint creates subtle variations
- Metallic accents: Because why not? 🙂
I tried a metallic finish in my powder room once. It looked amazing for about three days until I realized every imperfection caught the light. Live and learn.
Using a Paint Sprayer
Sprayers make ceiling painting faster but messier. Mask everything – walls, floors, windows, your cat if it wanders in. The overspray gets everywhere, and I mean everywhere. I found paint droplets in my kitchen three rooms away.
IMO, sprayers work best for empty rooms or new construction. For lived-in spaces, stick with rollers unless you enjoy taping and plastic-wrapping your entire life.
Troubleshooting Common Disasters
The Dreaded Lap Marks
See those dark stripes running across your ceiling? Those are lap marks from letting the paint edge dry before rolling over it. Prevention beats fixing:
- Work faster (but not sloppier)
- Keep a wet edge always
- Add paint extender in hot, dry conditions
If you’ve already got lap marks, sand lightly and repaint the entire ceiling. Yeah, it sucks.
Roller Marks and Stippling
Your ceiling looks like it has acne? That’s from using the wrong roller nap or pressing too hard. Light, even pressure wins the race. If you’re already seeing stippling, wait for it to dry completely, then sand lightly and apply another coat with proper technique.
Paint Drips on Everything
Despite your best efforts, paint will drip. Clean drops immediately while wet – dried paint becomes permanent decoration. Keep wet rags handy and check your work every few minutes.
Also Read: 15 Black Ceiling Bedroom Ideas That Are Anything But Basic
Working Around Obstacles
Ceiling Fans: The Ultimate Challenge
Should you remove the ceiling fan? Yes. Will you? Probably not, because who has time for electrical work? If you’re painting around it:
- Turn off power at the breaker (seriously)
- Cover blades with plastic bags
- Tape around the mounting bracket
- Use a brush for close work
- Accept imperfection in hidden areas
Dealing with Vaulted and Sloped Ceilings
Vaulted ceilings test your patience and your equipment. You’ll need:
- Extra-long extension poles
- Possibly scaffolding (rent it, don’t DIY)
- A helper to spot you
- More paint than you think
Start at the highest point and work down. The angle makes paint want to run, so use less on your roller and make more passes.
Safety First (Because ER Visits Aren’t Fun)
Ladder Logic
Never lean too far – if your belt buckle passes the ladder rail, you’re asking for trouble. Move the ladder instead of reaching. I know it’s annoying, but it beats explaining to the ER nurse how you fell while painting.
Set ladders on level ground only. That wobbly feeling? Not normal. Fix it before climbing. And please, no chairs on tables or other creative ladder substitutes.
Protecting Yourself
Paint fumes aren’t toxic, but they’re not pleasant either. Open windows, use fans, take breaks. Your brain needs oxygen to make good decisions, like not painting yourself into a corner.
Wear safety glasses when rolling overhead. Paint in the eye burns like crazy and turns your sclera an interesting shade of whatever color you’re using. Ask me how I know :/
The Finishing Touches
Removing Tape: Timing is Everything
Pull tape while the paint’s slightly tacky, not wet or fully dry. Pull at a 45-degree angle away from the paint line. Go slow – rushing creates jagged edges and pulls paint off with the tape.
If paint dried over the tape (happens to everyone), score the edge lightly with a utility knife before pulling. This prevents chunking and tears.
Touch-Ups Without Starting Over
Keep some paint in a small container for touch-ups. Dab, don’t brush, to blend repairs into the existing paint. Feather the edges by barely touching the surrounding area.
For tiny spots, use a small artist’s brush or even a Q-tip. Sometimes the smallest tools give the best results.
Cleanup and Maintenance
Proper Tool Care
Clean rollers and brushes immediately after use. For water-based paint:
- Rinse under warm water until clear
- Use dish soap for stubborn paint
- Spin dry rollers (outside, trust me)
- Reshape brush bristles and let air dry
Quality tools last years with proper care. That expensive brush pays for itself over time.
Storing Leftover Paint
Label everything – color name, room, date. Future you will appreciate current you’s organization. Store paint in a cool, dry place. Basements work great, garages not so much (temperature swings ruin paint).
Put plastic wrap under the lid before closing to create a better seal. Turn the can upside down briefly to seal the lid with paint. These tricks keep paint fresh for years.
When to Call It Quits and Hire a Pro
Look, I’m all for DIY, but sometimes you need to recognize defeat. Call a professional when:
- Ceilings are over 12 feet high
- There’s significant water damage
- You’re dealing with lead paint (pre-1978 homes)
- The ceiling needs major repairs first
- You value your sanity over saving money
Final Thoughts
Painting a ceiling isn’t rocket science, but it’s not exactly a relaxing Sunday activity either. Take your time, prep properly, and remember – nobody looks that closely at ceilings anyway. Well, except you for the next month as you spot every tiny imperfection.
The satisfaction of completing this job yourself makes the neck pain worthwhile. Plus, you’ll have a great answer next time someone asks what you did over the weekend. “Oh, just channeled my inner Michelangelo, no big deal.”
Remember, every ceiling painter started as a nervous homeowner with a roller and a dream. You’ve got this! And if all else fails, dim lighting hides a multitude of sins. Now grab that roller, crank up your favorite playlist, and show that ceiling who’s boss. Your future self lounging under that fresh, clean ceiling will thank you – right after the advil kicks in.