15 Genius Kitchen Cabinet Organization Ideas for Effortless Storage
Ugh. Kitchen cabinets. One minute they’re a pristine testament to your organizational dreams, and the next, they’re a chaotic black hole where Tupperware lids go to die and that one specific spice you know you bought last week has vanished without a trace.
\You open the door, something clatters out, and you just sigh and close it again, promising yourself you’ll deal with it “later.”
Sound familiar? Yeah, I’ve been there too. My kitchen used to be a masterclass in frustration. But after one too many avalanches of pots and pans, I decided enough was enough.
I embarked on a deep dive into the world of kitchen organization, trying every hack, product, and DIY solution I could find.
And you know what? I discovered that a blissful, functional kitchen isn’t about having a million-dollar renovation. It’s about working smarter, not harder. It’s about implementing clever, simple systems that actually work with you, not against you.
So, grab a coffee, pull up a chair, and let’s chat. I’m going to walk you through 15 absolutely genius kitchen cabinet organization ideas that will transform your space from a frantic mess into a haven of effortless storage.
No more digging. No more guessing. Just pure, organized bliss.
15 Genius Kitchen Cabinet Organization Ideas
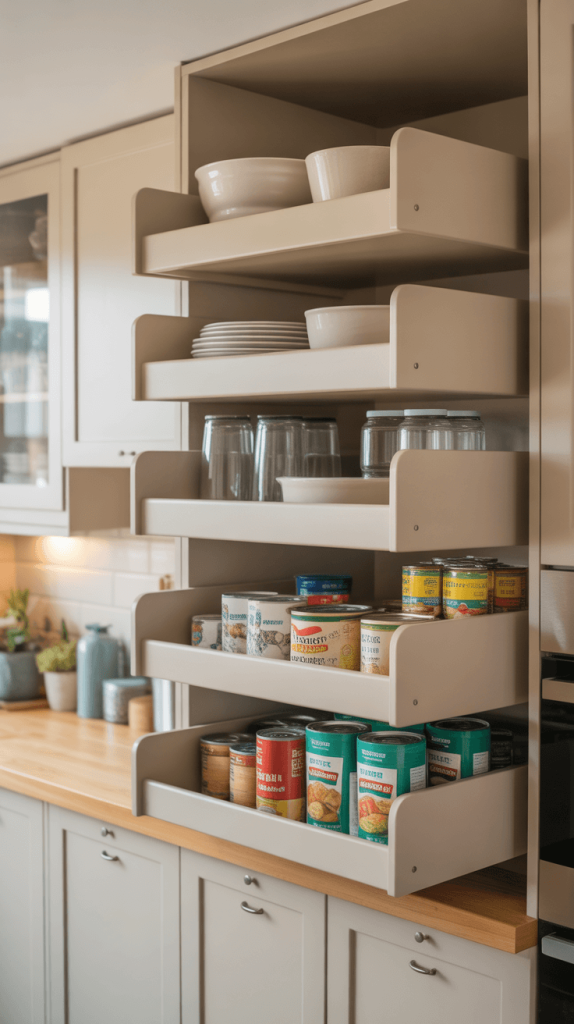
1. Use Pull-Out Shelves for Easy Access
Let’s start with the single biggest upgrade you can make to your kitchen cabinets. I’m talking about pull-out shelves. If you do nothing else on this list, do this. I installed them in my deep lower cabinets a year ago, and I’m not exaggerating when I say it changed my life.
Before pull-outs, accessing anything in the back of the cabinet was a full-on archaeological dig. I’d have to get on my hands and knees, remove the first three rows of items, and blindly feel around in the dark abyss. It was a nightmare.
How to Implement This Genius Idea:
- Ready-Made Kits: Companies like Rev-A-Shelf offer fantastic kits you can install yourself. They typically include the sliding mechanism and the shelf itself. You just need a drill and a bit of patience. It’s a perfect weekend project.
- Custom Built: If you’re doing a full kitchen remodel, talk to your cabinet maker about integrating pull-outs from the get-go. They can design them to fit your exact needs.
- What to Store on Them: These are perfect for heavy items you don’t use every single day but still need access to. Think:
- Stock pots and large baking sheets
- Small appliances like your stand mixer or food processor
- Cast iron skillets (no more throwing out your back!)
- Large packages of paper towels or canned goods
The bottom line: Pull-out shelves eliminate the dreaded “black hole” at the back of your cabinets. They bring everything into the light with a simple tug. Worth every single penny.
2. Maximize Vertical Space with Tall Storage Bins

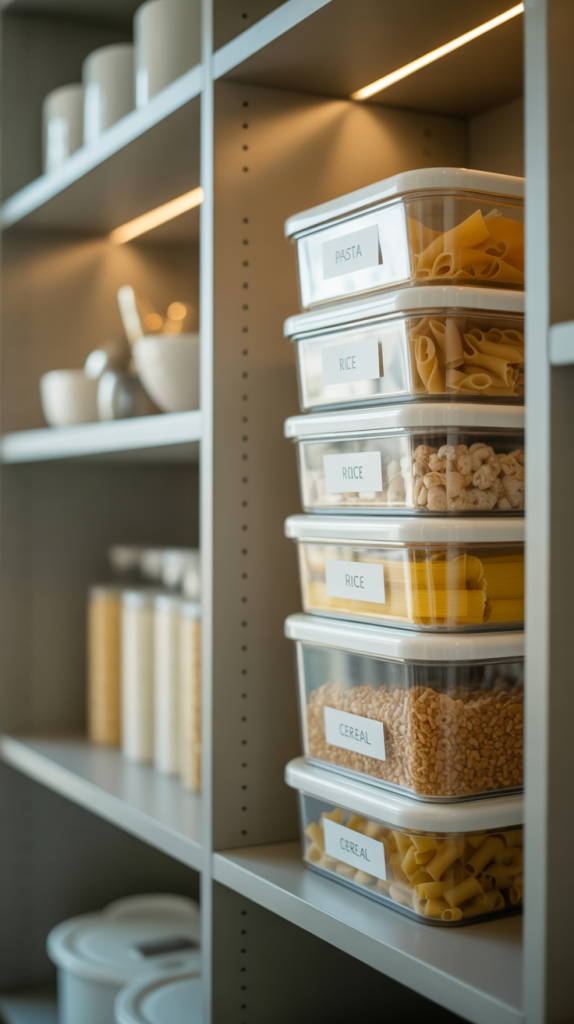
We often focus on the horizontal space in our cabinets, but what about the vertical space? That gap between the top of your boxes and the bottom of the shelf above is wasted real estate, my friend. This is where tall, narrow storage bins become your best organizational asset.
I use these in my pantry cabinet for all my dry goods—pasta, rice, chips, cereal boxes. Instead of having a jumbled pile of half-empty boxes threatening to topple over, everything stands tall and proud.
How to Implement This Genius Idea:
- Find the Right Bins: Look for bins that are tall and relatively narrow. They should fit snugly side-by-side on your shelf. Clear bins are ideal because you can see the contents at a glance.
- Categorize Everything: Don’t just throw things in randomly. Designate a bin for specific categories. I have one for pasta, one for rice and grains, one for baking supplies, and one for snacks.
- Label, Label, Label: This is non-negotiable. A simple label maker (or even cute washi tape and a sharpie) tells you exactly what’s in each bin without having to pull it out. It’s a tiny step that makes a huge difference.
Pro Tip: Use these same tall bin principles for your refrigerator to organize bottled drinks, yogurt cups, and other tall items. It works like a charm!
3. Install Tension Rods for Organizing Pot Lids

Pot lids are the natural enemy of kitchen order. They never stack nicely, they slide around, and they always seem to be in the way. For years, I just shoved them all in a cabinet and accepted the daily rattle of doom whenever I needed a pot. Then I discovered the tension rod hack, and I felt like a certified genius.
How to Implement This Genius Idea:
- Measure the width of your cabinet.
- Buy a tension rod (the kind you use for curtains) that fits that width.
- Install it vertically inside your pot cabinet.
- Slide your pot lids behind the rod, resting against the cabinet wall.
That’s it! The rod acts as a simple barricade, holding your lids neatly in place. Now, when you grab a pot, you can easily see and grab its matching lid right beside it. No more digging. No more noise. It’s sheer magic.
Also Read: 15 Stunning Kitchen Cabinet Ideas to Transform Your Space Easily
4. Create Custom Drawer Dividers for Utensils
Junk drawers are a universal truth, but your utensil drawers don’t have to be. That tangled mess of spatulas, whisks, and measuring spoons is not just annoying; it wastes time and space. The secret? Customization. A one-size-fits-all divider rarely works because our utensil collections are all weird and unique.
How to Implement This Genius Idea:
- Adjustable Dividers: My personal favorite. You can buy kits with little plastic pieces that snap together in a grid pattern. You can configure the compartments to be exactly the size you need for your giant slotted spoon or your tiny microplane.
- DIY Wooden Dividers: If you’re handy, you can cut thin pieces of wood or even use craft balsa wood to create a perfect, permanent grid for your drawer.
- Even Cheaper DIY: Use small, clean cardboard boxes (like tea or gelatin boxes) cut to size. Line them up in the drawer to create instant compartments. It’s free and it works!
The goal is to give every single utensil a dedicated home. This not only stops the jumbling but also makes it incredibly easy to see what you have and, more importantly, what you’re missing when it’s time to load the dishwasher.
5. Use Over-the-Door Organizers for Extra Storage
Are you using the backs of your cabinet doors? If not, you are missing out on a massive amount of storage space. This is prime real estate, people! Over-the-door organizers aren’t just for your bedroom or bathroom; they are a kitchen game-changer.
I have a skinny, wire over-the-door rack on the inside of my pantry door. It holds all my plastic wrap, aluminum foil, parchment paper, and reusable zip-top bags. It freed up an entire shelf in my actual pantry!
How to Implement This Genius Idea:
- Pantry Door: Perfect for spice jars, small canned goods, snack packets, or wrapping materials.
- Sink Cabinet Door: Install a small rack to hold scrub brushes, dishwasher tabs, or plastic grocery bags for recycling.
- Cleaning Supply Cabinet: Hang a rack to hold spray bottles, gloves, and sponges neatly.
Just be sure to measure the door and the interior of the cabinet to ensure the organizer won’t interfere with your shelves or the items on them when you close the door.
6. Incorporate Lazy Susans for Spices and Oils
How many times have you knocked over three bottles of oil trying to reach the one at the back? It’s a universal kitchen frustration. The solution is so simple and so satisfying: the lazy Susan. Turntables are the undisputed champions of corner cabinets and deep shelves.
I have a two-tier lazy Susan in my corner cabinet where I store all my cooking oils, vinegar, and soy sauce. A gentle spin brings anything I need right to the front. No more contortionist acts.
How to Implement This Genius Idea:
- Spices: A small turntable inside your spice cabinet means you’ll never lose a bottle to the dark depths again.
- Refrigerator: Use one in the fridge for condiments, jams, and jars. Say goodbye to that forgotten jar of salsa hiding behind the milk.
- Pantry: Great for cans, jars of pasta sauce, or anything else you tend to collect.
Pro Tip: Opt for a lipped or edged lazy Susan to prevent smaller items from spinning right off the edge. Safety first!
Also Read: 15 Stunning Green Kitchen Cabinets Ideas for a Stylish Home Makeover
7. Utilize Cabinet Door Hooks for Mugs or Towels
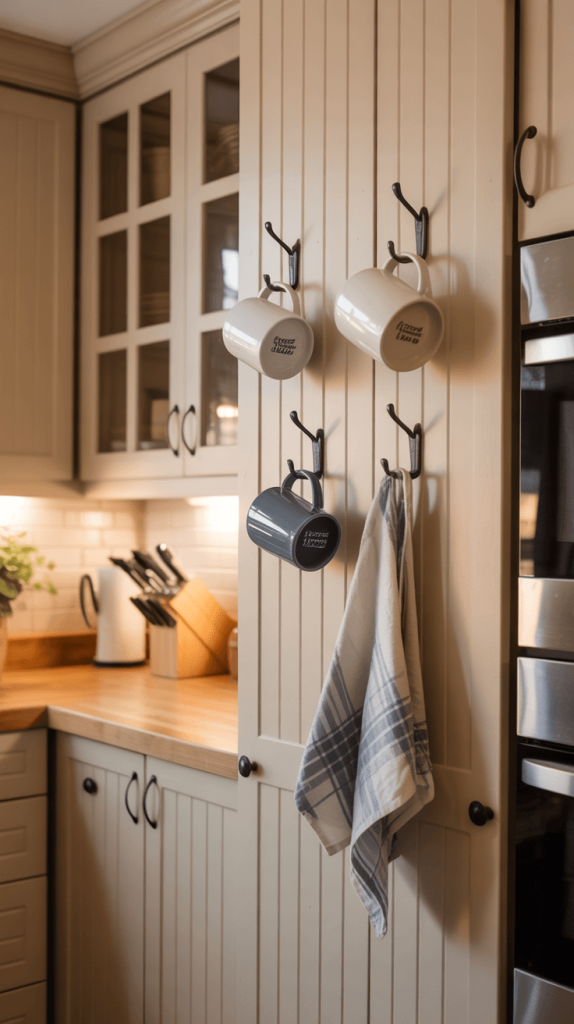
We’re going back to the magic of the cabinet door, but this time with hooks! This is such a simple idea, but it’s wildly effective for managing things that don’t stack well or that you use constantly.
I installed a few small, adhesive hooks on the inside of the cabinet door right above my coffee maker. This is where my favorite mugs live. It frees up cupboard space, and they double as decor when the door is open. Plus, it makes my morning coffee routine so much smoother.
How to Implement This Genius Idea:
- Adhesive Hooks: These are great because they require no tools and won’t damage the door. Just make sure you clean the surface well before applying and get hooks that can handle the weight of a mug.
- Command Hooks: Even better—they come off cleanly if you change your mind.
- What to Hang: Mugs, small measuring cups, oven mitts, kitchen towels, or even a small wire basket to hold tea bags or coffee pods.
8. Store Baking Supplies in Clear Containers
If you bake even occasionally, you know the struggle: a dozen different bags of flour, sugar, chocolate chips, and sprinkles, all half-open, taking up space and threatening to spill. The move to clear, airtight containers is a total game-changer for both organization and freshness.
I transferred all my baking staples into uniform rectangular containers, and my pantry has never looked more serene. It’s like a spa for ingredients.
Why This is a Genius Idea:
- Airtight Seal: Keeps pests out and freshness in. Your brown sugar will never harden again!
- Stackable: Uniform shapes stack neatly, maximizing vertical space.
- Visibility: You can see exactly what you have and how much is left at a single glance. No more buying your third bag of powdered sugar because you thought you were out.
- Cleanliness: It contains messes beautifully. Even if a bag tears open in your pantry, the mess is contained to the outside of the container, not all over your shelf.
FYI, the best part is you don’t need fancy, expensive containers. Simple, food-grade plastic or glass containers from any big-box store work perfectly.
9. Use Magnetic Strips for Knives and Small Tools
Knife blocks take up valuable counter space and can harbor crumbs and germs. Drawers can dull your knife blades and are dangerous to root through. The solution? Go magnetic.
A magnetic knife strip mounted on your wall or the side of a cabinet keeps your most important tools safely within reach, visually displayed, and your countertops clear. It looks incredibly sleek and professional, too.
How to Implement This Genius Idea:
- Installation is Key: Make sure you mount it securely into studs or with heavy-duty drywall anchors. You’re holding sharp, expensive knives, so safety is paramount.
- Beyond Knives: Don’t stop there! A magnetic strip is also perfect for holding metal measuring spoons, shears, pizza cutters, and even can openers.
- Where to Put It: The wall next to your prep area is ideal. Just make it’s not in a high-traffic area where someone might bump into it.
Also Read: 15 Stunning White Kitchen Cabinets Ideas for a Dreamy Home Makeover
10. Implement Stackable Containers for Pantry Items
This idea takes the clear container concept and applies it to your entire pantry. It’s about creating a uniform, modular system where everything has its place. When you use stackable containers, you’re essentially building your own custom shelving unit with your food.
I did this last fall, and the before-and-after photos are ridiculous. It went from a cluttered, stressful mess to a calm, organized oasis.
Choosing Your System:
- Material: You can choose plastic (lighter, less expensive) or glass (more eco-friendly, doesn’t stain).
- Shape: Rectangular containers are the most space-efficient. They leave no awkward gaps like round containers often do.
- The Transfer Process: This is a project. You’ll need to empty your pantry, donate old expired items, and then transfer everything. But IMO, it’s a one-day project that pays off for years.
The key to making this work is labeling. You might think you can tell the difference between flour and powdered sugar, but at 6 a.m., you will not. Label everything clearly.
11. Use a Pegboard for Kitchen Tools
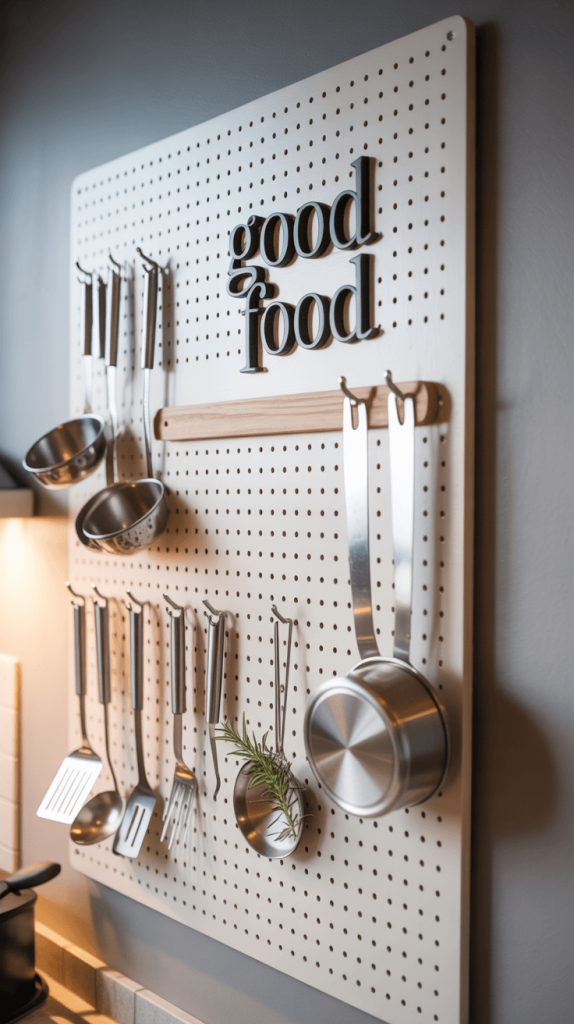
If you’re someone who likes to see all your tools, this one is for you. Pegboards aren’t just for garages and workshops. With a coat of cute paint and the right hooks, a kitchen pegboard is a stunning and supremely functional way to organize your most-used items.
The beauty of a pegboard is its flexibility. You can move the hooks around anytime you get a new tool or want to rearrange your system.
How to Implement This Genius Idea:
- Find a Spot: A blank wall near your cooking zone is perfect. Maybe next to the stove or over a baking station.
- Make It Pretty: Sand and paint the pegboard to match your kitchen’s decor. A bold color can make it a real focal point.
- Accessorize: You’ll need the pegboard itself, the hooks, and the little clips that hold the hooks in place. You can find kits at most hardware stores.
- What to Hang: Ladles, whisks, spatulas, measuring cups, strainers, pot holders—if it has a hole or a handle, it can probably live on the pegboard.
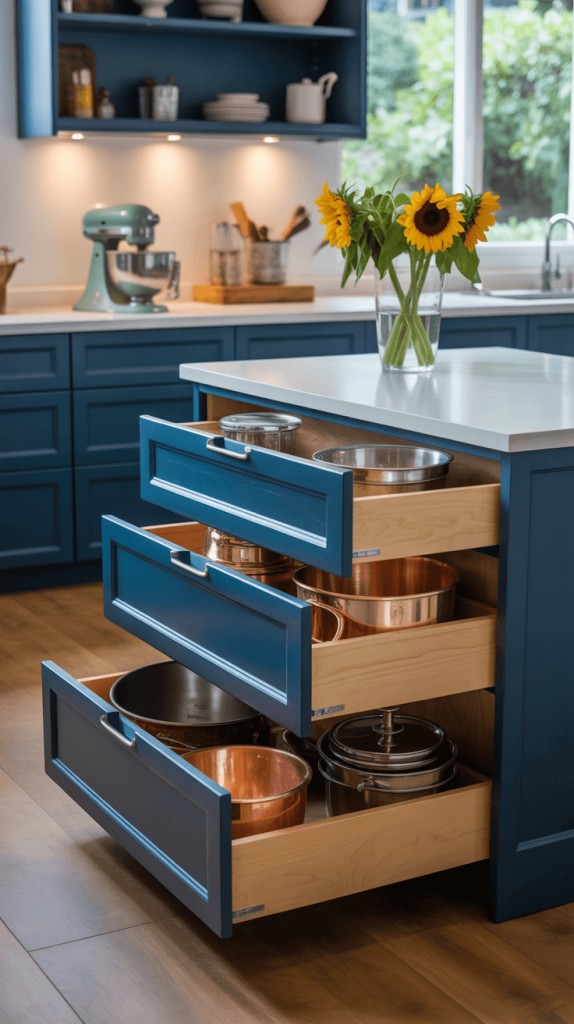
12. Organize Pots and Pans with a Pull-Out Rack
We touched on pull-out shelves earlier, but pots and pans deserve their own shout-out. These are the heaviest, most awkwardly shaped items in your kitchen. Stacking them is a noisy, frustrating game of Jenga that you always lose.
A dedicated pull-out rack for pots and pans is a specialized version of the pull-out shelf. It often includes hooks or dividers specifically designed to hold lids and nest pots efficiently.
Why This is Worth It:
- No More Stacking: Each pot and pan has its own individual spot. You can grab the one you need without moving three others.
- Lid Management: Many racks include built-in lid holders, solving two problems at once.
- Protects Your Cookware: No more scratching and clanging as you wrestle a cast-iron skillet out from the bottom of a pile.
If you’re not ready for a full built-in system, you can achieve a similar effect with a standalone pot rack organizer that sits on your existing shelf. It’s not quite as slick, but it’s a great budget-friendly start.
13. Incorporate a Drawer for Small Appliances
Your blender, toaster, and air fryer are bulky and awkward to store. Leaving them on the counter creates clutter, but constantly hauling them in and out of a deep cabinet is a pain. The solution? Give them a dedicated drawer.
This isn’t your average drawer. This is a large, heavy-duty, often electrically wired drawer designed specifically for appliances.
How to Implement This Genius Idea:
- The Dream Scenario: In a custom kitchen, you can have a drawer built with a pop-up electrical outlet inside. You open the drawer, use the appliance right there, and then close it all away. No heavy lifting.
- The DIY Version: You can create a simpler version by designating a large, easy-to-access shelf or a deep drawer (without wiring) for your most-used appliances. The key is that it should be easy to pull them out without a struggle.
- The Rule: If you use it daily, it can live on the counter. If you use it weekly, it deserves an easy-access home. If you use it once a year… maybe it’s time to donate it.
14. Use Tiered Shelf Organizers
This is one of the oldest organizing tricks in the book because it simply works. Tiered shelf organizers (or step shelves) are like stadium seating for your cans, spices, and jars. They create a second level, allowing you to see everything you have without playing a guessing game.
I use a narrow, two-tier metal organizer in my spice cabinet. Before, I had one row of spices in the front and a mysterious hidden row in the back. Now, I can see all 30+ jars at once. It’s a tiny miracle.
Where They Shine:
- Spices: Obviously.
- Canned Goods: Never buy diced tomatoes again because you thought you were out, only to find three cans hiding behind the beans.
- Under the Sink: Use a tiered rack to organize cleaning supplies so you can actually see what you have.
- Refrigerator: Great for organizing jars and cans in the fridge door.
15. Try DIY Sliding Drawers for Deeper Cabinets
Finally, let’s talk about those infuriatingly deep cabinets, usually found next to the fridge or in a corner. They swallow things whole. While a custom pull-out is the gold standard, it’s not always in the budget. Enter the brilliant DIY sliding drawer.
The concept is simple: you place a freestanding bin or basket inside the deep cabinet. This bin acts as a drawer that you can pull out to access the items in the back.
How to Implement This Genius Idea:
- Find a basket or bin that fits the depth and width of your cabinet.
- Fill it with the items that usually get lost in the back (my “appliance accessory” bin has all my mixer attachments, blender parts, and spiralizer blades).
- When you need something from the back, simply pull the entire bin out. The items behind it are now accessible, and the items in the bin are right there.
It’s a low-cost, low-commitment way to mimic the function of an expensive pull-out shelf. It’s not perfect, but it’s a massive improvement over the dreaded deep-cabinet dig.
Your Organized Kitchen Awaits
Whew! That was a lot, but honestly, each one of these ideas has genuinely saved my sanity in the kitchen. You don’t have to do all 15 at once. That would be overwhelming (and expensive!).
Start with the one area that frustrates you the most. Is it the pots and pans? Try the tension rod hack. Is it the pantry? Maybe invest in a few clear containers.
The goal isn’t to have a picture-perfect Instagram kitchen. The goal is to create a space that works for you. A space where cooking feels less like a chore and more like a joy because you can actually find what you need.
So, what are you waiting for? Pick one project, head to the store (or online), and get started. Your future self, the one who effortlessly whips up a weeknight dinner without a single cabinet avalanche, will thank you for it.
Happy organizing