15 Brilliant RV Kitchen Remodel Ideas to Maximize Space & Style
Alright, fellow road warrior, let’s have a real talk. You love the freedom of the open road.
You live for those sunset views from your kitchen window that change with every new campsite.
But when it comes to actually preparing a meal in that same kitchen? Well, let’s just say it can feel less like a gourmet experience and more like a game of culinary Tetris where the blocks are your spices, your cutting board, and your will to live.
I’ve been there. I’ve done the awkward dance between the fridge and the counter, butter knife in hand, trying to make a sandwich without elbowing my partner in the face.
I’ve played “Where’s Waldo?” with the can opener for a solid twenty minutes.
But after years of trial, error, and a few truly inspired “aha!” moments, I’ve learned that a little strategic planning can transform your RV kitchen from a frustrating afterthought into the heart of your rolling home.
So, grab a coffee, pull up a chair (metaphorically, since real estate is limited), and let’s dive into 15 brilliant ideas to max out your space and inject some serious style into your RV kitchen.
This isn’t about a full-blown, tear-out-the-walls renovation (unless you’re into that, you maniac, you). It’s about smart, clever upgrades that make a world of difference.
15 Brilliant RV Kitchen Remodel Ideas
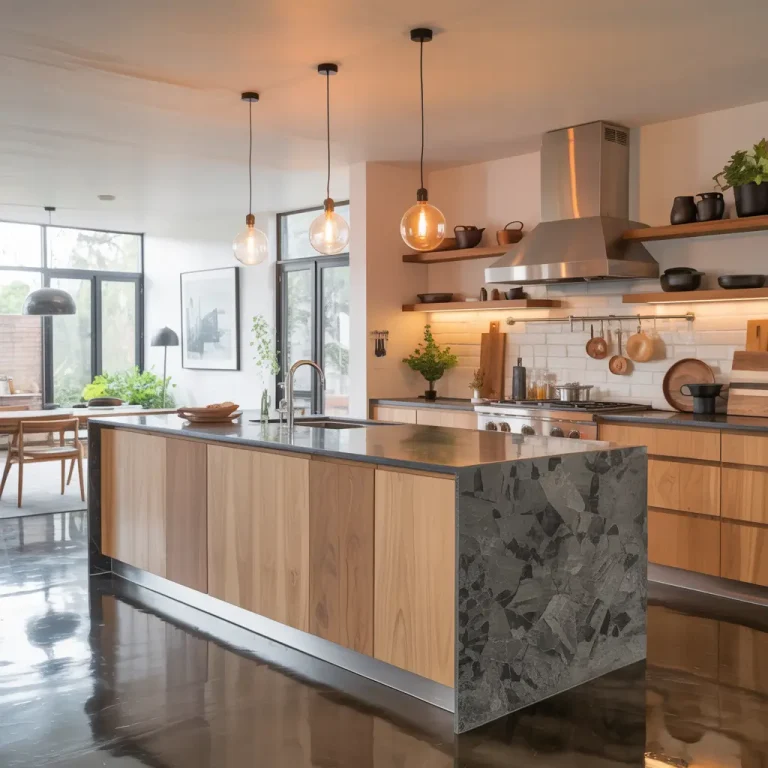
1. Maximize Vertical Space with Custom Shelving
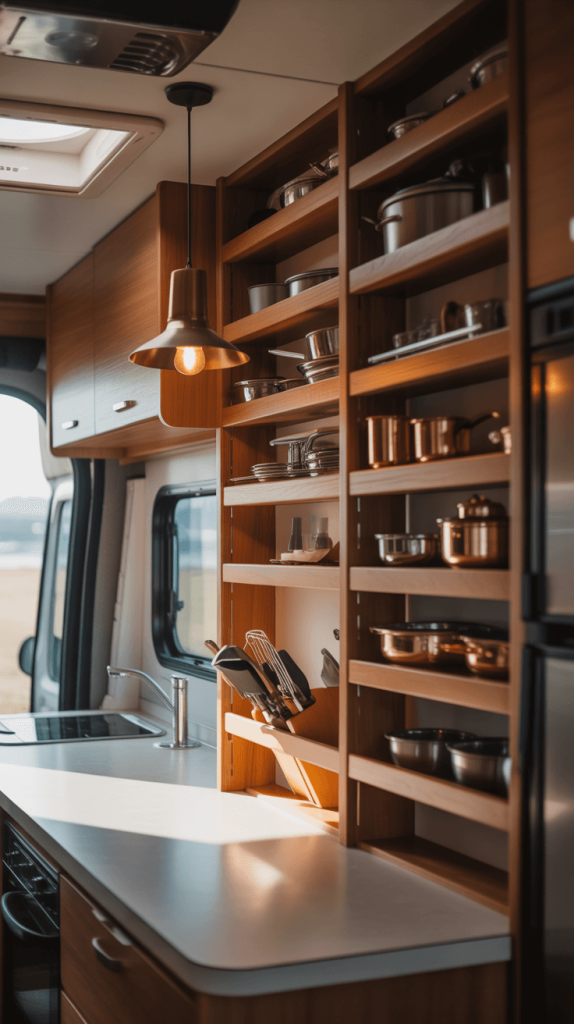
Look up. No, seriously, look up. What’s on your walls? Probably not much. In an RV, vertical space is the most underutilized real estate you have.
Floor space is a precious commodity, but walls? Walls are a blank canvas for storage.
Instead of letting your beautiful mugs and spices hog all your prime cabinet real estate, get them up on display with some custom shelving.
I’m not talking about bulky bookcases. Think sleek, floating shelves or even narrow, shallow shelves fitted perfectly between windows.
- Why it Works: It frees up your lower cabinets for larger, less frequently used items. Plus, it makes your kitchen feel more open and less cluttered. Having your favorite things on display adds a personal, homey touch that screams “this is my space,” not a generic rental.
- Pro Tip: Use tension rods inside upper cabinets to create dividers for baking sheets, cutting boards, and lids. It’s a $10 hack that solves a major organizational headache. Always, and I mean always, secure your shelves properly into studs with appropriate hardware. The road is bumpy, and you don’t want your grandmother’s china becoming a projectile.
2. Install Foldable Countertops for Extra Workspace
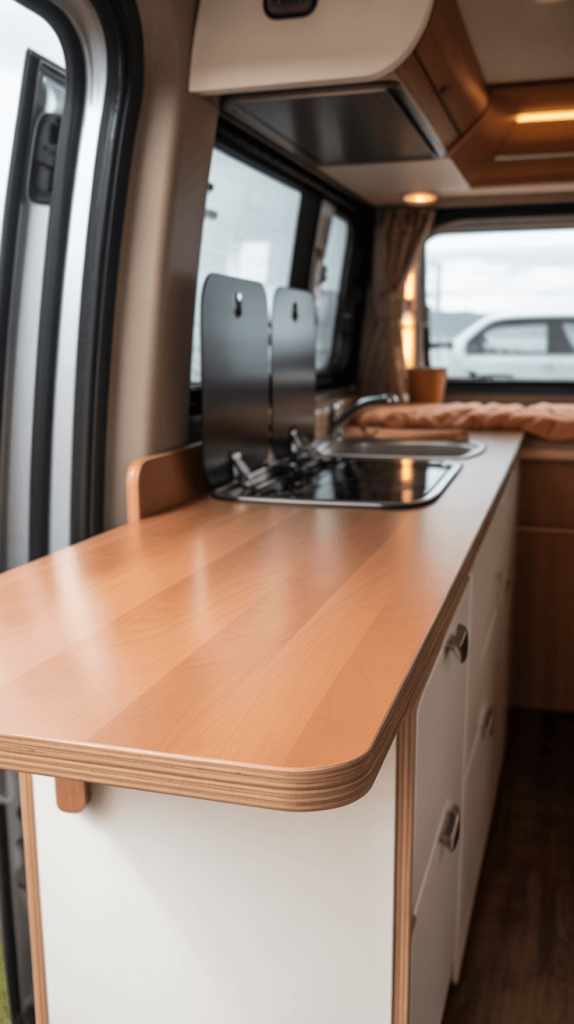
The great RV countertop conspiracy is real. Who decided we only need 2 square feet of space to prepare a three-course meal? It’s a mystery for the ages.
But we can fight back.
A fold-down countertop extension is an absolute game-changer. It’s like a magic trick. One minute, you have no space.
The next, voilà! You have a legitimate food prep area. You can have these custom-made to fit over your sink or stove (with a cutting board cover) or to extend off the end of your existing counter.
- Why it Works: It provides crucial workspace exactly when you need it and disappears completely when you don’t. It’s the ultimate solution for small spaces.
- Pro Tip: If you’re even slightly handy, this is a DIY project you can tackle with a nice piece of wood and a sturdy hinge. Just make sure it has a solid locking mechanism for travel. For a simpler fix, a large, sink cover cutting board instantly gives you back that precious sink real estate.
3. Switch to Multi-Functional Appliances
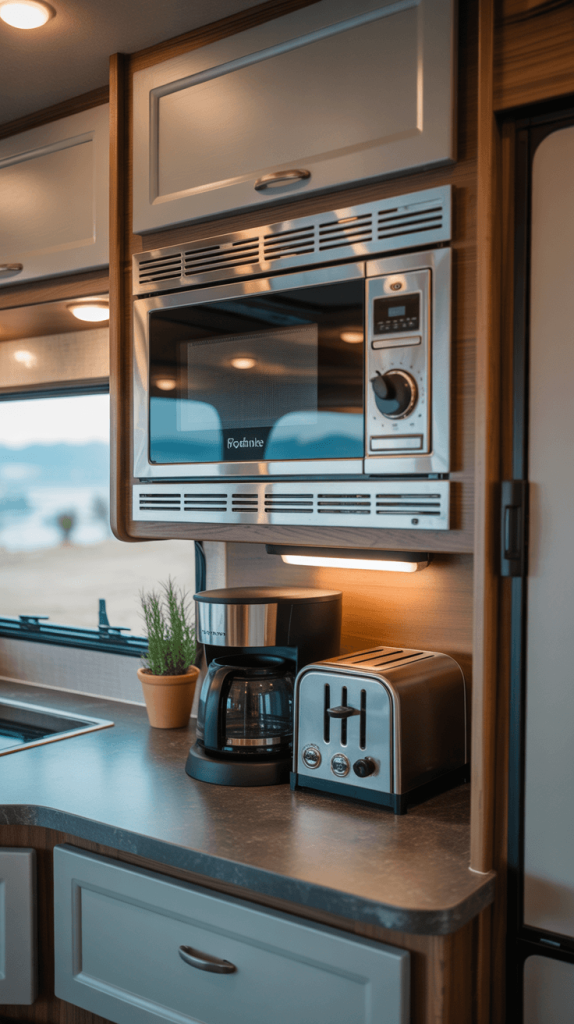
Let’s play a game. What single appliance can air fry, bake, roast, and dehydrate? If you said “my oven,” you’re tragically mistaken.
My oven is basically a storage box for my skillets because it takes forever to heat up and cooks everything unevenly.
Enter the world of multi-functional appliances. The holy trinity for the modern RVer has to be the Instant Pot, a quality air fryer, and a great coffee maker.
My Instant Pot is my kitchen MVP. I can sauté, pressure cook, and make yogurt in one pot, which means fewer dishes and way less energy used than my finicky oven.
- Why it Works: These devices do the job of multiple appliances while taking up a fraction of the space. They also generate less heat inside your rig, which is a major bonus in the summer.
- Pro Tip: Look for models designed for smaller spaces. Many brands now make slim-line or mini versions of popular appliances that fit perfectly on an RV counter without dominating it.
Also Read: 15 Creative Split-Level Kitchen Remodel Ideas to Transform Your Space
4. Incorporate Sliding Drawers for Easy Access
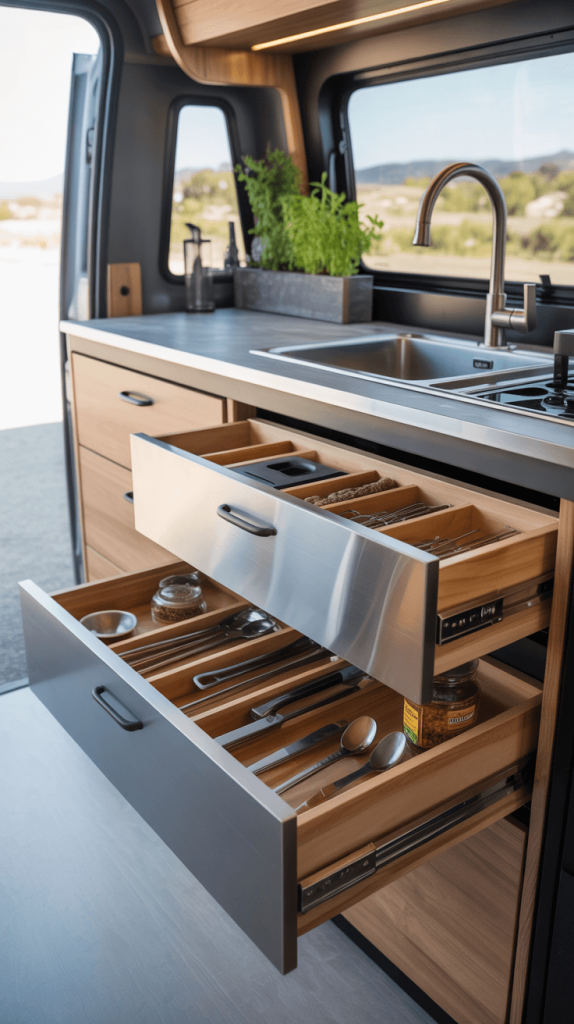
Ever found yourself on your hands and knees, head fully inside a bottom cabinet, desperately digging for that one pot lid you know is in there somewhere? Yeah, me too.
It’s a special kind of frustration.
The solution is so simple it’s almost stupid: sliding drawers. Installing pull-out shelves or wire baskets into your existing cabinets completely transforms them.
Suddenly, you can see and access everything in the back without performing archaeological excavations.
- Why it Works: It eliminates the dreaded “black hole” effect of deep cabinets. You utilize 100% of the space, not just the 20% at the front.
- Pro Tip: You can buy inexpensive slide kits and cut your own shelves to fit, or opt for pre-made organizing systems. Even a simple tip-out tray installed on the inside of cabinet doors creates perfect storage for cleaning supplies or foil/plastic wrap boxes.
5. Opt for Light and Reflective Colors
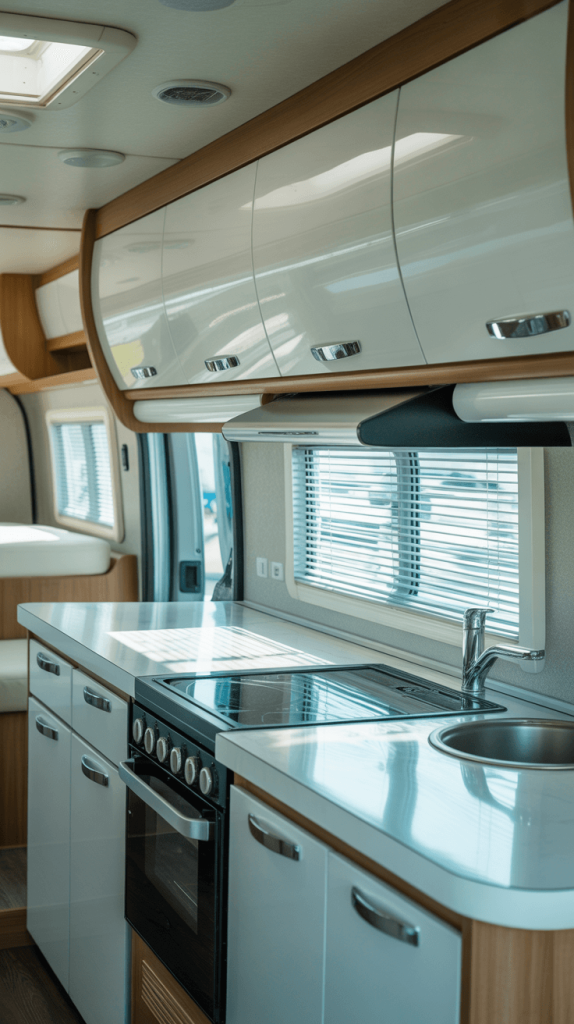
I get it. Dark, moody colors are trendy. They look amazing in a stationary, 2,000-square-foot home. In a 200-square-foot RV? Not so much.
Dark colors absorb light and make spaces feel cave-like and cramped.
This is one design rule you don’t want to break. Stick to a light, bright, and airy color palette. We’re talking whites, off-whites, light grays, and soft pastels. These colors reflect light, making your kitchen feel instantly larger and more open.
- Why it Works: It’s a visual trick that maximizes the perception of space. A light-colored kitchen just feels cleaner, brighter, and more welcoming.
- Pro Tip: You don’t have to live in a sterile, all-white box. Add your pops of color and personality through your decor—towels, a fruit bowl, that cool piece of art you found in Santa Fe. A glossy or semi-gloss finish on cabinets will reflect even more light than a flat matte finish.
6. Choose Compact and Stackable Storage Solutions
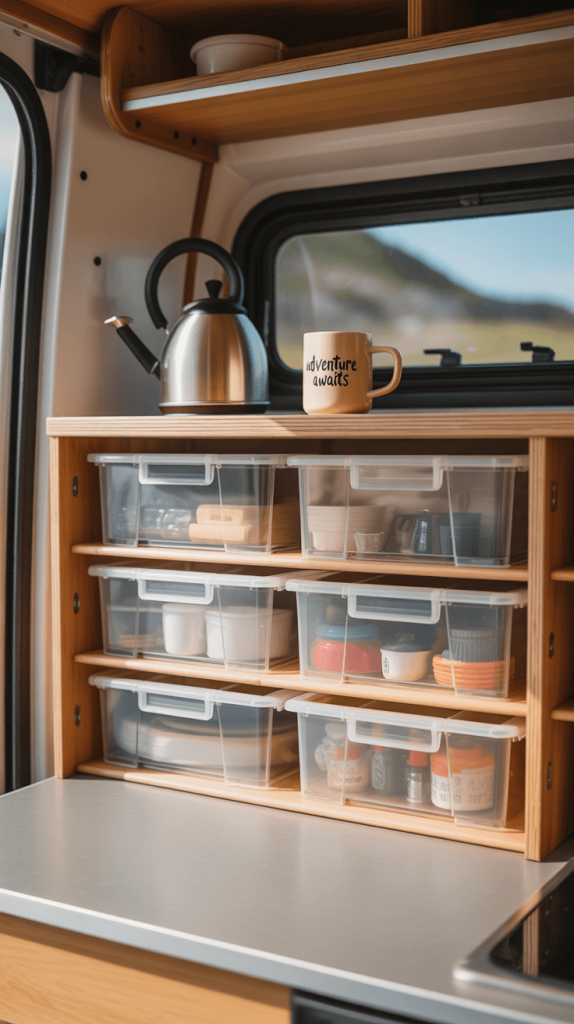
This is where your inner organizer gets to shine. Forget trying to make standard home organization products work. You need to think small and stackable.
Nesting bowls, collapsible colanders, and measuring cups that fit inside one another are your new best friends.
For food storage, ditch the mismatched plastic containers and invest in a uniform system of stackable, air-tight containers.
- Why it Works: It streamlines everything. Your drawers and cabinets become a perfectly efficient puzzle where every piece has a place. It also reduces clutter and, bonus, keeps your food fresher longer.
- Pro Tip: Square or rectangular containers use space far more efficiently than round ones. When you pack your cabinets, you’re not wasting the corners. IMO, this is one of the easiest and most impactful changes you can make over a weekend.
Also Read: 15 Creative Kitchen Remodel Ideas with Island: Stylish & Functional
7. Create a Collapsible Pantry for Efficient Storage
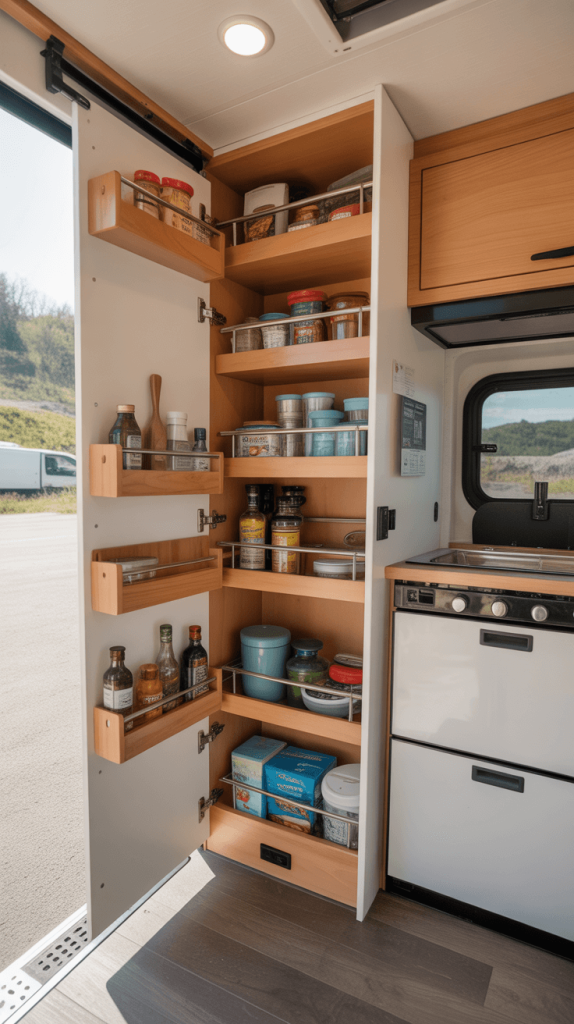
The RV pantry is often a comedy of errors—a deep, dark abyss where cans of beans go to hide for years.
Reaching something in the back requires a complex system of removal and restacking that inevitably ends with a bag of rice exploding everywhere.
Build or install a sliding or collapsible pantry system.
These are narrow, tall units with shelves on tracks that pull out so you can see everything at once. No more lost food!
- Why it Works: It brings your food to you. Every can, box, and bag is visible and accessible, which means you’ll actually use what you buy and avoid buying duplicates.
- Pro Tip: If you don’t have a built-in pantry, a freestanding slim rolling cart can work wonders in a narrow gap next to the fridge or counter. You can also use tiered shelf organizers (the kind that lets you see canned goods in the back) inside existing cabinets.
8. Install a Pull-Out Trash and Recycling Bin
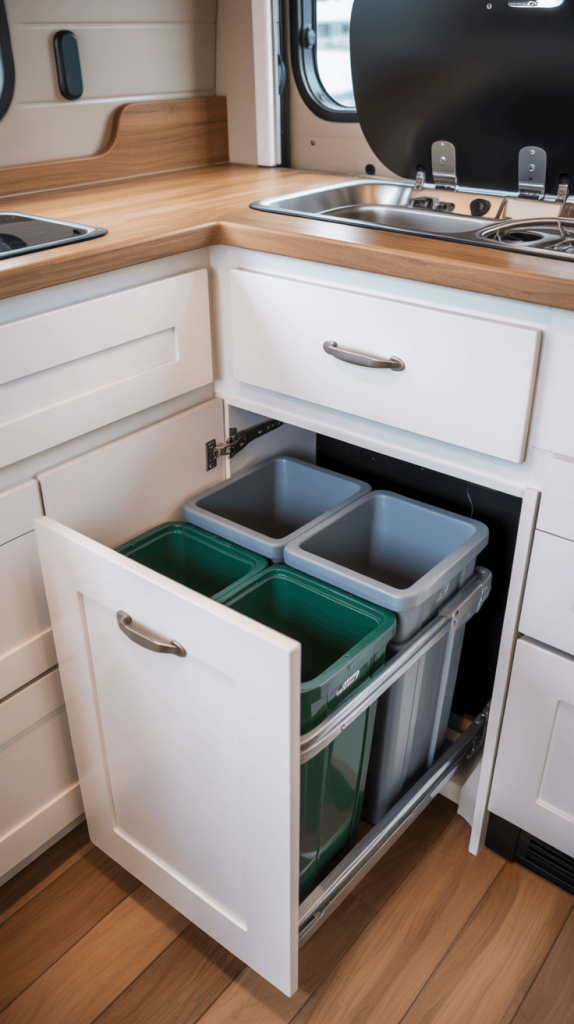
Where do you currently keep your trash? On the floor under the sink? Kicking around in the aisle? This is a constant pain point.
A loose trash bin is always in the way, and let’s be honest, it’s kind of an eyesore.
A built-in, pull-out trash and recycling bin system is a small luxury that feels massive.
You can install these in a lower cabinet, tucking your waste out of sight and out of the way until you need to pull the whole bin out to toss something.
- Why it Works: It saves precious floor space, contains odors, and keeps your kitchen looking neat and tidy. It’s a simple upgrade that adds a ton of functionality.
- Pro Tip: You can buy retrofit kits at any home improvement store. Measure your cabinet carefully first! Also, using standard-sized bags means you’re not stuck buying expensive custom liners.
9. Upgrade to Smart Lighting for Better Ambiance
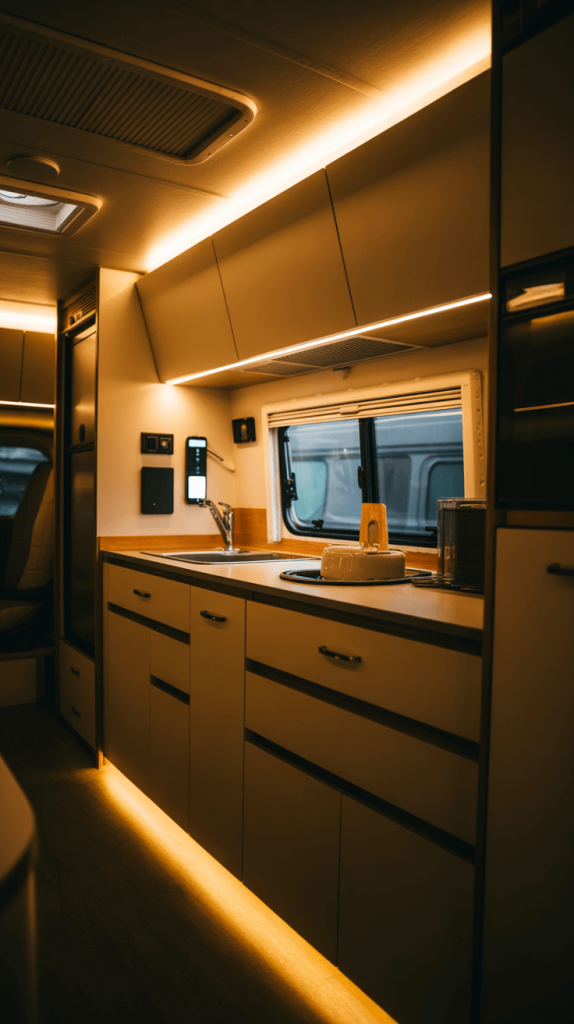
That single, sad fluorescent light in the center of your ceiling? It’s doing you no favors. It casts harsh shadows and makes your kitchen feel like a laboratory.
Lighting is everything when it comes to ambiance.
Swap out that old fixture for LED dimmable lights. Even better, install LED strip lighting under your upper cabinets. This provides direct, shadow-free light on your countertops for food prep and creates a warm, inviting glow in the evenings.
- Why it Works: Layered lighting allows you to set the mood. Bright for cooking, soft for dining. LEDs are also cool-running and energy-efficient, which is a huge win for your RV’s battery system.
- Pro Tip: Choose LEDs with a warm white color temperature (around 2700K-3000K). It mimics incandescent light and feels cozy, not clinical. Smart bulbs can even change color temperature and be controlled from your phone. 🙂
Also Read: 15 Simple Kitchen Remodel Ideas to Transform Your Space Quickly & Affordably
10. Use Removable and Washable Backsplash Tiles
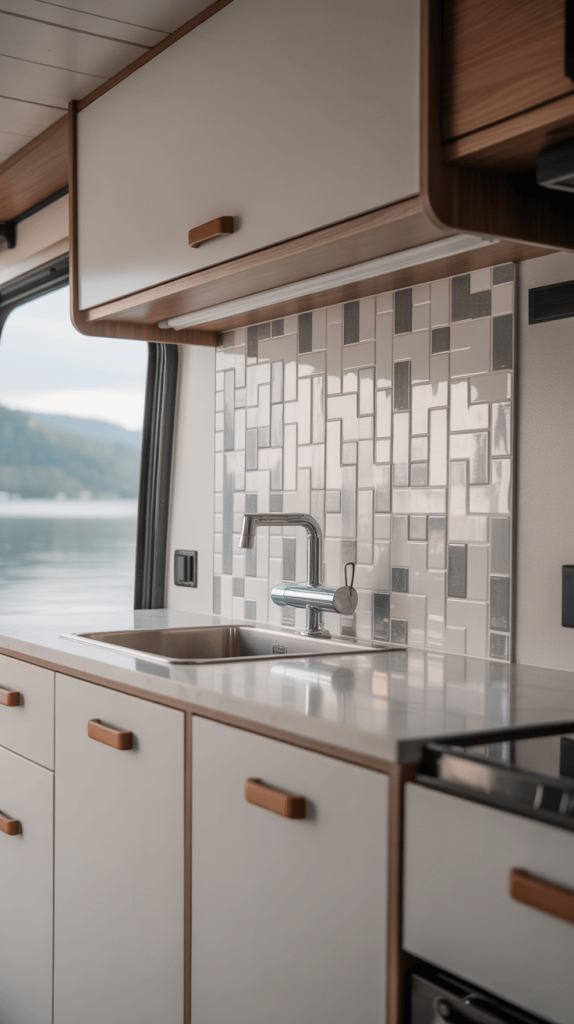
A backsplash is your chance to inject a huge dose of style without committing to a major renovation.
But the thought of grouting tile in a moving vehicle makes my eye twitch.
The answer? Peel-and-stick, removable backsplash tiles. The technology has come a long way! You can find gorgeous options that look like real subway tile, weathered tin, or even marble.
They are easy to install, and when you’re ready for a change (or to sell), they come right off.
- Why it Works: It protects your walls from splatters and adds a massive style upgrade with almost zero commitment. It’s a weekend project with a stunning payoff.
- Pro Tip: Thoroughly clean and dry your wall before application. Use a level to make sure your first tile is perfectly straight—everything else will follow. This is one of the most satisfying “quick win” projects on this list.
11. Install a Compact Dishwasher for Convenience
Wait, hear me out! I know what you’re thinking: “A dishwasher? In an RV? Is this person insane?” But countertop dishwashers are a real thing, and for some folks, they are an absolute game-changer.
These compact units are about the size of a microwave and hook up to your kitchen faucet.
They use a fraction of the water you would use hand-washing (seriously, it’s a common misconception that hand-washing saves water—it usually doesn’t).
- Why it Works: It saves you time, water, and the number one cause of post-dinner arguments: whose turn it is to do the dishes. For full-timers or families, this can significantly improve quality of life on the road.
- Pro Tip: This is a space-hogging appliance, so it’s only for those who truly despise dish duty and have the counter space to spare. Make sure you have the electrical capacity to run it, too. It’s not for everyone, but for the right person, it’s brilliant.
12. Incorporate Pull-Out Countertop Extensions
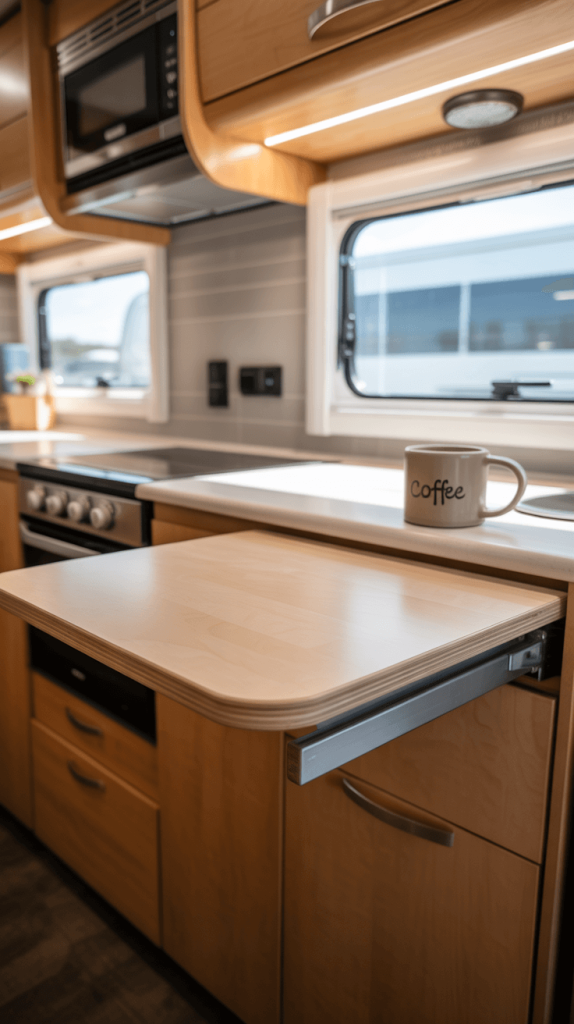
Similar to the fold-down counter, but this one is for your hidden master chefs. Some RVs have a nook or a drawer that can be fitted with a pull-out board.
You simply grab the handle and slide out a narrow extension of counter space.
It’s perfect for adding a little extra landing space next to the stove for spices or next to the coffee maker for your mug.
It stays low-profile and integrated into your cabinetry.
- Why it Works: It provides a tiny-but-mighty boost of functional space exactly where you need it, and it’s always there, ready to go.
- Pro Tip: You can often find these as replacement cutting boards with integrated pull-out rails designed for RVs. It’s a super slick, OEM-looking upgrade.
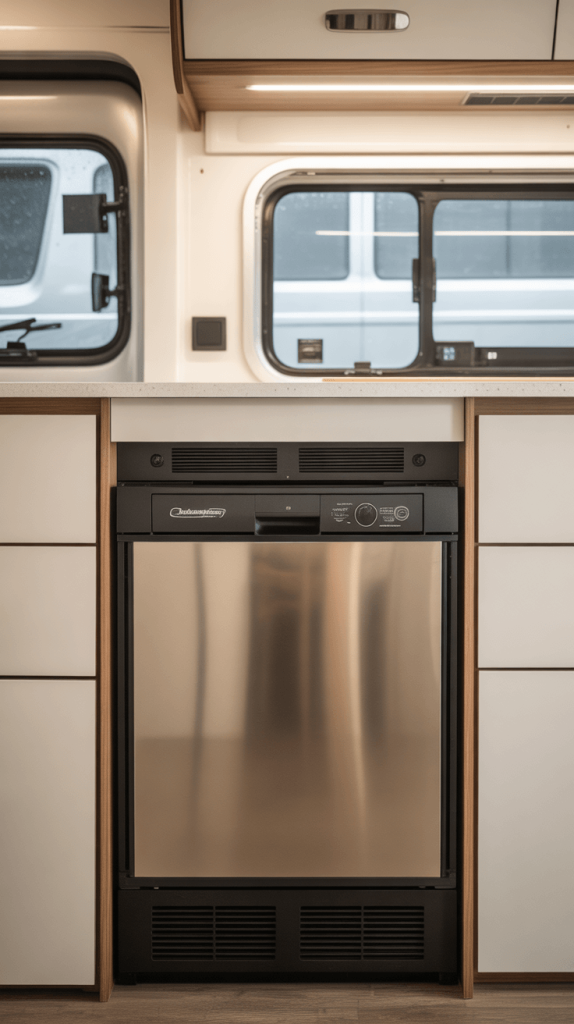
13. Upgrade to Energy-Efficient Appliances
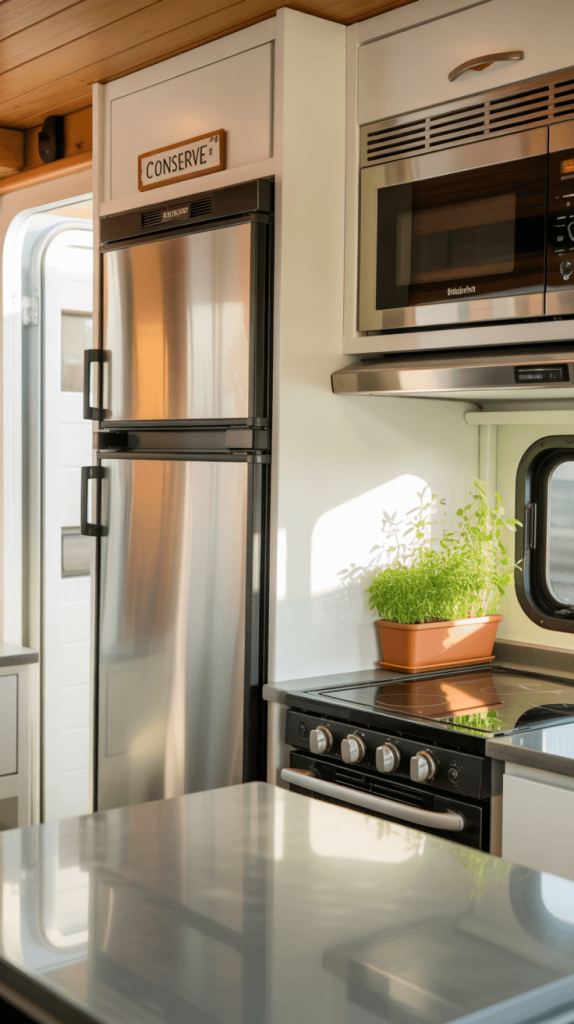
If your rig is older and still rocking its original appliances, you might be burning through propane and battery power like it’s going out of style.
Newer, energy-efficient appliances are designed to do more with less.
An RV-specific residential refrigerator (that runs efficiently on both AC and DC power) or a new propane furnace can be a big investment, but they pay off in convenience and efficiency. The biggest win is often swapping old incandescent bulbs for LEDs, as we already talked about.
- Why it Works: You’ll get more time off-grid, spend less on propane, and put less strain on your electrical system. It’s a practical upgrade that makes boondocking more comfortable.
- Pro Tip: Before you replace a major appliance, make sure it’s actually the bottleneck. Sometimes, adding better battery capacity or solar panels is a more effective first step. Do an energy audit of your rig to see where your power is really going.
14. Create a Minimalist Design for Easy Maintenance
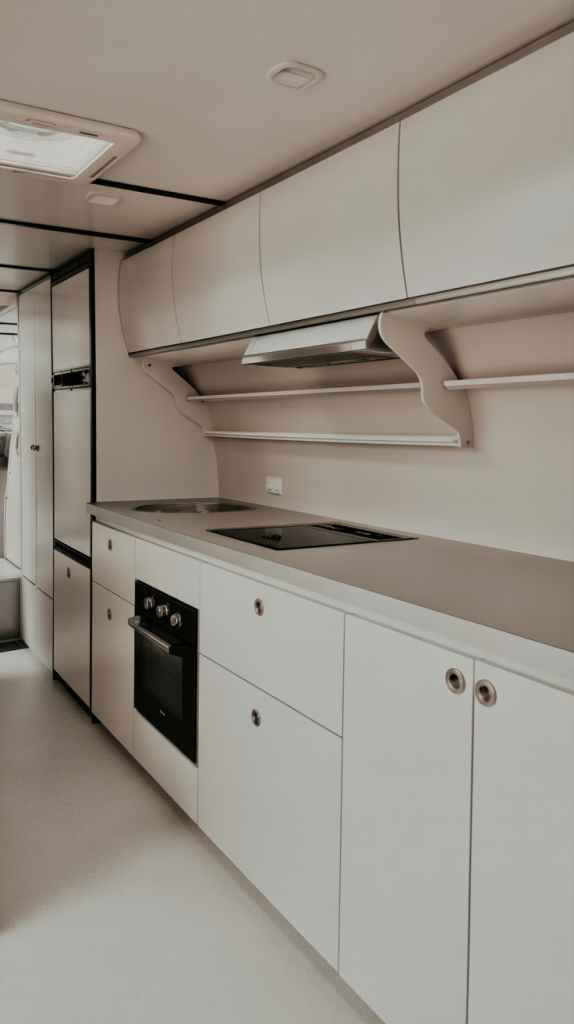
Less is more. Seriously. The fewer tchotchkes, doodads, and items you have sitting out on your counters, the bigger and cleaner your kitchen will feel.
A minimalist approach isn’t about being sterile; it’s about being intentional.
Every item on your counter should earn its keep. That means your coffee maker stays, but the collection of novelty salt and pepper shakers from every state might need to find a home in a closed cabinet.
- Why it Works: Fewer items on surfaces means less visual clutter, less stuff to secure for travel, and less dust and grime to clean. It makes the entire space feel calmer and more spacious.
- Pro Tip: Adopt a “one in, one out” rule. If you buy a new awesome kitchen gadget, an old one you don’t use as much has to go. This prevents the slow creep of clutter that plagues all of us.
15. Add Personal Touches with Custom Decor
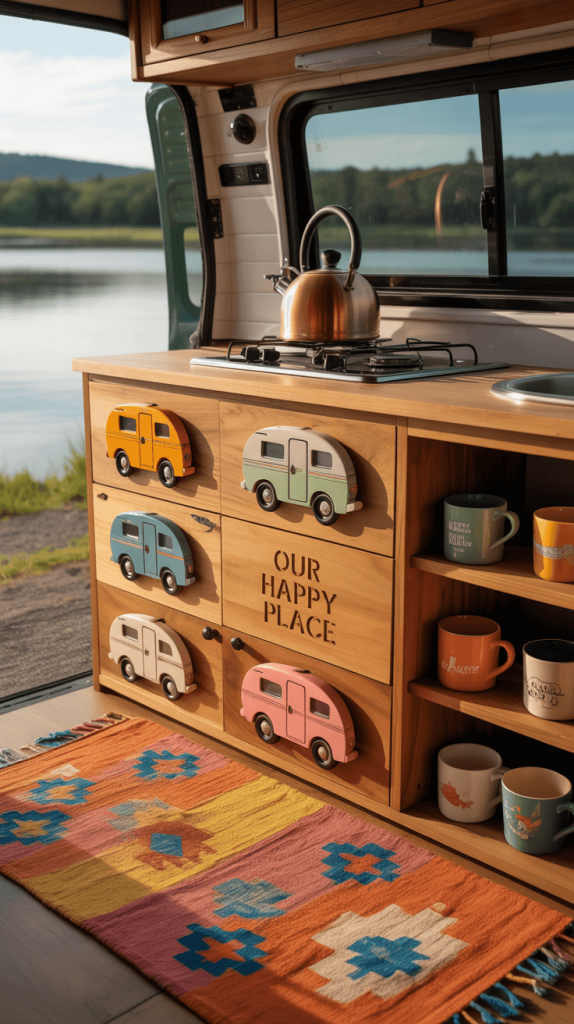
At the end of the day, an RV is your home. It shouldn’t just be functional; it should make you happy. The final and most important touch is you.
Hang a small piece of art that speaks to you.
Use colorful and fun textiles for your towels and pot holders. Display a few photos of your favorite adventures. Add a tiny plant (succulents are great travelers!) to a sunny spot.
- Why it Works: These personal touches transform a generic RV model into your home on wheels. It’s what gives your space heart and soul and makes you smile every time you walk in.
- Pro Tip: Use 3M Command strips for everything you hang. They hold securely but remove cleanly without damaging the walls, which is crucial for both travel and resale value. FYI, they are worth their weight in gold.
Conclusion
Whew! That was a lot, right? But see? Transforming your RV kitchen doesn’t have to mean a daunting, bank-breaking overhaul.
It’s about choosing a few clever ideas that solve your specific pain points.
Maybe you start with just #1 and #6—adding some shelves and getting stackable containers. That alone will feel revolutionary.
Next trip, you tackle the lighting (#9) or the peel-and-stick backsplash (#10).
Before you know it, you’ve created a space that is not only incredibly efficient but also a true reflection of your style.
The goal is to spend less time fighting with your kitchen and more time enjoying the meal—and the view—with the people you love.
So, what’s the first project you’re going to tackle? That useless cabinet under the sink is just begging for a pull-out trash bin, just saying… Happy remodeling, and I’ll see you out on the road