15 Minimalist Simple False Ceiling Design Ideas for Homes
Picture this: You walk into a room and something just feels right. The space breathes. The lighting hits perfectly. Everything flows. That’s the magic of a well-designed false ceiling – and honestly, it doesn’t need to scream for attention to make an impact.
I’ve spent the last decade obsessing over ceiling designs (weird hobby, I know), and here’s what I’ve learned: minimalist false ceilings pack the biggest punch. They transform spaces without the drama, add functionality without the fuss, and somehow make your rooms look like they belong in an architecture magazine. Plus, they won’t blow your budget or give your contractor a headache.
Ready to discover which simple false ceiling design will turn your home from “meh” to “magnificent”? Let’s explore 15 ideas that prove less really is more.
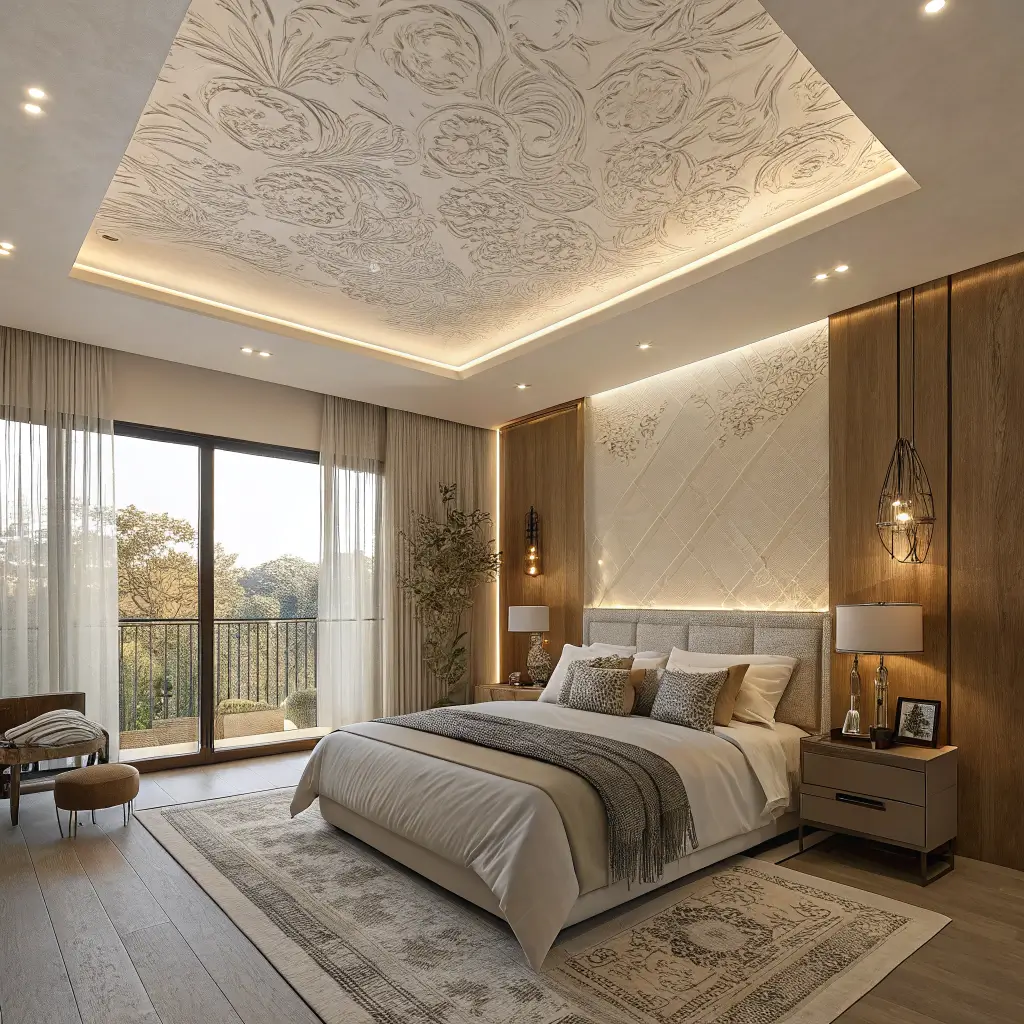
1. Minimalist Layered False Ceiling
The Art of Subtle Dimensions
You know what’s genius about layered false ceilings? They create depth without trying too hard. I installed one in my living room last year, and suddenly everyone thinks I hired an expensive designer. (I didn’t – just watched way too many YouTube tutorials.)
The layered approach works by creating two or three levels that step down from your original ceiling height. Each layer typically drops about 6-8 inches, creating this beautiful shadow play that makes your room feel taller. Weird how lowering the ceiling makes it feel higher, right?
Here’s what makes this design absolutely foolproof:
- Clean, straight lines that complement modern furniture
- Natural shadow effects that add visual interest
- Perfect for hiding ugly beams or uneven surfaces
- Works brilliantly with both square and rectangular rooms
Installation Tips That’ll Save Your Sanity
I learned this the hard way – always start with the outermost layer first. Trust me, working backwards saves you from redoing everything when measurements go wonky. Also, keep each layer at least 12 inches wide for proper visual impact.
The best part? You can add recessed LED strips between layers for that floating effect everyone goes crazy about. My electricity bill barely noticed the difference, but my Instagram followers definitely did 🙂
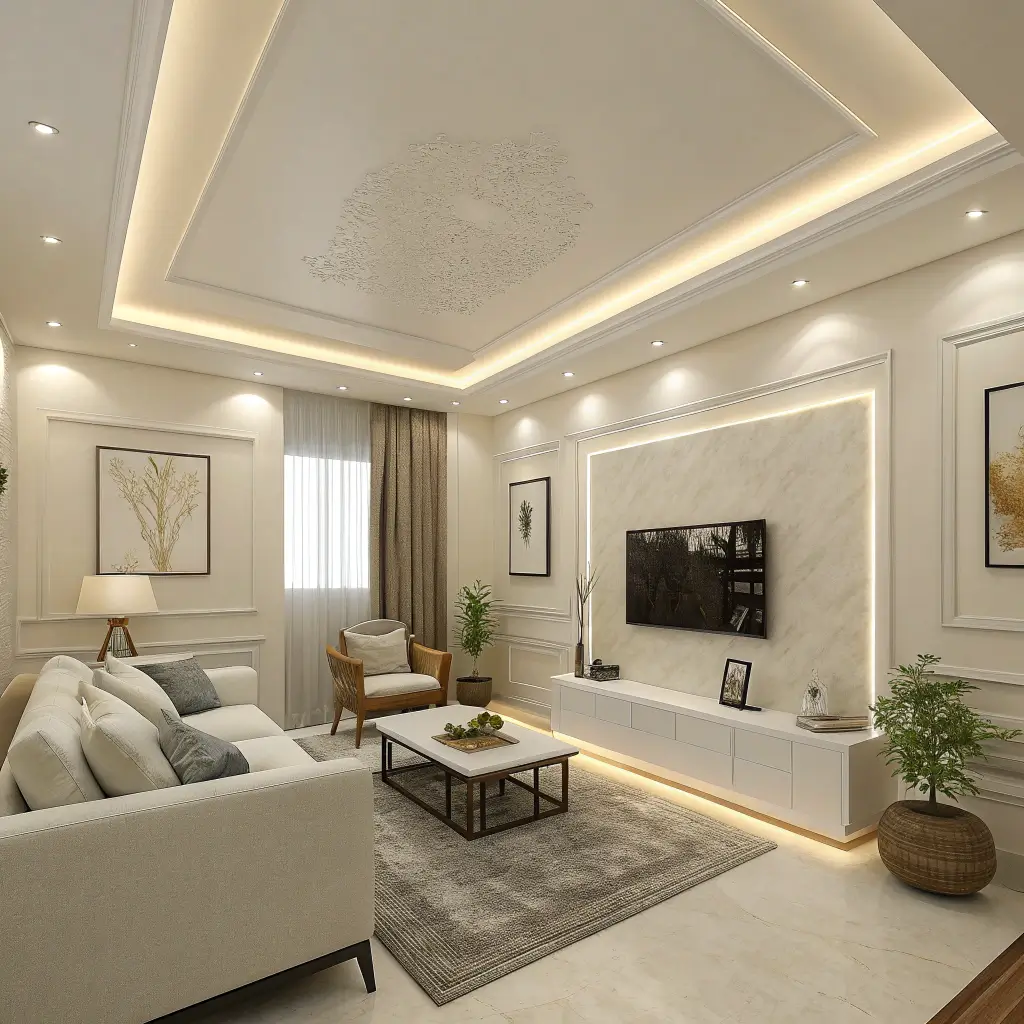
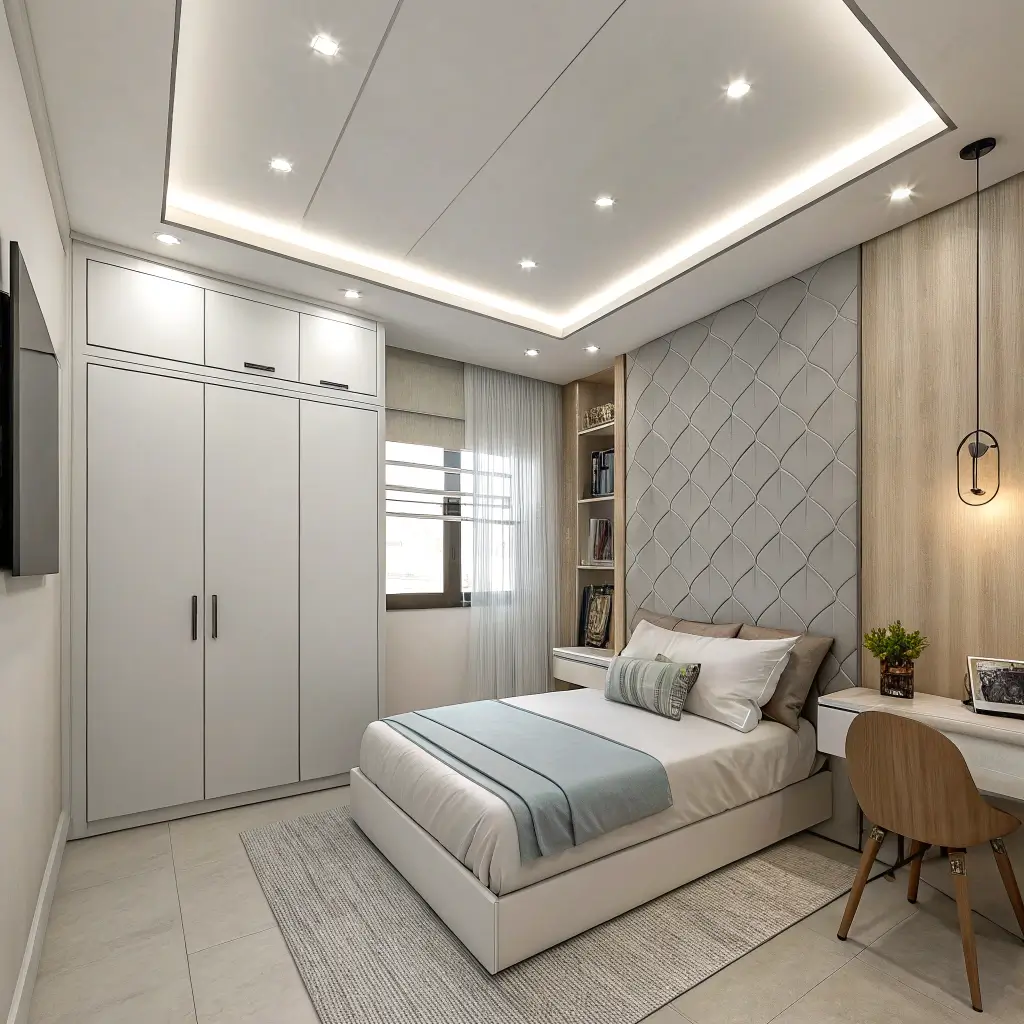
2. LED Cove Light Ceiling Design
Hidden Lighting That Changes Everything
Remember when we all thought ceiling lights had to hang down or stick out? Yeah, those days are over. Cove lighting hides in plain sight, washing your walls with this gorgeous ambient glow that makes everyone look 10 years younger. (Finally, lighting that works like an Instagram filter!)
The concept is beautifully simple. You create a recessed channel around your ceiling perimeter, tuck LED strips inside, and boom – instant sophistication. The light bounces off your walls and ceiling, creating this soft, indirect illumination that screams expensive taste.
Why Cove Lighting Beats Traditional Options
Let me break down why I’m obsessed with this design:
- Zero glare – perfect for TV rooms and bedrooms
- Creates the illusion of higher ceilings
- Energy-efficient LED strips last forever (okay, like 50,000 hours)
- Dimmable options for mood lighting
- No visible fixtures to collect dust
I’ve installed these in three different homes now, and each time people ask if I hired a lighting designer. Nope, just followed some basic rules: keep the cove at least 6 inches deep, angle it at 45 degrees, and use warm white LEDs unless you want your room to feel like a hospital.
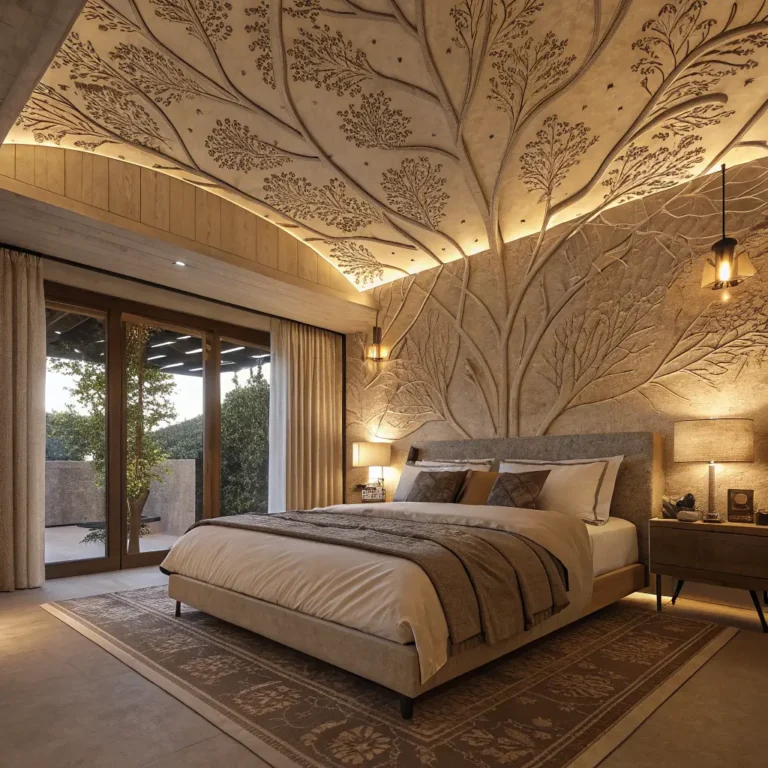
3. Wooden Panel False Ceiling
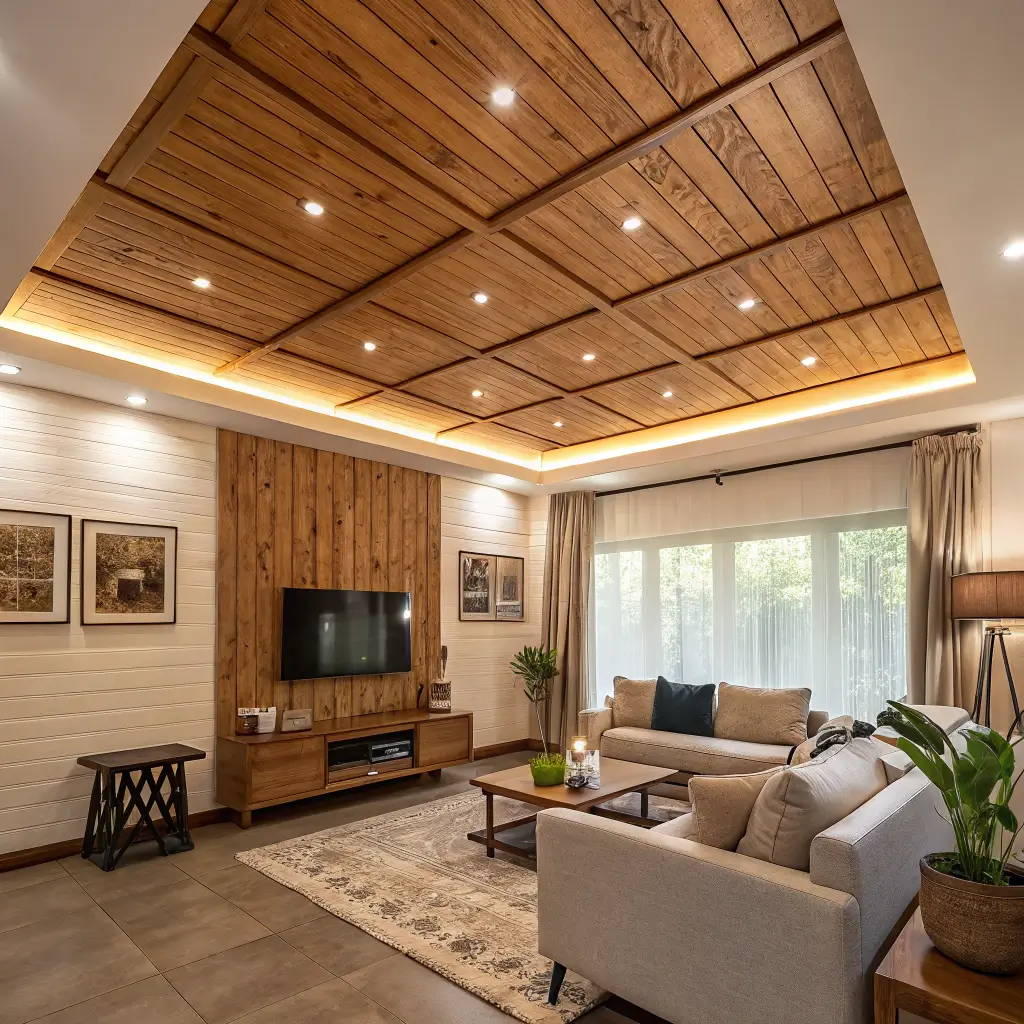
Bringing Nature Indoors (Without the Maintenance)
Who says minimalist can’t be warm? Wooden panel ceilings add that cozy, cabin-like vibe without making your space feel heavy or dated. I was skeptical at first – wouldn’t wood make my room feel smaller? Turns out, horizontal wood panels actually make spaces feel wider. Mind blown.
The trick lies in choosing the right wood tone and panel width. Light oak or ash keeps things airy, while narrow panels (think 3-4 inches) maintain that clean, minimalist aesthetic. You’re going for Scandinavian chic, not 1970s basement rec room.
Smart Wood Choices for Modern Homes
Here’s what works best:
- Engineered wood veneers – consistent grain, no warping
- Bamboo panels for eco-conscious homeowners
- Whitewashed or grey-stained options for contemporary vibes
- Mix wood with white gypsum borders for contrast
FYI, you don’t need to cover the entire ceiling. A wooden panel insert in the center or above your dining area creates a stunning focal point without overwhelming the space.
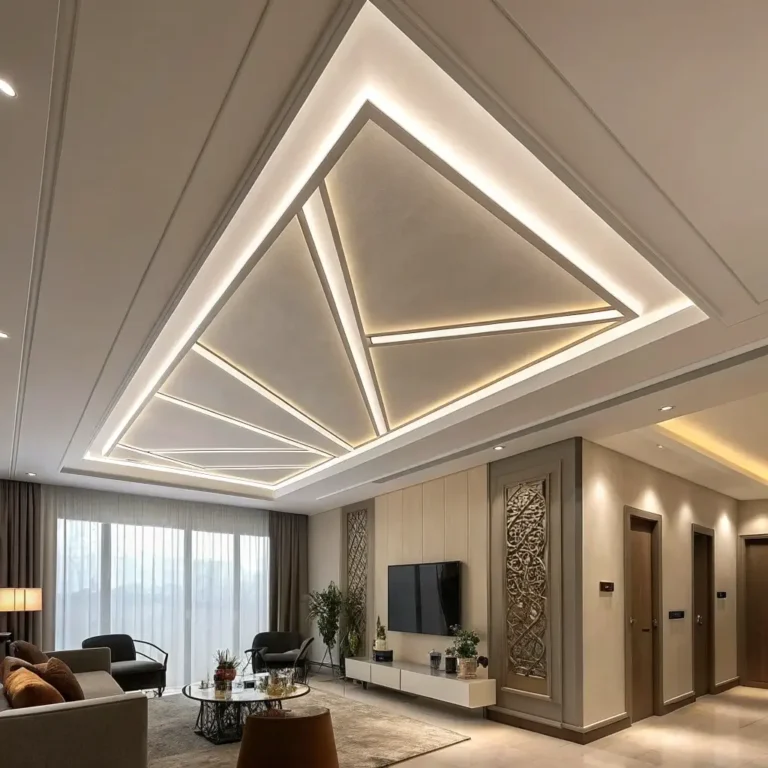
4. Gypsum Board Geometric Ceiling
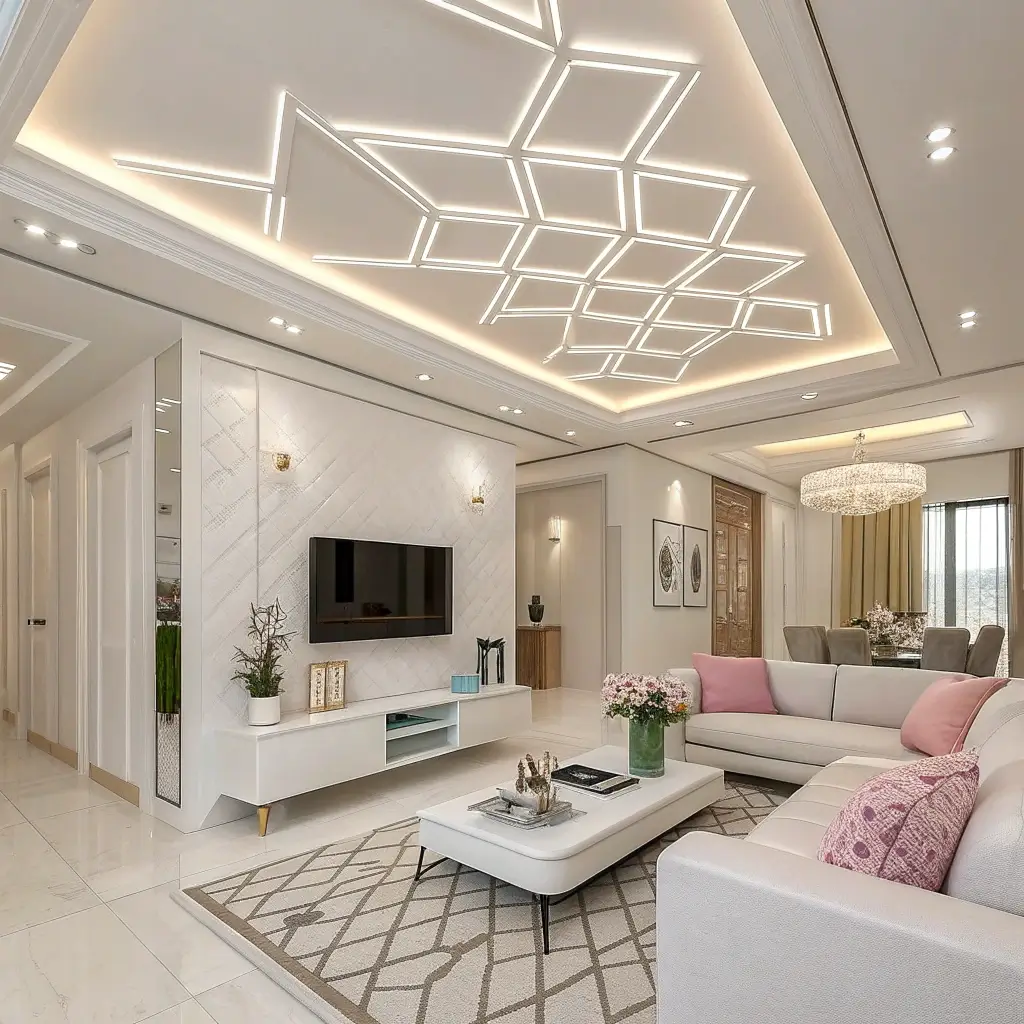
When Math Meets Style
Geometric ceilings make me feel like I’m living inside a piece of modern art. Simple shapes – rectangles, squares, hexagons – arranged in patterns that somehow make perfect sense and blow your mind simultaneously.
I recently helped my neighbor design a geometric ceiling with interlocking rectangles. We kept it super simple: three rectangular frames of different sizes, nested inside each other. The result? Their boring bedroom ceiling became the room’s main attraction. And get this – it only took their contractor two days to complete.
Creating Visual Interest Without Chaos
The beauty of geometric designs lies in their versatility:
- Single large shapes for minimalist impact
- Repeated patterns for rhythm and flow
- Asymmetrical arrangements for modern edge
- Combined with lighting for dramatic shadows
Pro tip: Start with paper cutouts on your floor to visualize the pattern. What looks good on paper doesn’t always translate to a 10-foot ceiling. (Ask me how I know…)
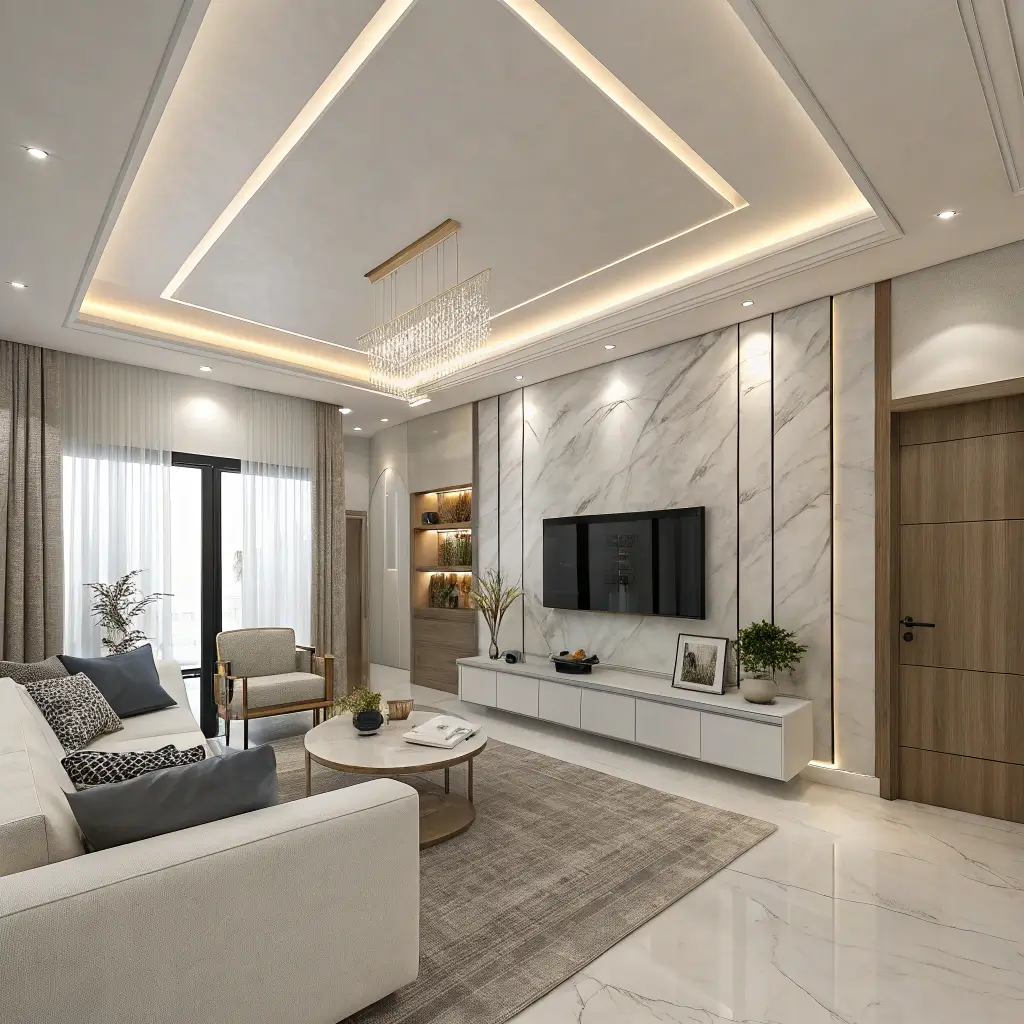
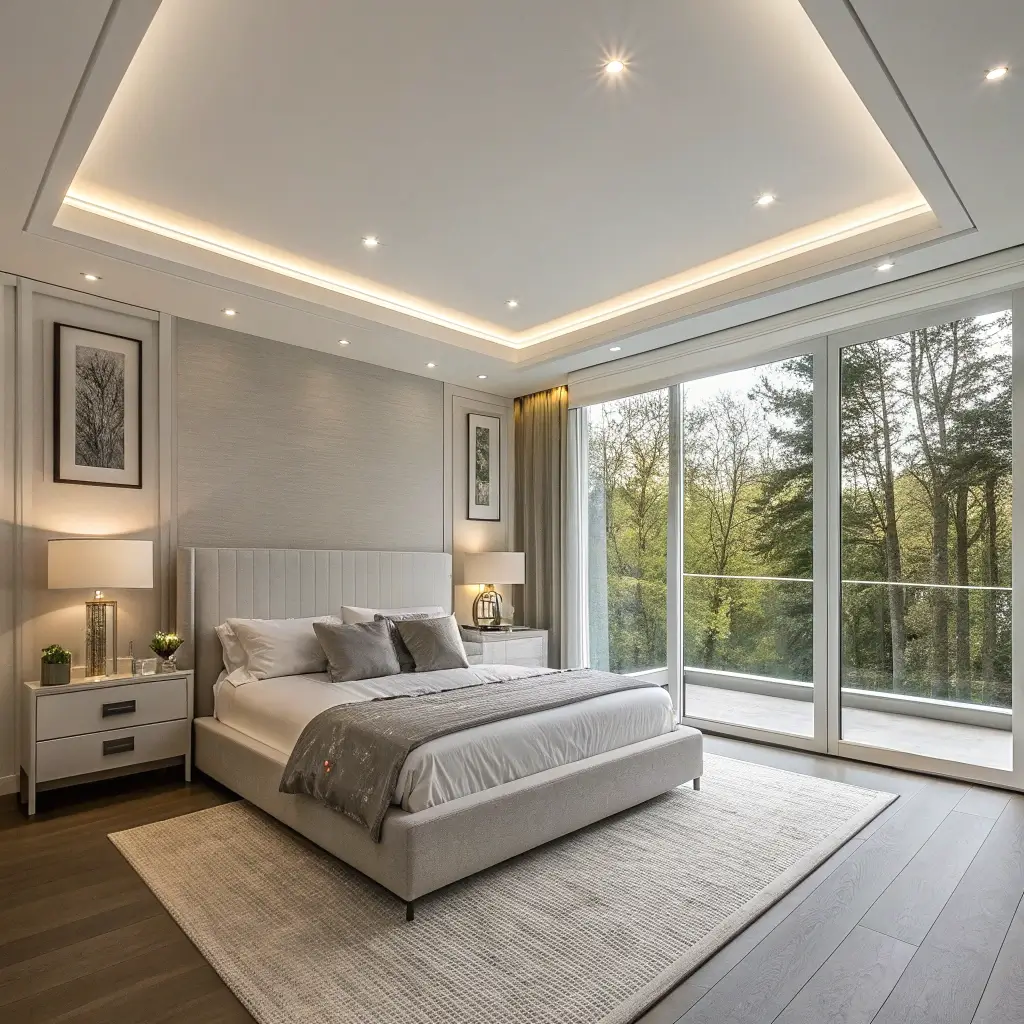
5. Floating Rectangle False Ceiling
The Illusion That Defies Gravity
Ever seen a ceiling that looks like it’s hovering? That’s the floating rectangle effect, and it’s easier to achieve than you’d think. By recessing the edges and adding hidden LED strips, you create this magical floating island that appears to defy physics.
My living room features a floating rectangle right above the seating area. Guests always ask how it’s “attached” – the hidden mounting and perimeter lighting create such a convincing illusion that people think it’s actually suspended.
Design Proportions That Work
Getting the size right is crucial:
- Rectangle should cover 40-60% of your room area
- Leave at least 18 inches from walls for the floating effect
- Keep thickness between 8-12 inches for proper proportion
- Center it over your main furniture grouping
The gap between the floating element and your actual ceiling? That’s where the magic happens. Hide your LED strips there, and watch your ceiling come alive at night.
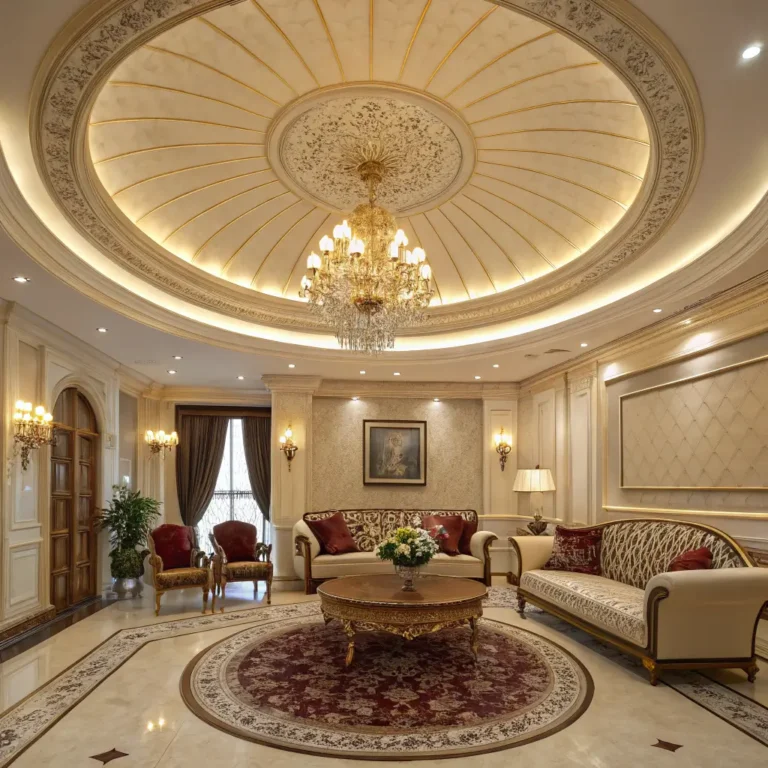
6. Circular Recessed Ceiling Design
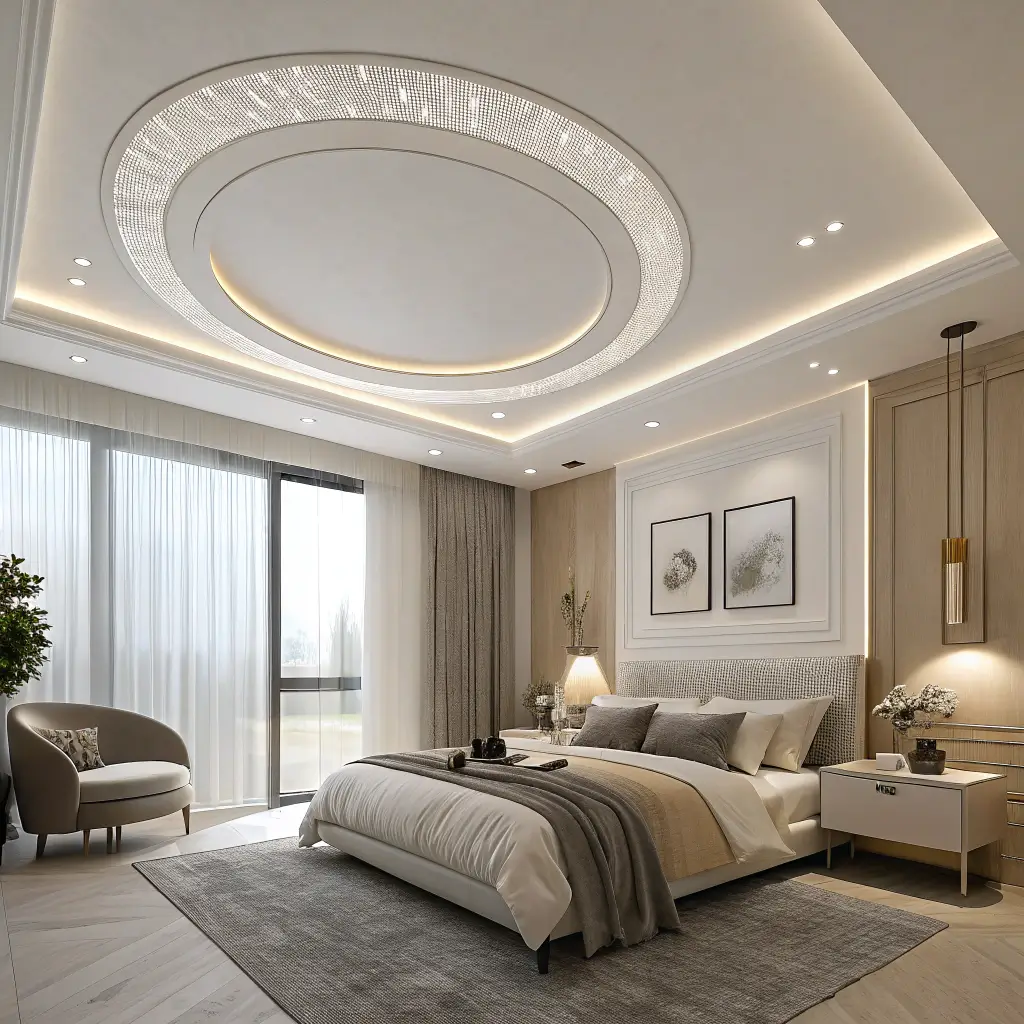
Breaking the Box With Curves
Squares and rectangles getting boring? Circular recessed ceilings add that unexpected curve that softens harsh angles and creates flow. Think of it as architectural feng shui – the circle brings balance to all those straight lines in your furniture and walls.
I’ll admit, I was nervous about adding a circle to my rectangular dining room. Wouldn’t it look weird? Nope. The 6-foot diameter circle above my dining table became the perfect frame for my chandelier. It defines the space without walls and makes family dinners feel somehow more intimate.
Making Circles Work in Square Rooms
Here’s how to nail the circular design:
- Size your circle to match your table or seating area
- Recess depth of 6-8 inches creates subtle definition
- Multiple smaller circles work better than one massive one
- Combine with pendant lights for layered lighting
The installation requires a skilled contractor (curves are trickier than straight lines), but the payoff is huge. Your ceiling becomes sculpture, not just structure.
Also Read: 15 Stunning Luxury Ceiling Design Ideas to Elevate Your Home
7. Modern Strip Light Ceiling
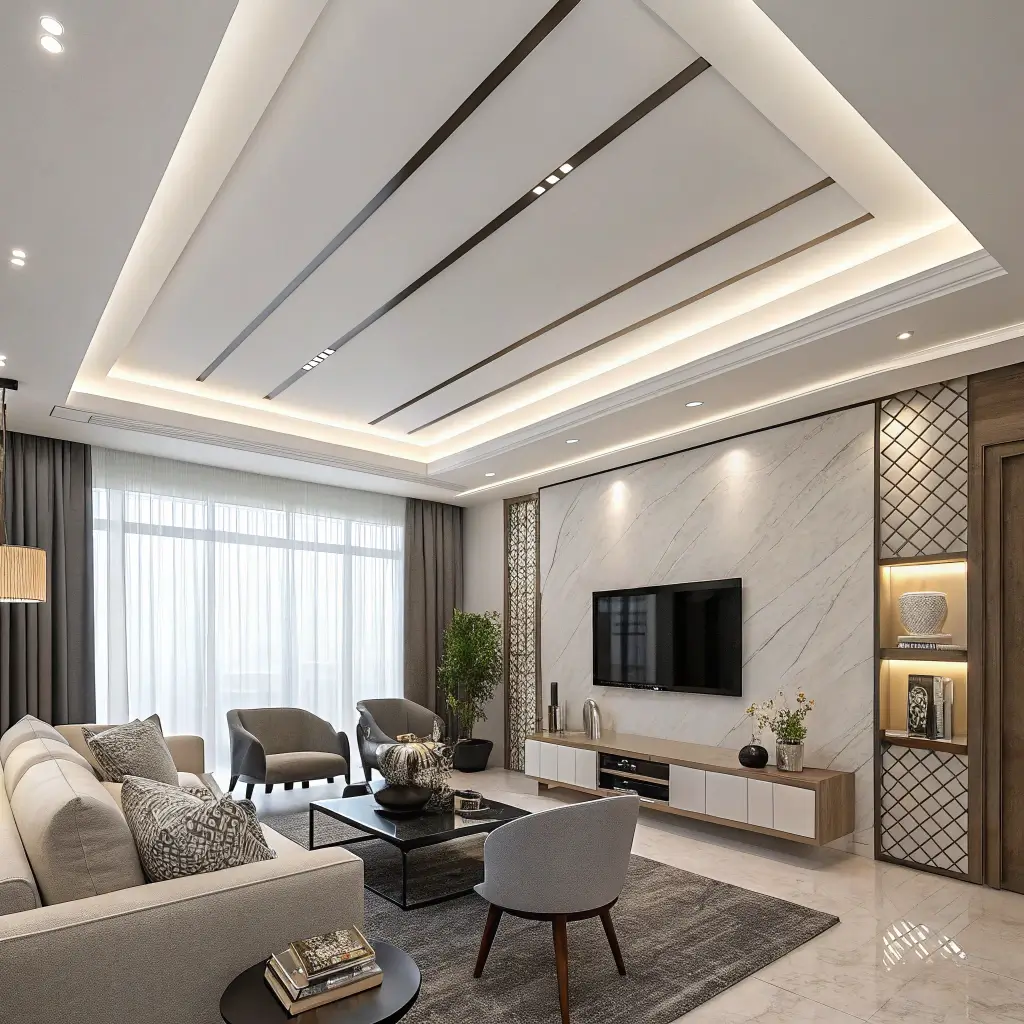
Lines of Light That Guide the Eye
Strip lights aren’t just for under cabinets anymore. Linear LED strips integrated into your ceiling create these amazing light lines that can make your room feel longer, wider, or simply more futuristic.
My home office features three parallel strips running the length of the ceiling. They provide incredible task lighting while making my narrow room feel twice as wide. Plus, they look like something from a sci-fi movie set (in the best way possible).
Strategic Strip Placement for Maximum Impact
Consider these approaches:
- Parallel strips for lengthening effect
- Perpendicular lines to widen narrow spaces
- Border strips for defining zones
- Diagonal arrangements for dynamic energy
The key? Don’t go overboard. Three to five strips max, or your ceiling starts looking like a subway map. Space them evenly, usually 2-3 feet apart, and always use dimmers. Trust me on this one.
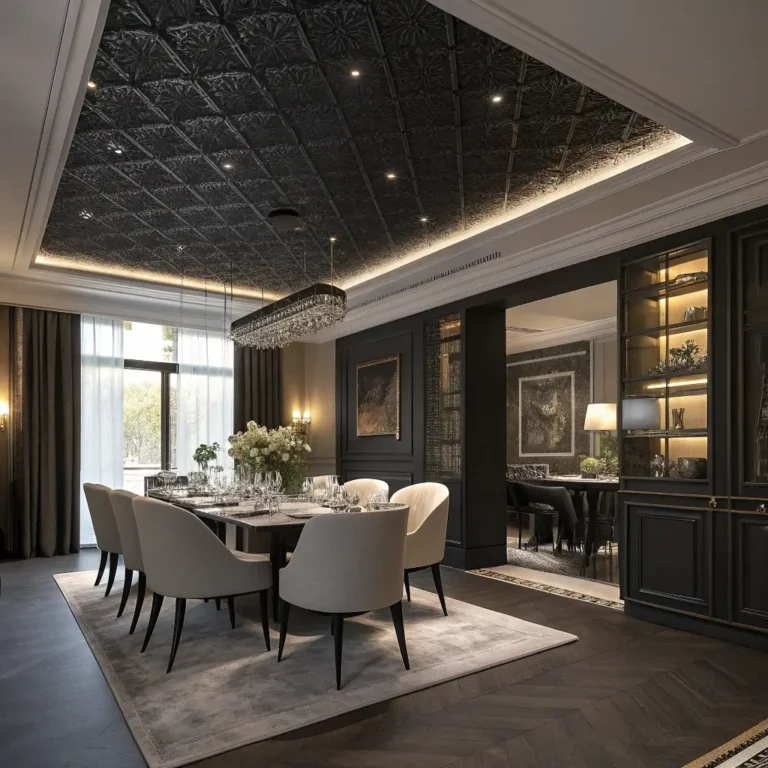
8. Textured Plaster Ceiling
Subtle Texture, Major Impact
Who says minimalist means perfectly smooth? Textured plaster adds depth and character without compromising simplicity. We’re not talking popcorn ceilings here (shudder) – think subtle sand finishes, gentle swirls, or barely-there stippling.
I experimented with a sand-finish plaster in my guest bedroom. The texture is almost invisible during the day, but when evening light hits it? The ceiling transforms into this gorgeous canvas of subtle shadows. It’s like having artwork overhead.
Texture Techniques That Stay Sophisticated
Keep it classy with these options:
- Fine sand texture – adds grip without roughness
- Venetian plaster for subtle shimmer
- Skip trowel technique for organic patterns
- Smooth knockdown for barely-there texture
The application requires an experienced plasterer (this isn’t a DIY weekend project), but the maintenance is zilch. No painting required, and the texture actually hides minor imperfections better than smooth ceilings.
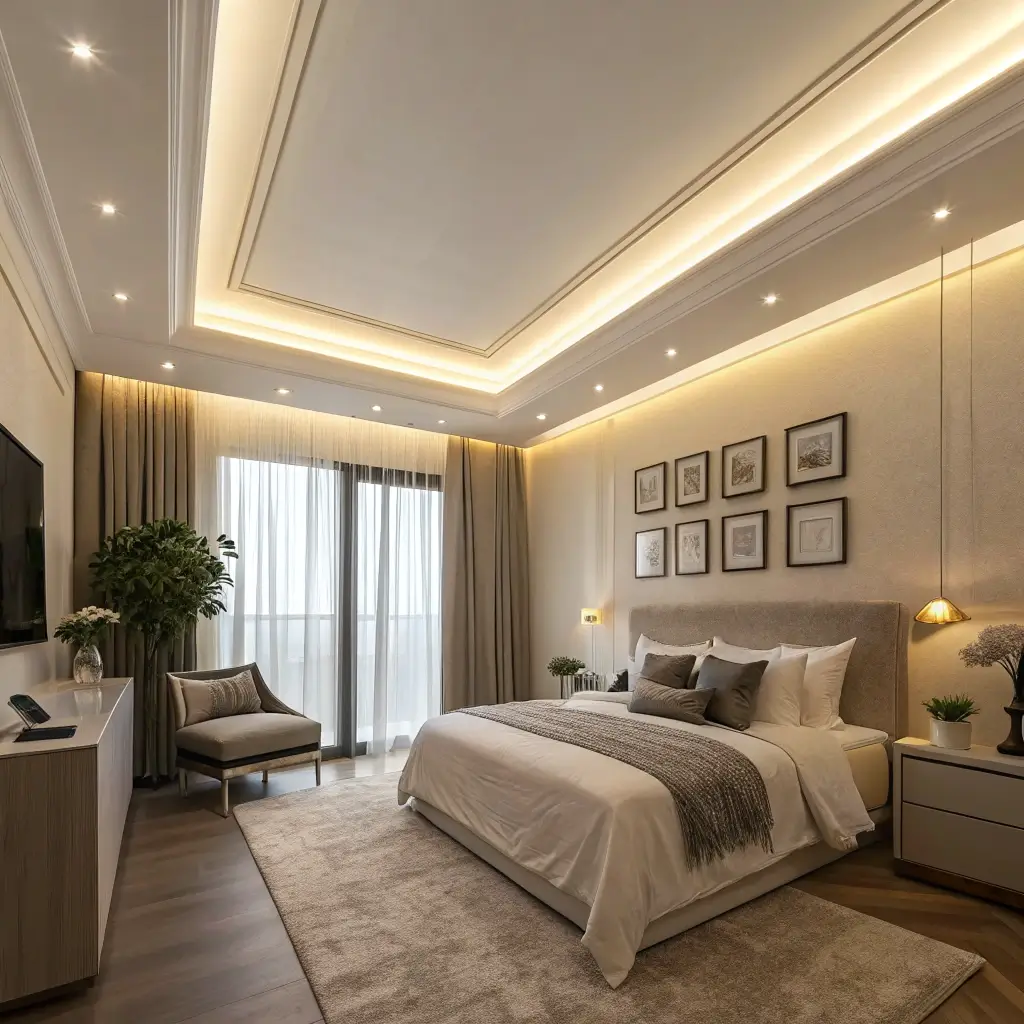
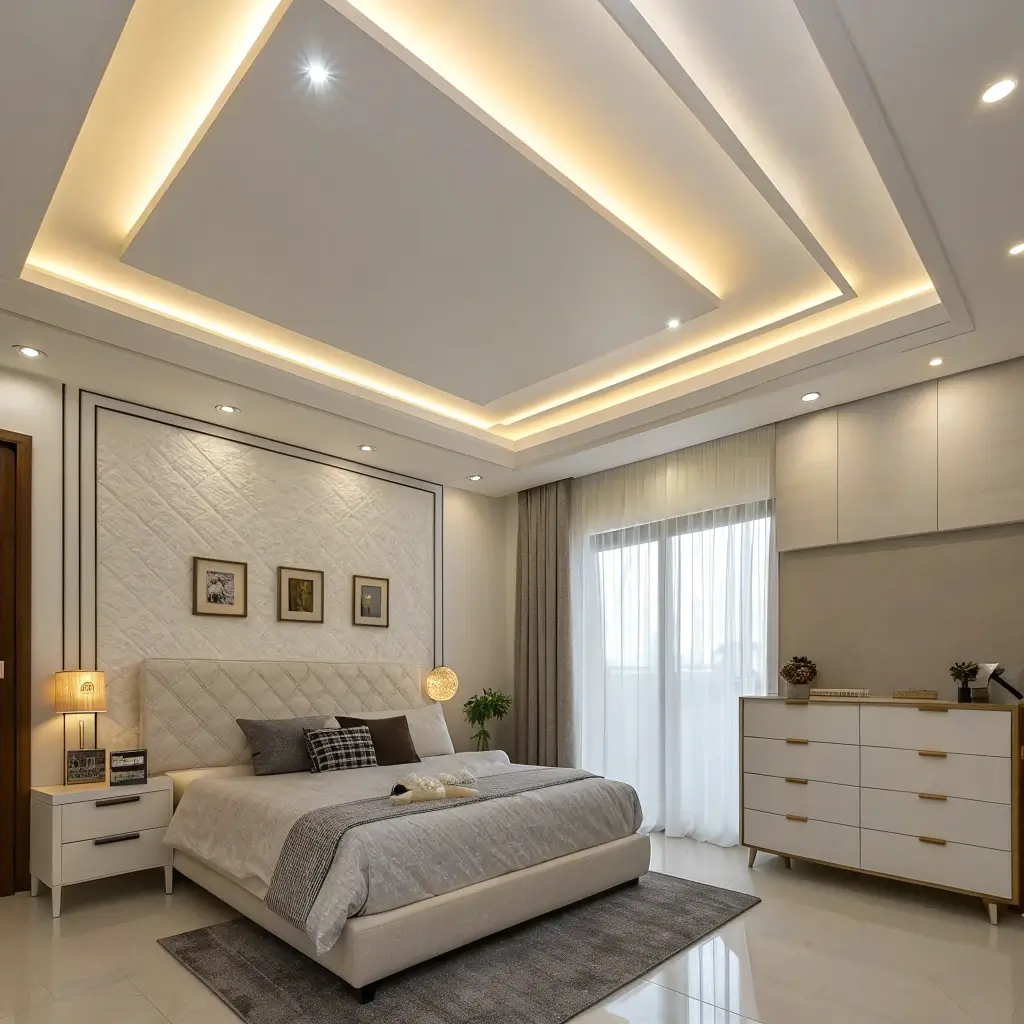
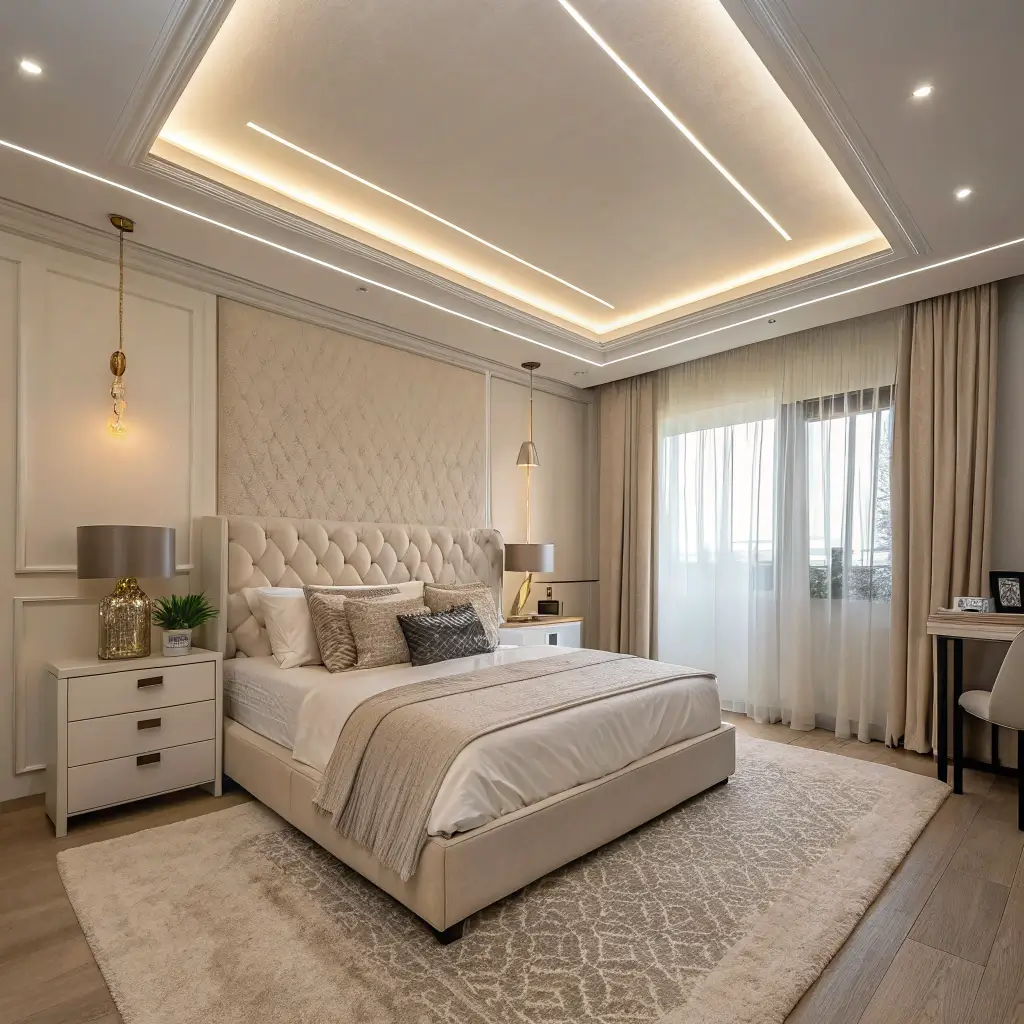
9. Simple Border False Ceiling
Framing Your Space With Finesse
Sometimes the simplest ideas hit hardest. A border false ceiling drops down just around your room’s perimeter, creating a frame that defines your space without overwhelming it. It’s like adding a picture frame to your room – suddenly everything inside looks more intentional.
My master bedroom has a 12-inch border that runs around all four walls. We tucked cove lighting inside, and now the room has this gorgeous glow every evening. The center stays at original height, so the room still feels spacious. Win-win.
Border Design Rules That Never Fail
Follow these guidelines:
- Border width of 12-18 inches works for most rooms
- Drop height of 6-10 inches creates definition
- Keep corners crisp and clean
- Add indirect lighting for evening ambiance
IMO, this is the perfect starter false ceiling. It’s relatively affordable, doesn’t require major structural work, and instantly upgrades any room. Plus, if you change your mind later, it’s easy to modify.
Also Read: 15 Elegant Gypsum Ceiling Design Ideas for Dream Interiors
10. Two-Tone Color False Ceiling
Playing With Contrast (Subtly)
Forget rainbow ceilings – two-tone designs using neutral shades create sophisticated contrast without the circus tent vibe. White and grey, cream and taupe, or my personal favorite: pure white with the softest hint of sage green.
Last year, I painted my living room ceiling white with a dove grey recessed center. The contrast is barely noticeable in photos, but in person? It adds this incredible depth that makes the room feel larger and more intentional. People always comment on how “put together” the space feels.
Color Combinations That Always Work
Stick with these winning pairs:
- White and light grey – timeless and versatile
- Cream and warm beige – cozy without heaviness
- White and pale blue – perfect for bedrooms
- Off-white and charcoal – dramatic yet refined
The transition between colors should align with architectural features. Use the false ceiling levels, beams, or geometric shapes as natural color boundaries. Random color blocking looks messy, not minimalist.
11. Grid Pattern False Ceiling

Organized Chaos That Makes Sense
Grid patterns speak to my inner perfectionist. Equal squares or rectangles arranged in perfect formation create rhythm and order while adding visual interest. It’s like turning your ceiling into a piece of geometric art that also happens to hide wiring and improve acoustics.
My home theater features a 3×3 grid with recessed panels. Each panel has subtle LED backlighting, creating this amazing checkerboard effect when dimmed. The grid also houses acoustic panels, so movie dialogue sounds crystal clear. Form meets function at its finest.
Grid Specifications for Different Rooms
Here’s what works:
- Large grids (4×4 feet) for spacious rooms
- Smaller grids (2×2 feet) for intimate spaces
- Rectangular grids to emphasize room direction
- Mix solid and recessed panels for variety
Keep the grid frame slim – about 4 inches wide max. Anything wider starts looking heavy and defeats the minimalist purpose. The beauty lies in the repetition and precision, not the bulk.
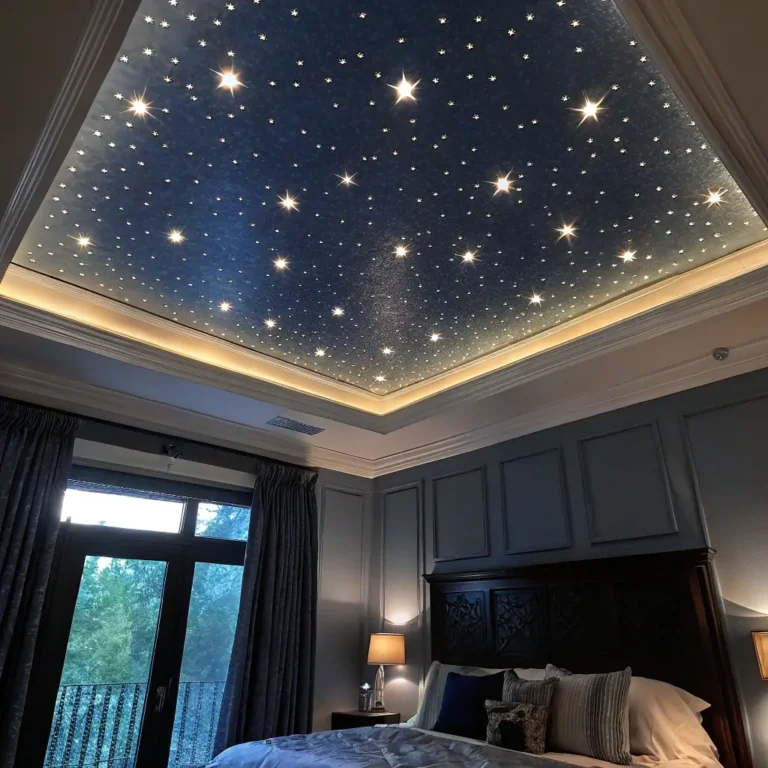
12. Ceiling with Hidden Lights
Invisible Illumination Magic
Want to know the ultimate minimalist flex? Lighting you can’t see. Hidden lights tucked behind panels, inside recesses, or above translucent materials create ambient lighting without a single visible fixture.
I went full ninja with my bathroom ceiling. The entire ceiling glows evenly thanks to LED panels hidden above frosted acrylic sheets. No shadows, no hot spots, just pure, even light that makes everyone look amazing. My morning routine has never been better :/
Hiding Spots for Maximum Effect
Strategic placement options include:
- Behind floating panels for perimeter glow
- Above stretch fabric for diffused light
- Inside ceiling coffers for indirect illumination
- Behind crown molding for wall washing
The trick is using enough lights to avoid dark spots. Calculate about 20 watts of LED per 100 square feet for ambient lighting. Double that for task areas like kitchens or offices.
Also Read: 15 Modern POP False Ceiling Design Ideas That Look Expensive
13. Curved Flow False Ceiling

Organic Shapes in a Linear World
Curves change everything. A flowing, curved false ceiling breaks up the tyranny of right angles and creates movement in static spaces. Not talking about crazy waves here – just gentle, subtle curves that guide your eye and soften the room’s energy.
My hallway used to feel like a bowling alley – long, narrow, boring. Adding a gently curved false ceiling that flows from the entrance to the living room transformed it into this elegant transition space. The curve leads visitors naturally through the home. Architecture as wayfinding!
Curve Considerations for Success
Master the curve with these tips:
- Gentle S-curves work better than dramatic waves
- Follow the room’s natural traffic flow
- Use curves to connect different ceiling heights
- Combine with linear elements for balance
Installation requires flexible materials like bent gypsum board or specialized metal frames. Yes, it costs more than straight lines, but the impact? Priceless. Your ceiling becomes a sculptural element that nobody expects.
14. Compact Square False Ceiling
Small Statements, Big Impact
Not every room needs a massive ceiling treatment. Compact square false ceilings create focal points without overwhelming smaller spaces. Think of them as ceiling accent pieces – they draw attention exactly where you want it.
My breakfast nook features a 4×4 foot square false ceiling directly above the table. It defines the dining area in my open-plan kitchen without walls or partitions. Add a pendant light through the center, and suddenly that corner table becomes a destination, not an afterthought.
Sizing and Positioning Squares
Get it right with these guidelines:
- Match square size to furniture below
- Center precisely for symmetrical impact
- Multiple small squares for larger rooms
- Combine with downlights for task lighting
The beauty of compact squares? They’re budget-friendly and quick to install. Perfect for renters who want impact without major renovation. Your landlord won’t even notice (probably).
15. False Ceiling with Skylight Effect
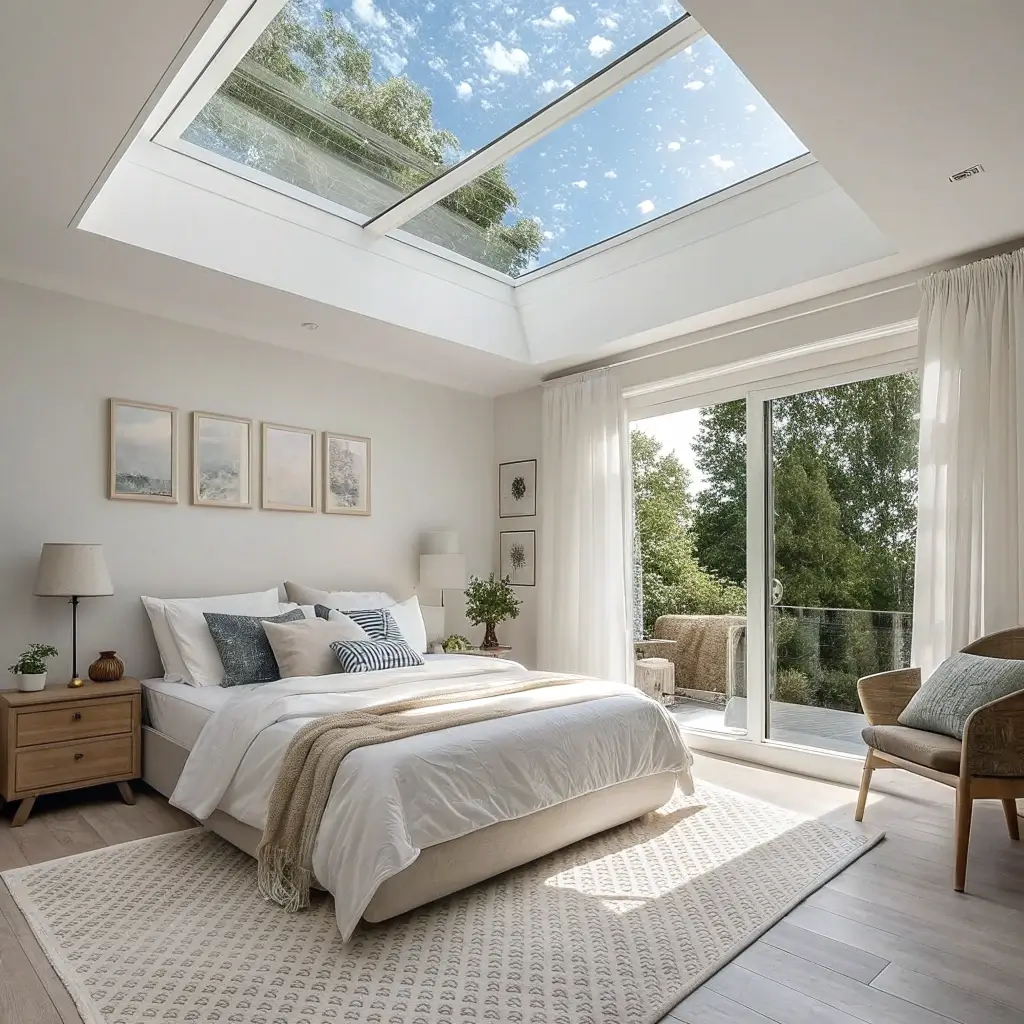
Bringing the Outside In
Can’t afford a real skylight? Fake it with a false ceiling skylight effect. Using backlit panels, smart glass, or even LED sky panels, you create the illusion of natural light streaming from above. It’s particularly genius for windowless rooms or basements.
I installed a LED sky panel in my windowless home office last winter. The panel mimics natural daylight cycles – bright and blue in the morning, warm and golden by evening. My productivity shot up, and those 3 PM energy crashes? Gone. Sometimes fake nature works better than the real thing.
Creating Convincing Skylight Effects
Make it believable with these techniques:
- LED panels with daylight color temperature (5000-6500K)
- Frosted glass or acrylic for diffusion
- Recessed frame for authentic depth
- Smart controls for changing light throughout the day
Position your fake skylight where a real one would go – avoid corners and keep it centered in the ceiling section. The illusion works best when it makes architectural sense.
Making Your Choice: Which Design Fits Your Space?
So which minimalist false ceiling should you choose? Here’s my honest take: start with your room’s function first. Bedrooms benefit from soft, indirect lighting designs like cove lighting or hidden lights. Living rooms can handle more dramatic statements like floating rectangles or geometric patterns. Kitchens need practical solutions like grid patterns that can incorporate task lighting.
Consider your budget too. Simple border ceilings and two-tone colors cost less than curved designs or complex geometric patterns. But here’s the thing – even the simplest false ceiling elevates your space beyond basic drywall. You’re not just covering pipes and wires; you’re creating architecture.
The Installation Reality Check
Let’s talk real talk about installation. Unless you’re seriously handy, hire a professional. I tried DIY-ing a simple false ceiling once. Let’s just say it’s now my cautionary tale at dinner parties. False ceilings require precise measurements, level installation, and proper support. One miscalculation and you’re looking at cracks, sagging, or worse.
Budget for the whole project:
- Materials: 40-50% of total cost
- Labor: 30-40% of total cost
- Lighting: 10-15% of total cost
- Finishing: 5-10% of total cost
- Contingency: Always add 10-15% buffer
Most minimalist designs take 3-7 days to complete, depending on room size and complexity. Yes, you’ll deal with dust and disruption, but the transformation? Totally worth the temporary chaos.
Living With Your New Ceiling
Here’s what nobody tells you about false ceilings – they change how you use your space. That floating rectangle above your sofa? It naturally creates a conversation zone. The cove lighting in your bedroom? You’ll find yourself dimming it for evening relaxation without thinking.
Maintenance is surprisingly minimal. Dust occasionally, check LED strips yearly, and repaint every 5-7 years. Way less hassle than maintaining exposed beams or dealing with popcorn ceiling removal.
The best part? These minimalist designs age gracefully. While trendy treatments look dated fast, clean lines and simple geometry stay fresh. Your ceiling becomes a timeless backdrop that adapts to changing decor trends below.
Your Ceiling, Your Statement
Look, we spend so much time choosing furniture, agonizing over paint colors, and arranging wall art. Why ignore the fifth wall? A minimalist false ceiling doesn’t scream for attention – it whispers sophistication. It’s the difference between a room that functions and one that truly flows.
Whether you choose the subtle elegance of hidden lights, the modern edge of geometric patterns, or the organic flow of curves, you’re making a statement: good design doesn’t need to shout. Sometimes the most powerful design element is the one people don’t immediately notice – they just feel its impact.
Ready to look up and see possibility instead of plain drywall? Pick your favorite design, find a skilled contractor, and prepare for the compliments. Because once you go false ceiling, there’s no going back to boring. Trust me – I’ve got 15 different ceilings to prove it.