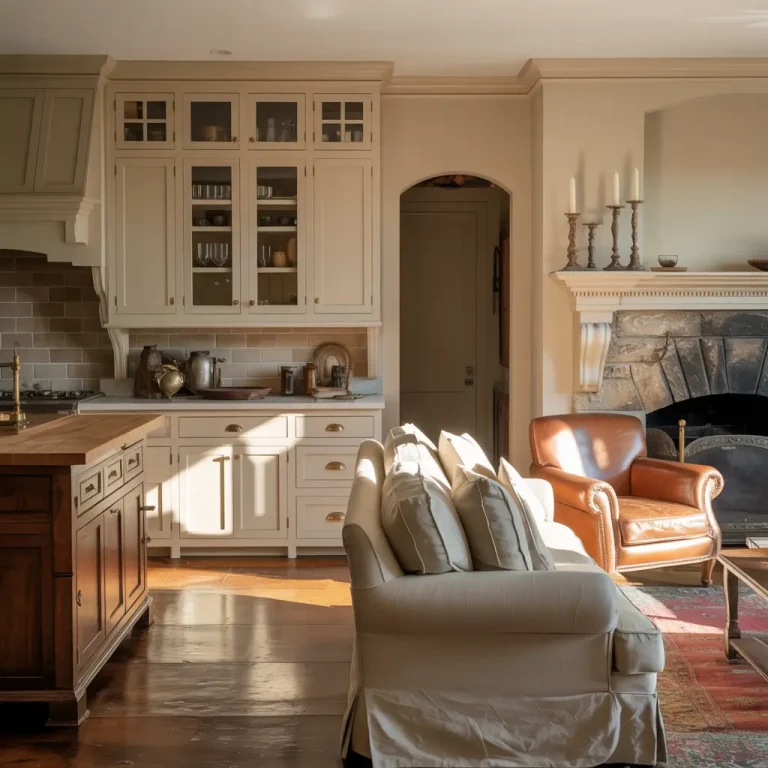
15 Simple Kitchen Remodel Ideas to Transform Your Space Quickly & Affordably
Alright, let’s have a real talk. You’re scrolling through Instagram or Pinterest, you see these flawless, magazine-worthy kitchens, and you let out a sigh that could power a small wind turbine. Your kitchen… doesn’t look like that.
Maybe the cabinets are from a questionable decade, the countertops are stained, or you have approximately three square inches of usable counter space. The thought of a full-blown, down-to-the-studs kitchen remodel makes your wallet spontaneously combust in your pocket. I get it. I’ve been there.
But what if I told you that you don’t need a second mortgage or a six-month-long construction project to fall in love with your kitchen again? It’s true. The secret is focusing on high-impact, low-cost changes that add up to a massive transformation.
We’re talking about clever upgrades, smart cosmetic touches, and organizational wins that make your space not only look better but work better for you.
I’ve tackled more DIY projects than I can count (some successful, some… well, let’s call them “learning experiences”), and I’ve compiled the absolute best, most affordable ideas that actually work.
So, grab a coffee, and let’s dive into 15 simple ways to give your kitchen a fresh, new lease on life without calling in a team of contractors.
15 Simple Kitchen Remodel Ideas
1. Install Open Shelving for a Modern Look
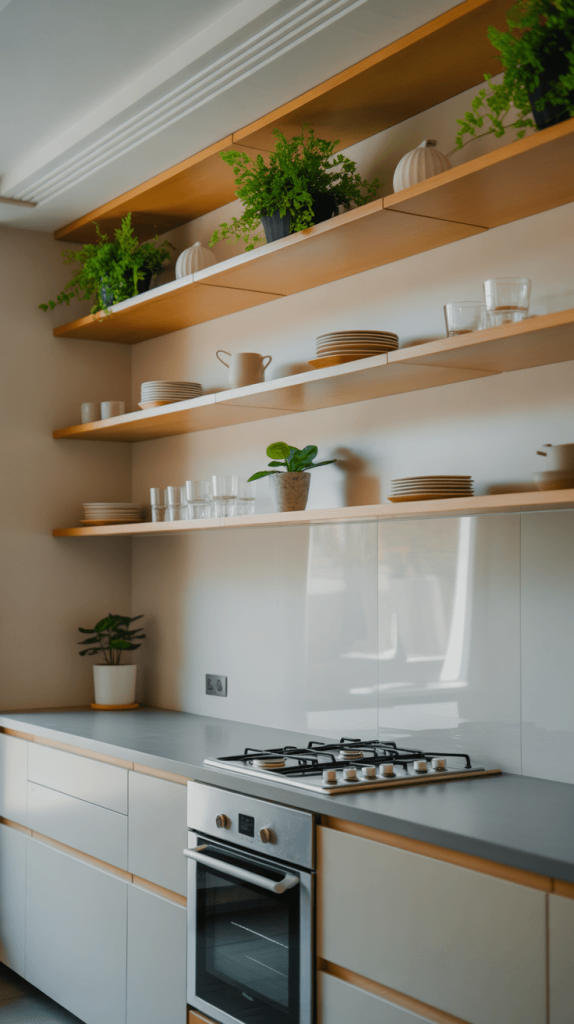
- Let’s kick things off with one of my personal favorites. Open shelving is like the cool, laid-back cousin of the upper cabinet.
- It instantly makes a kitchen feel airy, open, and modern.
- Why it works: Upper cabinets can be bulky and visually heavy. Swapping out just one section (like the cabinets flanking your sink or stove) for a couple of floating shelves creates negative space and makes your ceiling appear higher. It forces you to curate your items, turning your pretty dishes, glassware, and cookbooks into display-worthy decor.
- How to do it affordably:
- The DIY Route: You can use common boards from your local hardware store, sand them down, and finish them with stain or paint. Brackets come in every style imaginable, from minimalist black iron to rustic wrought iron.
- The IKEA Hack: IMO, the IKEA LACK wall shelf is a legendary budget-friendly option. It’s deep, sturdy, and has a clean finish that looks far more expensive than it is.
- Pro Tip: Keep it tidy. Open shelving looks chic only if it’s organized. Don’t cram every mug you own onto it. Style it intentionally with a color scheme in mind. And for the love of all that is good, please dust regularly. 🙂
- <H3>What to Put on Your Open Shelves</H3>
- Matching dinnerware sets
- Elegant glassware
- A beautiful ceramic canister for utensils
- A small potted herb like basil or mint
- Your favorite cookbooks with beautiful spines
2. Upgrade Your Kitchen Lighting
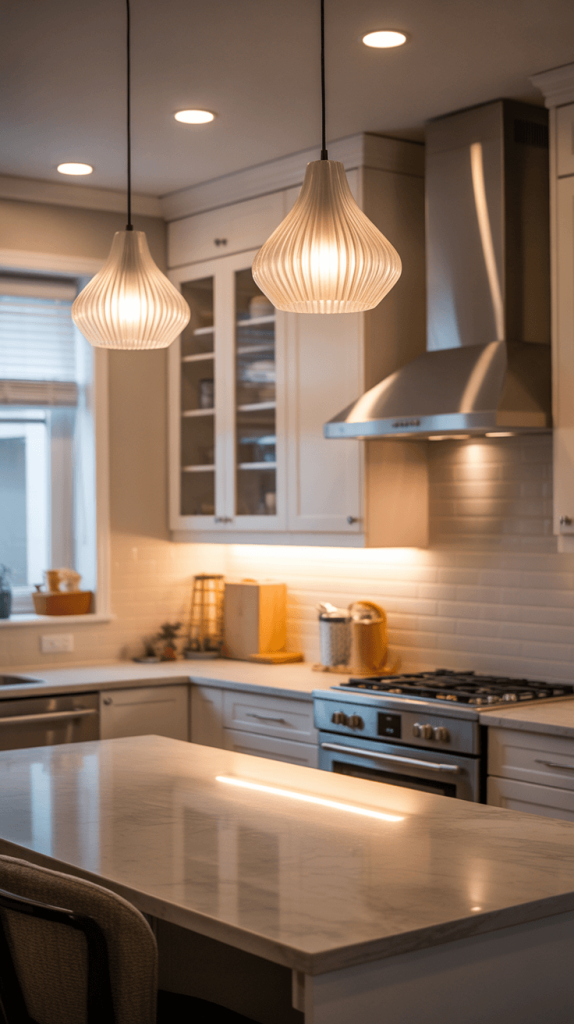
Lighting is the jewelry of a room. You can have a beautifully outfitted kitchen, but if it’s lit by a single, sad fluorescent box in the center of the ceiling (we’ve all been there), it will never feel warm or inviting.
Why it works: Good lighting creates ambiance, highlights your best features, and makes food prep infinitely easier and safer. It’s one of the most dramatic changes you can make for a relatively small investment.
Affordable Lighting Ideas:
- Swap the Overhead Fixture: This is the biggest bang for your buck. Ditch the outdated fixture for a modern pendant light over the island or a stylish chandelier over the table. You can find incredible options at places like HomeGoods, Wayfair, and even Amazon.
- Under-Cabinet Lighting: This is a game-changer for countertop tasks. LED strip lights are inexpensive, easy to install (many are plug-in or peel-and-stick), and they completely eliminate shadows while you’re chopping veggies. They also add a gorgeous ambient glow in the evening.
- Add Plug-in Sconces: No hardwiring? No problem! The market for beautiful plug-in wall sconces has exploded. You can use them to flank a window or frame your open shelves, adding another layer of light and style without an electrician.
3. Refresh Your Cabinets with Paint
If your cabinets are structurally sound but just ugly or dated, paint is your absolute best friend.
It is the number one most transformative, cost-effective thing you can do in a kitchen. I’ve done this in two homes now, and while it’s a bit of a project, the result is mind-blowing.
Why it works: A new color can completely redefine the entire mood of your kitchen. Going for a crisp white? Instant clean and classic. A moody navy or green? Hello, drama and sophistication. It makes everything look new and cohesive.
The Process (The CliffsNotes Version):
- Clean & Degrease: TSP substitute is your friend here. Cabinets are grease magnets.
- Sand & Prime: Don’t skip this! Sanding creates a surface for the paint to grip. Use a high-adhesion primer like Zinsser BIN or KILZ, especially if you’re covering a dark color or a wood stain.
- Paint: Use a paint formulated for cabinets. Benjamin Moore Advance or Sherwin-Williams Emerald Urethane Trim Enamel are gold standards—they self-level, are incredibly durable, and cure to a hard, washable finish. Use a high-quality brush and a mini roller for a smooth finish.
- New Hardware: While you’re at it, plan to replace the hardware (see idea #6!). It’s easier to do when the doors are off and you can fill the old holes before painting.
Also Read: 15 Smart Mobile Home Kitchen Remodel Ideas for Stunning Spaces
4. Add a Backsplash for Instant Style

A backsplash is like a necklace for your kitchen—it’s the perfect accessory that pulls the whole outfit together.
It protects your walls from splatters and adds a massive dose of personality.
Why it works: It introduces texture, color, and pattern. Whether you go for a classic white subway tile, a colorful Moroccan fish scale, or a modern large-format slab look, it immediately makes your kitchen look finished and designed.
Affordable & Easy Options:
- Peel-and-Stick Tiles: Don’t underestimate these! Modern peel-and-stick options are fantastic. They come in realistic ceramic, stone, and metal looks and are a perfect rental-friendly or commitment-phobe’s solution. You can install them in an afternoon.
- Beadboard or Shiplap: For a cottage or farmhouse feel, painting a beadboard or shiplap panel and installing it as a backsplash is charming and inexpensive.
- DIY-Friendly Real Tile: If you’re ready for the real deal, a classic 3×6 white subway tile is incredibly affordable and forgiving for a first-time tiler. 🙂
5. Create More Counter Space with a Kitchen Island

Lack of counter space is the universal kitchen complaint.
But what if you don’t have the layout or budget for a permanent island? You get creative with a movable one.
Why it works: A kitchen island (even a small one) adds precious prep space, extra storage, and can often serve as a casual eating spot. It becomes the functional heart of the kitchen.
Budget-Friendly Island Solutions:
- Repurpose Furniture: An old wooden table, a small dresser, or even a sturdy desk can be painted and wheeled into the center of your kitchen. Add a butcher block top to the dresser for cutting.
- Butcher Block Cart: Stores like IKEA and Home Depot sell fantastic rolling butcher block islands that are both stylish and functional. Many have drawers and shelves for added storage.
- Build Your Own: If you’re handy, building a simple box frame on locking casters and topping it with a pre-cut slab of wood from a lumber yard is a fantastic weekend project.
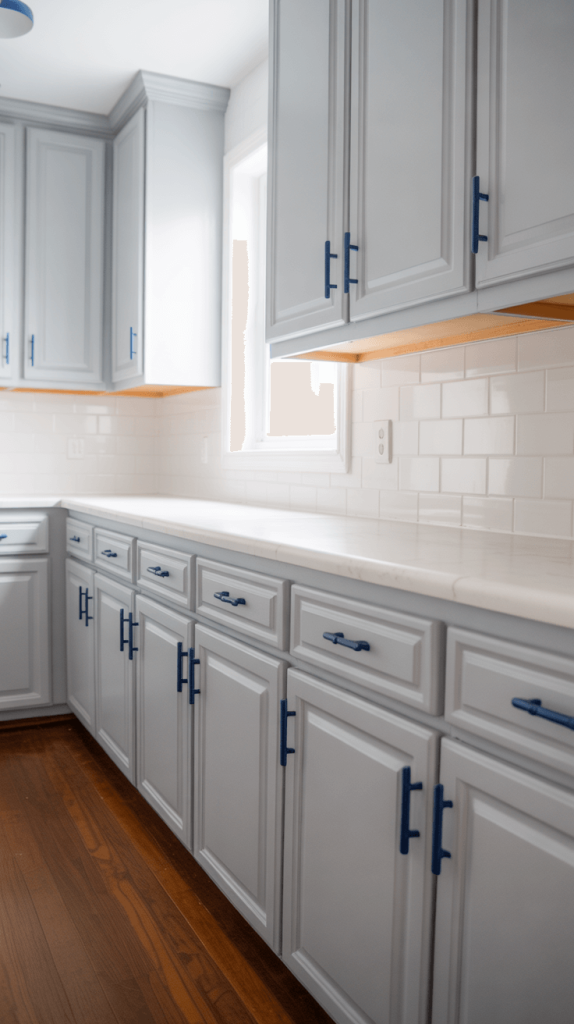
6. Replace Old Hardware for a Quick Update
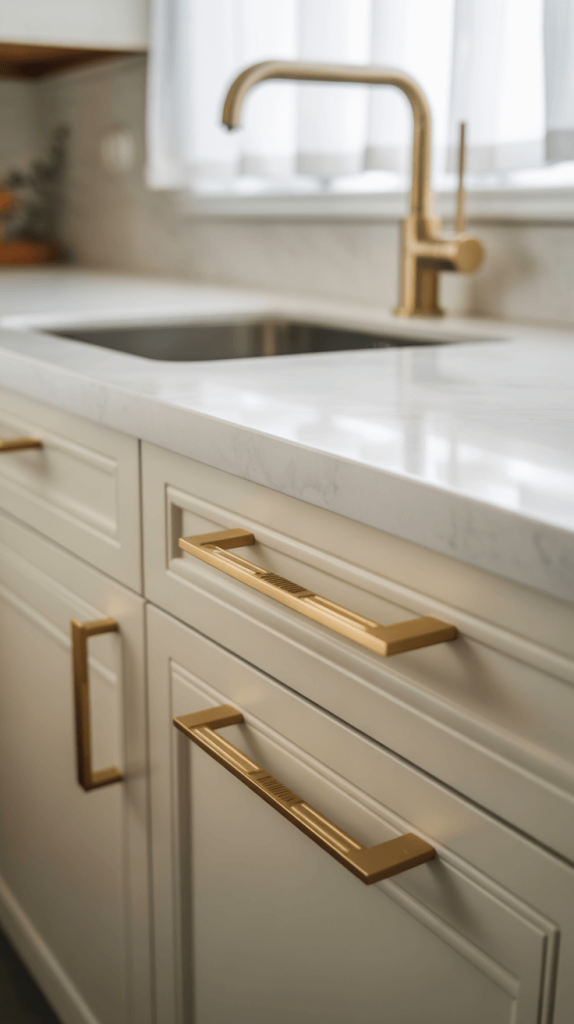
This is the 5-minute makeup tutorial of kitchen updates. It’s astonishing how such a small detail can make such a huge difference.
We’re talking about cabinet knobs and drawer pulls.
Why it works: New hardware updates the style instantly. It’s like changing the jewelry on an outfit. Outdated brass knobs from the 90s can make even nice cabinets look old. Swapping them for modern black bin pulls, sleek brass tab pulls, or rustic ceramic knobs changes the entire vibe.
How to do it:
- Measure: The most important step! You need to know the center-to-center measurement of the holes on your current hardware. If you’re changing styles (e.g., from a single knob to a long pull), you might need to drill new holes. Pro tip: use a template! They’re cheap and ensure perfect alignment.
- Choose a Finish: Mixing metals is totally in style now. Don’t feel locked into one finish. Just ensure there’s a common element (like all brushed finishes or all warm-toned metals) to keep it cohesive.
Also Read: 15 Kitchen Remodel On A Budget Ideas for a Stunning Transformation
7. Add a New Sink and Faucet

Your sink and faucet are the workhorses of the kitchen. You interact with them dozens of times a day.
If they’re stained, scratched, shallow, or just plain ugly, they drag down the whole room.
Why it works: A new, deeper, quieter sink makes cleanup a less miserable chore. A new faucet with features like a pull-down sprayer feels luxurious and modern. This upgrade is more about improving your daily experience than just aesthetics (though the aesthetics are a nice bonus!).
What to consider:
- Sink Materials: Stainless steel is affordable, durable, and classic. Fireclay or composite granite sinks offer a beautiful farmhouse look and are very resistant to chips and stains.
- Faucet Features: Look for a magnetic docking pull-down sprayer (so it doesn’t flop around), a high arc for filling large pots, and a finish that matches your other hardware. I switched to a pull-down faucet a year ago and honestly, I don’t know how I lived without it.
8. Use Light Colors to Open Up the Space
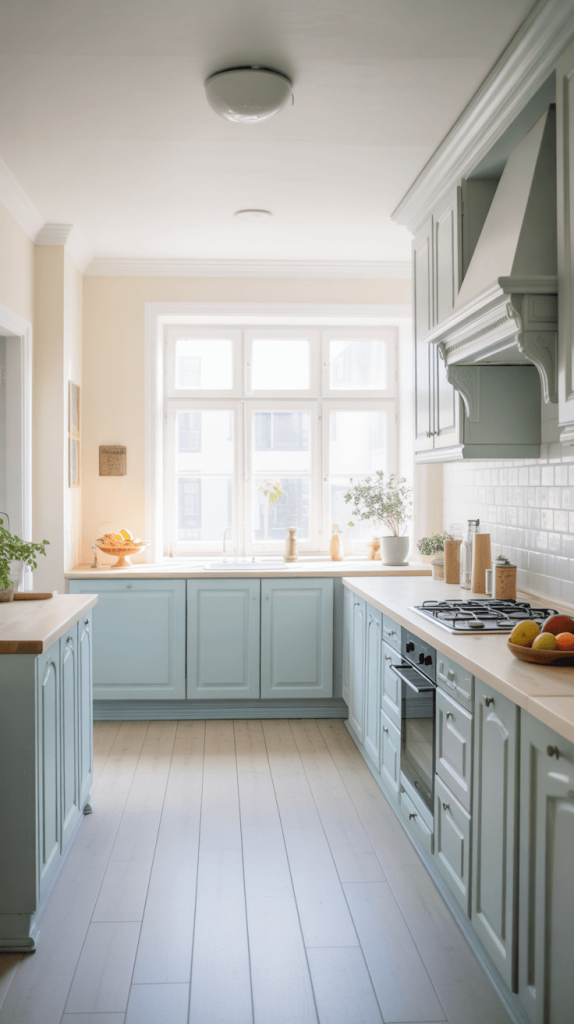
This is Design 101, but it works every single time.
If your kitchen feels small, dark, or cramped, the fastest way to visually expand it is with a light color palette.
Why it works: Light colors reflect light, making a space feel brighter and more open. They recede, making walls feel farther away. Dark colors absorb light and can make a room feel cozy but also smaller.
How to implement it:
- Paint the Walls: A bright white or a very light gray, greige, or pale blue on the walls can work wonders.
- Light Cabinets: If you’re painting your cabinets (see #3!), choosing a light color will amplify this effect.
- Countertops & Backsplash: Keeping these surfaces light continues the airy feeling from the floor up.
9. Install a Pot Filler Faucet
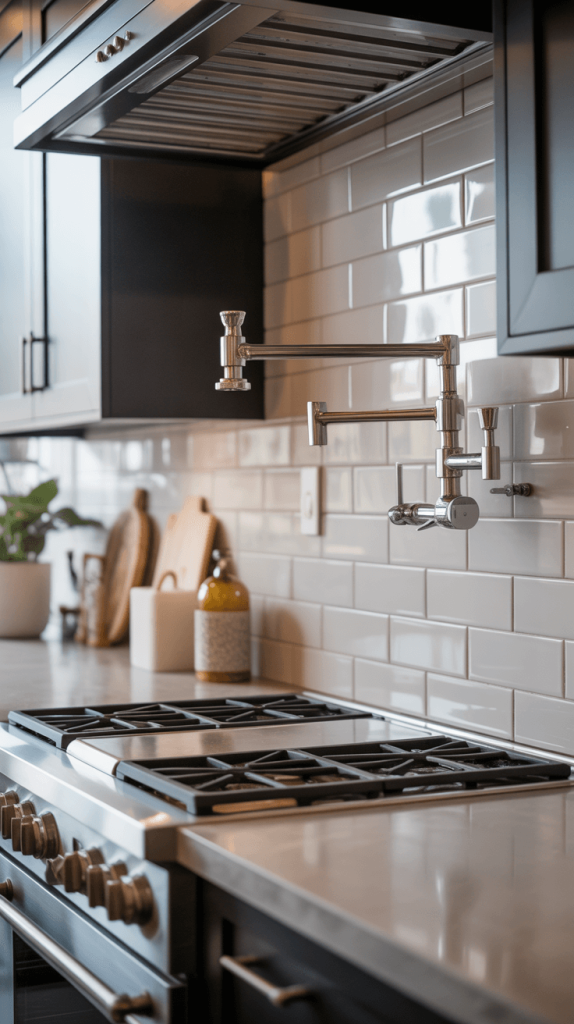
Okay, this one leans a bit more toward the “splurge” end of affordable, but hear me out.
If you do a lot of cooking, especially pasta, a pot filler is a small luxury that feels incredibly high-end.
Why it works: It’s all about convenience. You can fill a heavy pot with water right on the stove instead of lugging it from the sink. It adds a serious “chef’s kitchen” vibe and is a fantastic talking point.
The Reality Check:
- It requires plumbing. This isn’t always a simple DIY project unless you’re very confident with plumbing. You need to run a water line through the wall behind your stove.
- It’s not strictly necessary. Let’s be real, it’s a luxury. But if you’re looking for that one special upgrade that makes your kitchen unique, this is a great contender. FYI, they come in a huge range of styles and prices.
Also Read: 15 Genius Galley Kitchen Remodel Ideas for a Stylish, Space-Saving Upgrade
10. Create a Coffee Bar Area
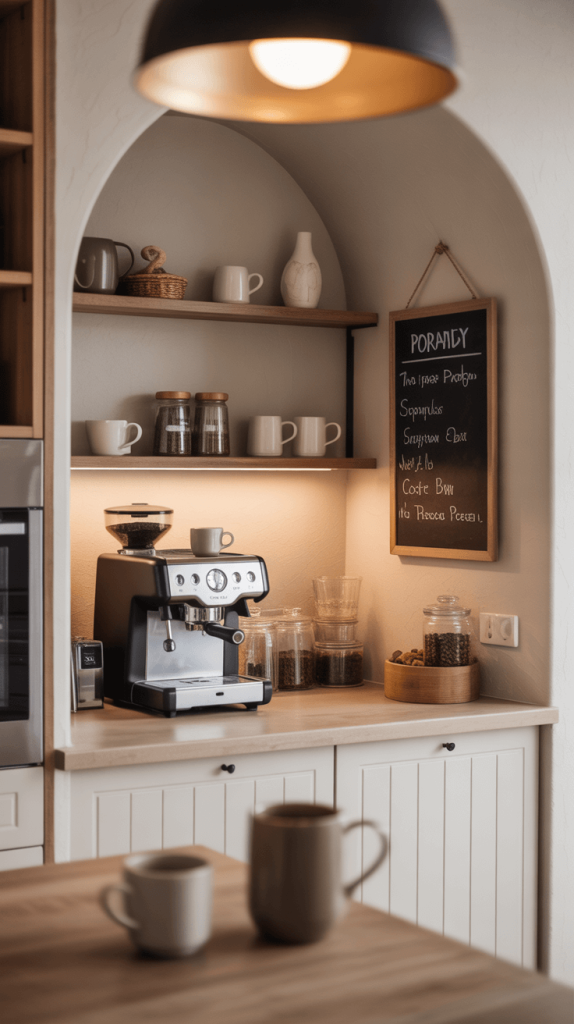
Are you a caffeine-fueled human like me? Then dedicating a small corner of your kitchen to this daily ritual is a no-brainer.
It declutters your main counter and creates a dedicated, joyful station for making your favorite brew.
Why it works: It organizes all your coffee-making essentials in one spot, making your morning routine smoother and more enjoyable. It also looks adorable.
How to build your coffee bar:
- Find a Spot: A corner of the counter, a small cart, or even a repurposed bar cart.
- Gather the Essentials: Your coffee maker, a canister for beans, a cute jar for sugar, a mug tree, and a small tray to corral it all.
- Add Style: Hang a small piece of art above it, use a pretty rug underneath, or install a tiny shelf for syrups and creams. It’s all in the details!
11. Add a Statement Rug

Wait, a rug? In the kitchen? Absolutely! A well-chosen runner or area rug adds a huge dose of color, pattern, and softness underfoot.
Why it works: It defines the space, adds warmth and comfort (standing on a hard floor for hours is tough on your back and feet), and protects your flooring. It’s an instant style injection.
What to look for:
- Material is key. You need a low-pile, washable rug. Think indoor-outdoor rugs, flatweaves (like dhurries), or rag rugs. They’re durable and easy to clean. Avoid high-pile shags that will trap every crumb.
- Size: A runner in front of the sink and stove is perfect. For larger kitchens, an area rug under the table or island works well.
12. Organize with Drawer Dividers
Let’s go inside the cabinets for a minute. You can have a beautiful kitchen, but if you open a drawer and it’s a chaotic jumble of utensils, that beautiful feeling vanishes.
Drawer organizers are a cheap and brilliant solution.
Why it works: Everything has a designated home. This saves you time rummaging and keeps your tools in good condition (no more scratching your good knives against other metal). It’s a small act of organization that pays off every single day.
Options:
- Custom Cut Dividers: Companies like Rev-A-Shelf make amazing adjustable and custom-fit dividers.
- IKEA SKÅDIS: The pegboard system isn’t just for walls! You can lay it flat in a deep drawer and use the hooks and containers to organize tools perfectly.
- Simple Bamboo Trays: Inexpensive and effective for separating cutlery and gadgets.
13. Use a Farmhouse Sink for a Rustic Touch
The farmhouse (or apron-front) sink has enduring popularity for a reason. It’s deep, wide, and incredibly charming.
It instantly gives a kitchen a warm, rustic, or traditional feel.
Why it works: Beyond its good looks, it’s supremely functional. Its depth makes it easy to wash large baking sheets and pots without water splashing everywhere.
It’s a focal point that anchors the entire room.
Considerations:
- Installation: Most farmhouse sinks are designed to be “top-mounted” or “front-mounted,” meaning the countertop or cabinetry is built to accommodate the exposed front panel. This often requires custom cabinetry or modification, so it’s a more involved project.
- Materials: Fireclay is the classic material—it’s durable and has a bright white finish. Copper and composite granite are other beautiful (but more expensive) options.
14. Upgrade to Quartz Countertops

Now, this is a bigger ticket item, but if you have a little more room in your budget and your laminate countertops are letting you down, quartz is the way to go.
It’s often the one splurge that makes a kitchen look truly remodeled.
Why it works: Quartz is an engineered stone that is non-porous (so it never needs sealing), incredibly durable, and resistant to stains and scratches. It comes in a mind-boggling array of colors and patterns that can mimic marble, concrete, or granite without the high maintenance.
Quartz vs. Other Stones:
- vs. Granite: Granite is natural and requires annual sealing. Quartz does not.
- vs. Marble: Marble is beautiful but soft, porous, and prone to etching from acids like lemon juice. Quartz is much more resilient.
- vs. Laminate: There’s no comparison in terms of aesthetics, heat resistance, or durability. Quartz is a massive upgrade.
It’s a significant investment, but for the value it adds in both looks and function, it’s often worth saving for.
15. Repurpose Unused Spaces

Last but not least, look at your kitchen with fresh eyes. Where is there dead space? That awkward gap next to the refrigerator? The empty side of a cabinet? Utilizing these spots can net you big gains in storage.
Why it works: It maximizes every single inch of your kitchen’s footprint without adding any square footage. It’s about working smarter, not harder.
Clever Ideas:
- Fridge Side Rack: A tall, narrow rack that attaches to the side of your fridge is perfect for storing foil, wraps, spices, or even towels.
- Toe-Kick Drawer: That space under your lower cabinets? It’s often hollow. You can install shallow drawers there to store flat pans, baking sheets, or trays. Genius, right?
- Inside Cabinet Doors: Add hooks or skinny racks to the inside of cabinet doors to store lids, measuring spoons, or cutting boards.
- The End of an Island: If your island has a blank end panel, add a narrow shelving unit or a row of hooks for hanging towels or mugs.
Conclusion
See? I told you we could do this without a full-blown renovation. The key is to stop looking at the kitchen as one massive, intimidating project and start seeing it as a collection of smaller, manageable wins.
You don’t have to do all 15 of these ideas at once. Pick two or three that address your biggest pain points and start there.
Maybe you begin with a fresh coat of paint on the cabinets (#3) and some new hardware (#6). Then next month, you tackle the lighting (#2) and add a fun rug (#11).
Before you know it, you’ll be walking into your kitchen and feeling that sense of pride and calm—the feeling you get from a space that is both beautiful and truly works for you.
So, what are you waiting for? Which idea are you most excited to try first? Go on, get started. Your new favorite room is waiting for you. 😉