10 Stylish Unfinished Basement Ideas on a Budget Made Easy
Let’s be real – your unfinished basement probably looks like something out of a horror movie right now.
You know the vibe: concrete floors, exposed pipes, and that special basement smell that screams “I haven’t been touched since 1987.”
But here’s the thing – transforming your basement doesn’t have to drain your bank account like those fancy home renovation shows suggest.
I spent years staring at my own creepy basement before finally deciding to tackle it. And guess what? I discovered you can create an amazing space without selling a kidney or taking out a second mortgage.
Whether you’re dreaming of a cozy hangout spot or desperately need extra living space, I’ve got you covered with these budget-friendly basement ideas that actually work.
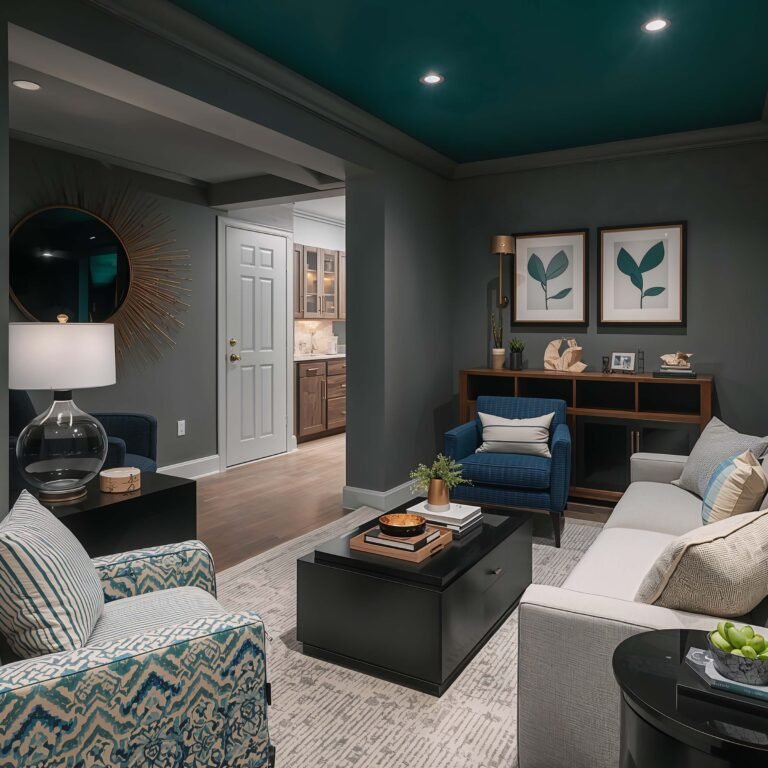
Cozy DIY Basement Lounge
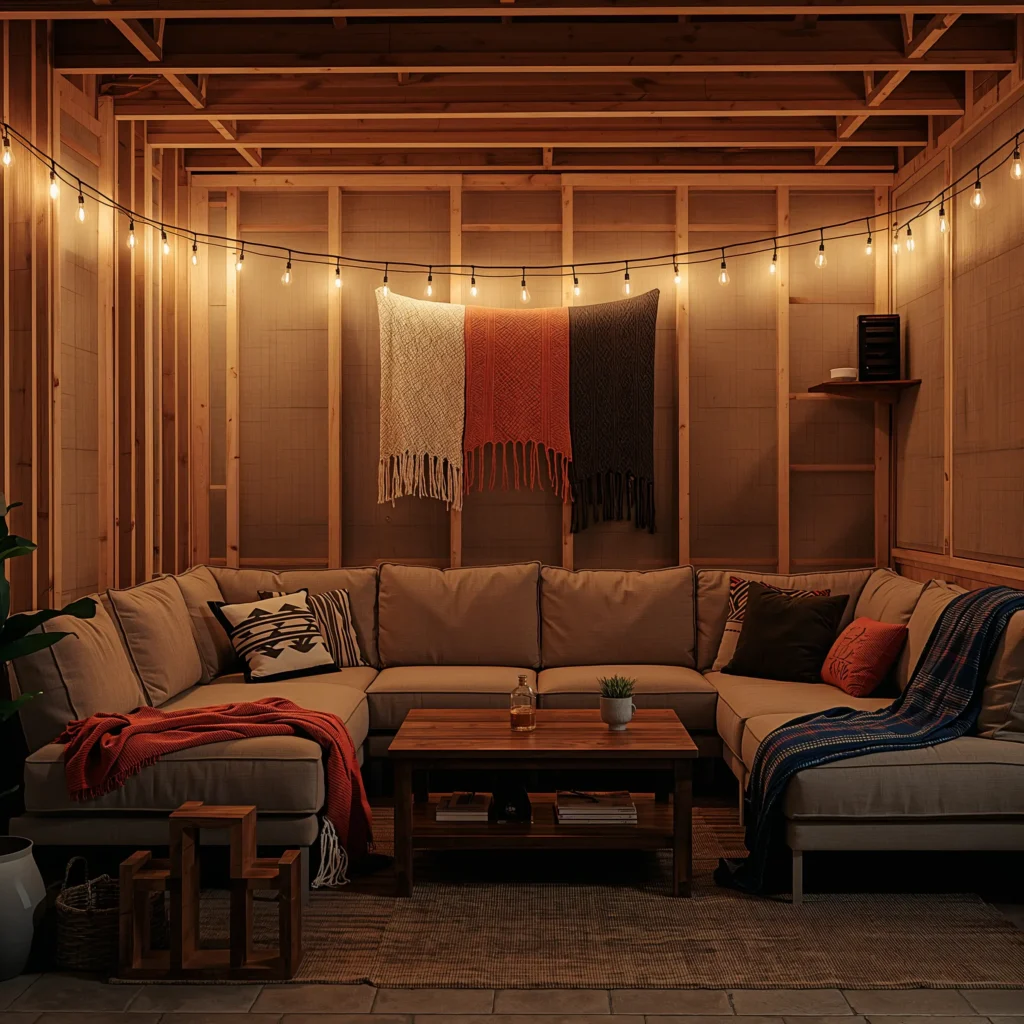
Creating a basement lounge might be the easiest transformation you’ll ever tackle. Remember, we’re working with what we’ve got here – and that’s perfectly fine! The key to a successful basement lounge lies in creating warmth where there was once cold concrete.
Setting the Foundation
First things first – you need to deal with that cold floor situation. Interlocking foam tiles changed my life, and they’ll change yours too. These babies cost around $1-2 per square foot and you can install them yourself in an afternoon. No special tools, no contractor needed – just click them together like a giant puzzle.
Area rugs work wonders on top of these tiles. Hit up discount stores or online marketplaces for deals – I scored a massive 8×10 rug for $60 that completely transformed my space. Layer a couple of smaller rugs for that designer look without the designer price tag.
Creating the Vibe
Lighting makes or breaks a basement lounge. Since you’re probably dealing with minimal natural light, string lights are your new best friend. Hang them along the ceiling beams or create a canopy effect – instant ambiance for under $30.
Here’s what you’ll want to focus on:
- Warm LED bulbs (3000K or lower) to combat that harsh basement feel
- Floor lamps from thrift stores (usually $10-20 each)
- Battery-powered puck lights for dark corners
- Smart bulbs if you want to get fancy with color changes
Furniture on the Cheap
Who says you need brand-new furniture? Facebook Marketplace and Craigslist are goldmines for basement lounges. I furnished my entire space for under $300 by being patient and pouncing on good deals.
Pallets make incredible DIY couches when you stack them and throw some cushions on top. Sand them down, add a coat of stain, and boom – you’ve got industrial chic seating that cost you basically nothing. Pro tip: check with local businesses for free pallets – they’re usually happy to get rid of them.
Budget-Friendly Home Office Basement
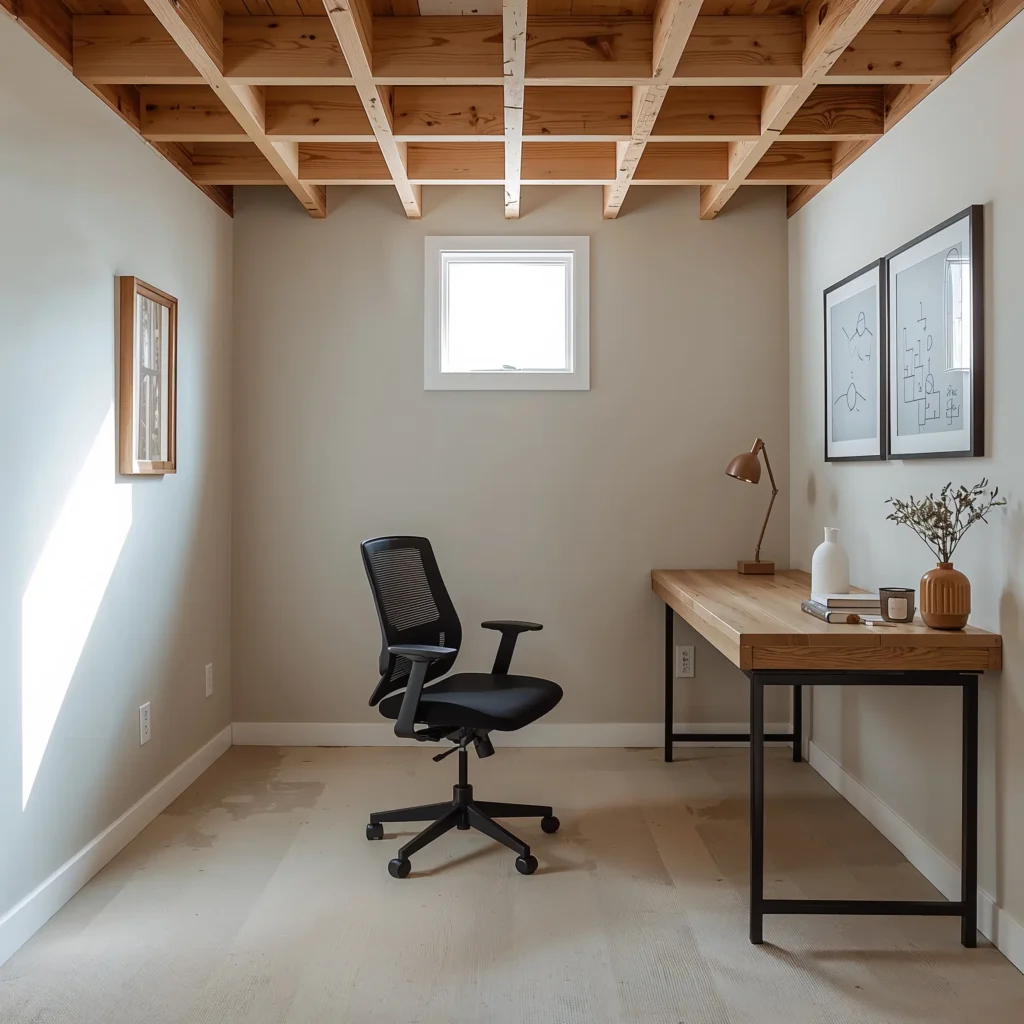
Working from home in your bedroom is getting old, isn’t it? Your basement can become the perfect home office without the corporate price tag. The beauty of a basement office is that nobody expects it to look perfect – it just needs to function well.
Desk Solutions That Don’t Break the Bank
Forget those $800 standing desks. A solid door from a home improvement store ($40-60) plus two sawhorses ($30 total) creates a massive workspace that beats any particle board desk. I’ve been using this setup for three years, and it’s still going strong.
Wall-mounted desks save space and money. A simple bracket system and a piece of butcher block creates a floating desk for under $100. Plus, you can customize the height exactly where you want it.
Storage Hacks for Your Basement Office
Metal shelving units might not win beauty contests, but they’re basement office MVPs. Industrial wire shelving runs about $40-60 per unit and holds everything you throw at it. Dress them up with storage boxes or baskets from the dollar store.
Consider these budget storage solutions:
- Pegboard walls for vertical organization ($20-30)
- Milk crates as modular storage (often free from grocery stores)
- Repurposed kitchen cabinets from renovation sales
- DIY floating shelves using brackets and reclaimed wood
Tech Setup Without the Premium Price
You don’t need the fanciest equipment to be productive. A decent monitor arm ($30) instantly upgrades your workspace ergonomics. Good lighting trumps expensive gear every time – position a simple desk lamp to reduce eye strain.
Cable management transforms the look of any basement office. Command strips and zip ties cost next to nothing but make your setup look professional. Trust me, hiding those cables makes a bigger difference than any expensive desk ever could.
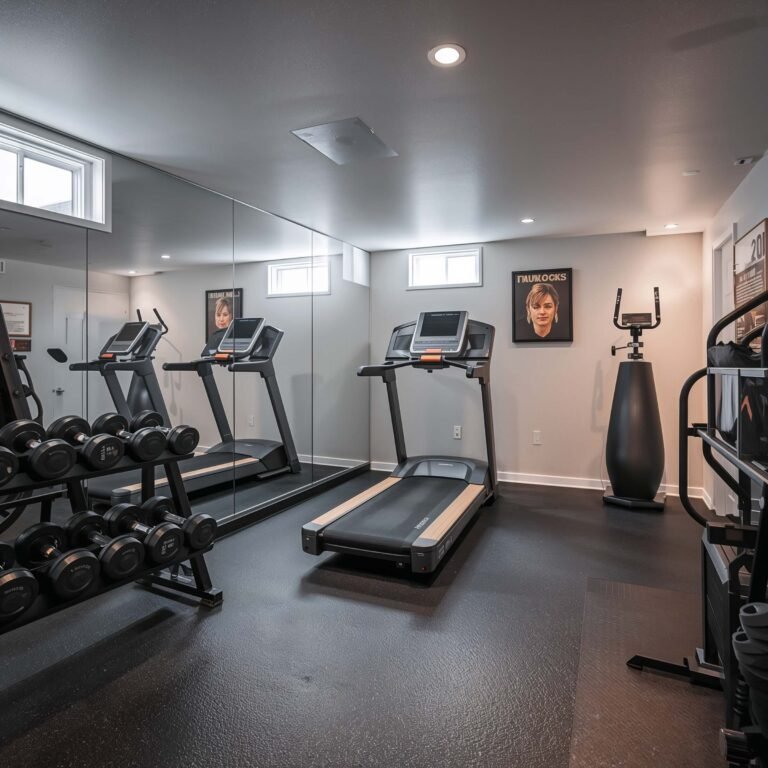
Small Space Basement Gym Ideas
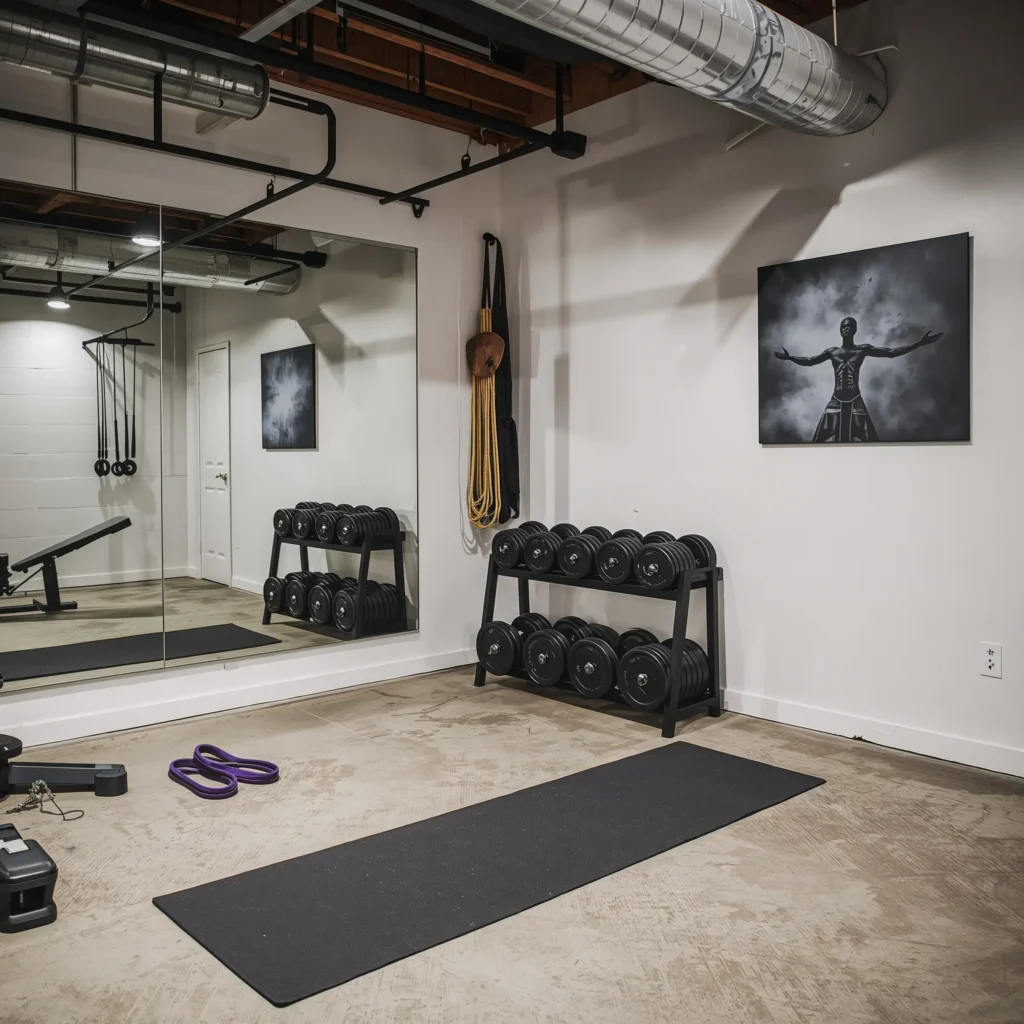
Building a home gym sounds expensive, but honestly? You can create a killer workout space for less than a year’s gym membership. My basement gym cost me about $400 total, and I use it way more than I ever used my $50/month gym membership.
Essential Equipment on a Budget
Start with the basics and build from there. Resistance bands give you a full workout for $20-30. Add a yoga mat ($15), and you’ve got 80% of what you need for most workouts.
Used equipment saves massive money. Check Facebook Marketplace in January when everyone’s giving up on New Year’s resolutions – prices drop like crazy. I scored a complete dumbbell set for $50 that would’ve cost $200+ new.
Flooring That Can Take a Beating
Horse stall mats from farm supply stores are the secret weapon of budget home gyms. At $40-50 per mat, they’re cheaper than gym flooring and practically indestructible. They smell a bit rubbery at first (okay, a lot rubbery), but that fades after a few weeks.
Interlocking EVA foam tiles work great for lighter workouts. You can often find them for $20-30 for a pack that covers 24 square feet. Just don’t drop heavy weights on them – learned that one the hard way :/
Making the Most of Limited Space
Wall-mounted equipment maximizes every square foot. A pull-up bar that attaches to ceiling joists costs about $40 and takes up zero floor space. Resistance band anchors turn any wall into a cable machine for $15.
Here’s my space-saving equipment list:
- Adjustable dumbbells (one set replaces multiple weights)
- Foldable workout bench (slides under other furniture)
- Wall-mounted mirror (makes space feel bigger, helps with form)
- Suspension trainer (full-body workouts in 6 square feet)
Also Read: 10 Trendy Basement Floor Ideas That Wow Every Guest
Affordable Basement Playroom for Kids

Kids don’t care if their playroom looks like it belongs in a magazine. They want space to play, create, and make memories. A basement playroom keeps the chaos contained while giving them freedom to be kids.
Safety First, Budget Second
Before anything else, make sure your basement is safe for little ones. Foam corner guards cost a few dollars but prevent countless tears. Baby gates at the stairs are non-negotiable if you’ve got toddlers.
Waterproof paint or sealant on concrete floors makes cleanup easier and prevents moisture issues. This might be your biggest expense at $100-150, but it’s worth every penny when juice boxes get launched across the room.
Storage That Grows With Them
Cube organizers are playroom gold. The 9-cube units (around $60) hold fabric bins perfectly and can be reconfigured as kids grow. Label everything with pictures for non-readers – laminated photos work great and cost nothing if you print at home.
Repurpose old furniture for toy storage. That old dresser nobody wants? Perfect for art supplies, Legos, and action figures. Sand it down, let the kids help paint it, and you’ve got custom storage plus a fun weekend project.
Creating Play Zones
Different areas for different activities keeps kids engaged longer. Use colorful tape on the floor to define spaces – reading corner here, building zone there, art station in the corner. Kids love boundaries (even if they don’t admit it), and tape costs like $5.
Budget-friendly play zone ideas:
- Reading nook with floor pillows and string lights
- Art wall using chalkboard paint or white board sheets
- Performance stage using a simple platform and curtain
- Building area with a designated Lego table (IKEA table + baseplate)
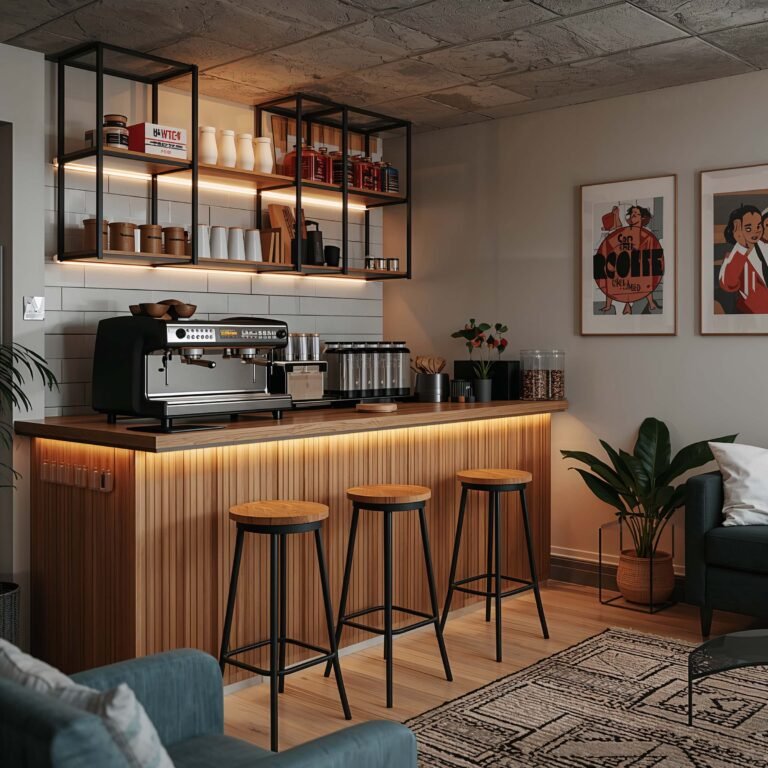
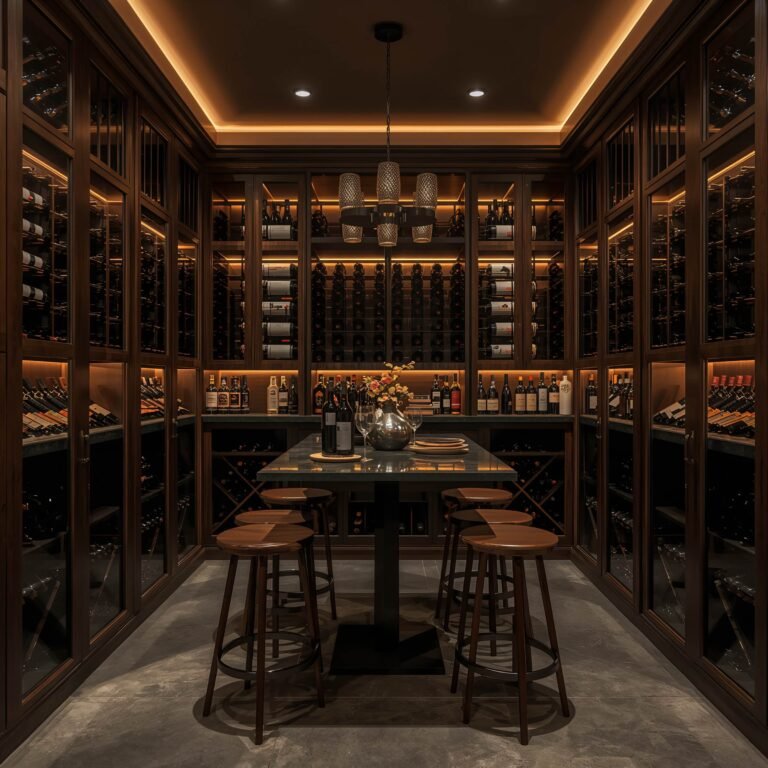
Rustic Basement Bar on a Budget
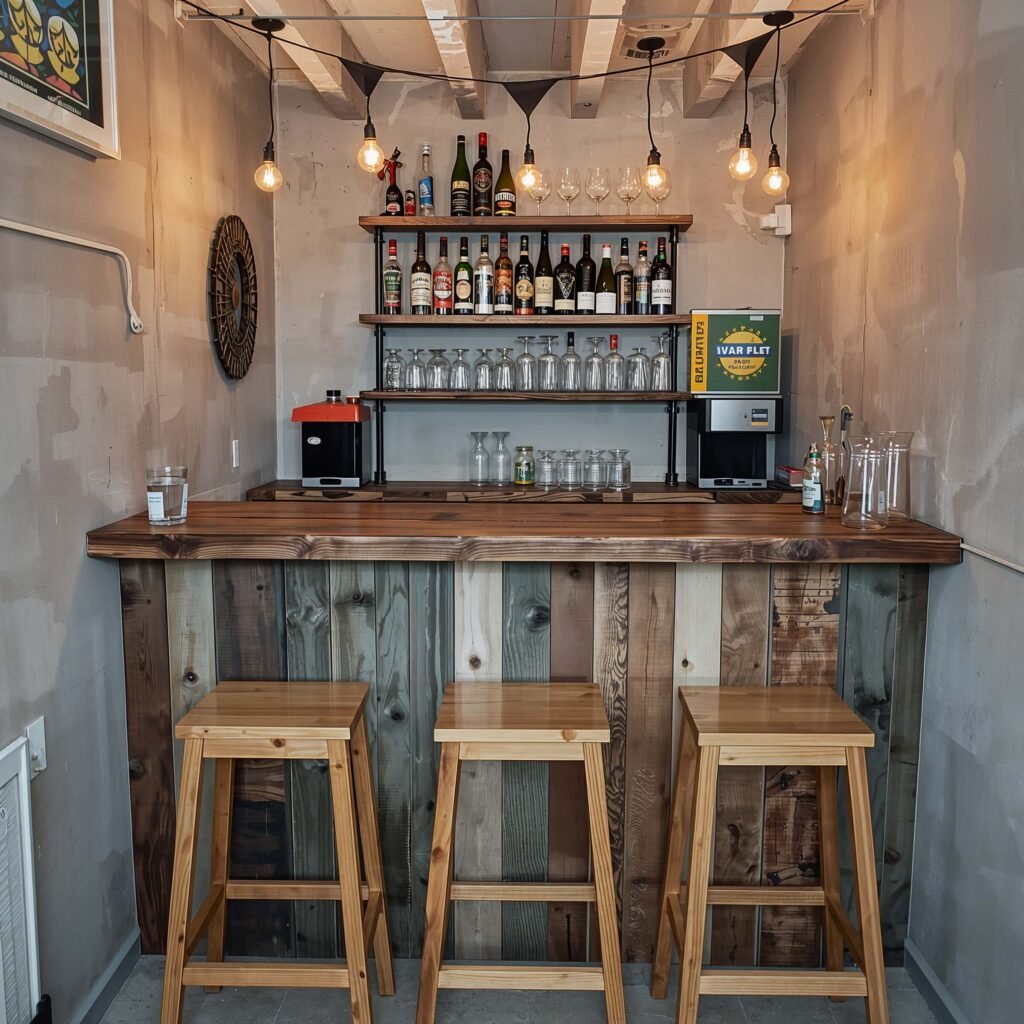
You know what’s overrated? Spending $10,000 on a basement bar you’ll use twice a year. You know what’s awesome? Building a rustic bar for under $500 that becomes everyone’s favorite hangout spot.
The Bar Structure Itself
Reclaimed wood is your ticket to rustic charm without the rustic price. Check construction sites (with permission), Craigslist, or Facebook Marketplace for old barn wood or pallets. I built my entire bar top from an old door I found for free – just sanded it down and applied polyurethane.
Basic bar frames don’t require master carpentry skills. 2x4s and plywood create a sturdy structure for under $100. Cover it with reclaimed wood, add some industrial pipe footrests ($30 at Home Depot), and suddenly you’re a bar-building genius.
Backbar Storage and Display
Open shelving behind the bar showcases your collection without expensive cabinetry. Floating shelves made from reclaimed wood and brackets cost about $20 per shelf and look incredibly authentic.
Mason jars aren’t just for Pinterest anymore – they make perfect glassware for a rustic bar and cost way less than traditional barware. Hit up thrift stores for mismatched vintage glasses that add character for pennies on the dollar.
Lighting and Ambiance
Edison bulb string lights scream “rustic bar” and cost about $25. Hang them above the bar or create a canopy effect across the ceiling. Dimmable lights are crucial – nobody wants hospital lighting while they’re trying to relax.
Minimalist Storage Solutions for Basements
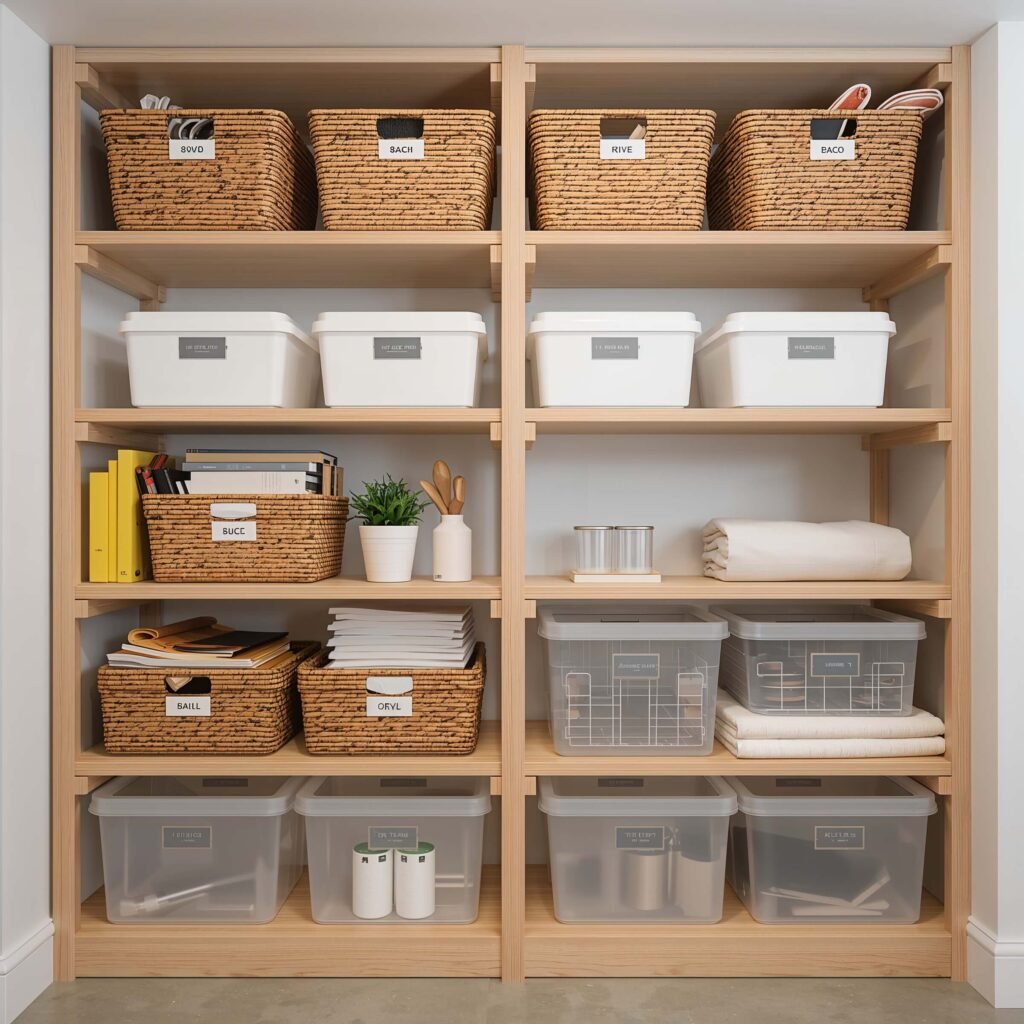
Here’s the truth nobody wants to admit – most of us use our basements as glorified storage units. But even storage can look good without spending a fortune. Minimalist doesn’t mean empty; it means intentional.
Vertical Storage Systems
Floor-to-ceiling shelving maximizes every inch without cluttering floor space. Wire shelving units might not be pretty, but uniform storage boxes hide the chaos and create clean lines. Get matching boxes from the dollar store – $50 transforms an entire wall.
Ceiling storage often gets overlooked in basements. Heavy-duty hooks ($3-5 each) hold bikes, kayaks, or seasonal decorations. Overhead storage nets ($20-30) create a drop ceiling effect while holding lightweight items.
Clear Bins and Labels
Clear plastic bins might seem boring, but they’re minimalist storage heroes. You can see everything without opening boxes, which means you’ll actually use what you store. Label makers are worth the $20 investment – trust me on this one.
Creating Zones
Divide your basement into storage zones:
- Seasonal decorations (furthest corner, accessed rarely)
- Sports equipment (near stairs for easy grabbing)
- Pantry overflow (climate-controlled area)
- Memory boxes (high shelves, protected from moisture)
Also Read: 10 Beautiful Basement Stairwell Ideas to Transform Your Space
DIY Basement Movie Theater Setup
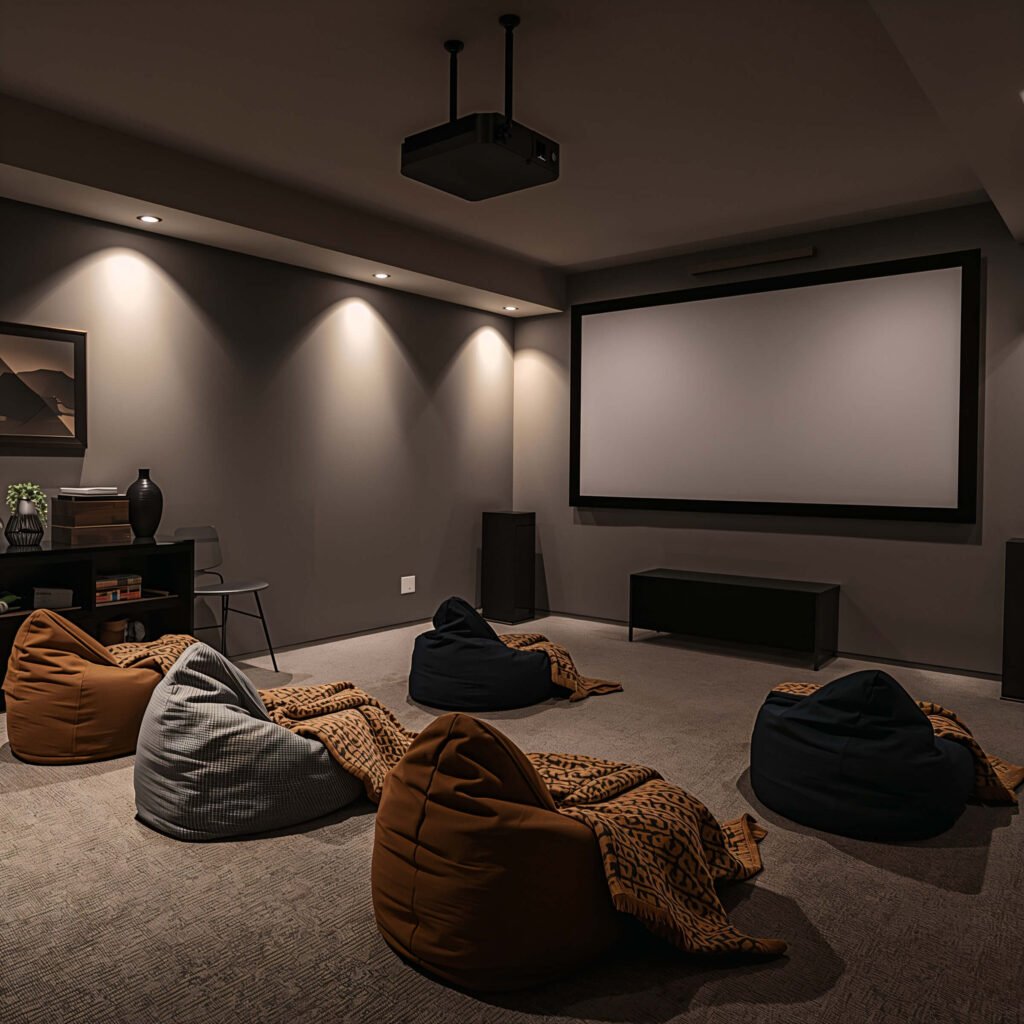
Building a basement theater sounds ridiculously expensive, right? Wrong. You can create an incredible movie experience for under $600 if you know where to cut corners and where to splurge.
The Screen Situation
Forget those $2,000 projection screens. A gallon of screen paint ($60) on a smooth wall creates a better picture than most budget screens. Frame it with black velvet tape ($20) for that professional theater look.
If your walls are rough, a white sheet stretched on a frame works surprisingly well. Build the frame from 1×2 lumber ($20 total) and stretch the sheet tight. Not perfect, but definitely good enough for movie nights.
Projector on a Budget
Refurbished projectors offer incredible value. Look for 1080p models from 2-3 years ago – they’re usually $200-300 and work perfectly in dark basements. Native 4K is nice, but honestly? You won’t notice the difference from your couch.
Mount your projector properly to avoid the dreaded keystone effect. A ceiling mount costs $30 and makes everything look more professional. Plus, nobody can walk in front of the projector during crucial scenes.
Sound Without Breaking the Bank
You don’t need a 7.1 surround system immediately. Start with a decent soundbar ($100-150) and add speakers later. Position matters more than expensive equipment – place that soundbar at ear level for the best experience.
Acoustic panels seem fancy but foam tiles from Amazon ($30 for a pack) do basically the same thing. Arrange them on the wall behind your seating area to reduce echo and improve sound quality dramatically.
Seating Solutions
Used furniture stores are goldmines for theater seating. Old recliners that nobody wants for their living room work perfectly in basement theaters. I found four matching recliners for $200 total – they’re ugly as sin but incredibly comfortable in the dark.
Floor seating creates a casual vibe kids love. Grab some large floor pillows, bean bags, or even inflatable loungers. Layer different heights to ensure everyone can see the screen clearly.
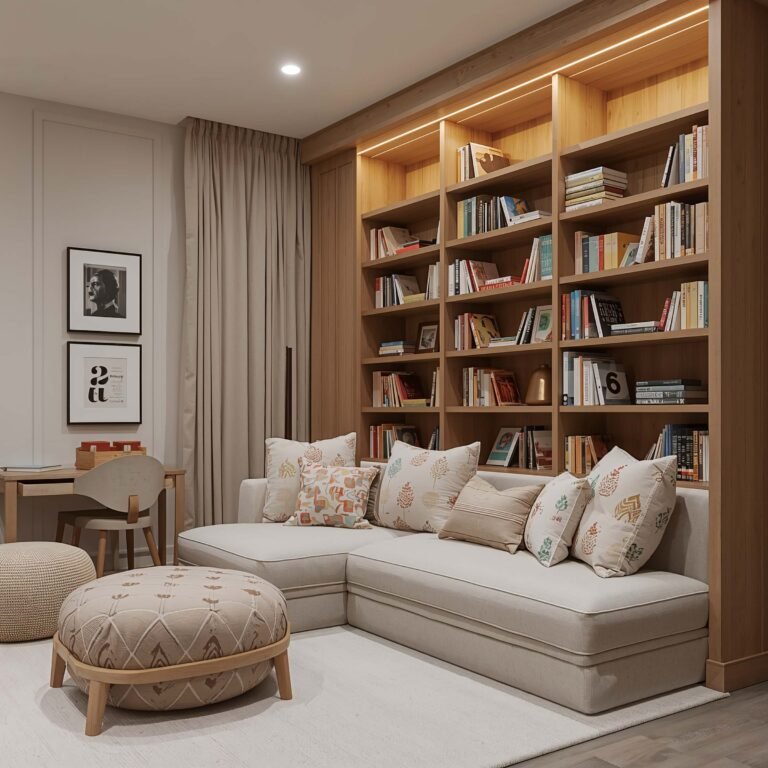
Stylish Basement Reading Nook

Creating a reading nook in your basement might seem counterintuitive – who wants to read in a dungeon? But basements offer something precious: quiet isolation from the chaos upstairs. That’s worth its weight in gold, IMO.
The Perfect Reading Chair
Your reading chair makes or breaks the nook. Skip the new furniture stores and hit estate sales or consignment shops. Wingback chairs create that classic library feel and usually cost $50-100 used versus $500+ new.
Don’t overlook the power of a good ottoman. Your legs need somewhere to go, and a storage ottoman ($40-60) pulls double duty. I store extra blankets and books in mine – maximum comfort, minimum clutter.
Lighting for Readers
Reading requires specific lighting that won’t strain your eyes. A good floor lamp positioned behind your chair prevents shadows on your book. Adjustable pharmacy lamps ($30-40) let you direct light exactly where needed.
Natural light might be limited, but you can fake it. Full-spectrum bulbs ($10-15) mimic daylight and reduce eye fatigue during long reading sessions. Add battery-powered candles for ambiance without fire hazards.
Book Storage and Display
Floating shelves turn your book collection into art. U-shaped brackets and reclaimed wood create custom shelving for under $20 per shelf. Arrange books by color for that Instagram-worthy rainbow effect, or go classic with traditional organization.
Multi-Purpose Basement Craft Room
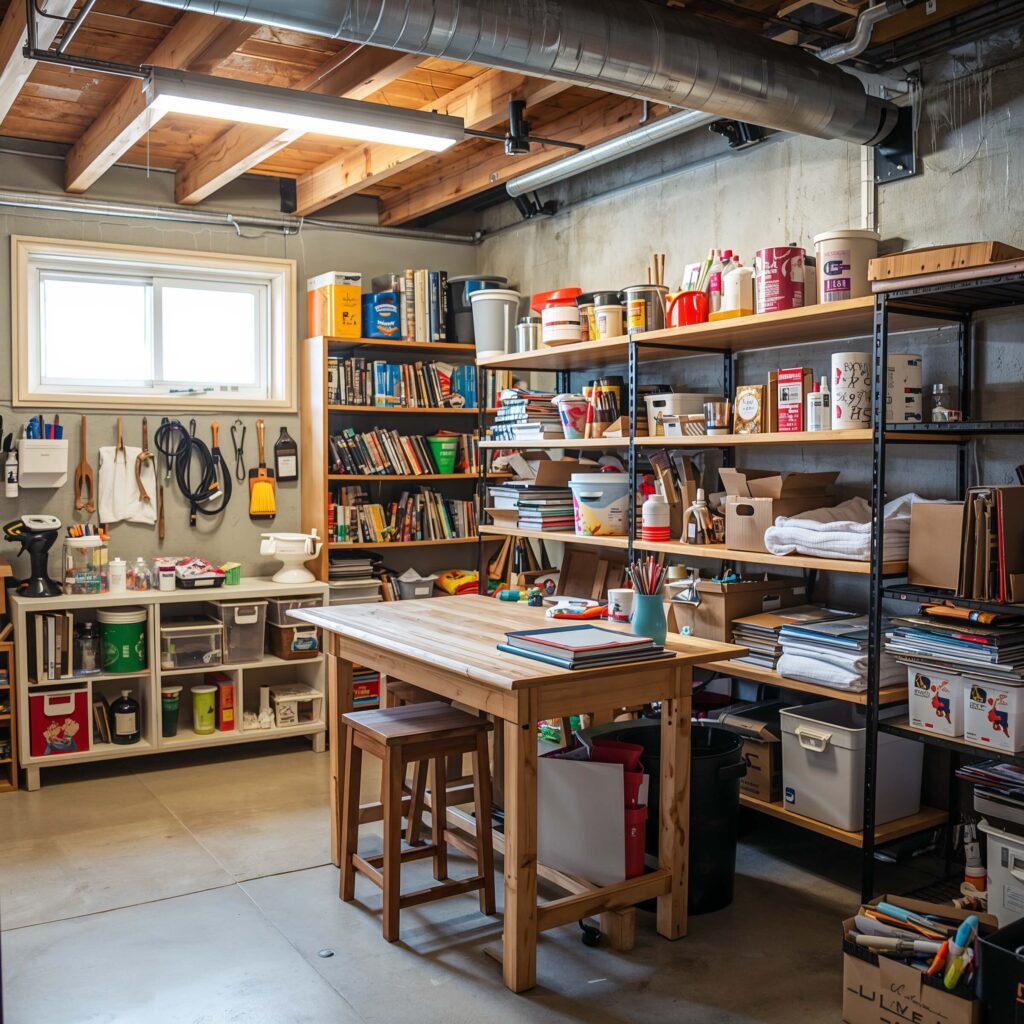
A dedicated craft room sounds like luxury, but your basement can become a creative paradise without the premium price tag. The key lies in flexible storage and smart organization that adapts to different projects.
Work Surface Solutions
Folding tables are craft room MVPs. Two 6-foot folding tables ($50 each) create massive workspace that can be reconfigured or stored as needed. Cover them with self-healing cutting mats ($30) to protect the surface.
Create a cutting station from an old door and sawhorses. At standing height, it’s perfect for fabric cutting and reduces back strain. Total cost: about $50 if you find a free door.
Organization That Actually Works
Pegboard walls revolutionize craft storage. A 4×8 sheet of pegboard ($30) holds all your tools within arm’s reach. Paint it a fun color before mounting – why should storage be boring?
Clear shoe organizers aren’t just for shoes:
- Ribbon spools visible and accessible
- Paint bottles organized by color
- Small tools like scissors and rulers
- Yarn skeins displayed beautifully
Lighting for Detailed Work
Task lighting prevents eye strain and mistakes. Swing-arm lamps ($25-40) clamp onto tables and move where you need them. Daylight bulbs show true colors – crucial for matching fabrics or paints.
Under-cabinet LED strips ($20) illuminate work surfaces without taking up space. Stick them under shelves or cabinets for shadow-free crafting. Battery-powered versions mean no electrical work required.
Also Read: 10 Creative Basement Living Room Ideas for Small Spaces
Bright & Airy Basement Makeover
Basements get a bad rap for being dark and depressing. But with some strategic choices, you can create a bright space that makes people forget they’re underground. No skylights or major construction required 🙂
Paint That Changes Everything
White paint seems obvious, but the right white makes all the difference. Avoid pure white – it looks gray in basements. Choose whites with warm undertones (think Swiss Coffee or Cloud White) that reflect light without looking dingy.
Paint the ceiling too! So many people forget this, but a white ceiling can make your basement feel 2 feet taller. Use flat paint to hide imperfections in the ceiling – it’s like Instagram filters for your basement.
Mirrors and Metallic Accents
Strategically placed mirrors double your light instantly. Large mirrors from discount stores ($40-60) reflect both natural and artificial light throughout the space. Position them opposite windows or light sources for maximum effect.
Metallic accents bounce light around like crazy. Spray paint old frames gold or silver ($5 per can), add metallic throw pillows ($10-15 each), or hang metallic artwork. Every reflective surface amplifies your existing light.
Window Treatments That Maximize Light
Even tiny basement windows can work harder with the right treatment. Skip heavy curtains – they block precious light. Sheer curtains or cellular shades filter light while maintaining privacy.
Paint window frames bright white to make windows appear larger. Add interior window boxes with mirrors on the bottom to reflect light upward. This trick costs about $20 per window but makes a massive difference.
Flooring That Brightens
Dark carpet makes basements feel like caves. If you’re stuck with existing carpet, large light-colored area rugs can brighten the space for $100-200. Layer smaller rugs for added interest and light reflection.
Painted concrete floors cost almost nothing but transform the entire feel. Epoxy paint in light gray or white (about $100 for a large basement) creates a modern, bright foundation that’s easy to clean.
Making It All Come Together
After transforming my own basement and helping friends with theirs, here’s what I’ve learned: perfection is overrated and budget constraints force creativity. Every single idea I’ve shared came from real experience, real failures, and real successes.
Start with one project. Don’t try to tackle everything at once or you’ll end up with a half-finished mess that’ll haunt you for years. Pick the idea that solves your biggest pain point first. Need home office space? Start there. Kids driving you crazy? Playroom it is.
Budget doesn’t mean cheap-looking, it means being smart about where you spend. Sometimes spending $50 on the right paint makes more impact than $500 on furniture. Sometimes free pallets create better atmosphere than expensive built-ins.
Remember, basements are forgiving spaces. Nobody expects perfection down there, which means you can experiment, make mistakes, and learn as you go. That exposed pipe that seemed like an eyesore? Painted matte black, it becomes industrial chic. Those concrete walls you hate? They’re perfect for that rustic bar vibe.
Your basement transformation won’t happen overnight, and that’s actually a good thing. Building it slowly means you can adjust as you go, find better deals, and create something uniquely yours. Plus, there’s something satisfying about telling guests “Yeah, I built that myself for like fifty bucks.”
FYI, every basement is different, and what worked in mine might need tweaking in yours. But that’s the beauty of DIY basement transformation – you’re not following someone else’s blueprint, you’re creating your own. So grab that measuring tape, hit up Facebook Marketplace, and start turning that creepy basement into your new favorite room. Your wallet (and your family) will thank you for it.