12 Easy Study Room Decor Ideas DIY for Students
Remember that time you walked into someone’s study room and thought, “Wow, I need this vibe in my life”? Well, I’ve got news for you – you don’t need to hire an interior designer or blow your savings to create that Pinterest-worthy study space.
Trust me, I’ve transformed my cramped little study corner into something I actually want to spend time in, and it cost me less than a fancy coffee maker.
Let’s talk about DIY study room decor that’ll make you excited to hit the books (or at least pretend to while you’re actually scrolling through social media).
These aren’t your run-of-the-mill ideas either – we’re talking practical, budget-friendly projects that you can knock out in a weekend. Some might even take less time than deciding what to watch on Netflix!
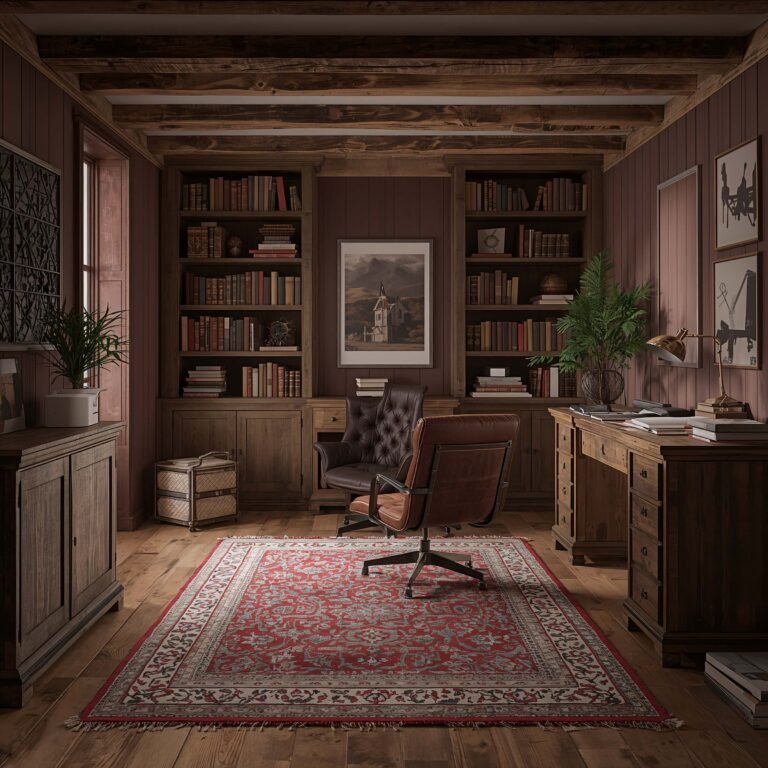
Floating Shelf Book Nook
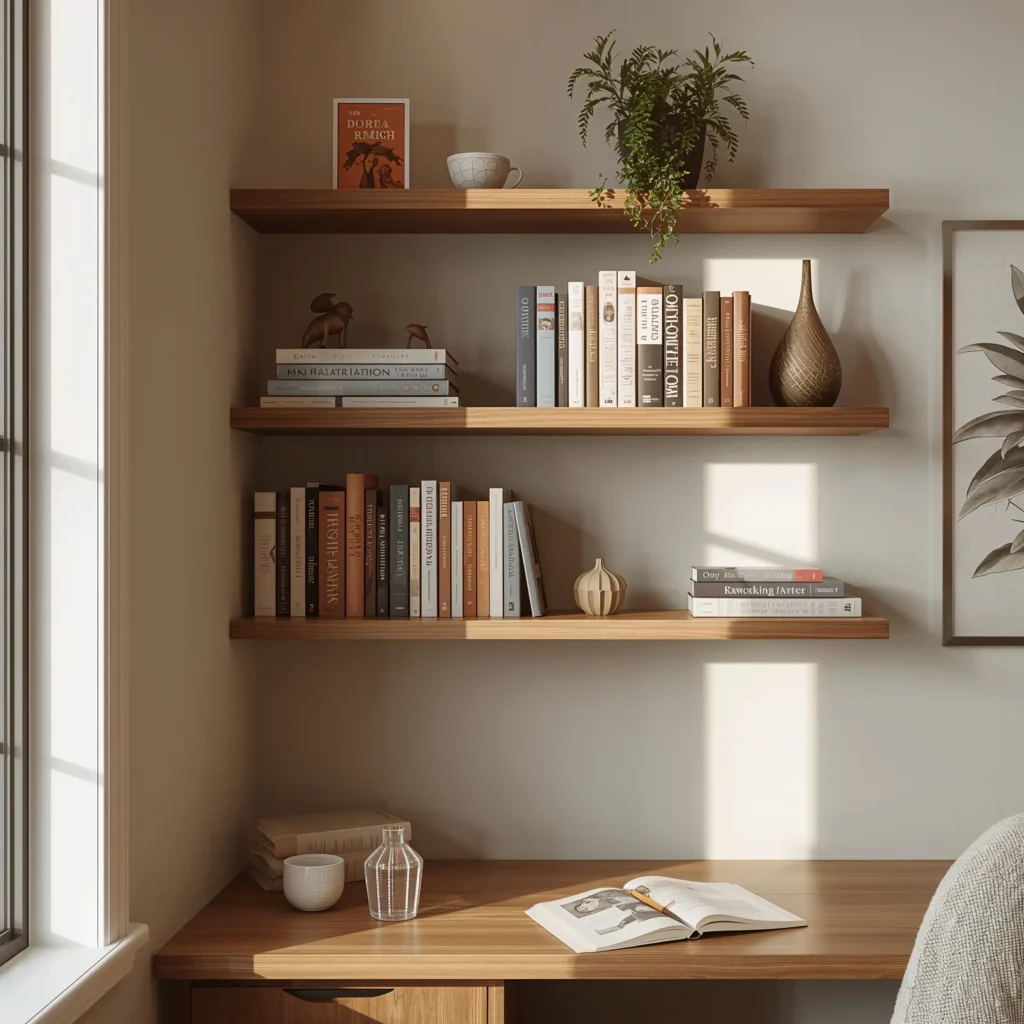
You know what changed my study game completely? Installing floating shelves above my desk. I’m not kidding – this simple addition transformed my wall from boring blank space into a functional display area that actually makes me look like I have my life together.
Here’s what makes floating shelves absolutely brilliant for study rooms. First, they keep your favorite books within arm’s reach without eating up precious desk space. I used to stack books on my desk like some sort of paper fortress, and let me tell you, trying to find that one reference book in a pile of twenty? Not fun.
Getting Started with Your Floating Shelves
The installation process surprised me with how straightforward it was. You’ll need:
- L-brackets (get sturdy ones, not the flimsy stuff)
- Wood planks (I went with pine because I’m basic like that)
- Wall anchors if you’re not drilling into studs
- A level (unless you enjoy crooked shelves – no judgment)
I arranged mine in a staggered pattern because straight lines felt too corporate office for my taste. The best part? You can paint or stain the wood to match your vibe. I went with a walnut stain that makes everything look expensive, even though the whole project cost me about $30.
Pro tip: Mix books with small plants and decorative items. It breaks up the monotony and makes your study space feel less like a library and more like a curated corner of creativity.
Corkboard Wall Organizer
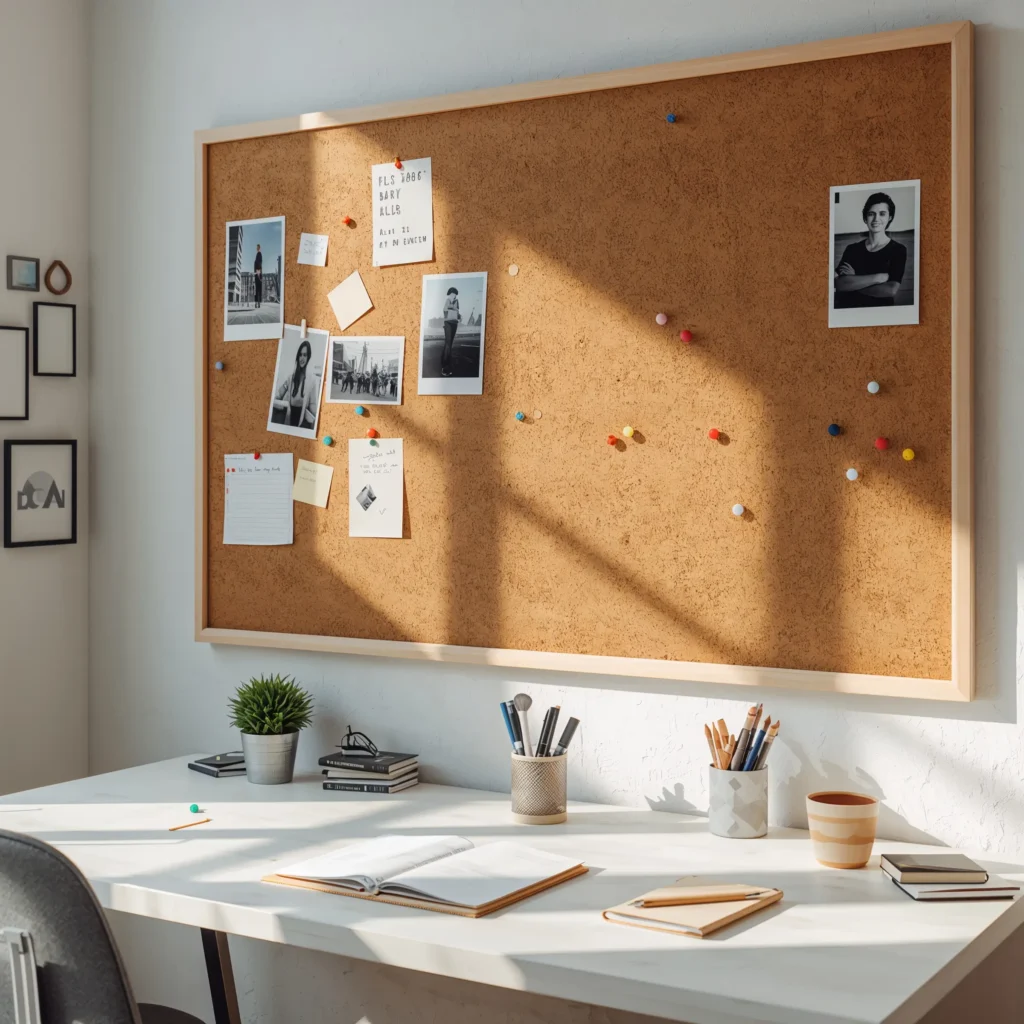
Let’s get real for a second – corkboards aren’t just for college dorms anymore. I resisted this idea for years because I thought corkboards screamed “boring office cubicle,” but wow, was I wrong.
I created an entire corkboard wall section, and it’s become the command center of my study room. Think about it: where else can you pin inspiration quotes, important deadlines, concert tickets, and that photo of your dog wearing sunglasses all in one place?
Making Your Corkboard Actually Look Good
Here’s where most people mess up – they buy those sad, brown corkboards from the office supply store and call it a day. Don’t be that person. Instead:
- Cover your cork with fabric (I used a geometric print that makes me happy)
- Frame it with decorative molding for a custom look
- Paint the cork if you’re feeling adventurous (yes, this works!)
I arranged multiple cork tiles in a grid pattern, which looks way more intentional than one giant board. Plus, you can color-code different sections. My setup has one section for deadlines, another for inspiration, and a third for random stuff that makes me smile.
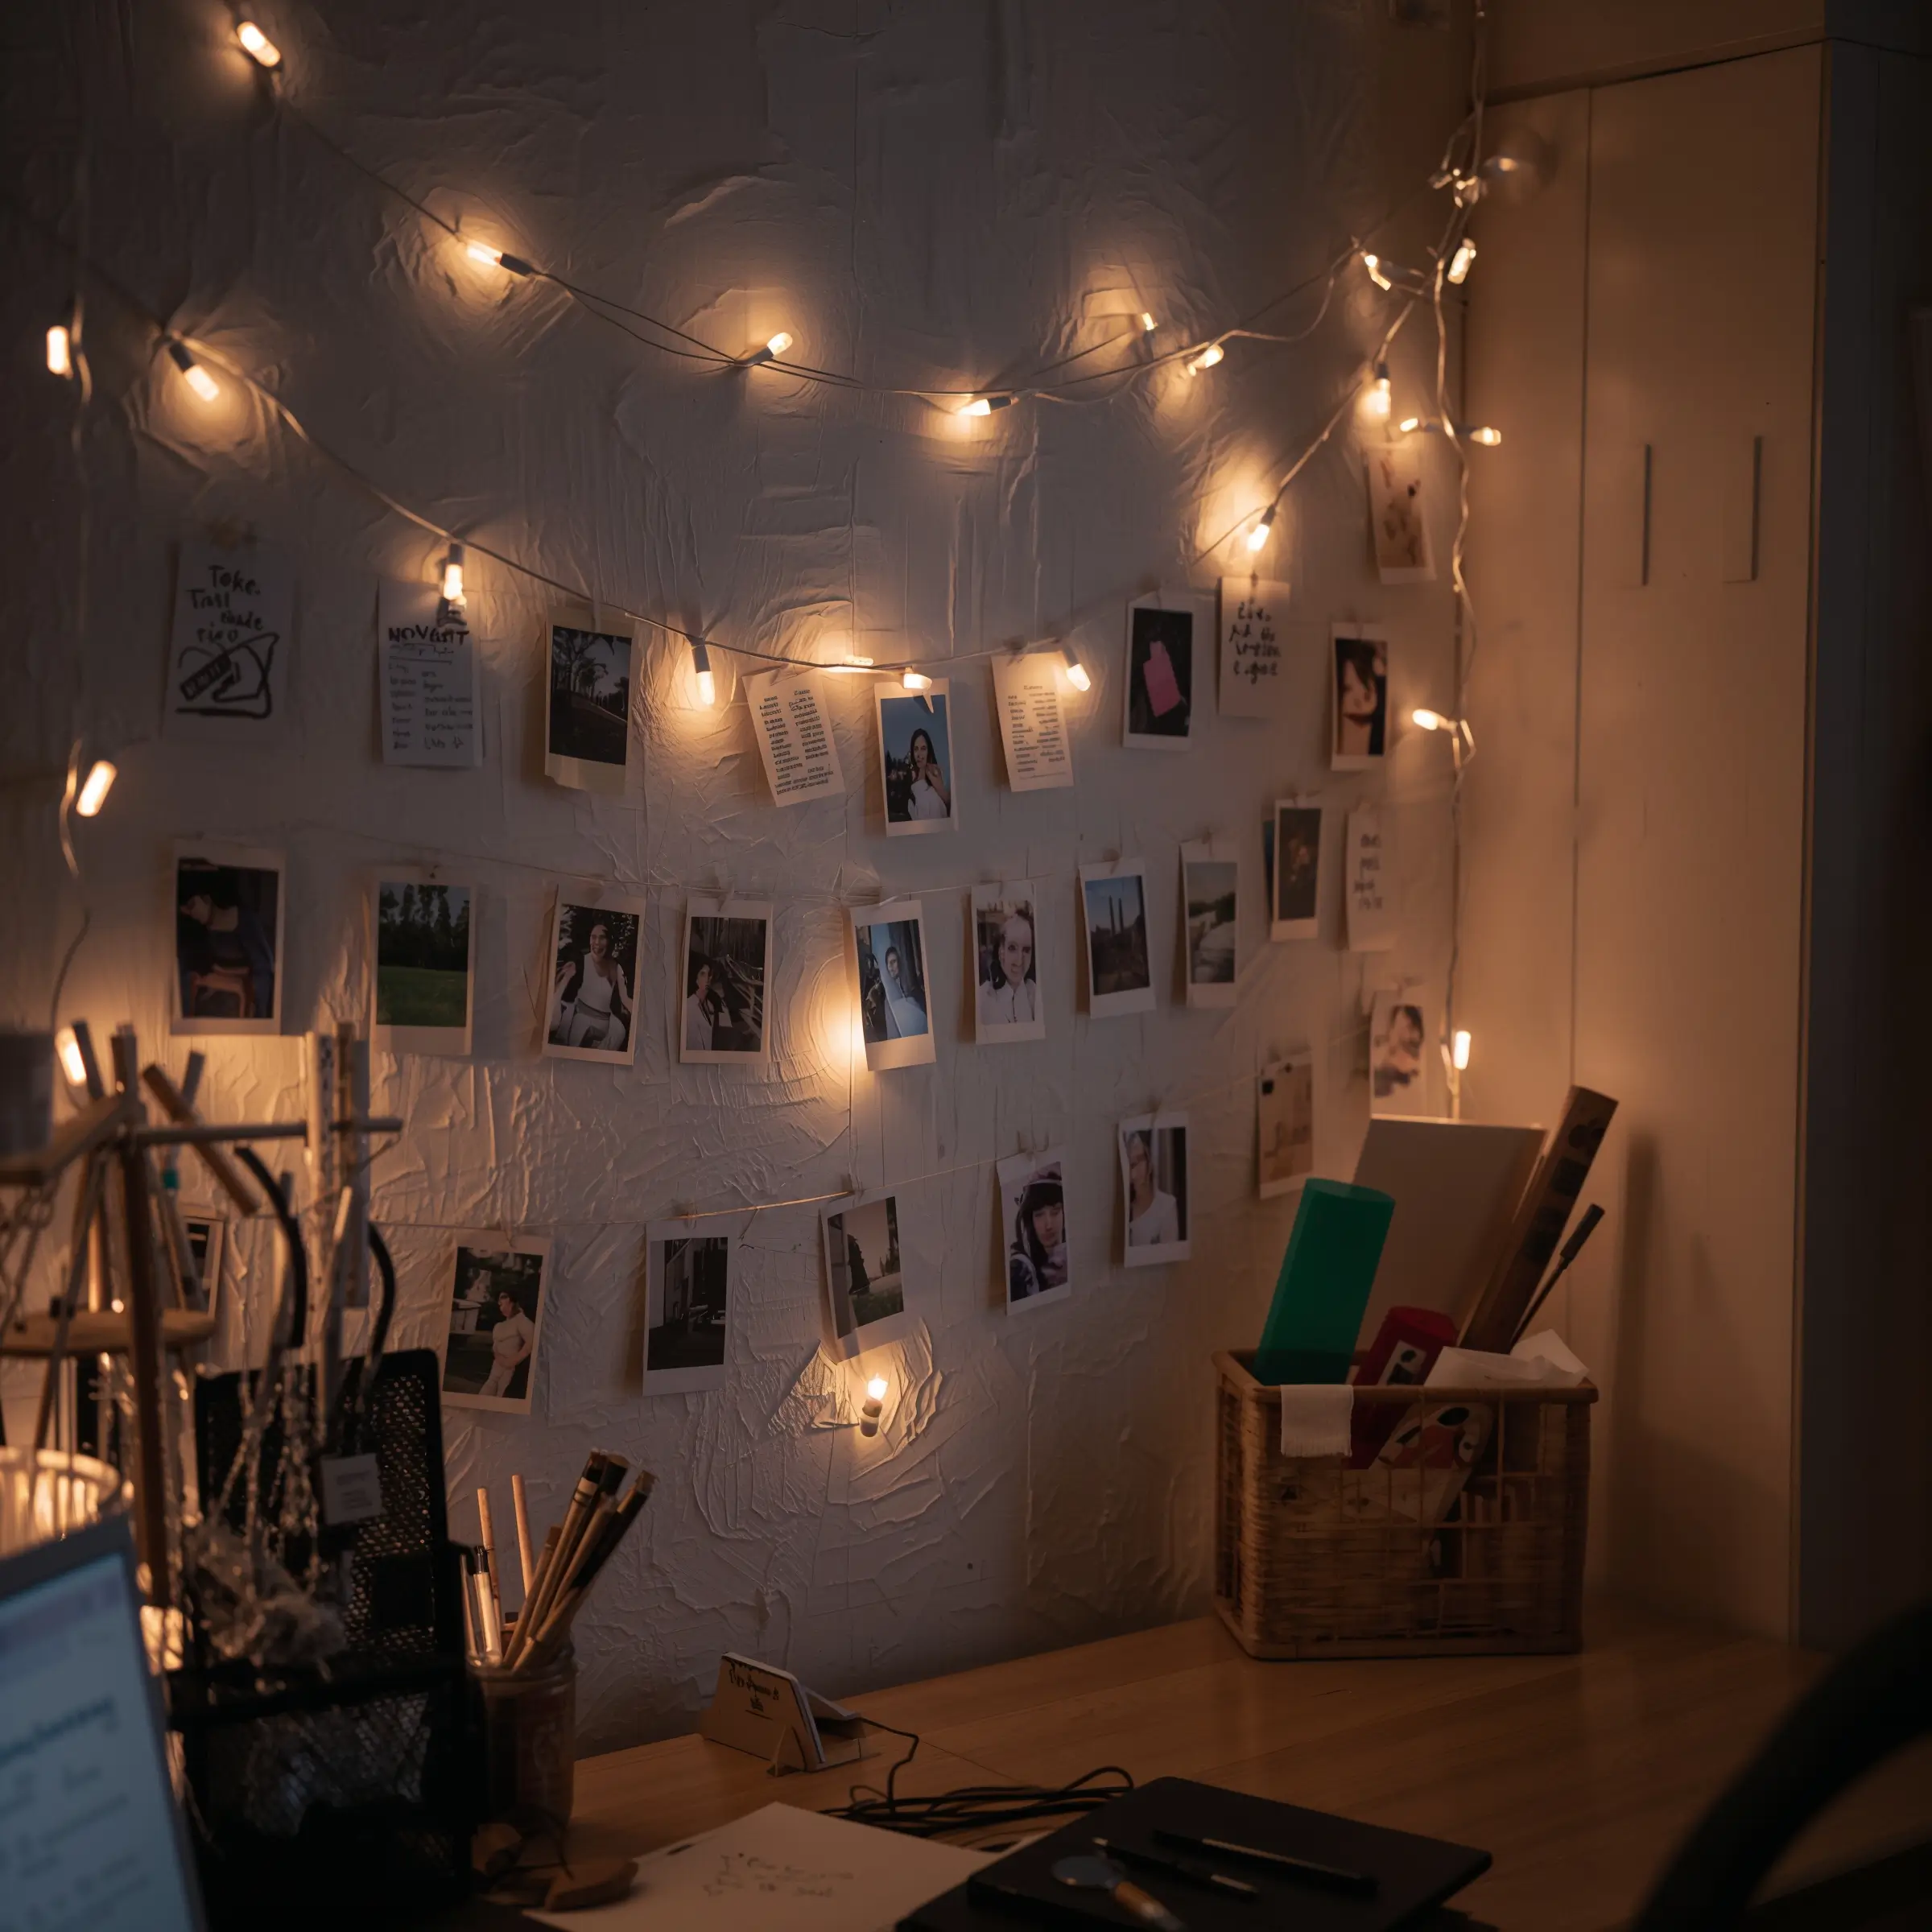
String Light Photo Display

Who says fairy lights are just for teenage bedrooms? String lights with photo clips create the perfect ambiance for late-night study sessions while displaying memories that keep you motivated.
I strung mine in a zigzag pattern across one wall, and honestly, it’s become my favorite corner of the room. The soft lighting reduces eye strain when I’m studying after dark, and seeing photos of friends and family reminds me why I’m working so hard in the first place.
Setting Up Your Light Display
The setup couldn’t be simpler:
- Get LED string lights with clips (LED because they don’t get hot)
- Map out your pattern with small pencil marks
- Use clear Command hooks to guide the lights
- Clip on photos, postcards, or even study notes
What I love about this setup is how easily you can switch things up. Exam week? Replace vacation photos with formula sheets. Having friends over? Swap in party pics. It’s like having a customizable mood board that also provides ambient lighting.
Also Read: 10 Cozy Study Room Decor Student Ideas to Boost Productivity
Colorful Desk Drawer Makeover
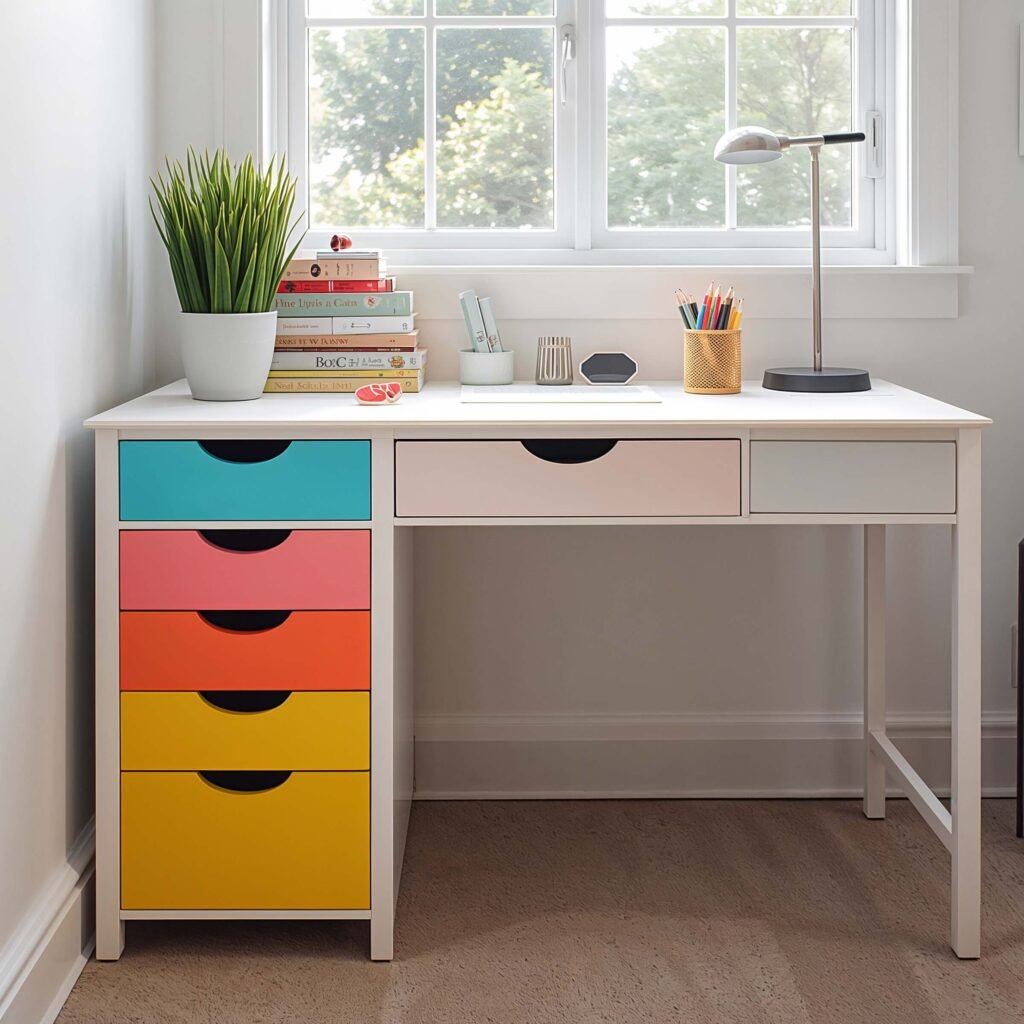
Ever opened your desk drawer and felt instantly depressed by the chaos inside? Yeah, me too. That’s why I decided to give my drawers a complete organizational makeover with some DIY dividers and colorful contact paper.
This project takes maybe two hours max, but the satisfaction lasts forever. I’m talking about opening your drawer and actually finding what you need without excavating through layers of random supplies. Revolutionary, right?
The Drawer Transformation Process
Start by emptying everything out (prepare to find pens you forgot existed). Then:
- Line the drawer with patterned contact paper or wrapping paper
- Create dividers using small boxes or cardboard
- Wrap dividers in matching or complementary paper
- Arrange compartments based on what you actually use
I went with a bright yellow geometric pattern because it makes me smile every single time I open the drawer. FYI, this small pop of color can seriously boost your mood during study sessions 🙂
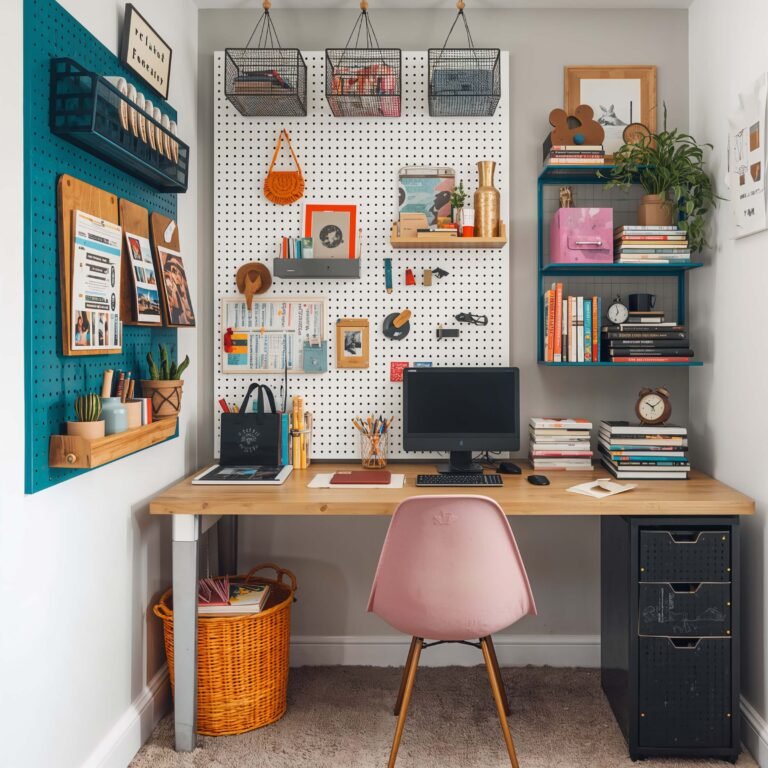
DIY Pegboard Study Station
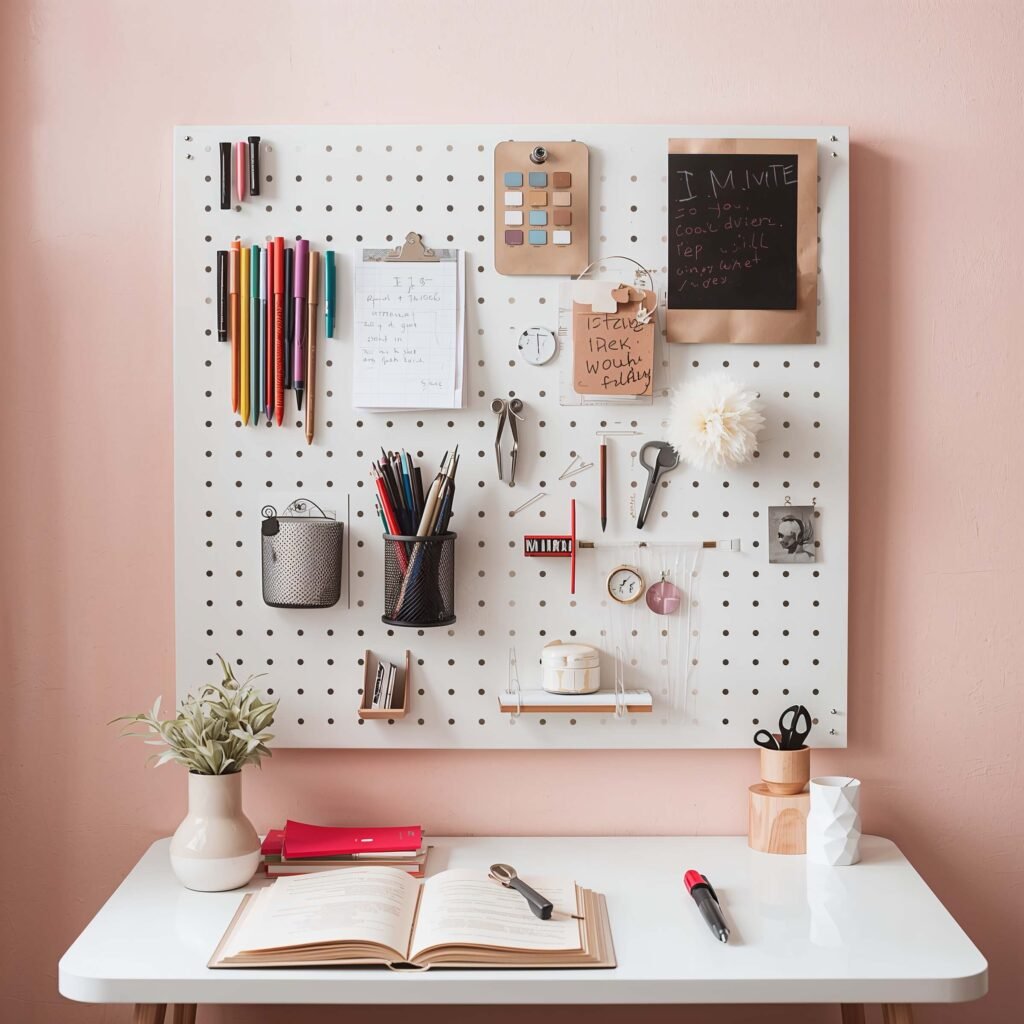
Let me introduce you to the Swiss Army knife of wall organization – the pegboard. I know what you’re thinking: “Isn’t that for garages?” But hear me out. A painted pegboard with the right accessories becomes a completely customizable organization system that grows with your needs.
I painted mine matte black, which looks surprisingly chic against my white walls. The contrast makes everything I hang on it pop, and rearranging the setup takes seconds when my study needs change.
Building Your Pegboard Command Center
Here’s how to make your pegboard not look like it belongs in your dad’s workshop:
- Paint it a bold color that complements your room
- Invest in stylish pegboard accessories (cups, shelves, hooks)
- Add small potted plants in hanging containers
- Include a mini whiteboard for quick notes
The beauty of this system? You can reorganize it whenever you want. During finals, I load it up with reference materials. During regular weeks, it holds my headphones, supplies, and a few decorative items.
Washi Tape Wall Patterns
Okay, can we talk about washi tape for a minute? This stuff is basically magic for renters or anyone who’s commitment-phobic about wall decor. I created an entire geometric wall design behind my desk using nothing but washi tape, and people think I hired someone to paint it.
The best part about washi tape designs? If you mess up or get bored, you just peel it off and start over. No damage, no drama, no angry landlords.
Creating Your Tape Masterpiece
Start simple if you’re new to this:
- Map out your design with light pencil marks
- Begin with one focal point (I started with a large triangle)
- Build outward with complementary patterns
- Mix different widths and patterns of tape for depth
I spent about $15 on various washi tape rolls and created a design that would’ve cost hundreds if painted professionally. Plus, changing it seasonally keeps my study space feeling fresh.
Also Read: 12 Inspiring Kids Study Room Ideas for Small Spaces
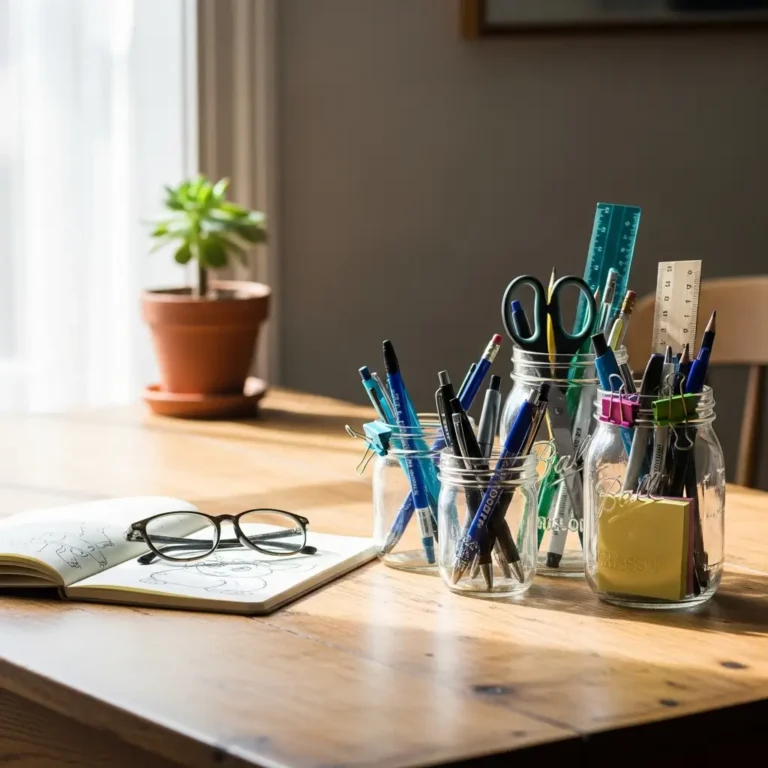
Mason Jar Desk Organizers
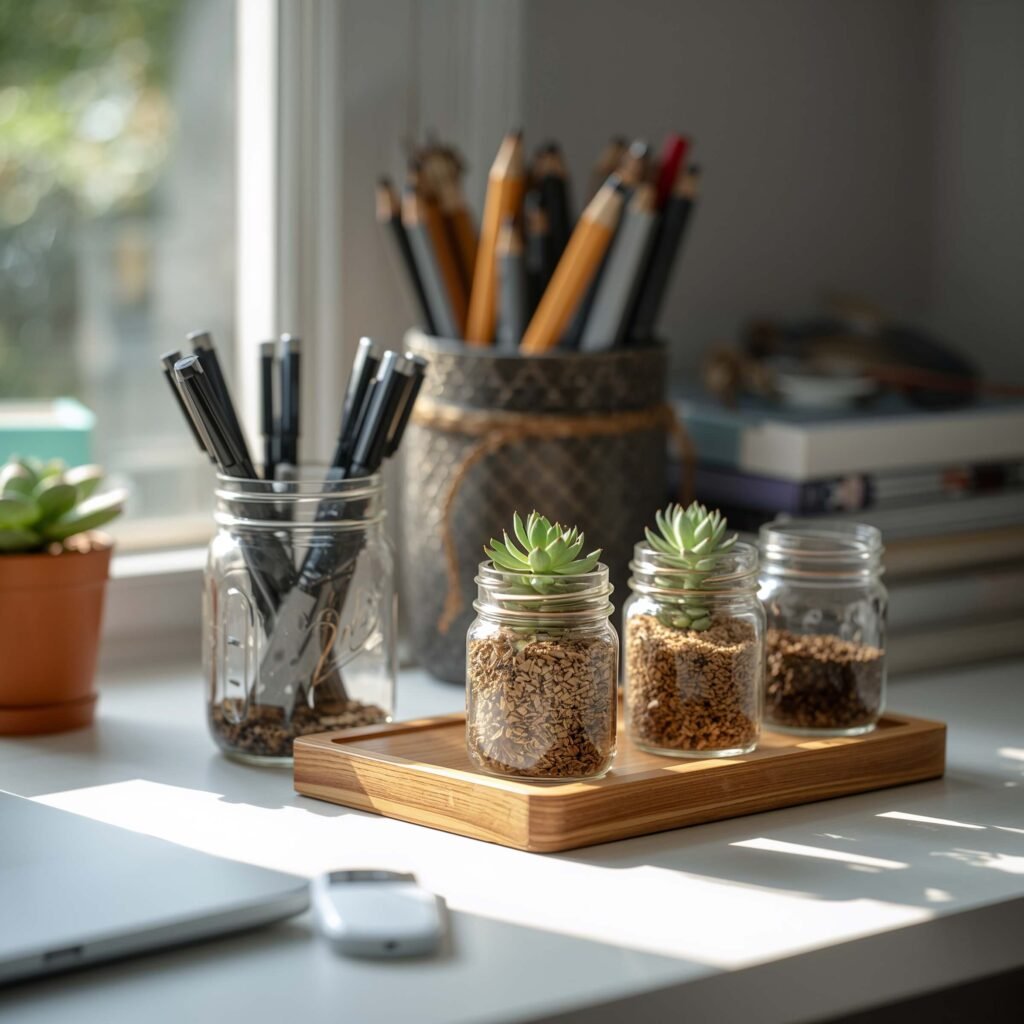
Before you roll your eyes at another mason jar craft, hear me out. Mason jars make incredible desk organizers when you do them right. I’m not talking about just plopping jars on your desk – I’m talking about a coordinated system that actually looks intentional.
I spray-painted mine in a gradient from dark to light blue, which looks way more sophisticated than clear jars everywhere. They hold everything from pens to paper clips to that collection of USB drives I definitely need to keep (even though I use cloud storage for everything).
Elevating Your Mason Jar Game
Here’s how to make mason jars look less “country kitchen” and more “modern study”:
- Spray paint them in coordinating colors
- Add labels using a label maker or vinyl letters
- Create a wooden base to keep them organized
- Use different sizes for visual interest
The wooden base I made from a piece of scrap wood transformed loose jars into a cohesive organizer unit. It took maybe 30 minutes to put together, and now my desk looks like I actually know what I’m doing.
Repurposed Crate Bookshelves
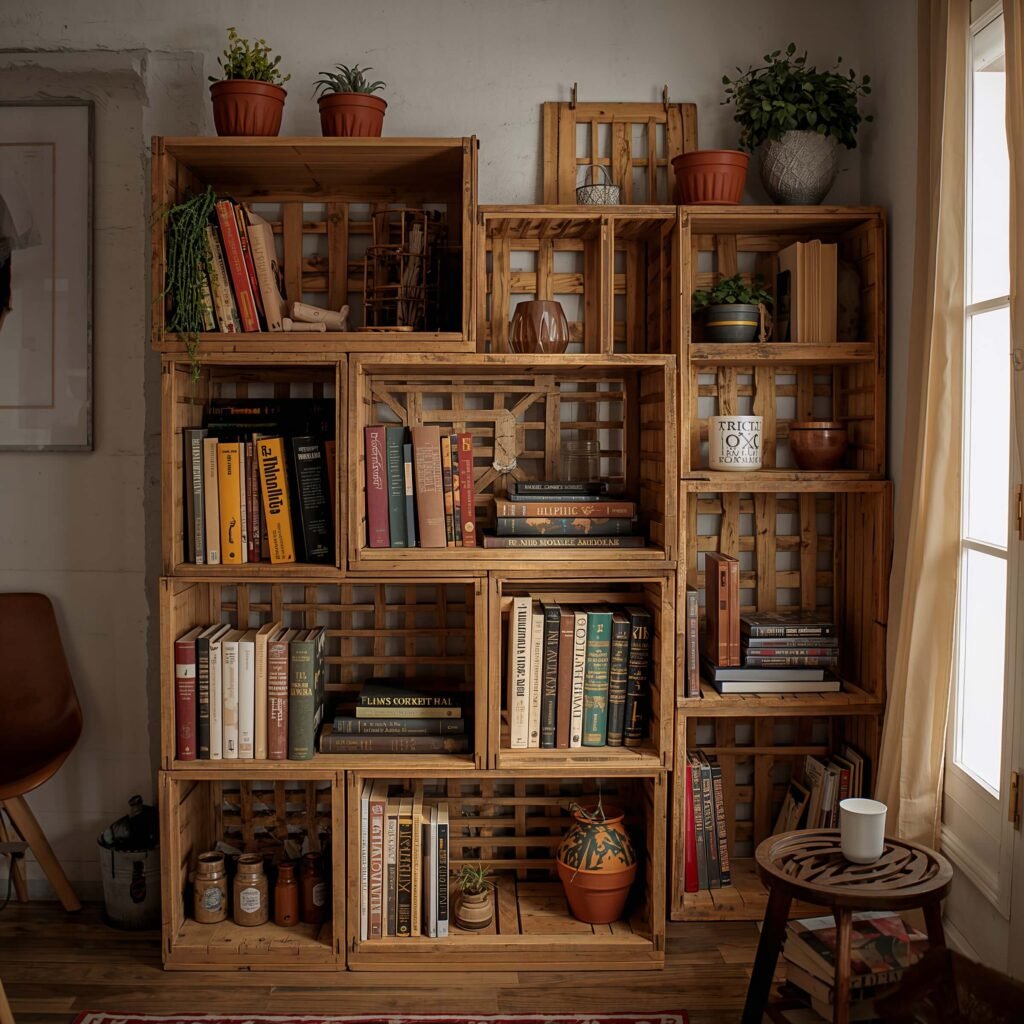
Found some old wooden crates at a flea market? Perfect. Wooden crates make amazing modular bookshelves that you can arrange and rearrange based on your space and needs. I’ve got six crates configured in an asymmetrical pattern, and it’s become the focal point of my study room.
What makes crate shelving genius is the flexibility. Need more storage? Add another crate. Moving to a new place? They stack flat for transport. Want to change the look? Rearrange them in minutes.
Building Your Crate Library
The process is almost embarrassingly simple:
- Sand the crates smooth (splinters and studying don’t mix)
- Stain or paint them to match your aesthetic
- Mount them to the wall or stack them freestanding
- Add LED strip lights inside for drama
I alternated the orientation of my crates – some opening sideways, some facing forward – which creates interesting shadows and depth. The whole setup cost less than $60, and it holds way more than traditional bookshelves would in the same space.
Personalized Wall Quote Canvas
Ever notice how the right words at the right moment can completely shift your mindset? That’s why I created a giant canvas with my favorite motivational quote. But instead of buying generic inspiration art, I made something that actually means something to me.
I chose a quote from my favorite author that reminds me why I love learning. Seeing it every day, in my own handwriting (well, attempted calligraphy), hits different than some mass-produced poster would.
Creating Your Quote Art
You don’t need to be an artist for this:
- Get a large blank canvas (check discount stores)
- Project or trace your quote if you’re not confident freehanding
- Use acrylic paint for bold letters
- Add decorative elements like gold leaf or geometric shapes
Mine says “The expert in anything was once a disaster” – which, honestly, perfectly describes my DIY journey. I added gold geometric triangles in the corners because I’m apparently obsessed with geometric patterns (as you might have noticed).
Also Read: 10 Charming Study Room Aesthetic Ideas for Small Spaces
Hanging Plant Desk Corner
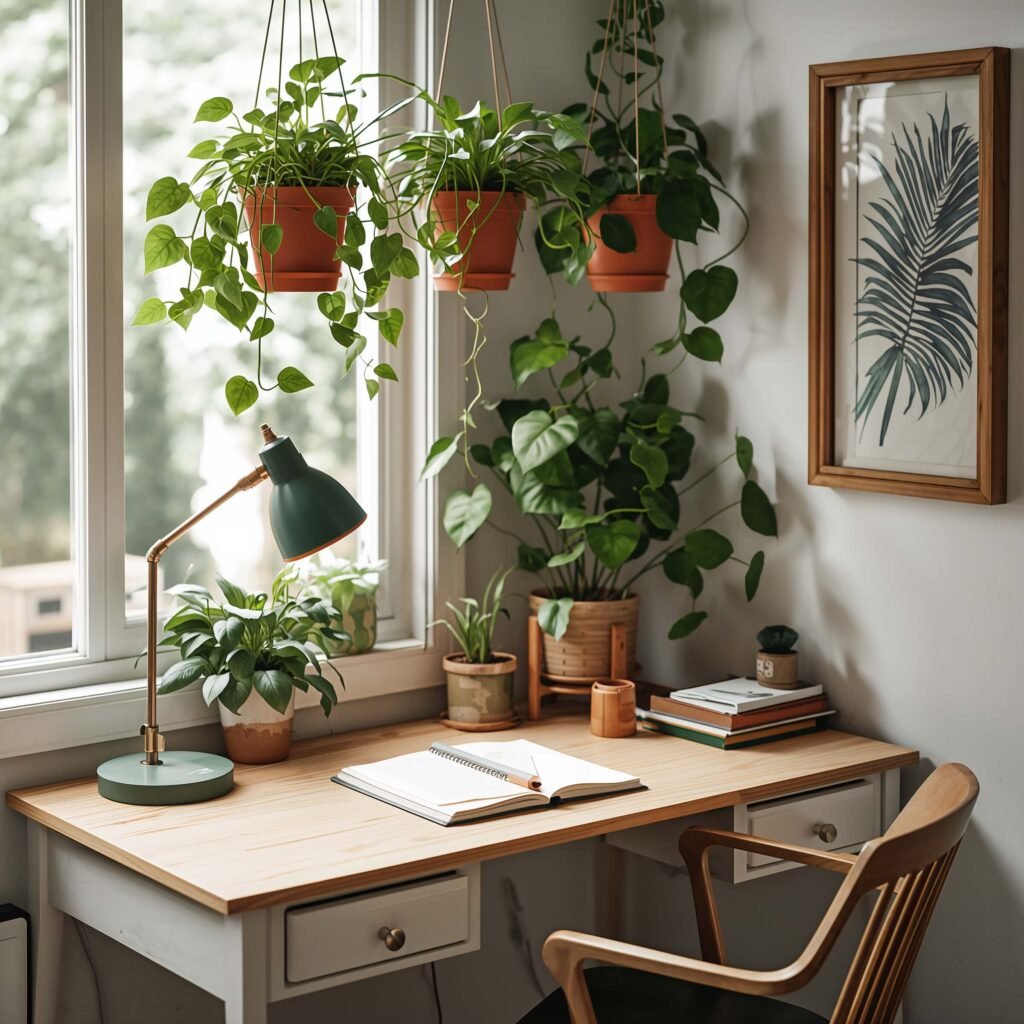
Plants in a study room aren’t just trendy – they’re scientifically proven to improve focus and air quality. But desk space is precious, right? That’s why I went vertical with macrame plant hangers in my study corner.
I’ve got three plants at different heights creating this cascading green waterfall effect. It brings life to the space without sacrificing a single inch of work surface. Plus, taking care of plants gives me legitimate study breaks that don’t involve scrolling through social media.
Setting Up Your Green Corner
Here’s my setup that’s kept plants alive for over a year (miracle, IMO):
- Pothos for the top (virtually indestructible)
- Spider plant in the middle (produces baby plants!)
- Succulent at the lowest point (needs minimal water)
- Macrame hangers at varying lengths for visual interest
The key is choosing plants that thrive in your room’s light conditions. Don’t be that person who kills a cactus because they put it in a dark corner. Ask me how I know :/
Chalkboard Painted Wall Section
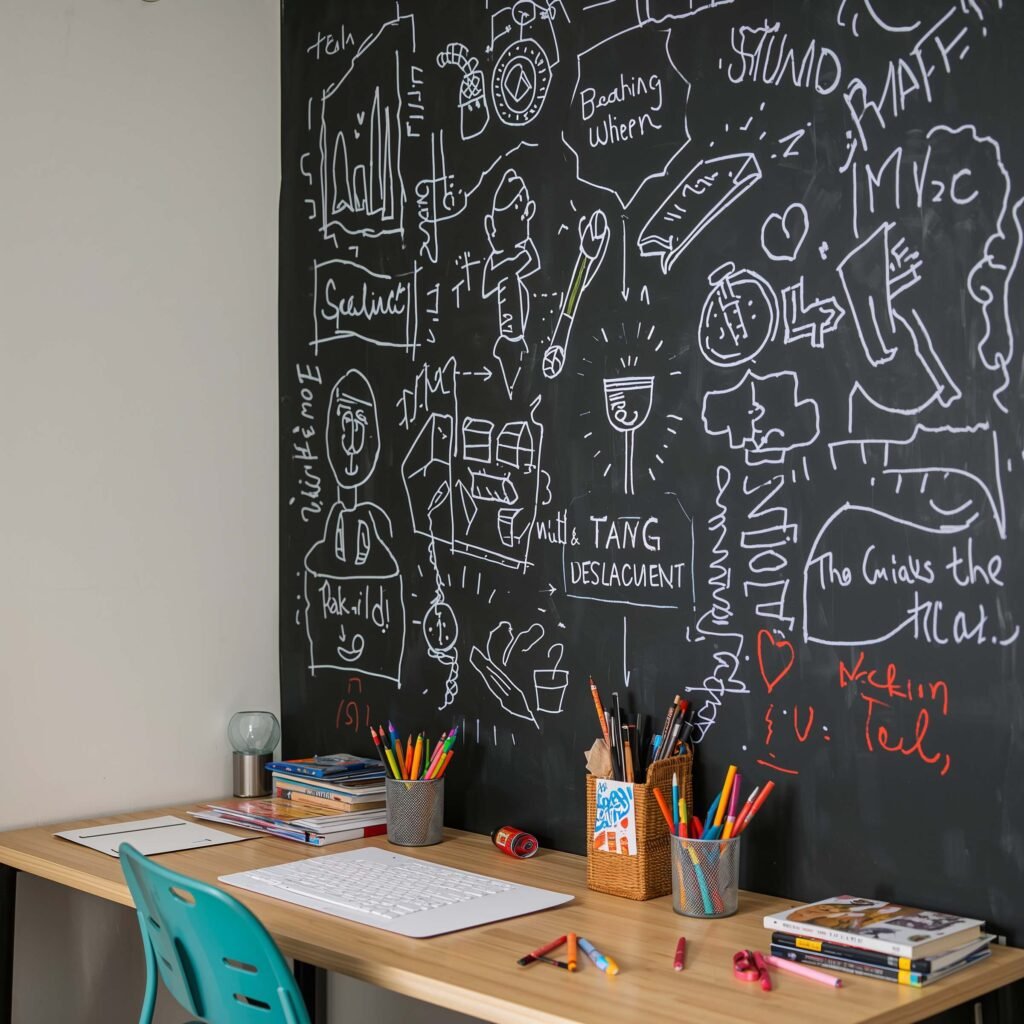
Creating a chalkboard wall section might be the best decision I made for my study room. It’s like having a giant notepad that never runs out of pages. I use it for everything from working out math problems to creating mind maps to leaving myself passive-aggressive reminders about deadlines.
The best part? When you’re stuck on a problem, standing up and writing on the wall gets your blood flowing. It’s way more engaging than staring at a notebook.
Painting Your Chalkboard Wall
The process is simpler than you’d think:
- Tape off your section with painter’s tape
- Apply chalkboard paint in thin, even coats
- Wait for it to cure completely (patience is key here)
- Season the board by rubbing chalk all over it, then erasing
I created a 4×4 foot section, which gives me plenty of space without overwhelming the room. Pro tip: frame it with decorative molding to make it look intentional rather than like you got lazy halfway through painting.
DIY Fabric Bulletin Board
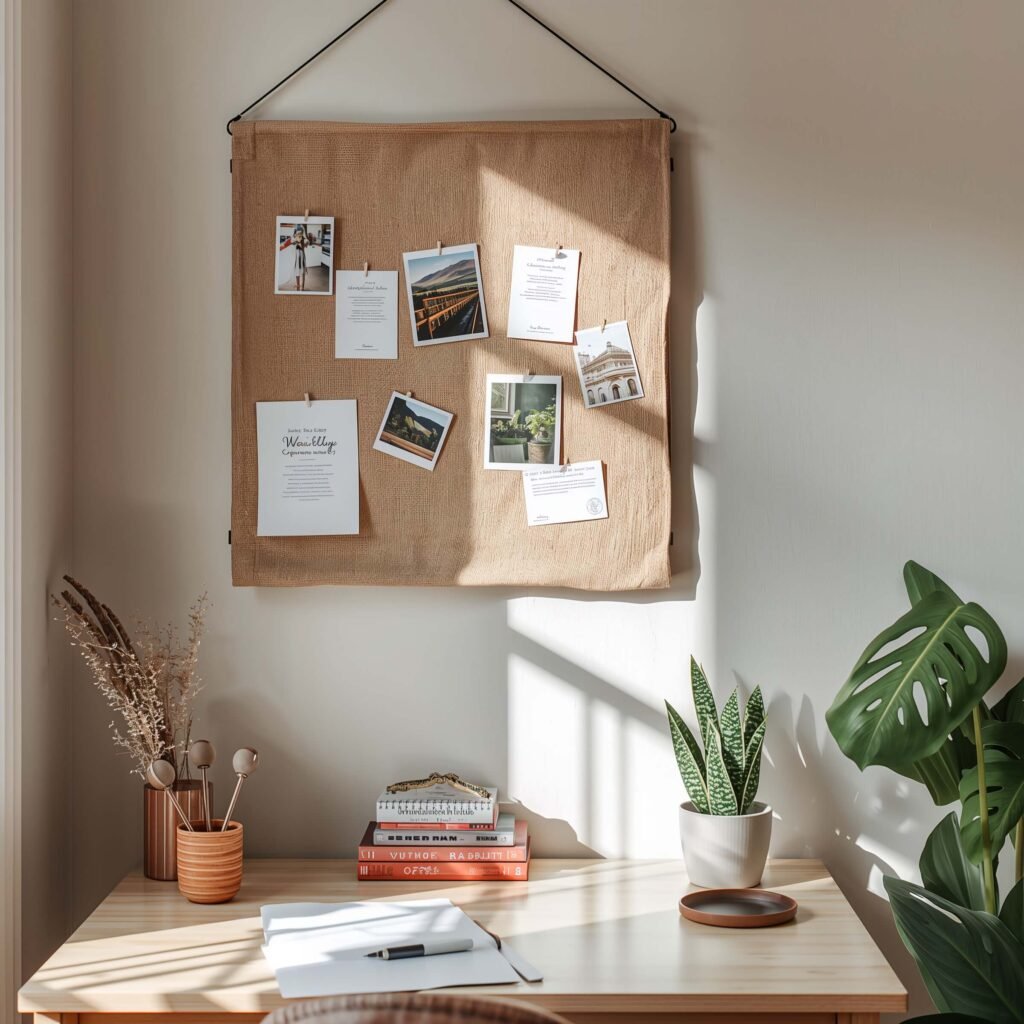
Last but definitely not least, let’s talk about fabric bulletin boards. These are like corkboards’ cooler, more sophisticated cousin. I made mine using foam board, batting, and fabric that matches my room’s color scheme, and it looks like something from a design magazine.
The fabric adds texture and warmth to the room while still being completely functional. I use decorative pins to attach everything from concert tickets to study schedules, and unlike cork, the fabric doesn’t show a million pinholes over time.
Crafting Your Fabric Board
This project takes about an hour:
- Cut foam board to your desired size
- Add a layer of batting for dimension
- Stretch fabric tightly over both
- Staple or glue fabric to the back
- Add ribbon in a diamond pattern for extra organization
I made three smaller boards instead of one large one, arranged in a triptych style. It looks more like art than organization, which is exactly the vibe I wanted.
Wrapping It All Up
So there you have it – twelve DIY study room decor ideas that won’t require selling a kidney or spending every weekend for the next month crafting. The beauty of these projects is that you can mix and match based on your space, style, and sanity level.
My study room went from a sad, uninspiring corner to a space where I actually want to spend time. And the whole transformation cost less than what most people spend on textbooks in a semester. The key is starting with one project that excites you most, then building from there.
Remember, your study space should inspire you, not stress you out. These DIY projects let you create a personalized environment that reflects who you are while keeping everything organized and functional. Whether you tackle all twelve ideas or just pick your favorites, you’re going to end up with a study room that makes hitting the books feel less like a chore and more like a choice.
Now stop reading and start creating – those floating shelves won’t install themselves! And when you’re done, you’ll have a study space that’s not just Instagram-worthy but actually makes studying more enjoyable. Who knew that was even possible?