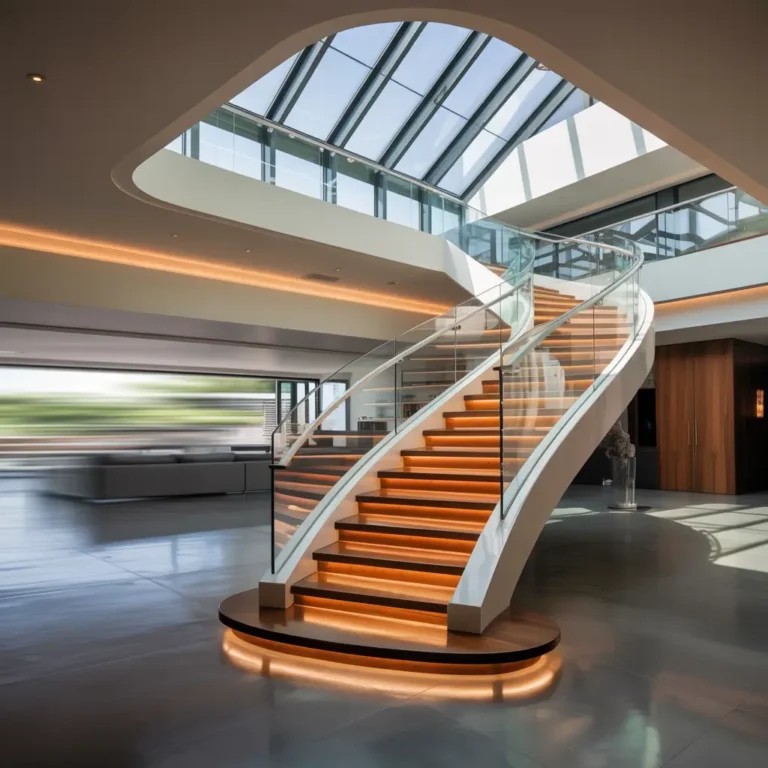
10 Stunning DIY Stairs Makeover Ideas for Budget Homes
Look, I’ll be straight with you – your stairs are probably the most overlooked part of your home right now.
You walk up and down them dozens of times a day, but when’s the last time you actually looked at them? I mean, really looked? If you’re like most of us, they’re just… there.
Plain, boring, maybe a little scuffed up from years of foot traffic and probably that time you tried to carry that massive IKEA box upstairs (we’ve all been there).
But here’s the thing – your staircase is prime real estate for a dramatic makeover that won’t require a second mortgage.
I’ve been down this rabbit hole myself, transforming three different staircases over the years, and let me tell you, the impact is absolutely wild. We’re talking about a space that connects your entire home, so why not make it spectacular?
Painted Geometric Stair Risers Makeover
Ever walked past a staircase that made you stop dead in your tracks? That’s exactly what geometric painted risers will do for your guests. I stumbled onto this trend about two years ago when I was desperately trying to jazz up my builder-grade stairs, and honestly, it changed everything.
The beauty of geometric patterns lies in their flexibility. You can go bold with contrasting triangles, keep it sophisticated with hexagons, or create movement with chevron patterns. The best part? You don’t need to be Picasso to pull this off.
Here’s what you’ll need for this transformation:
- High-quality painter’s tape (trust me, don’t cheap out here)
- Primer specifically designed for stairs
- Semi-gloss or satin paint in your chosen colors
- Small foam rollers and angled brushes
- A level and measuring tape
Start by thoroughly cleaning your risers and letting them dry completely. Sketch your pattern on paper first – this saves you from that “oh crap, what was I thinking?” moment halfway through. Apply your base color first, let it cure for at least 24 hours, then tape off your geometric shapes.
Pro tip from my own disaster: Remove the tape while the paint is still slightly tacky. Wait too long, and you’ll peel off chunks of your beautiful work. Ask me how I know this :/
The transformation typically takes a weekend, but the impact lasts for years. Plus, if you get bored with your pattern (like I did), you can always paint over it and try something new.
Peel-and-Stick Tile Staircase Transformation
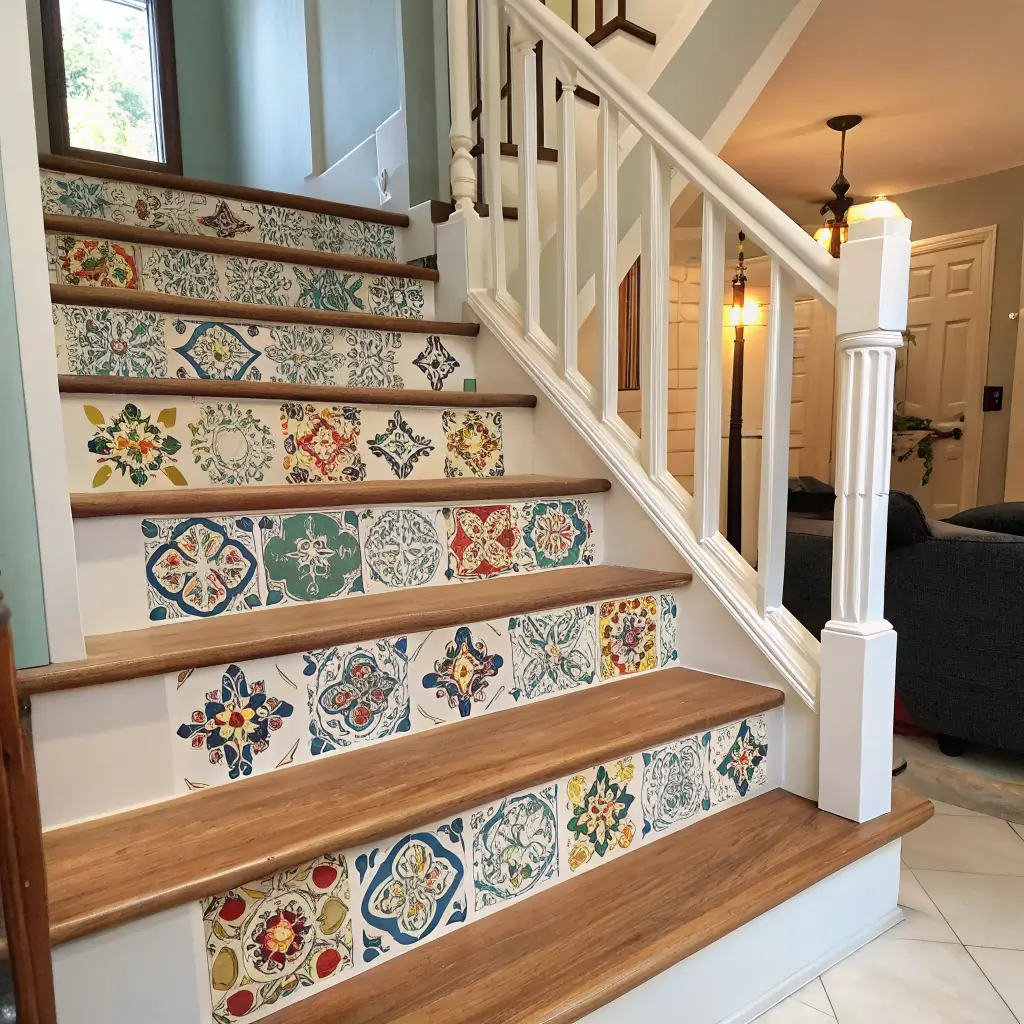
Okay, let’s talk about the game-changer that is peel-and-stick tile. When I first heard about this option, I was skeptical. Really skeptical. How could something so simple create a high-end look? But after seeing my neighbor’s absolutely stunning marble-look transformation, I became a believer.
Peel-and-stick tiles have come a long way from those flimsy contact paper disasters of the past. Today’s options are thick, durable, and incredibly realistic. You can achieve looks ranging from classic subway tile to natural stone without the massive expense or installation headaches.
The process is surprisingly straightforward. Start with clean, dry stairs and measure each tread and riser carefully. Most tiles can be cut with a utility knife and straight edge, making fitting around awkward corners totally manageable.
Here’s what works best:
- Choose tiles with strong adhesive backing
- Work in temperatures between 65-75°F for optimal adhesion
- Use a rolling pin or hand roller to eliminate air bubbles
- Start from the center of each step and work outward
I particularly love this method for basements or secondary staircases where you want impact without major investment. The entire project typically costs under $200 and can be completed in a day.
One heads up though – if your stairs see heavy traffic, invest in higher-quality tiles. The cheap stuff might start peeling at the edges after a few months of constant use.
Farmhouse Wood Plank Stair Upgrade
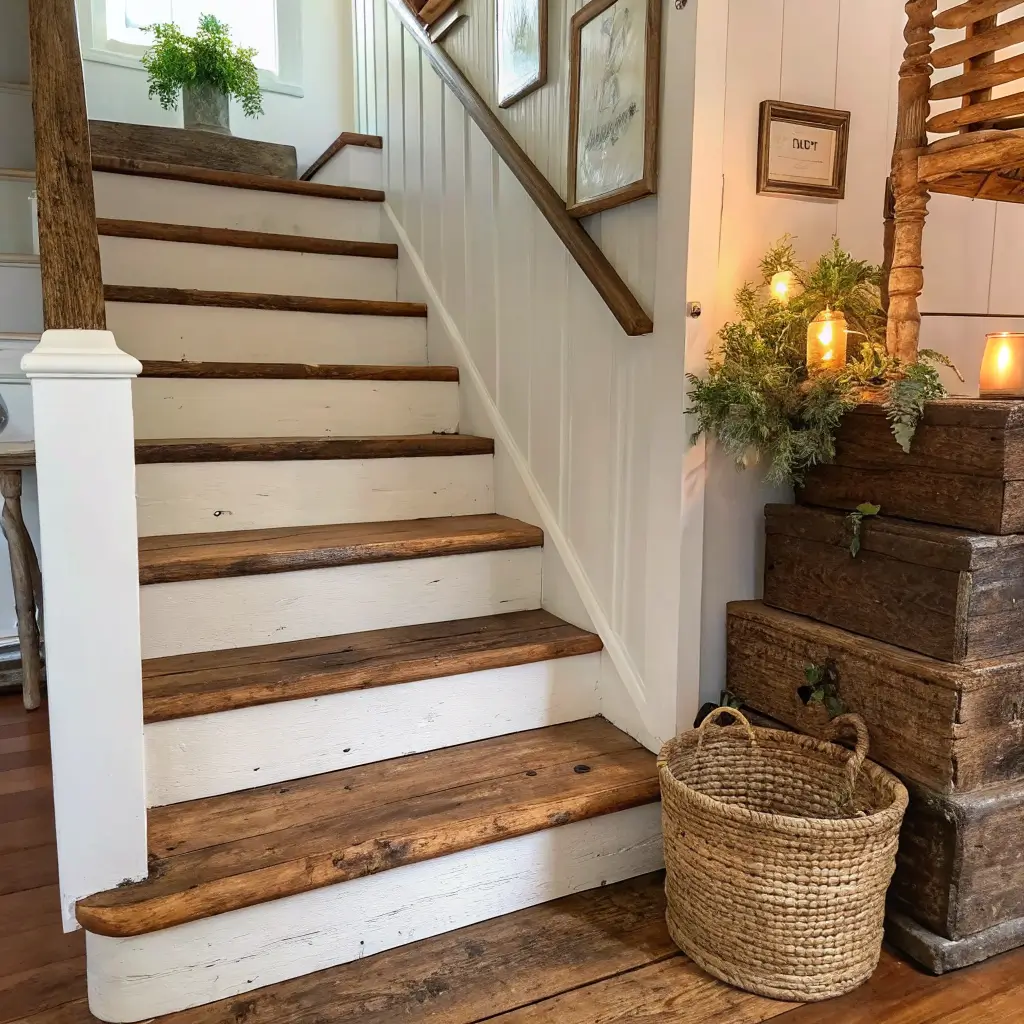
Nothing says “welcome home” quite like the warm, rustic charm of wood plank stairs. This makeover captures that cozy farmhouse aesthetic that everyone’s obsessing over, and honestly, I get why. There’s something incredibly inviting about natural wood that makes your entire home feel more grounded.
The key to nailing this look is choosing the right wood and finish. Pine planks give you that authentic farmhouse feel without the premium hardwood price tag. I used 1×8 pine boards for my own stair makeover, and the results were exactly what I hoped for.
Here’s your game plan:
- Measure each tread carefully and cut planks to fit
- Sand everything thoroughly (this step matters more than you think)
- Apply wood conditioner before staining for even color
- Use construction adhesive and finish nails for secure attachment
- Seal with a durable polyurethane finish
The staining process is where you can really customize the look. Go darker for dramatic contrast, or keep it light and natural for that fresh, airy feeling. I went with a classic weathered gray that perfectly complemented my existing decor.
Real talk: This project requires more time and skill than some others on this list. Plan for a full weekend, and don’t rush the drying times between coats. Trust the process – the results are absolutely worth it.
Also Read: 10 Gorgeous Stairs Tiles Design Ideas for Dream Homes
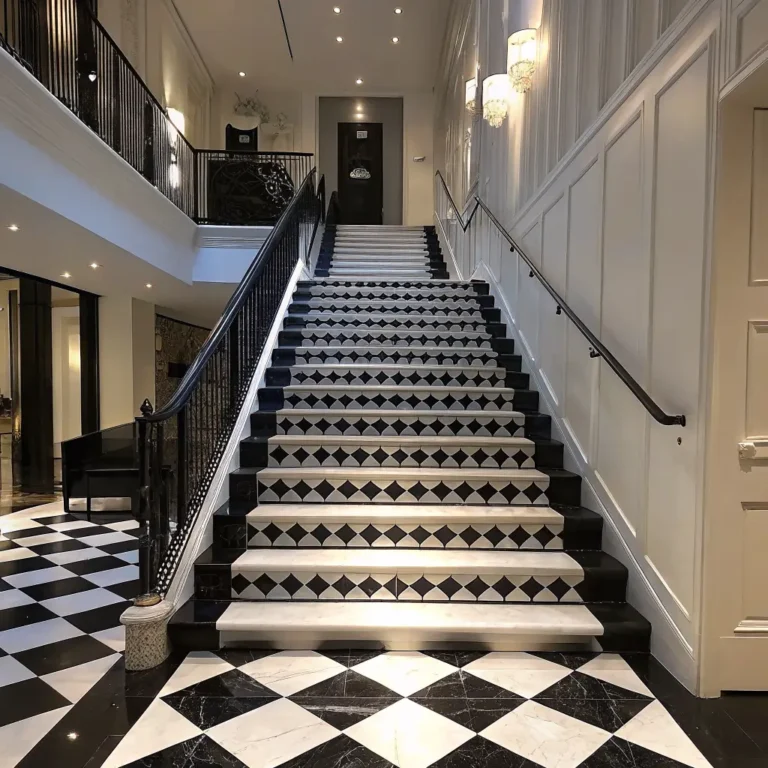
Black and White Contrast Stair Design
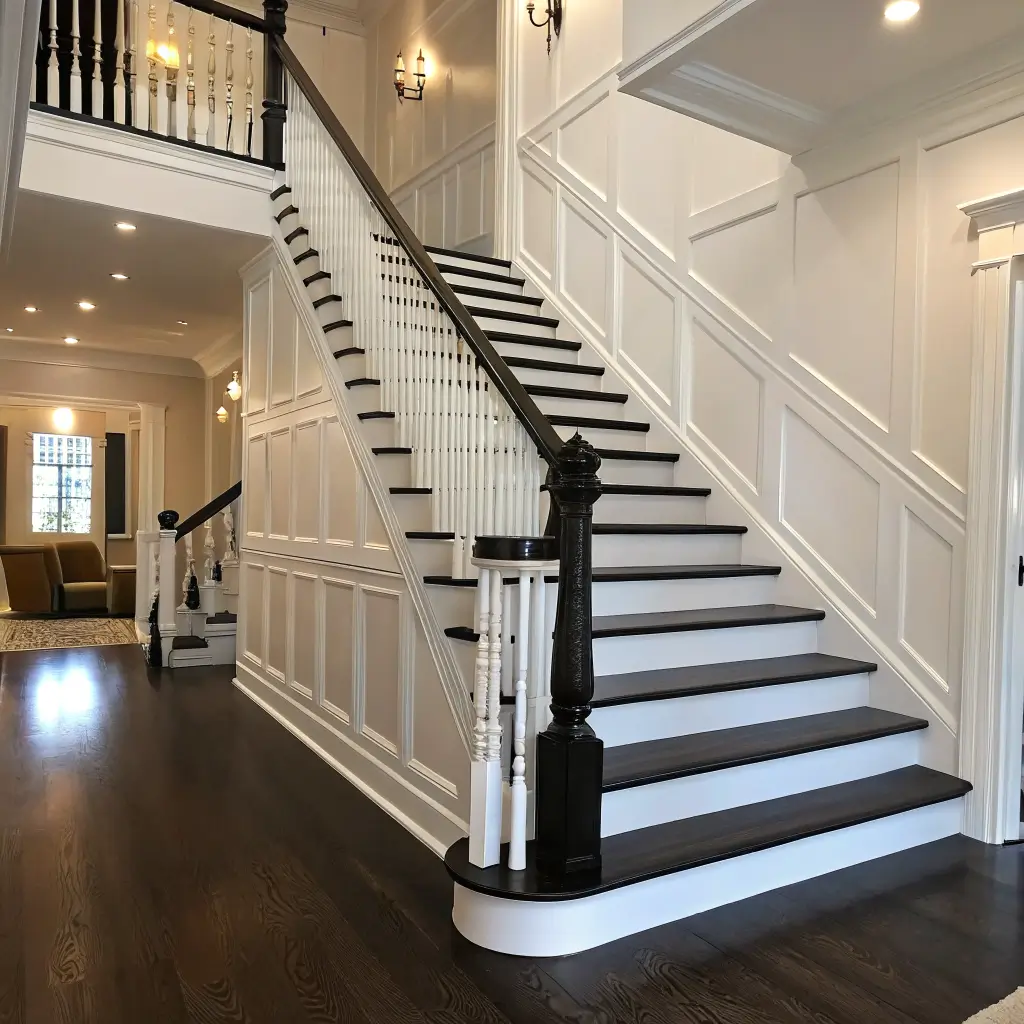
Want to create serious drama? Black and white contrast is your answer. This isn’t just a color scheme – it’s a statement. When I first suggested this to my friend Sarah, she thought I was crazy. “Won’t it be too bold?” she asked. Six months later, her staircase is the star of every Instagram post she shares.
The magic happens in the execution. You can paint alternating steps, create bold stripes, or even combine painted treads with contrasting risers. The stark contrast draws the eye upward and makes your staircase feel like architectural art.
My favorite approach combines black painted risers with crisp white treads. It’s clean, sophisticated, and works with virtually any decor style. Plus, the high contrast actually helps with safety – each step is clearly defined, which is particularly helpful in lower light conditions.
For this transformation, you’ll want:
- High-quality primer (essential for good adhesion)
- True black and pure white paint in a durable finish
- Excellent brushes and rollers for smooth application
- Painter’s tape for crisp lines
- Drop cloths to protect surrounding areas
The prep work is crucial here. Any imperfections in your painting will be magnified by the high contrast, so take time to sand, fill holes, and clean thoroughly before you start.
Consider adding a clear protective topcoat, especially on the treads. Black shows every speck of dust and footprint, so you’ll want that extra layer of protection to keep your masterpiece looking fresh.
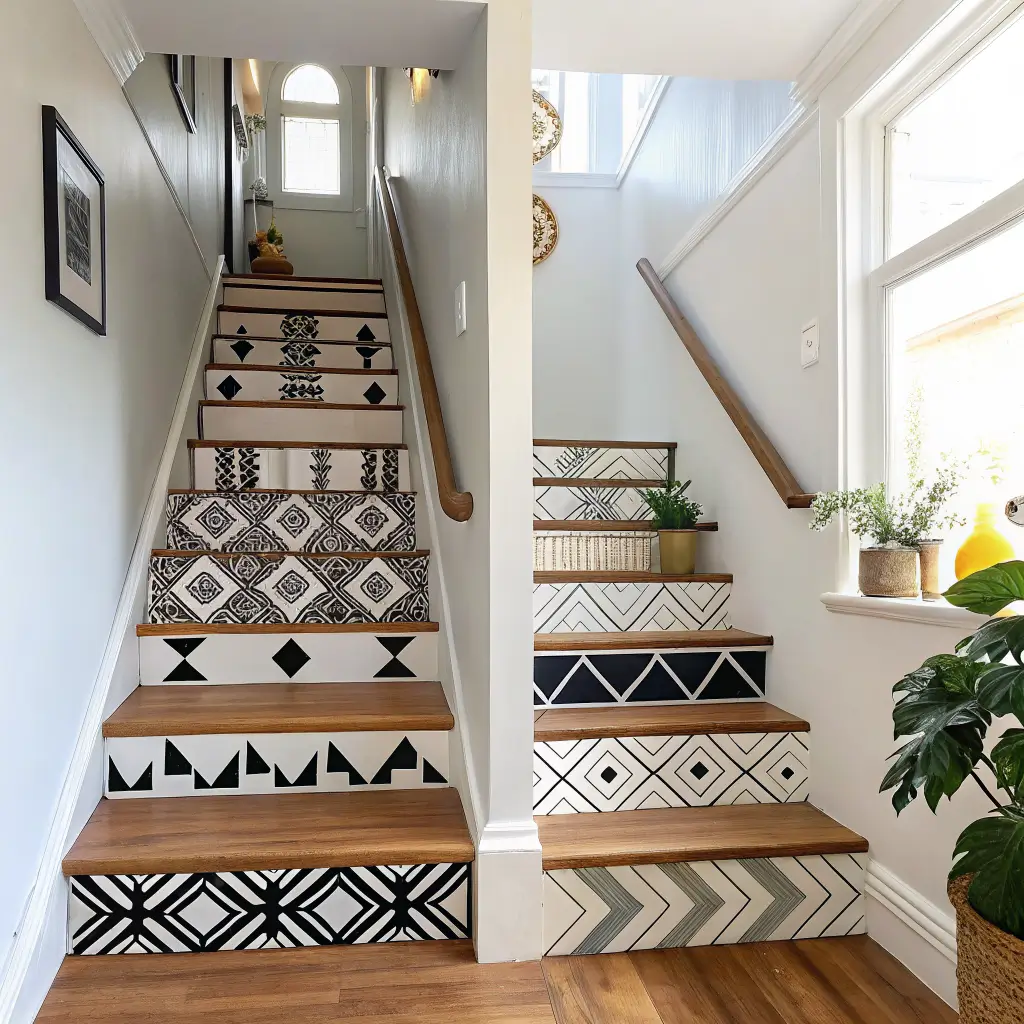
Stenciled Pattern Stair Riser Makeover
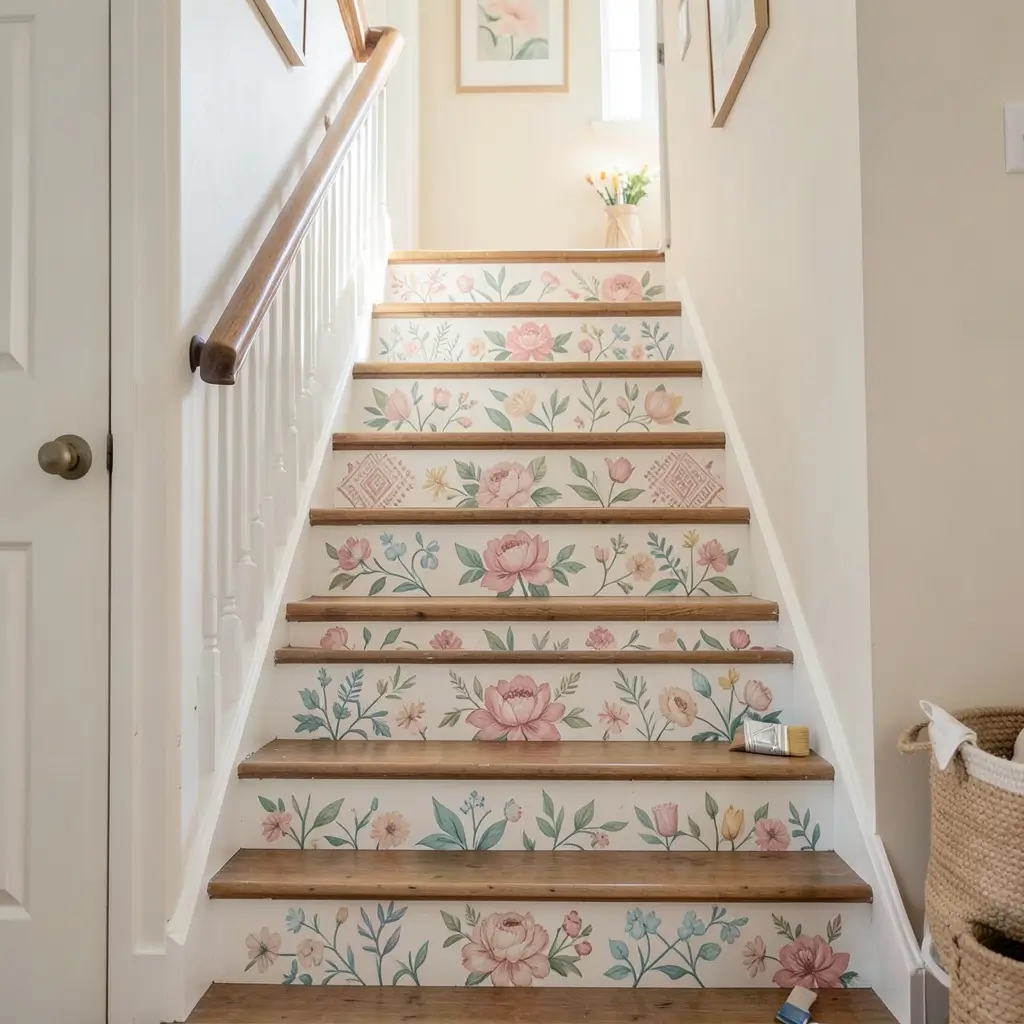
Stenciling might sound old-fashioned, but modern stencil designs are absolutely stunning. This technique lets you add intricate patterns that would be nearly impossible to paint freehand, and the results look like expensive custom tilework.
I discovered this method by accident when I was browsing Pinterest late one night (dangerous, I know). A beautiful Moroccan-inspired pattern caught my eye, and I thought, “There’s no way that’s hand-painted.” Turns out, it was all done with stencils, and it looked incredible.
The variety of available stencil patterns is mind-blowing. You can find everything from delicate florals to bold geometric designs, traditional damask to modern abstract patterns. The key is choosing something that complements your home’s overall style.
Here’s what makes stenciling successful:
- Use a small, dense foam roller for best results
- Don’t overload your roller with paint – less is more
- Hold the stencil firmly in place to prevent bleeding
- Clean your stencil frequently to maintain crisp edges
- Work in good light to spot any mistakes immediately
Start with the bottom riser and work your way up. This lets you perfect your technique before you get to the more visible upper steps. I learned this lesson the hard way when my first few attempts were… let’s call them “rustic.”
Pro tip: Create a test panel on cardboard first to practice your technique and confirm your paint colors work well together.
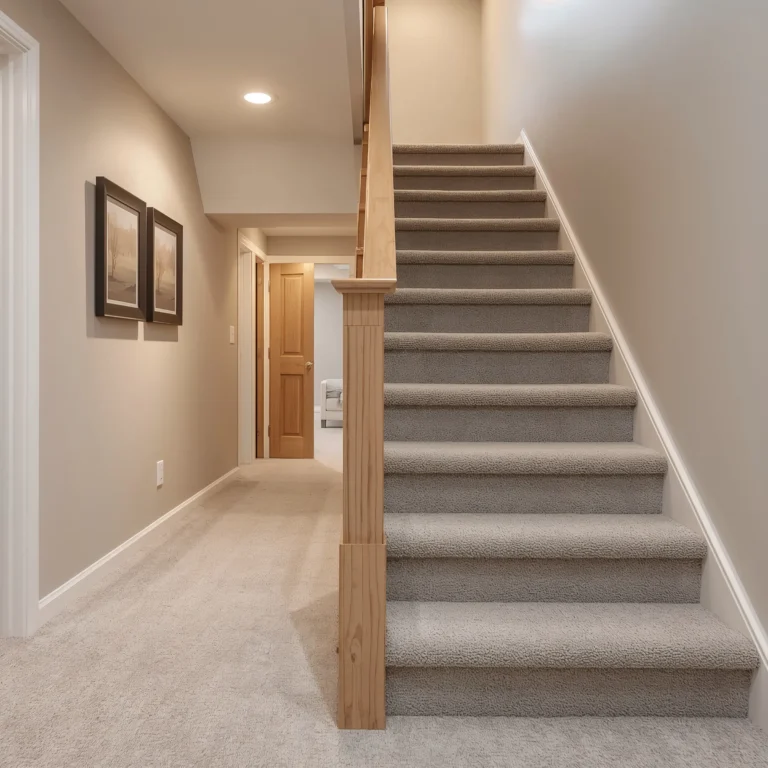
Carpet Runner DIY Stair Upgrade
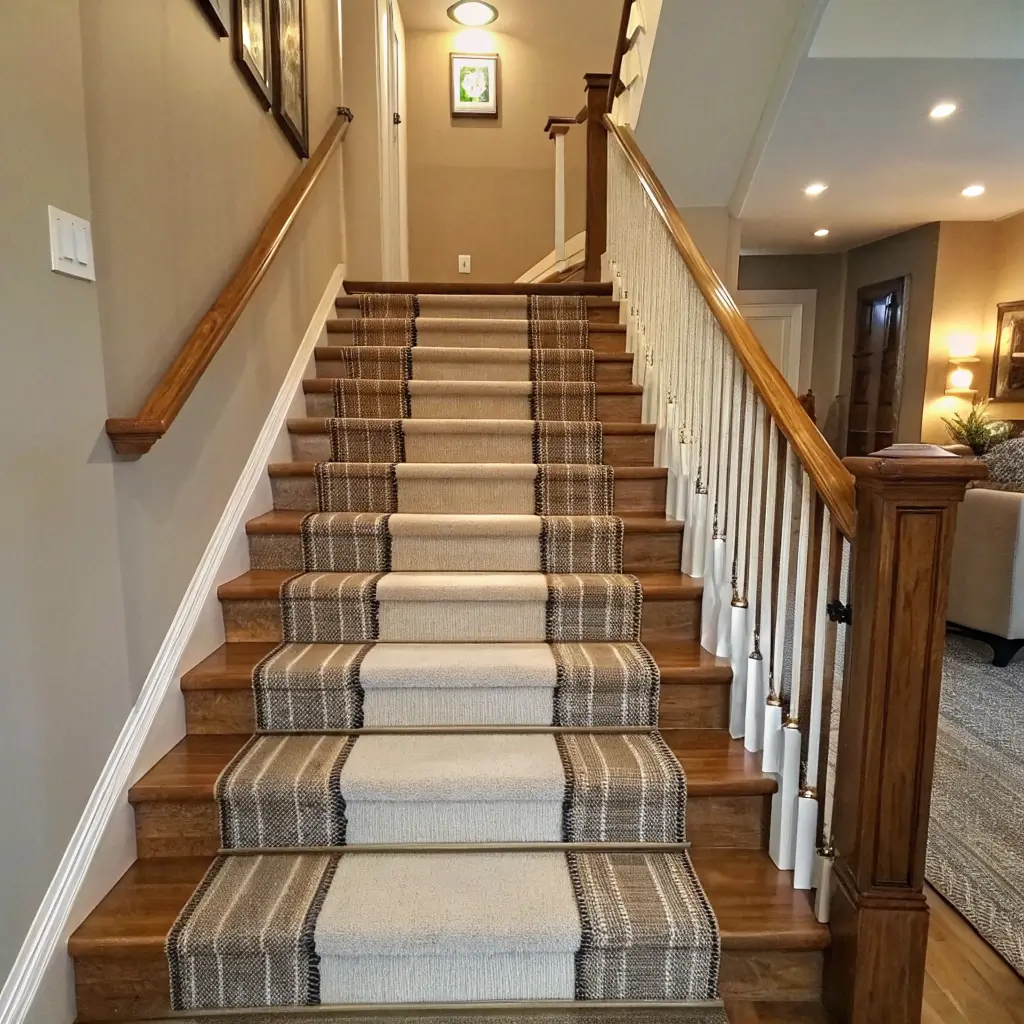
Sometimes the most dramatic transformation comes from adding rather than removing. A well-chosen carpet runner can completely change your staircase’s personality while adding comfort and safety. Plus, it’s one of the more budget-friendly options on this list.
The runner game has seriously evolved. We’re not talking about your grandmother’s dusty rose florals here. Modern runners come in bold patterns, rich textures, and colors that can either complement or completely transform your existing decor.
I’m partial to natural fiber runners like jute or sisal for their durability and timeless appeal, but don’t overlook synthetic options if you need something more stain-resistant (especially important if you have kids or pets).
Installation is more straightforward than you might think:
- Measure your stairs carefully and add extra length for adjustments
- Use carpet tacks or a staple gun for secure attachment
- Start from the bottom and work up, keeping the runner centered
- Pull taut at each step to avoid bunching or loose spots
- Trim excess length with a sharp utility knife
The safety factor here is huge. Carpet runners provide much better traction than bare wood or painted stairs, which is particularly important for older family members or anyone navigating stairs in socks.
Choose patterns that won’t show every bit of dirt and consider the maintenance requirements. A beautiful white geometric pattern might look amazing in photos, but it’ll drive you crazy if you’re constantly cleaning it.
Also Read: 10 Creative Stairs Makeover Ideas for Dream Homes
Ombre Painted Staircase Effect
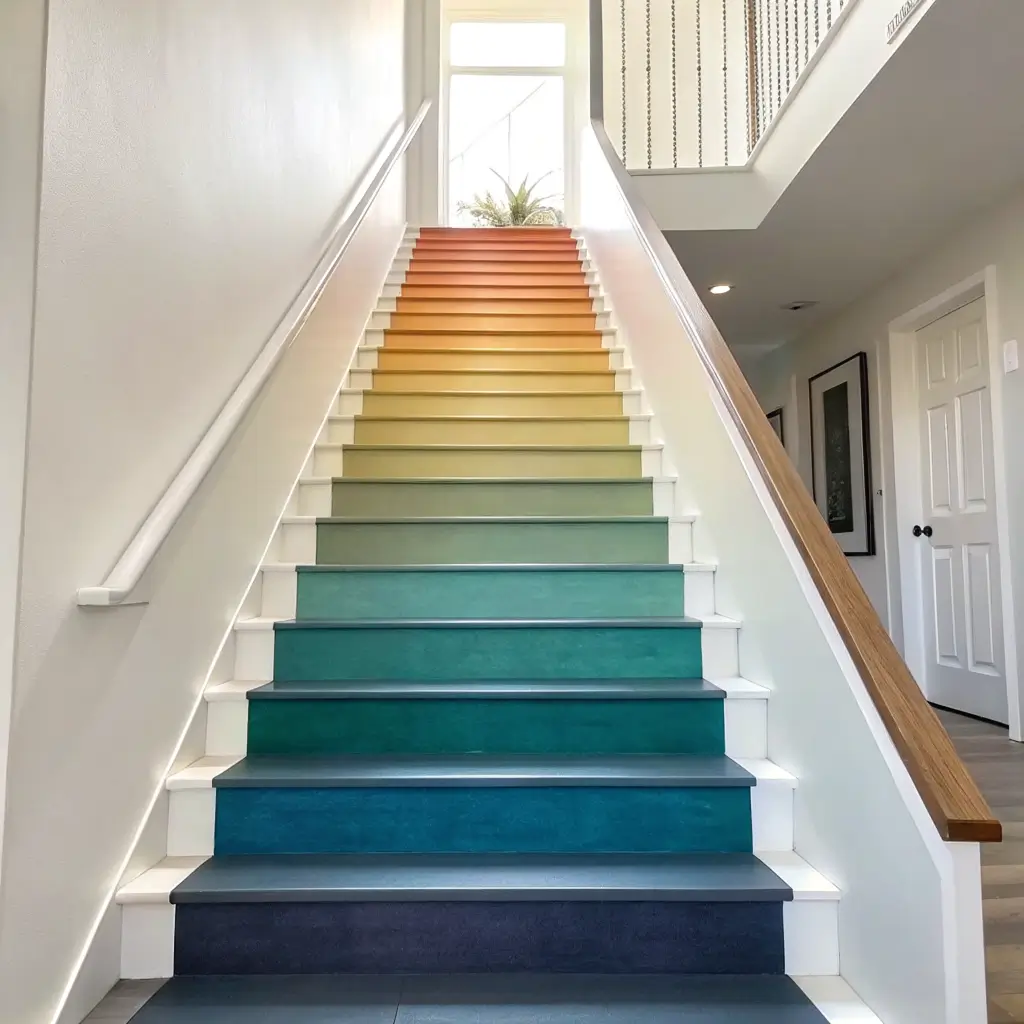
Creating an ombre effect on your staircase is like bringing a sunset indoors. This technique gradually transitions from one color to another, creating movement and visual interest that’s absolutely captivating. I’ll admit, when I first attempted this, I was terrified I’d end up with something that looked like a paint store explosion.
The secret to successful ombre is patience and blending. You’re essentially creating a custom gradient that flows from step to step, and rushing this process will leave you with harsh lines instead of smooth transitions.
Start by choosing your color palette. You can go subtle with different shades of the same color, or bold with complementary colors. I used varying shades of blue on my own stairs, transitioning from deep navy at the bottom to soft sky blue at the top, and the effect is breathtaking.
Here’s your step-by-step approach:
- Plan your color progression on paper first
- Mix your paint colors in small batches to ensure consistency
- Use a wet blending technique while the paint is still workable
- Work on one step at a time, blending edges immediately
- Step back frequently to check your overall effect
This technique works best when you have adequate time to complete the entire staircase in one session. Paint dries quickly, and trying to blend with dried edges creates visible seam lines.
The key tool here is a large, soft brush for blending. Don’t try to achieve the entire gradient with a roller – you need that brush control for smooth transitions.
Rustic Distressed Wood Stair Makeover
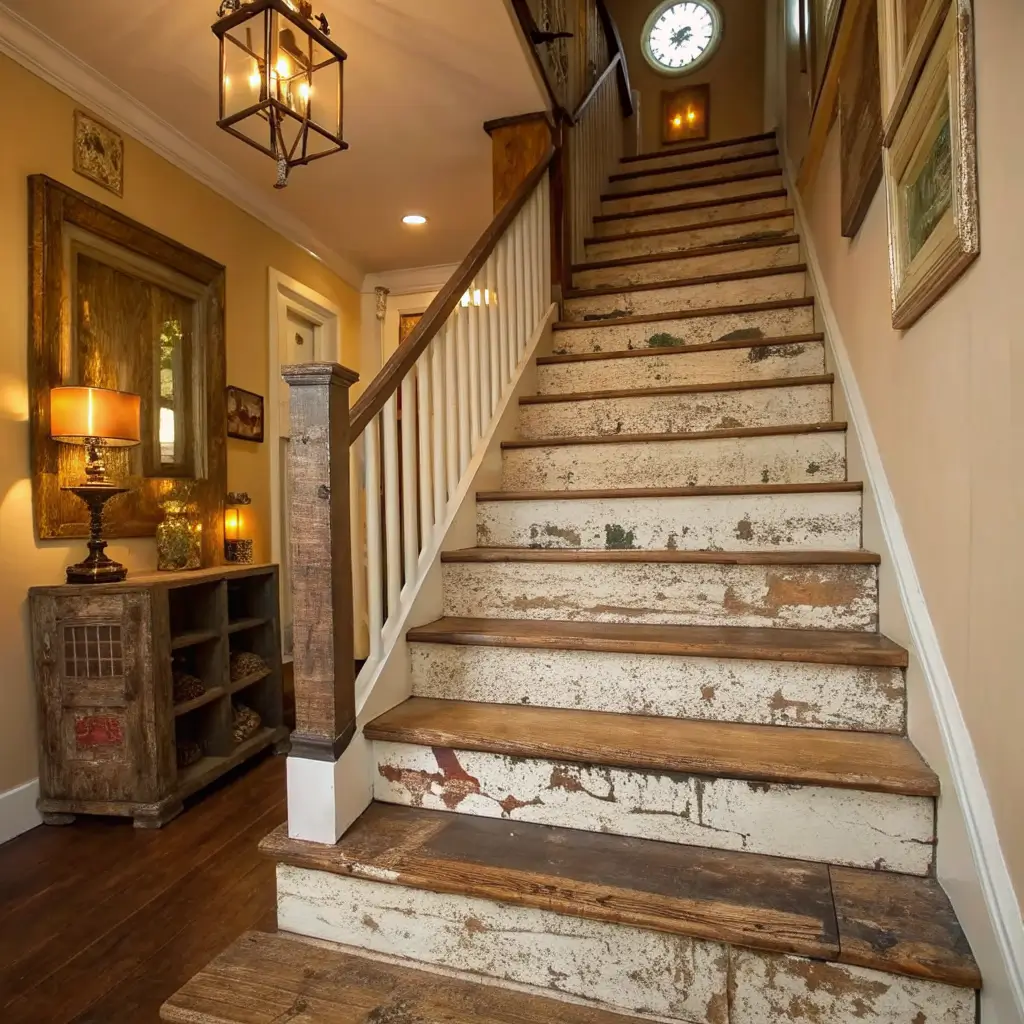
Want to add character and charm that looks like it’s been there for decades? Distressed wood techniques can transform new construction stairs into something with serious vintage appeal. This approach works particularly well if you’re going for that reclaimed barn wood aesthetic without the premium price tag.
Distressing is an art form that’s surprisingly forgiving. Unlike precise geometric patterns or perfect paint jobs, the beauty here lies in the imperfections. Every ding, scratch, and worn spot adds to the authentic aged appearance.
You can start with new wood and age it yourself, or if you’re lucky enough to find reclaimed materials, work with their existing character. I prefer the DIY aging approach because you have complete control over the final look.
Essential distressing techniques include:
- Sanding specific areas to simulate natural wear patterns
- Using a hammer and chain to create authentic dents and marks
- Applying multiple stain colors and selectively removing some
- Dry brushing paint for a weathered, layered appearance
- Focusing distressing on edges and high-traffic areas
The key is studying real aged wood to understand where natural wear occurs. Edges get rounded, corners get dinged, and high-traffic areas develop smooth wear patterns. Replicate these naturally occurring details for the most convincing results.
Consider the overall story you’re telling. Are these stairs from an old farmhouse? A weathered beach cottage? A rustic cabin? Let that narrative guide your distressing choices.
Minimalist All-White Stair Transformation

Sometimes the most powerful statement is the simplest one. An all-white staircase creates clean lines, reflects light beautifully, and makes any space feel larger and more open. This approach particularly shines in smaller homes where you want to maximize the sense of space.
Pure white isn’t as simple as it sounds. There are dozens of white paint colors, each with different undertones that can dramatically affect your final result. Some lean warm with yellow or pink undertones, others are cool with blue or gray undertones.
I learned this lesson when I painted my first white staircase and ended up with what looked like a dingy cream color instead of the crisp, clean white I envisioned. The problem? I chose a warm white in a north-facing stairwell that never gets direct sunlight.
For the best results:
- Test multiple white shades in your specific lighting conditions
- Use a high-quality primer designed for the surface you’re painting
- Apply multiple thin coats rather than one thick coat
- Invest in premium paint for durability and easy cleaning
- Consider different sheens for treads versus risers
Maintenance is the reality check here. White shows everything – every footprint, scuff mark, and bit of dust. You’ll need to stay on top of cleaning and touch-ups to maintain that crisp, fresh appearance.
But when it’s done right? The result is absolutely stunning. White stairs create a sophisticated backdrop that lets your other decor elements shine while making the entire space feel more expensive and thoughtfully designed.
Also Read: 10 Amazing Basement Stairs Ideas Stylish Home Upgrade
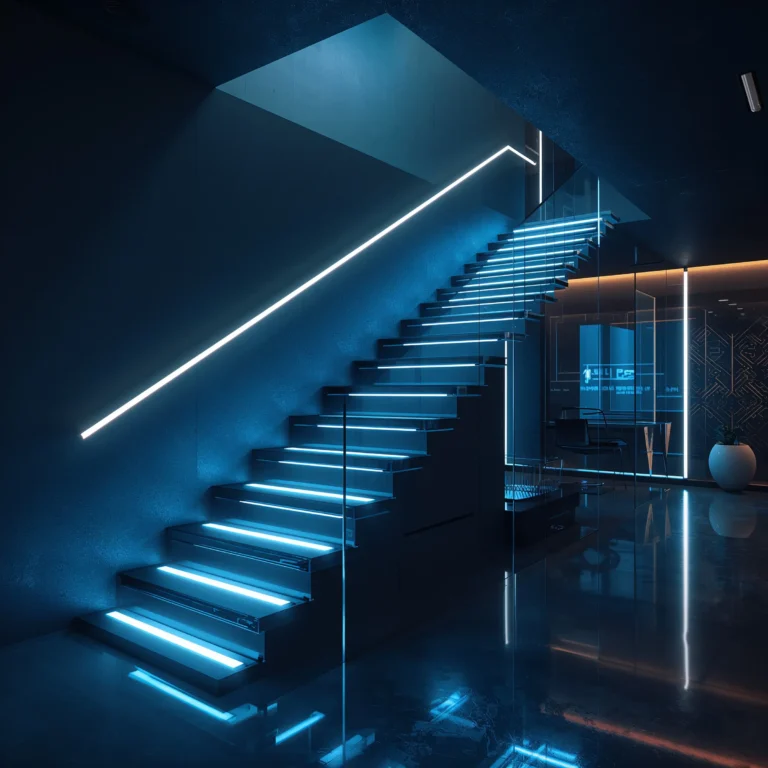
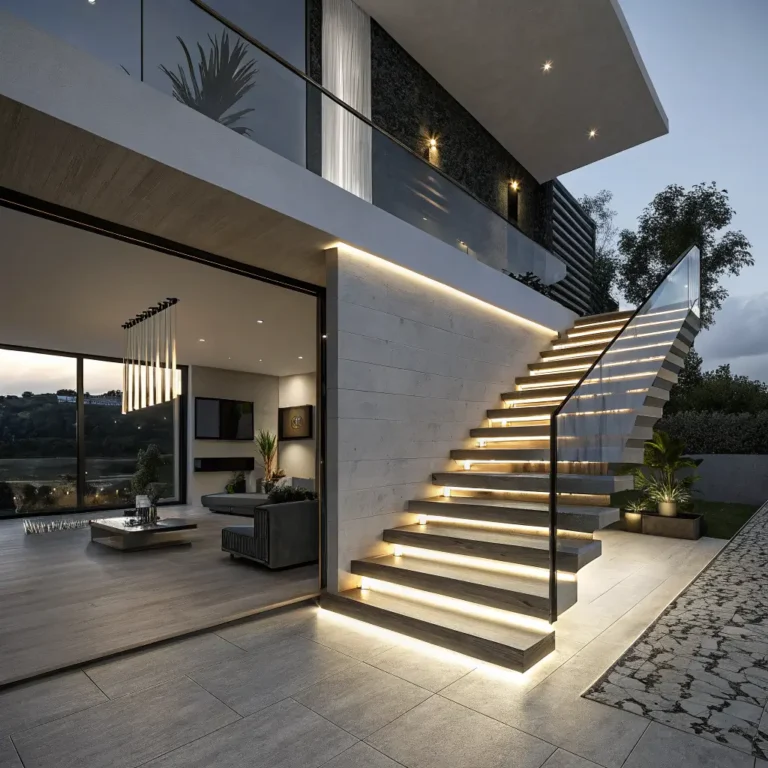
LED Lighted Modern Staircase Makeover
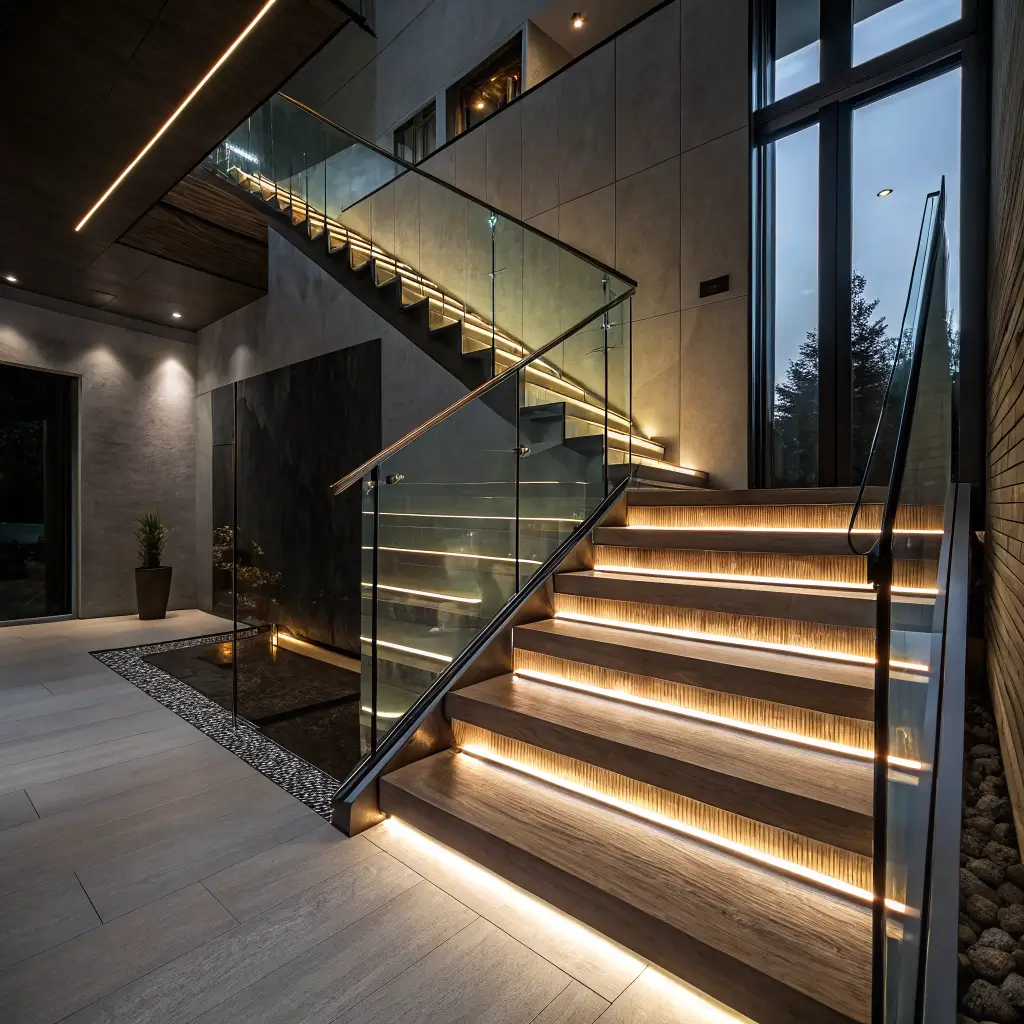
Ready to step into the future? LED lighting integration transforms your staircase into something that belongs in a high-end modern home. This upgrade combines safety with serious style points, and honestly, it never gets old walking up stairs that look like they’re floating.
LED strip lighting has become incredibly accessible and easy to install. You don’t need an electrician for most applications – many systems run on low voltage and can be plugged into standard outlets.
The most popular approach involves installing LED strips under the nosing of each step, creating the illusion that your stairs are floating. The effect is particularly dramatic in darker spaces or during evening hours.
Installation considerations include:
- Choosing between warm and cool white LEDs (or color-changing options)
- Planning your power source and wire routing
- Selecting appropriate diffusers for even light distribution
- Considering smart controls for dimming and scheduling
- Ensuring proper weather rating if near exterior doors
I recommend starting simple with basic warm white strips before moving to more complex color-changing systems. Get comfortable with the installation process and live with the lighting for a while before deciding if you want additional features.
The safety benefits here are substantial. Well-lit stairs significantly reduce the risk of trips and falls, especially important for older family members or guests unfamiliar with your home’s layout.
Consider motion sensors to automatically activate the lighting when someone approaches the stairs. It’s incredibly convenient and adds to that high-tech, modern feel you’re going for.
Conclusion
Look, transforming your staircase doesn’t have to involve a massive renovation budget or months of construction chaos. These ten approaches prove you can create stunning results with some creativity, basic DIY skills, and a weekend or two of focused effort.
The best part? You’re not stuck with any of these choices forever. Paint can be changed, tiles can be replaced, and even more permanent upgrades like wood planking can be modified over time. The key is choosing an approach that excites you enough to actually follow through with the project.
My personal recommendation? Start with something reversible like a carpet runner or peel-and-stick tiles to test the waters. Once you see how dramatically a staircase makeover can impact your entire home, you’ll probably be ready to tackle something more permanent for your next project.
Whatever direction you choose, remember that your staircase connects every level of your home. Making it beautiful isn’t just about aesthetics – it’s about creating a space that makes you smile every time you walk through it. And honestly, we could all use a few more reasons to smile in our daily routines, right? 🙂