10 Creative Study Room Inspiration Ideas for Cozy Productivity
You know that feeling when you sit down to study and suddenly every single thing in the universe becomes more interesting than your textbook? Yeah, I’ve been there.
Turns out, your study space might be the culprit. After redesigning my own study room three times (and helping friends with theirs), I’ve discovered that the right setup can actually make you want to crack open those books.
Let me share some study room ideas that transformed my procrastination station into an actual productivity powerhouse. And no, you don’t need a trust fund to make these work 🙂
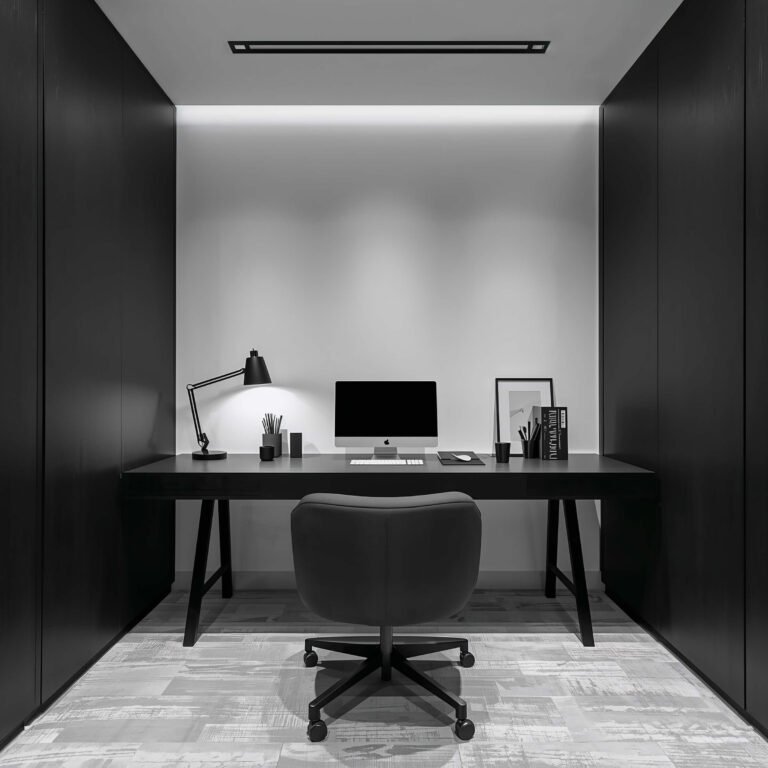
Minimalist Neutral Study Room Setup

Remember when Marie Kondo took over the world and we all started thanking our socks? Well, she was onto something with that whole minimalism thing. A minimalist neutral study room strips away all the visual noise that makes your brain go “squirrel!” every five seconds.
I switched to this style last year, and honestly? Game-changer. Start with a clean white or light wood desk – nothing fancy, just something that doesn’t scream for attention. Pair it with walls in soft grays, whites, or beiges. The magic happens when you realize your brain stops getting distracted by that neon poster you thought was cool in freshman year.
The Essential Elements
Here’s what you actually need for this setup:
- One simple desk (no drawers hanging open everywhere)
- A comfortable chair in a neutral tone
- Minimal desk accessories in matching colors
- Hidden storage solutions (because clutter is the enemy)
- One or two accent pieces maximum
The best part? You save money because you’re literally buying less stuff. Your parents will love this angle, trust me. Keep your color palette limited to three colors max – I stick with white, gray, and natural wood tones. Everything matches, nothing clashes, and your focus stays where it should be.
Want to know the secret sauce? Negative space. Leave some breathing room on your desk and walls. Not every inch needs decoration. Your brain will thank you when it’s not processing seventeen different patterns while trying to understand calculus.
Cozy Warm Lighting Study Corner
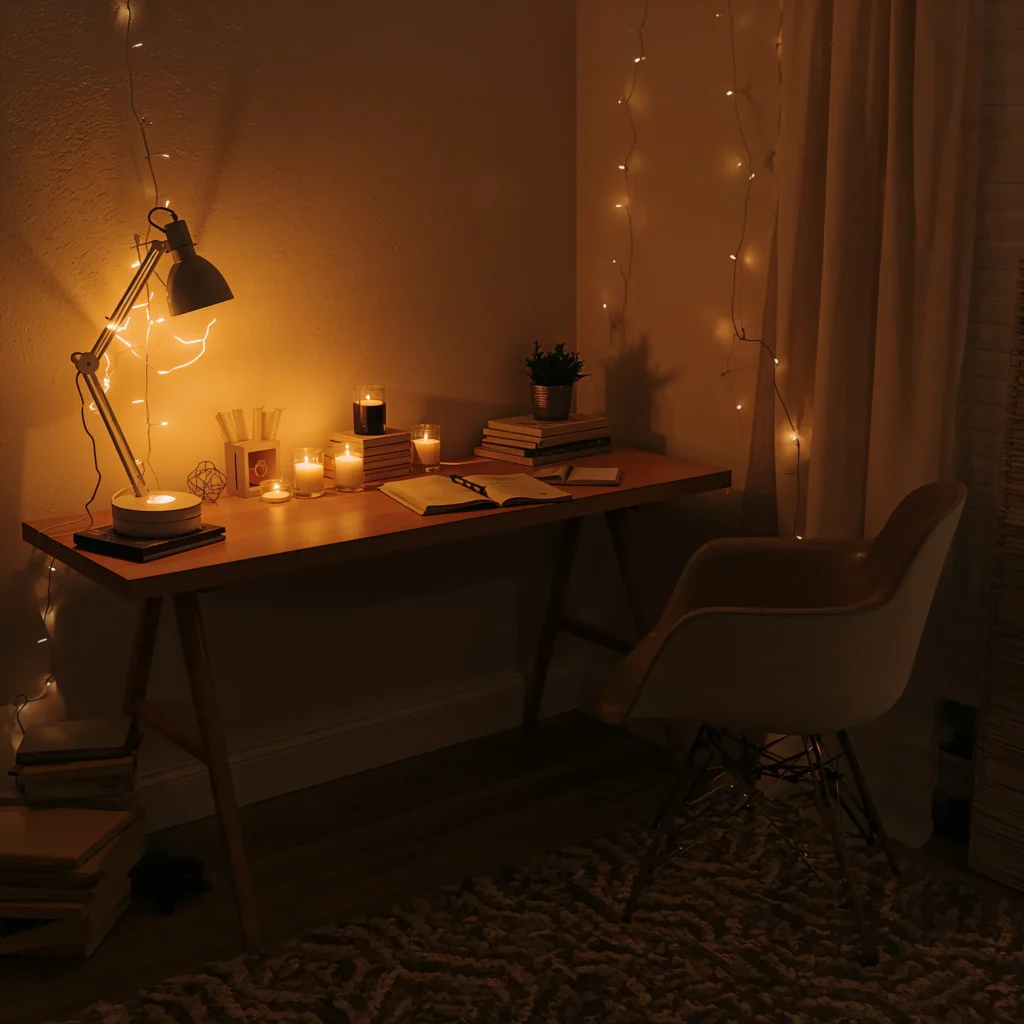
Harsh overhead lighting makes everyone look like they’re being interrogated by the FBI. Who wants to study in that environment? Creating a cozy warm lighting setup transformed my late-night study sessions from torture to… well, slightly less torturous.
Start by ditching that ceiling light for actual studying. I use it only when I’m cleaning or looking for something I dropped. Instead, layer your lighting like you’re creating a mood – because you are! You’re creating a “I can actually focus here” mood.
Building Your Lighting Layers
Get yourself these lighting essentials:
- A warm-toned desk lamp (3000K color temperature is perfect)
- String lights or LED strips for ambient lighting
- A floor lamp for overall room warmth
- Candles (fake ones work too if you’re accident-prone like me)
Position your main desk lamp to avoid shadows on your work. I learned this the hard way after getting headaches from squinting at my own shadow for hours. Warm white bulbs make everything feel cozier – think sunset vibes, not hospital waiting room.
The string lights aren’t just for Instagram photos (though they do look great). They create this soft background glow that makes evening study sessions feel less like punishment. Hang them along the wall behind your desk or drape them around a bookshelf. Just don’t go overboard – this is a study room, not a Christmas display.
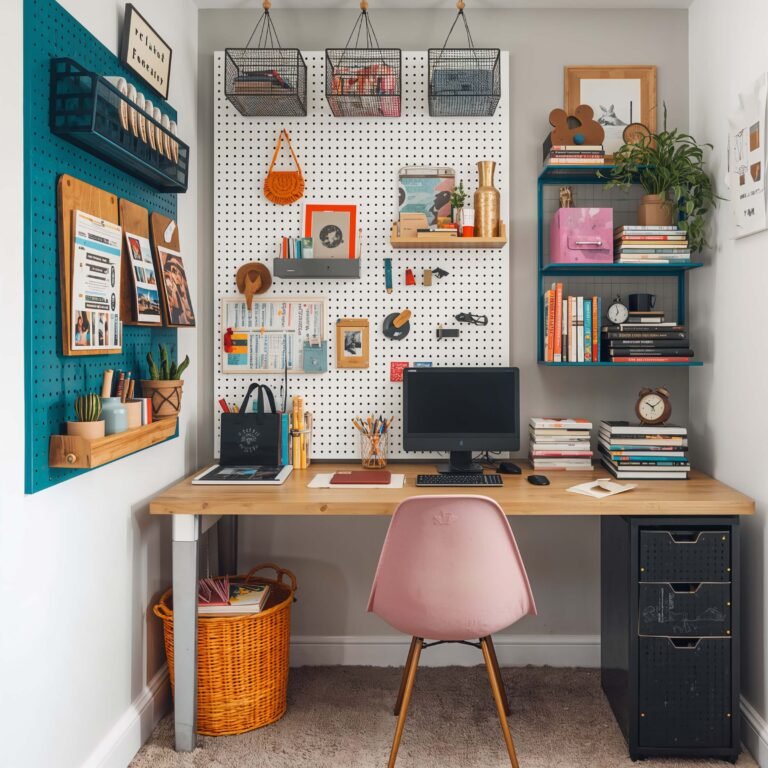
Small Bedroom Study Desk Layout
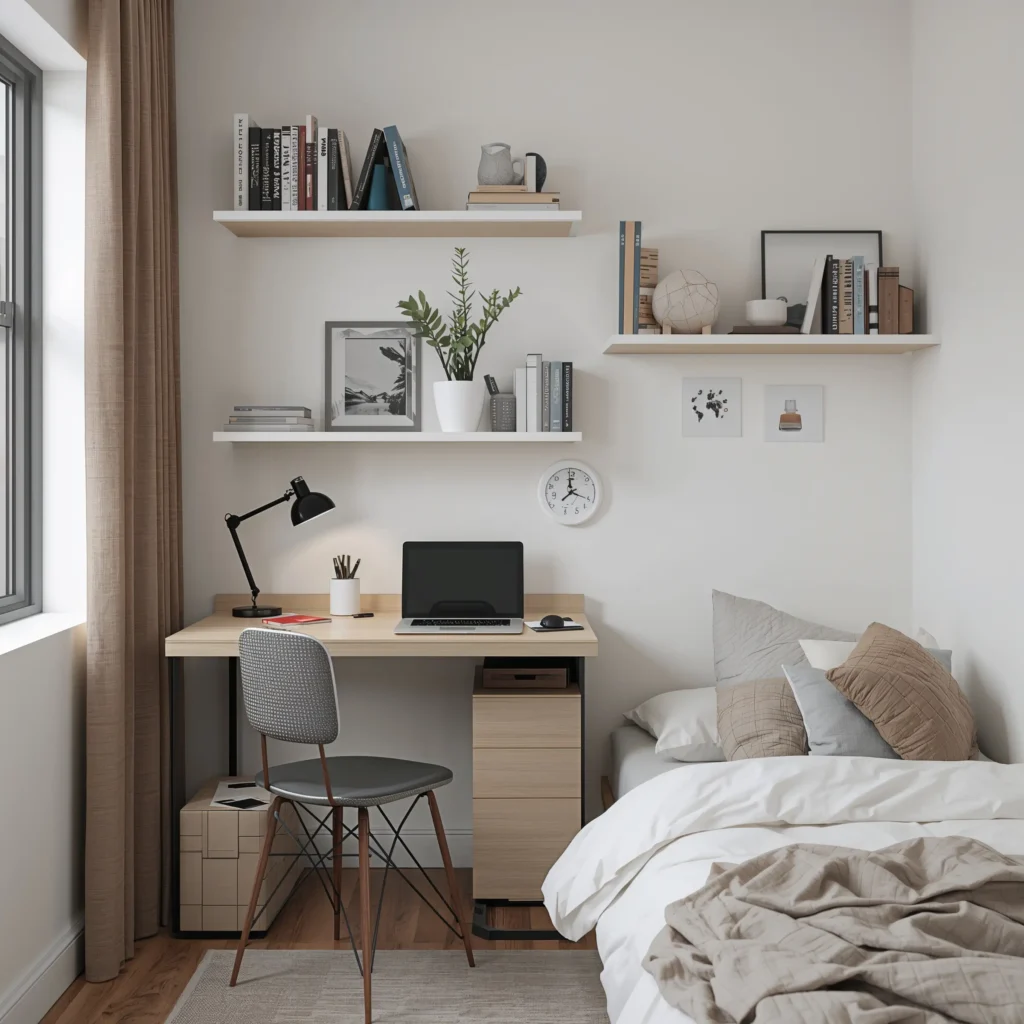
Living in a shoebox-sized room? Join the club. My first apartment bedroom was so small, I had to choose between opening the door fully or having a desk. Spoiler alert: the desk won. But here’s what I learned about maximizing tiny spaces for studying.
Wall-mounted desks are your new best friend. They take up zero floor space and can fold away when you need room for yoga or crying about exams (we’ve all been there). Mount it at the perfect height for you – around 29-30 inches usually works. Add a floating shelf above for books and supplies.
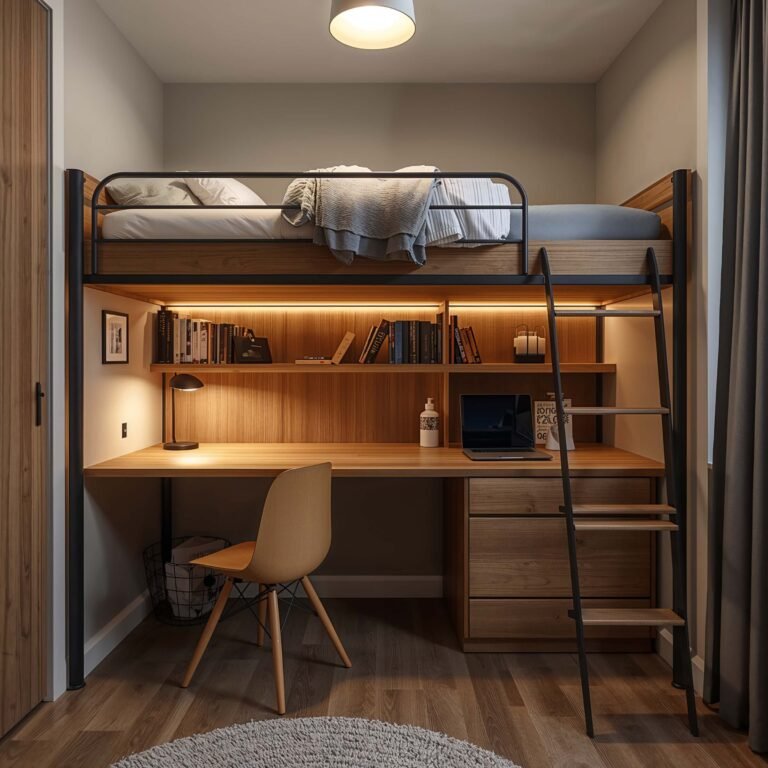
Ever considered using your bed as part of the setup? Hear me out. A desk that slides under a lofted bed gives you a cave-like study nook that’s surprisingly cozy. Plus, your commute from bed to desk is approximately two seconds. Efficiency at its finest, right?
Space-Saving Tricks That Actually Work
- Use vertical space religiously (walls are free real estate)
- Get furniture that multitasks (storage ottoman as seating, anyone?)
- Corner desks maximize every square inch
- Pegboards keep supplies accessible but off the desk
- Under-desk storage drawers that attach with no drilling
The key is being ruthless about what stays in your study area. That collection of empty coffee cups? Not study material. Those seventeen different highlighters when you only use two? Marie Kondo them outta there.
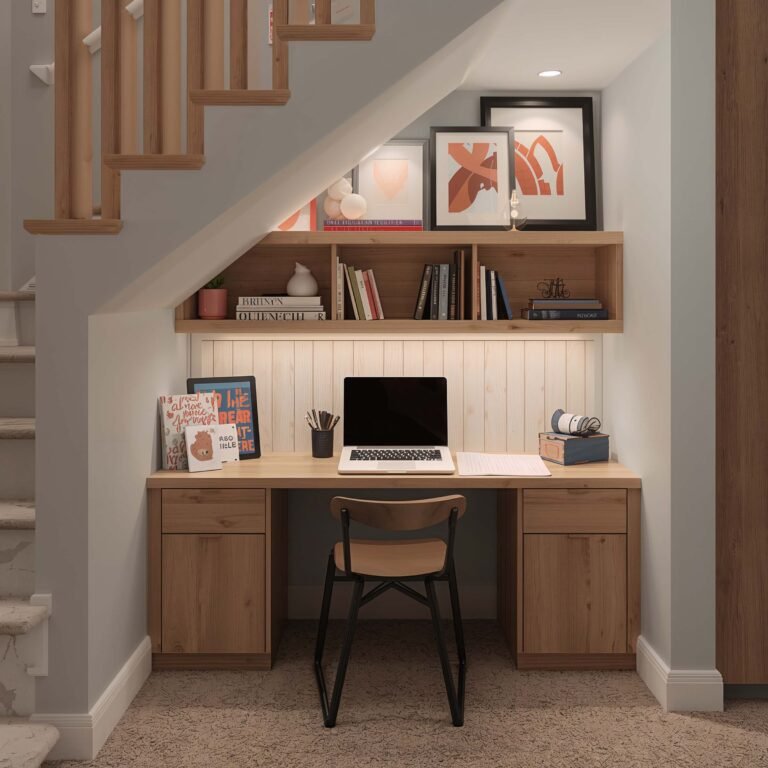
Aesthetic Study Desk with Floating Shelves
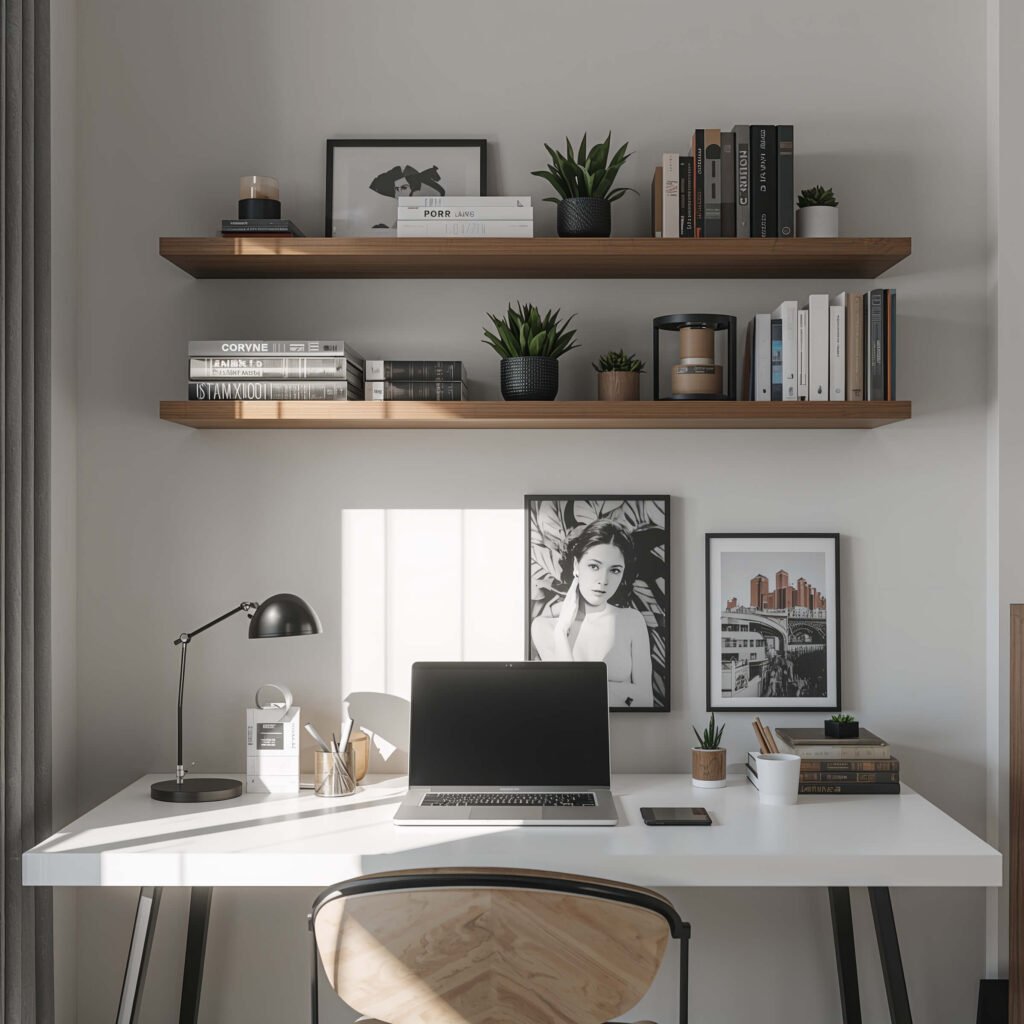
Let’s be real – we all want our study space to look good enough for social media. Nothing wrong with that! An aesthetic setup with floating shelves combines form and function beautifully. Plus, floating shelves make small rooms look bigger because you can see the wall behind them.
I installed three floating shelves above my desk last summer, and they’re perfect for displaying books spine-out (very Pinterest), keeping plants, and storing supplies in cute containers. The trick is maintaining visual balance – don’t just dump everything up there randomly.
Styling Your Floating Shelves
Here’s my formula for shelf styling that works:
- Mix heights (tall books, short plants, medium containers)
- Follow the rule of thirds (group items in odd numbers)
- Leave breathing room between groupings
- Color coordinate your book spines (controversial but effective)
- Add personal touches (photos, small art pieces)
Mount your shelves at least 12-15 inches apart so you can actually fit books standing up. I made the rookie mistake of spacing them too close initially. Ever tried cramming a textbook sideways? Not fun. Use sturdy brackets – those textbooks weigh more than you think, and nobody wants a shelf collapse mid-study session.
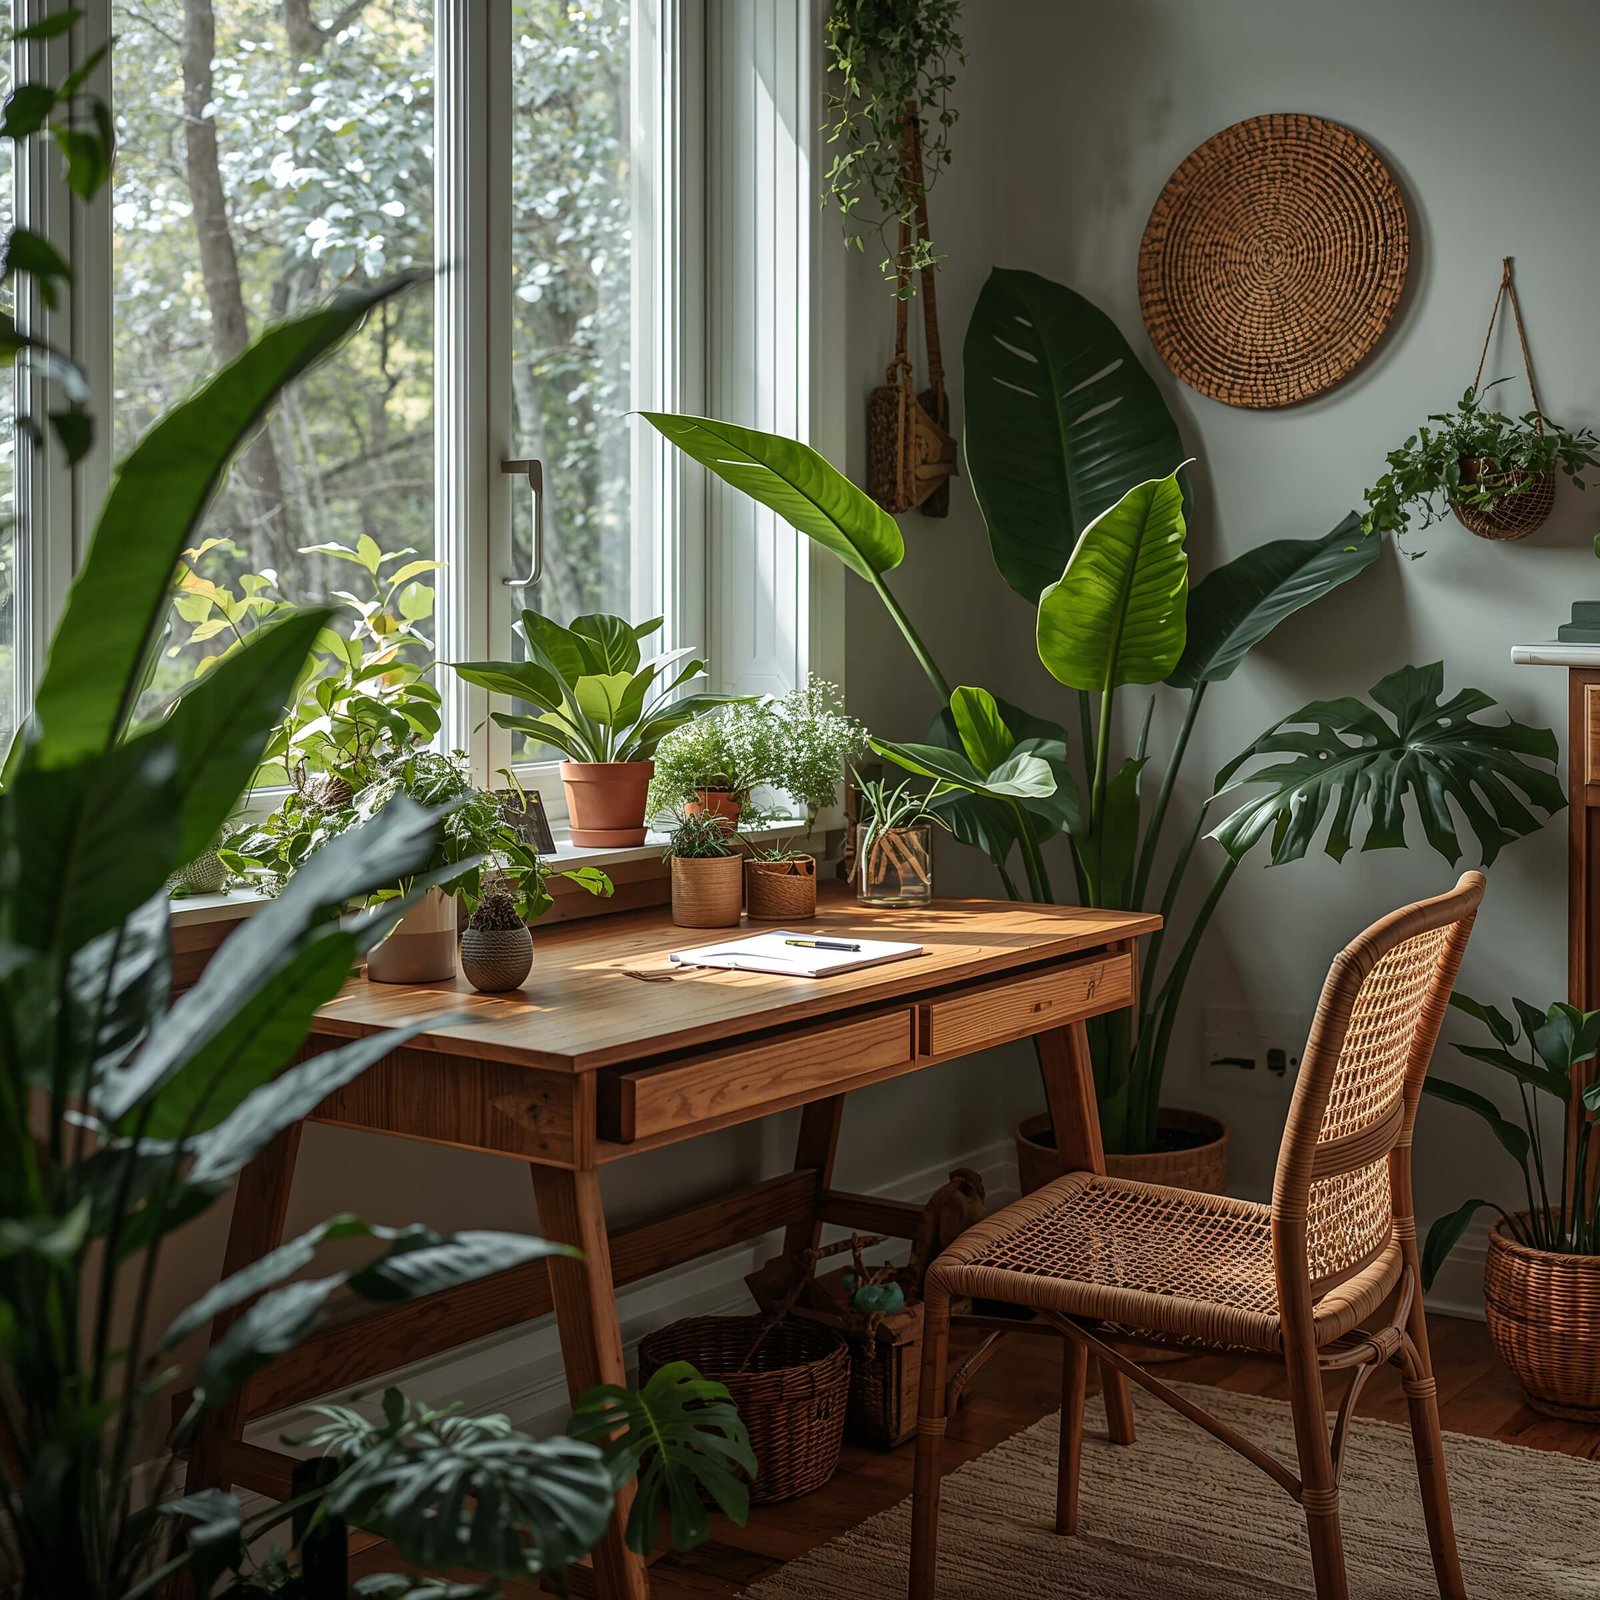
Nature-Inspired Study Room with Indoor Plants

Plants in your study room aren’t just trendy – they actually improve air quality and reduce stress. Science says so, and who am I to argue with science? Creating a nature-inspired study space brings the outside in, minus the bugs and unpredictable weather.
Start with easy-to-care-for plants because dead plants are depressing, not inspiring. Pothos, snake plants, and ZZ plants survive even if you forget they exist for weeks. I’ve tested this theory extensively (unintentionally). They thrive in low light and irregular watering schedules – perfect for busy students.
Best Plants for Study Rooms
My top picks for study room greenery:
- Snake Plant: Produces oxygen at night, survives neglect
- Pothos: Trails beautifully from shelves, very forgiving
- Spider Plant: Easy to propagate, adds visual interest
- Succulents: Minimal watering, maximum aesthetic
- Peace Lily: Tells you when it needs water by drooping
Position larger plants in corners or beside your desk. Smaller ones work great on floating shelves or desk corners. Hanging planters save desk space while adding vertical interest. Just make sure they’re not directly above your laptop – learned that lesson the hard way during an overzealous watering session.
Want to maximize the nature vibe? Add natural textures like a jute rug, wooden desk accessories, or a cork board. The combination creates this calm, grounded feeling that makes marathon study sessions more bearable.
Scandinavian Style Study Room Design
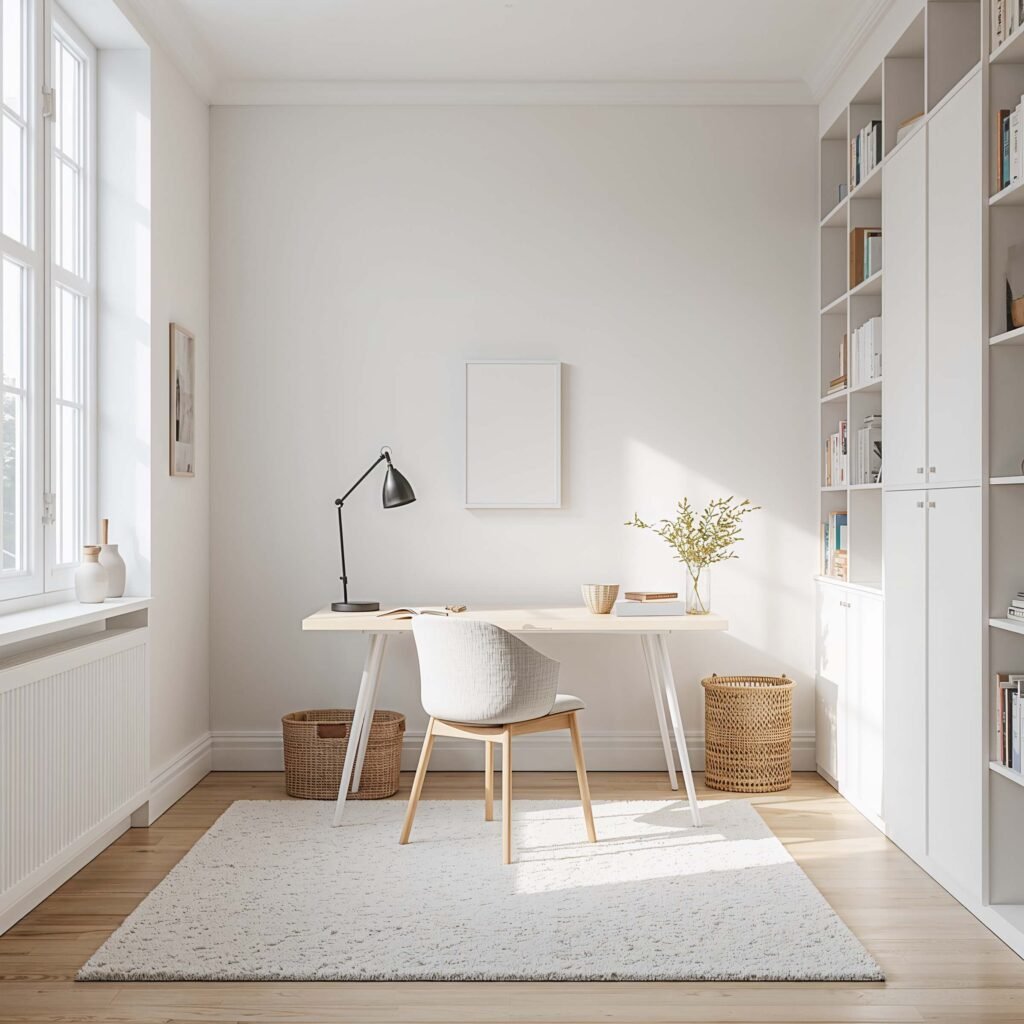
Scandinavian design makes everything look expensive even when you bought it from IKEA (which, FYI, is actually Scandinavian, so that tracks). This style combines functionality with simple beauty – exactly what you need in a study space.
The color palette stays simple: white, light wood, and maybe one accent color if you’re feeling wild. My Scandi-inspired setup uses white walls, a birch desk, and navy blue accessories. That’s it. The simplicity keeps your mind clear and focused.
Key Elements of Scandinavian Study Design
Essential components for nailing this look:
- Light wood furniture (birch, pine, or light oak)
- White or light gray walls
- Geometric patterns in small doses
- Cozy textiles (think chunky knit throws)
- Functional storage that looks good empty or full
The Scandinavian philosophy of “lagom” (not too much, not too little, just right) applies perfectly to study rooms. Every item should earn its place. That decorative bowl? Only if it holds paper clips. That throw pillow? Only if it supports your back during long reading sessions.
Natural light is crucial in Scandinavian design. If you’ve got a window, don’t block it with heavy curtains. Use sheer white curtains or blinds that let light filter through. The goal is bright, airy, and calm – basically the opposite of my brain during finals week.
Also Read: 10 Cozy Study Room Decor Student Ideas to Boost Productivity
Window-Side Natural Light Study Desk
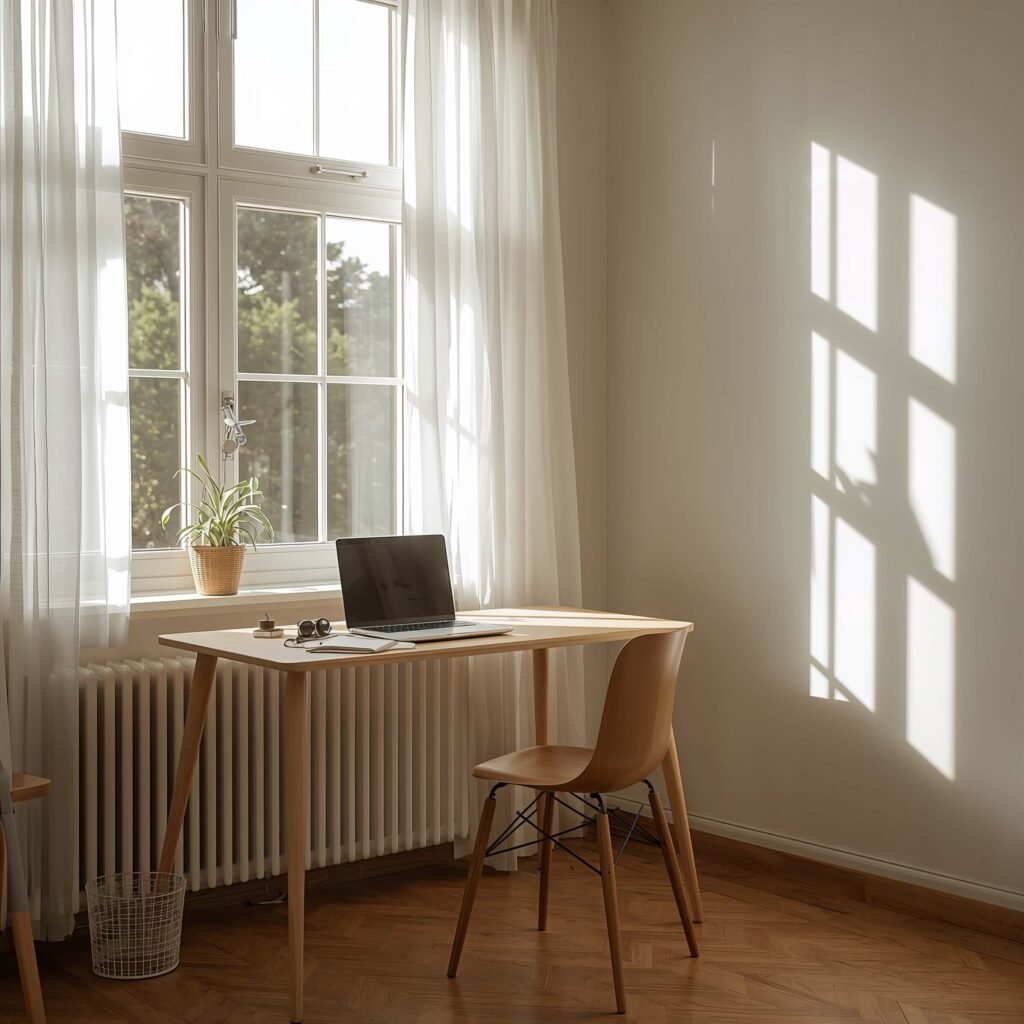
Speaking of windows, positioning your desk by one might be the best decision you make for your study space. Natural light reduces eye strain, improves mood, and helps maintain your circadian rhythm. Plus, it’s free lighting until sunset!
I moved my desk next to the window last year, and my productivity shot up. There’s something about natural light that makes everything feel less like a chore. Even statistics homework seems slightly less evil when you can glance outside occasionally.
Maximizing Your Window Setup
Here’s how to make the most of window-side studying:
- Position your desk perpendicular to the window (avoids glare)
- Use adjustable blinds for brightness control
- Add sheer curtains to diffuse harsh sunlight
- Keep window sills clear for maximum light
- Face your computer screen away from direct sunlight
Watch out for the afternoon sun though. Nothing ruins focus faster than being slowly roasted by direct sunlight. I use adjustable blinds to control the light throughout the day. Pro tip: those sticky window films that create a frosted glass effect work great for privacy without sacrificing light.
The view matters too. If you’re looking at a brick wall, maybe add some window clings or hang a small plant. But if you’ve got trees or sky? That’s free stress relief right there. Sometimes I catch myself staring outside instead of studying, but hey, that’s what breaks are for, right?
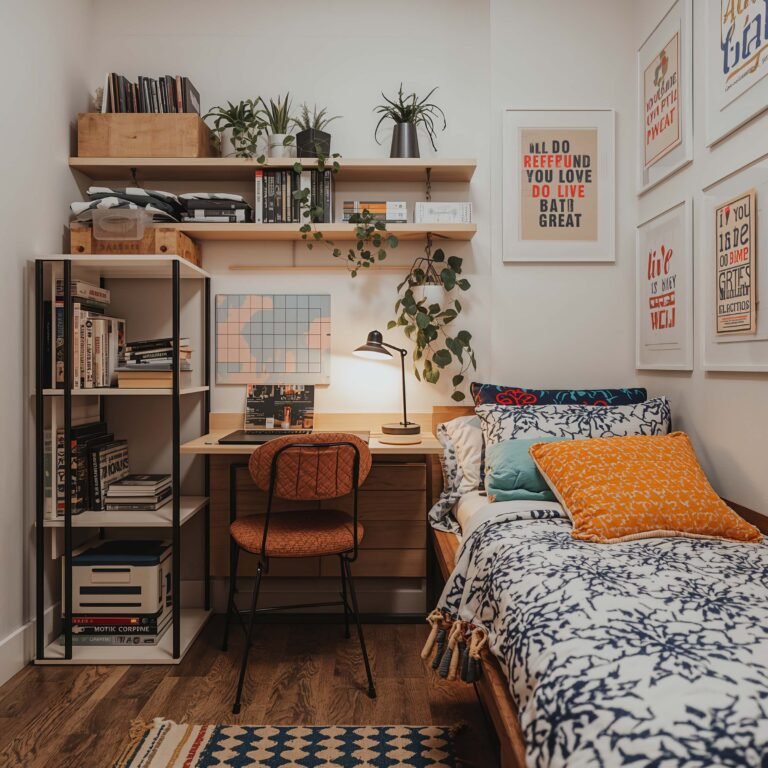
Pastel Aesthetic Study Room Setup
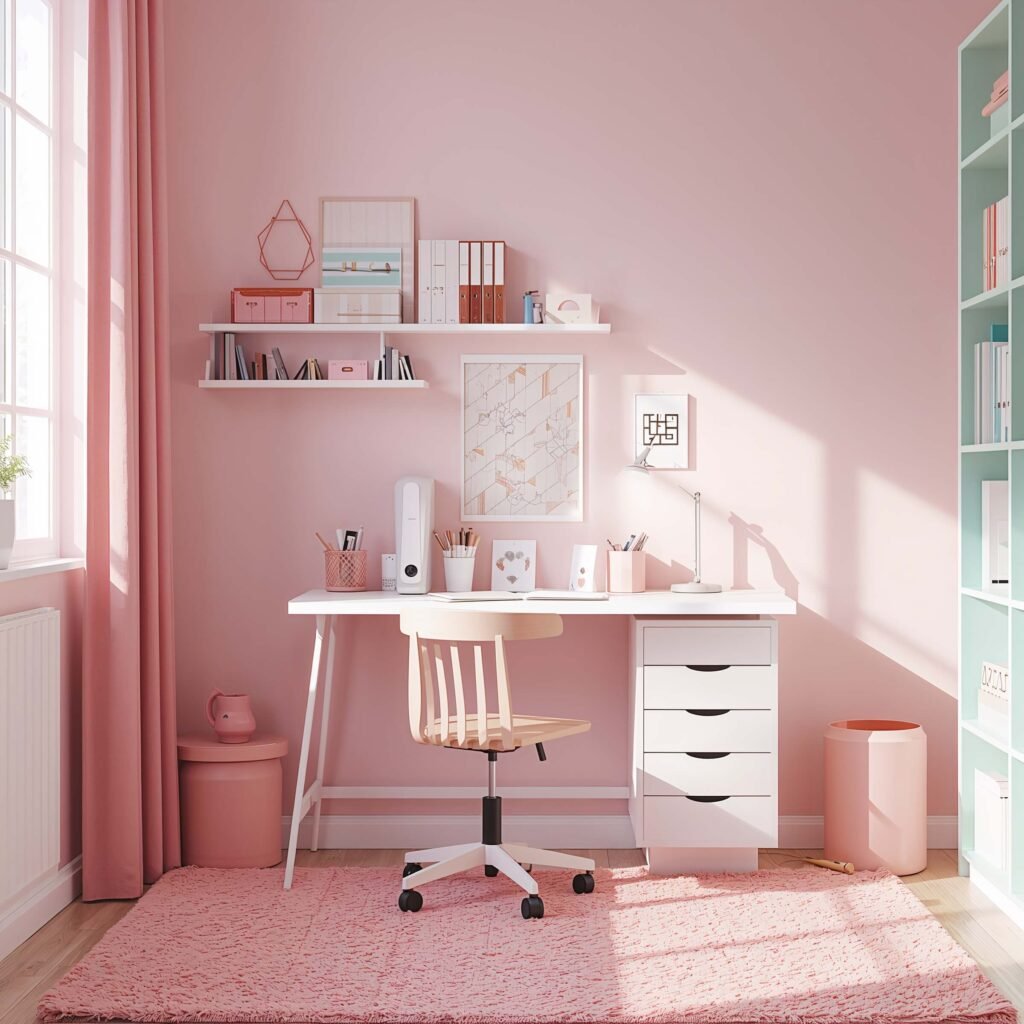
Who says study rooms have to be boring? A pastel aesthetic creates a calm, cheerful environment that makes studying feel less like a punishment. Think soft pinks, mint greens, lavender, and baby blue – colors that whisper instead of shout.
I helped my roommate create a pastel paradise last semester, and even I want to study there now. The key is balancing colors so it doesn’t look like a unicorn exploded. Pick two or three pastel shades and stick with them. Her combo of blush pink, soft sage, and cream works perfectly.
Creating Your Pastel Paradise
Elements that bring the pastel aesthetic together:
- Soft-colored desk accessories (pen holders, organizers)
- Pastel wall art or prints
- Colored notebooks and folders in matching hues
- A pastel desk chair or chair cushion
- Subtle lighting in warm tones
The beauty of pastels? They’re calming without being boring. Mint green supposedly helps with concentration, while soft pink reduces aggression (useful during stressful study sessions). Mix in plenty of white to keep things from looking too sweet.
Don’t forget texture! Fuzzy pillows, smooth ceramics, and soft throws in pastel shades add depth to the color scheme. The combination creates this dreamy study space that’s still functional. IMO, if you’re going to spend hours studying, might as well do it somewhere pretty.
Smart Storage Study Room Organization
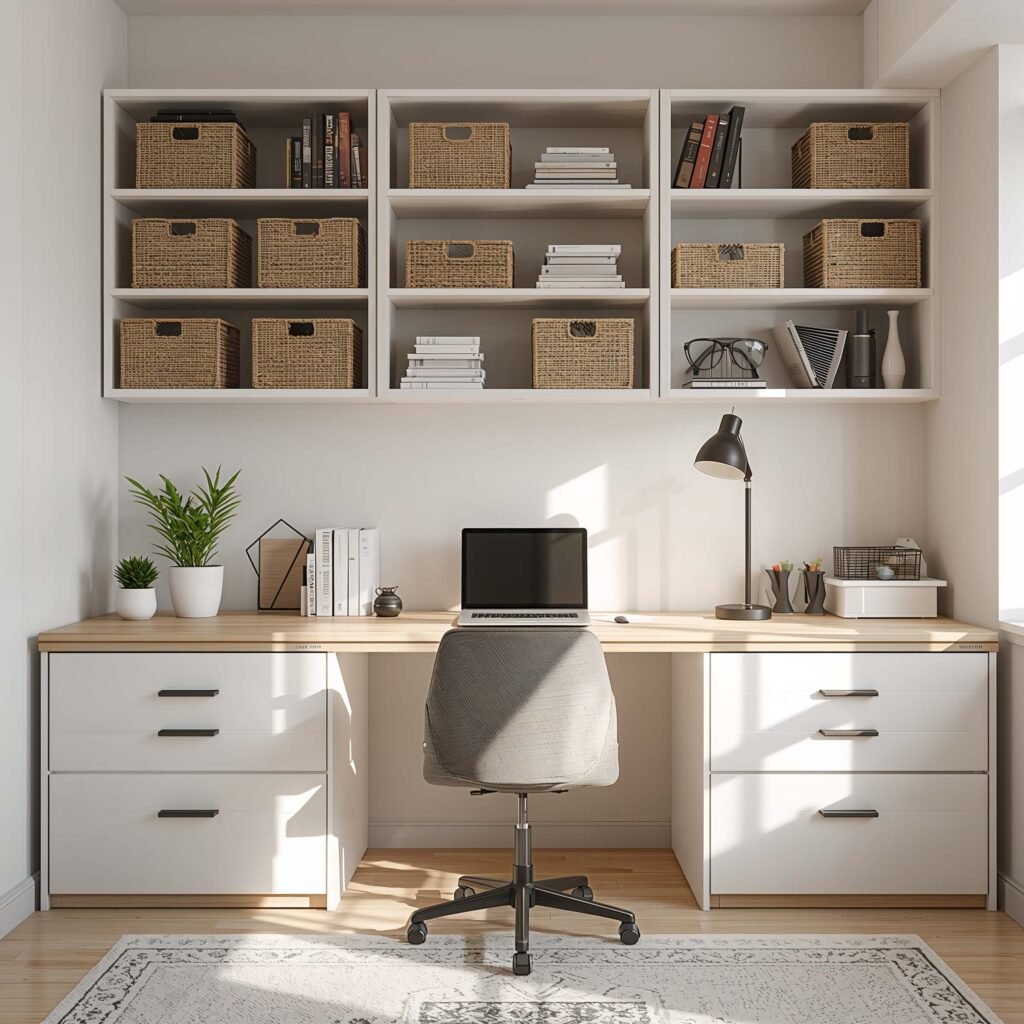
Let’s talk about the unsexy but crucial aspect of study rooms: storage. Smart organization means the difference between finding your notes in seconds or spending twenty minutes excavating your desk. I’ve been on both sides, and organized is definitely better.
The secret is having a designated spot for everything. Sounds simple, but how many times have you bought another pack of pens because you couldn’t find the seventeen you already own? Drawer organizers changed my life – dramatic, but true.
Storage Solutions That Actually Work
My tested and approved storage systems:
- Desktop organizers with multiple compartments
- File folders labeled by subject (revolutionary, I know)
- Wall-mounted magazine holders for notebooks
- Under-desk drawers that attach without drilling
- Rolling carts that tuck away when not needed
Label everything – yes, even the obvious stuff. Future stressed-you will appreciate current organized-you. I use a label maker because my handwriting looks like a doctor’s prescription, but handwritten labels work too.
Here’s a game-changer: the one-touch rule. Every item should take only one motion to put away. If you have to open three containers to store a pencil, you’ll just leave it on the desk. Trust me, I’ve tested this theory extensively.
Keep frequently used items within arm’s reach. That means pens, highlighters, and sticky notes stay on the desk. Reference books go on the nearest shelf. Everything else? Storage bins under the desk or in the closet. Vertical file organizers on the wall keep papers visible but off your workspace.
Also Read: 12 Inspiring Kids Study Room Ideas for Small Spaces
Modern LED Lighting Study Desk Setup
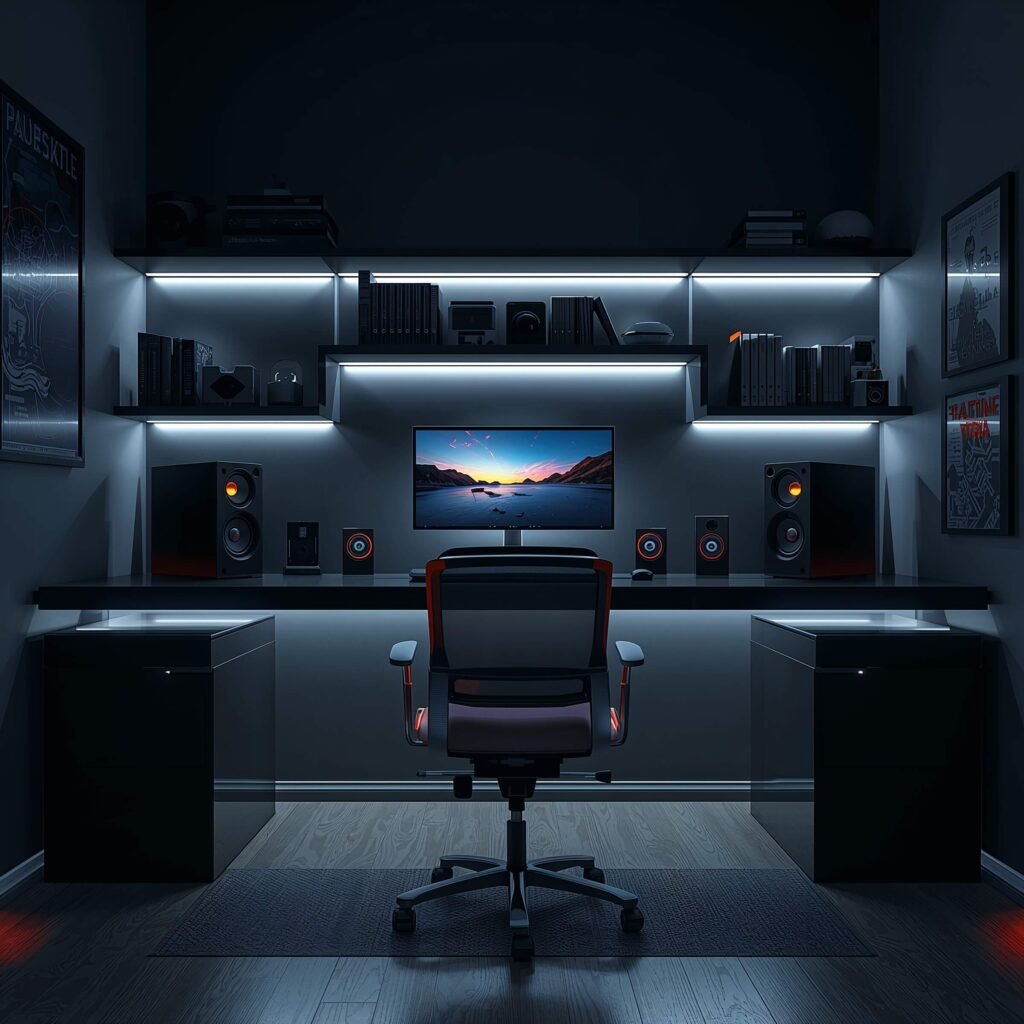
Welcome to the future, where your lights can be any color of the rainbow and controlled by your phone. Modern LED setups aren’t just about looking cool (though they definitely do). They’re about creating the perfect lighting for any study situation.
I installed LED strips behind my monitor last month, and goodbye eye strain! The bias lighting reduces the contrast between your bright screen and dark room. Your eyes will thank you after those late-night research sessions.
LED Lighting Options and Setup
Here’s what’s worth investing in:
- LED strip lights with color options
- Smart bulbs you can control via app
- Monitor light bars that don’t take desk space
- RGB mouse pads (unnecessary but fun)
- Adjustable color temperature desk lamps
The beauty of LEDs? You can adjust the color temperature based on the time and task. Cool white (5000K+) for detailed work in the morning, warm white (3000K) for relaxed evening reading. Some smart bulbs even sync with sunrise/sunset automatically.
Don’t go overboard with the rainbow effects though. Sure, purple lights look cool in photos, but trying to read under them? Not so much. Save the party colors for breaks and stick to whites and warm yellows for actual studying. Though I’ll admit, changing my lights to green when I finish a chapter feels like a small celebration.
Installation tip: Hide your LED strips behind furniture or under shelves for indirect lighting. Direct LED strips in your face are harsh and distracting. The goal is ambient lighting that enhances, not dominates. Most strips come with adhesive backing, making installation easier than assembling IKEA furniture (low bar, but still).
Making It All Work Together
So there you have it – ten study room ideas that actually make studying bearable, maybe even enjoyable. The best part? You don’t have to pick just one. Mix and match elements that speak to you. Maybe you want a minimalist desk with pastel accessories and LED lighting. Go for it!
The perfect study room is the one that makes YOU want to sit down and get work done. Whether that’s surrounded by plants, bathed in natural light, or organized within an inch of its life, make it yours. Your study space should inspire you, not stress you out.
Start small if you’re overwhelmed. Pick one idea and implement it this weekend. Add another element next month. Before you know it, you’ll have a study room that’s both functional and genuinely enjoyable to spend time in. And who knows? You might actually start looking forward to study sessions. Stranger things have happened, right?
Remember, the goal isn’t perfection – it’s creating a space where you can focus, learn, and occasionally not hate studying. Whether you’re working with a mansion-sized room or a tiny corner of your bedroom, these ideas can adapt to your space and budget. Now stop procrastinating by reading about study rooms and go create one! (: